


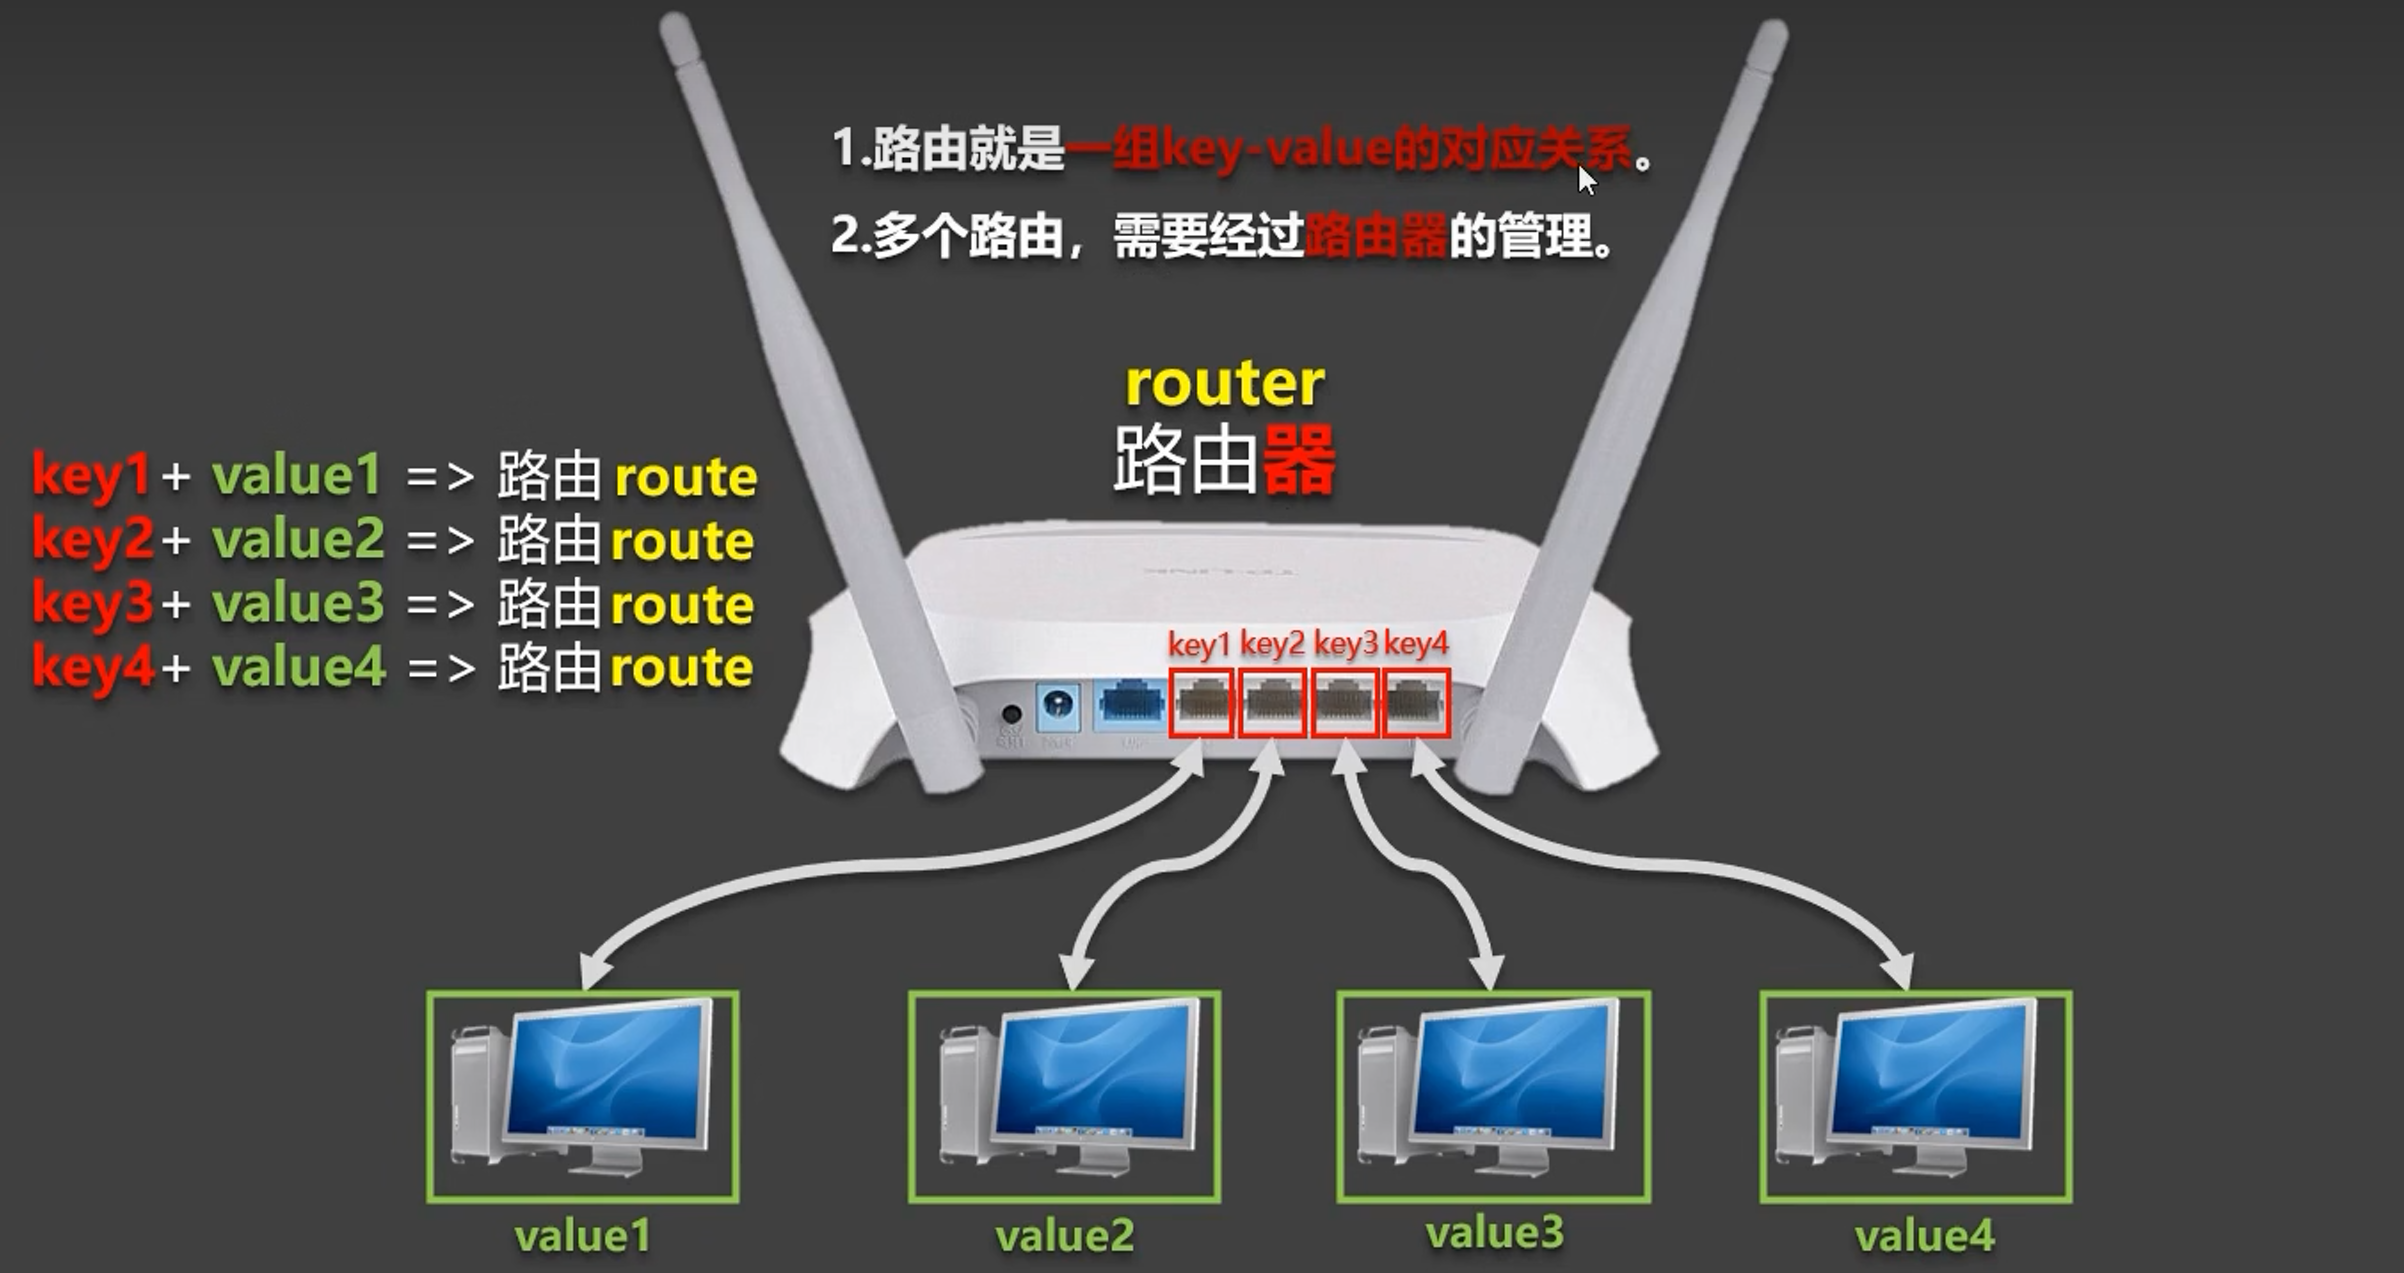
多个路由需要由一个路由器管理
## 路由
1. 理解:一个路由(route)就是一组映射关系(key - value),多个路由需要路由器(router)进行管理。
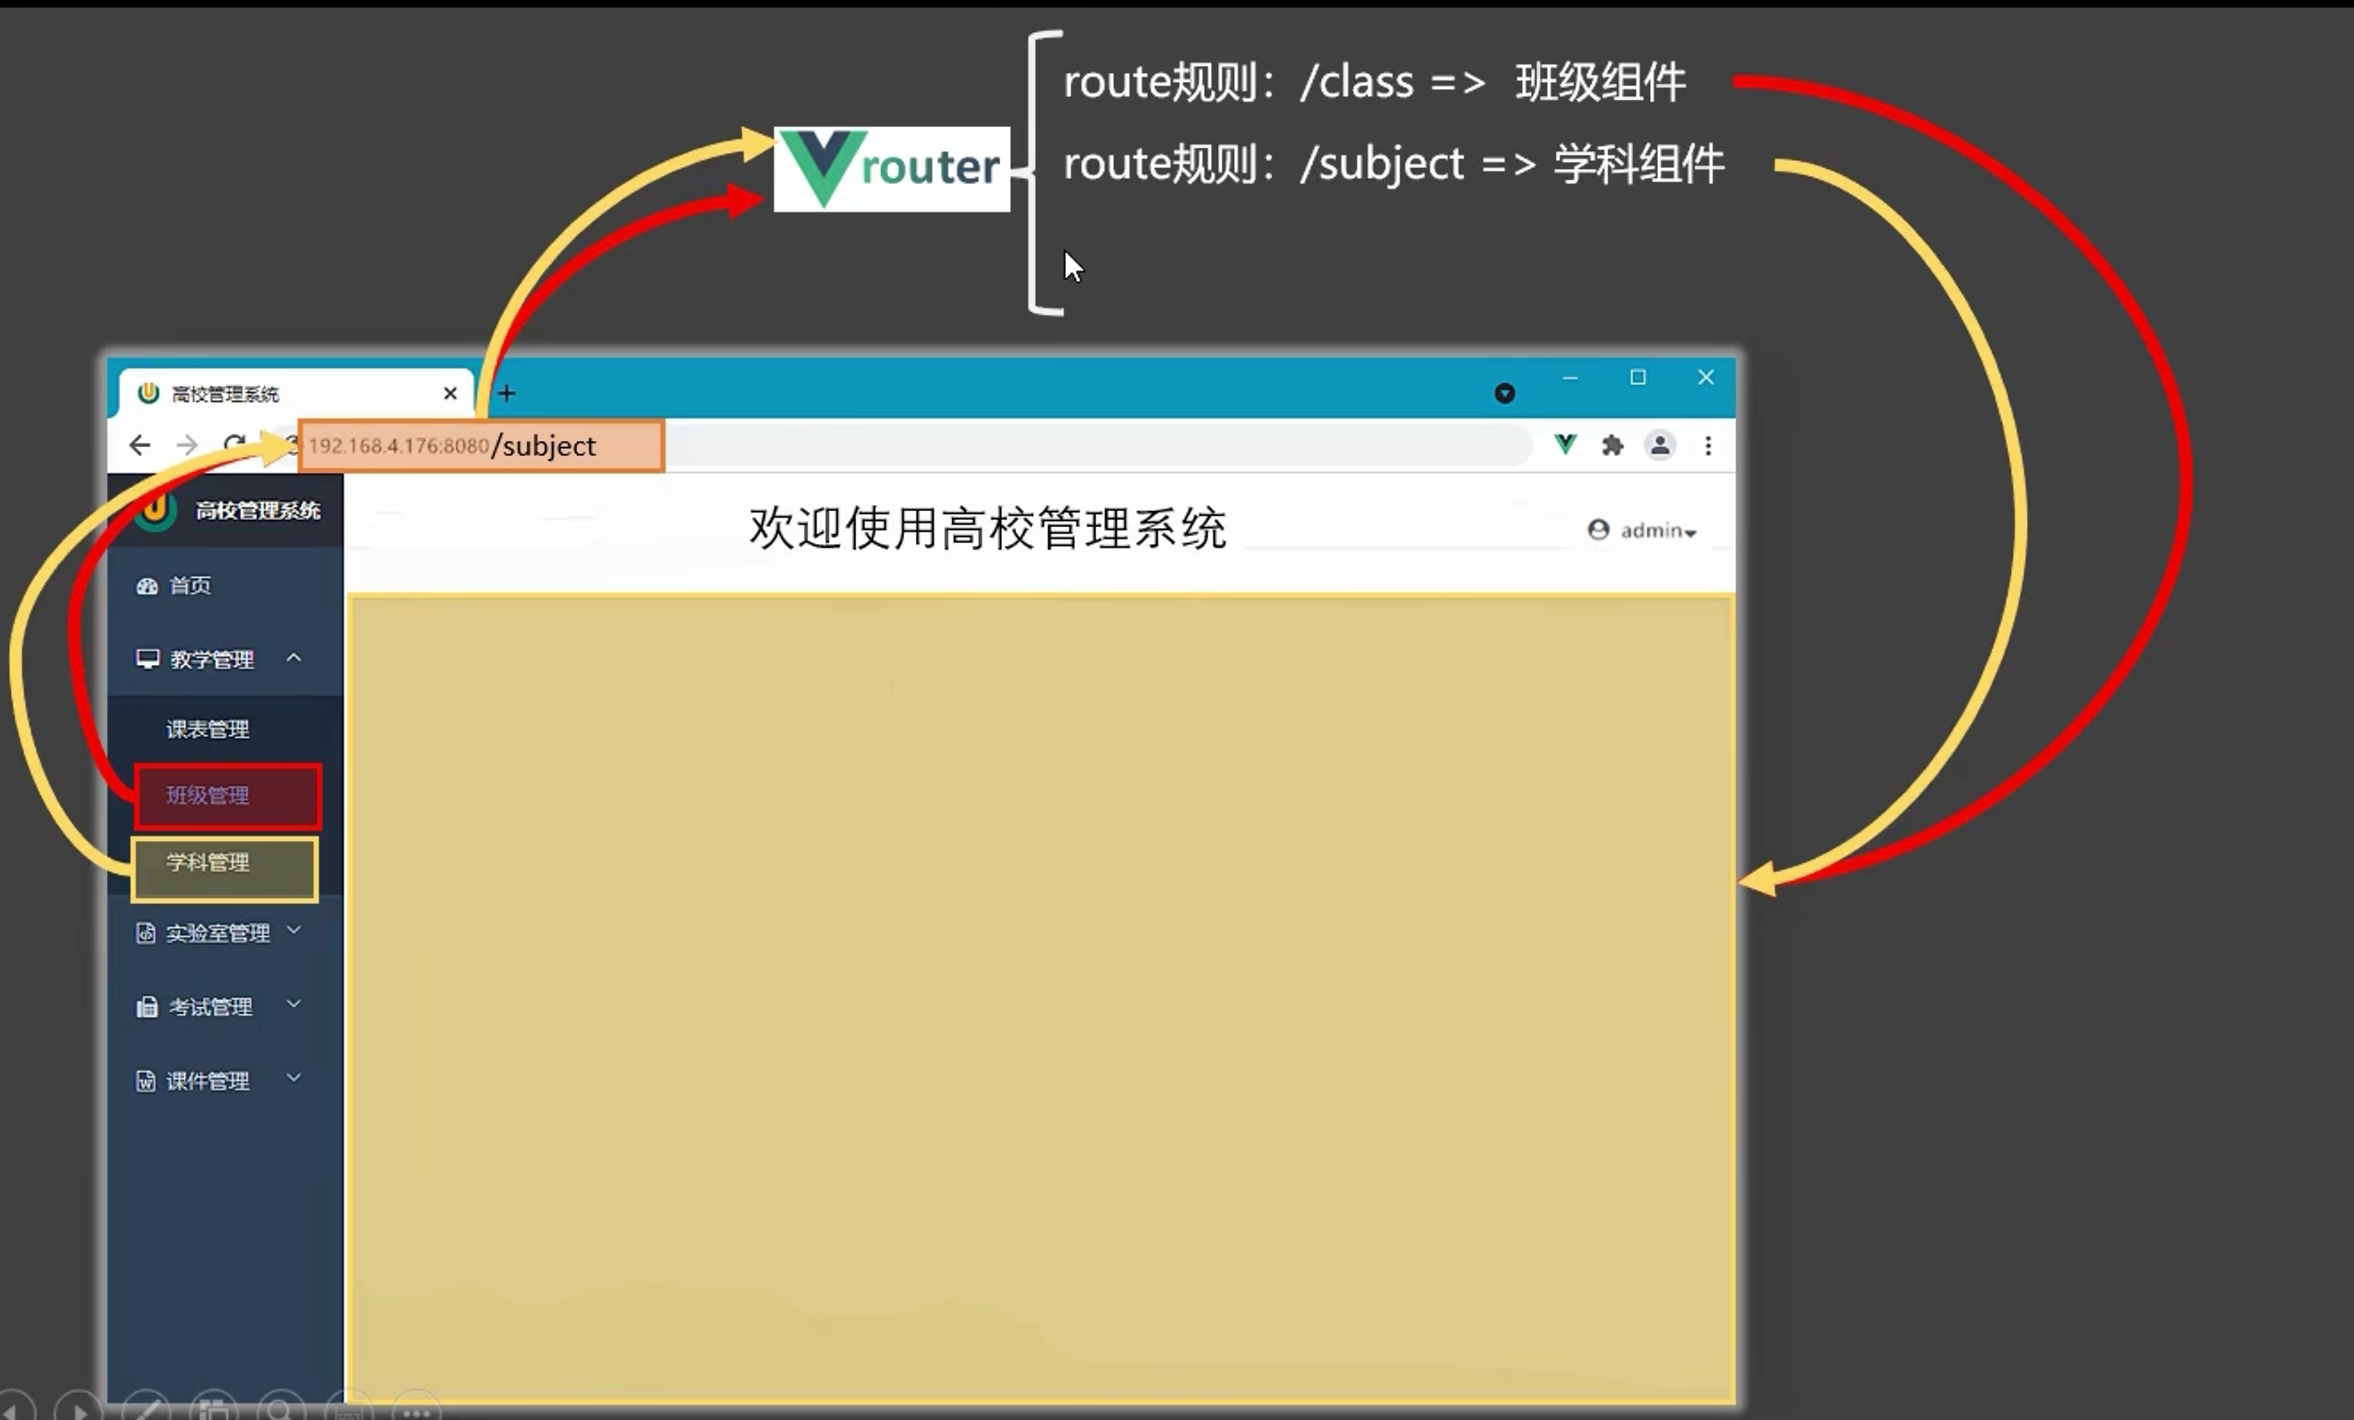
2. 前端路由:key是路径,value是组件。
### 1.基本使用
1. 安装vue-router,命令:```npm i vue-router```
2. 应用插件:```Vue.use(VueRouter)```
3. 编写router配置项:
```js
   //引入VueRouter
   import VueRouter from 'vue-router'
   //引入Luyou 组件
   import About from '../components/About'
   import Home from '../components/Home'
   //创建router实例对象,去管理一组一组的路由规则
   const router = new VueRouter({
      routes:[
        {
            path:'/about',
            component:About
        },
        {
            path:'/home',
            component:Home
        }
     ]
  })

   //暴露router
   exportdefault router
```
4. 实现切换(active-class可配置高亮样式)
```vue
<router-link active-class="active"to="/about">About</router-link>```
5. 指定展示位置
```vue
<router-view></router-view>```
### 2.几个注意点
1. 路由组件通常存放在```pages```文件夹,一般组件通常存放在```components```文件夹。
2. 通过切换,“隐藏”了的路由组件,默认是被销毁掉的,需要的时候再去挂载。
3. 每个组件都有自己的```$route```属性,里面存储着自己的路由信息。
4. 整个应用只有一个router,可以通过组件的```$router```属性获取到。
### 3.多级路由(多级路由)
1. 配置路由规则,使用children配置项:
```js
  routes:[
     {
         path:'/about',
         component:About,
     },
     {
         path:'/home',
         component:Home,
         children:[ //通过children配置子级路由
           {
               path:'news', //此处一定不要写:/news
               component:News
           },
           {
               path:'message',//此处一定不要写:/message
               component:Message
           }
        ]
     }
  ]
```
2. 跳转(要写完整路径):
```vue
<router-link to="/home/news">News</router-link>```


 11万+
11万+


 被折叠的 条评论
为什么被折叠?
被折叠的 条评论
为什么被折叠?
 到【灌水乐园】发言


