


springboot中事务的使用方式
在spring的bean中,要开启数据库事务只需要在方法中标注注解
@Transactional
注解常用的参数有
- Class[] rollbackFor() default {} 指定回滚异常
- Propagation propagation() default Propagation.REQUIRED 事务的传播机制
- Isolation isolation() default Isolation.DEFAULT 事务的隔离级别
事务传播机制REQUIRED和REQUIRED_NEW
REQUIRED是默认的级别,如果当前没有事务,创建新事务;如果有事务,加入当前事务
REQUIRED_NEW 如果无论当前有没有事务,开启一个新的事务
Spring异步注解@Async
启动类中加入注解@EnableAsync
@Async注解标注在方法中,使方法异步执行
测试
通过调用接口新增数据
test1方法中保存了code为-1的一条数据
test2方法中保存了code为0~9的十条数据,插入第四条数据会抛出异常报错
    @Resource
    private TestBaseService testBaseService;
    @Resource
    private ApplicationContext applicationContext;

    @GetMapping("/add")
    @Transactional(rollbackFor = Exception.class, propagation = Propagation.REQUIRED)
    public void test1() {
        TestBaseEntity preEntity = new TestBaseEntity();
        preEntity.setCode("-1");
        testBaseService.save(preEntity);
        TestBaseController bean = applicationContext.getBean(TestBaseController.class);
        for (int i = 0; i < 10; i++) {
            TestBaseEntity entity = new TestBaseEntity();
            entity.setCode(String.valueOf(i));
            bean.test2(entity, i);
        }
    }

    //@Async
    //@Transactional(rollbackFor = Exception.class, propagation = Propagation.REQUIRES_NEW)
    public void test2(TestBaseEntity entity, int i) {
        testBaseService.save(entity);
        if (i == 4) {
            throw new RuntimeException("异常");
        }
    }
调用接口,发现没有数据新增
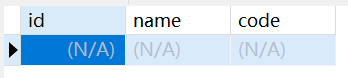
因为只设置了一个事务,有异常会导致事务回滚;有一条失败全部失败
test1设置事务提交后,再执行test2
@GetMapping("/add")
@Transactional(rollbackFor = Exception.class, propagation = Propagation.REQUIRED)
public void testTransactional() {
    TestBaseEntity preEntity = new TestBaseEntity();
    preEntity.setCode("-1");
    testBaseService.save(preEntity);
    TestBaseController bean = applicationContext.getBean(TestBaseController.class);
    for (int i = 0; i < 10; i++) {
        TestBaseEntity entity = new TestBaseEntity();
        entity.setCode(String.valueOf(i));
        int finalI = i;
        TransactionSynchronizationManager.registerSynchronization(new TransactionSynchronization() {
            @Override
            public void afterCommit() {
                bean.saveTest(entity, finalI);
                TransactionSynchronization.super.afterCommit();
            }
        });
    }
}
结果图
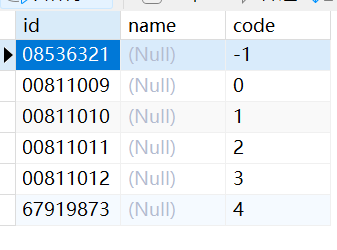
可以看到 -1 ~ 4都新增成功了
因为手动将test1的事务提交了,而test2没有事务,所有即便报错也没有回滚,code=4正常插入
test2传播机制设置为REQUIRED_NEW
@Transactional(rollbackFor = Exception.class, propagation = Propagation.REQUIRES_NEW)
    public void test2(TestBaseEntity entity, int i) {
        testBaseService.save(entity);
        if (i == 4) {
            throw new RuntimeException("异常");
        }
    }
调用接口,结果如下
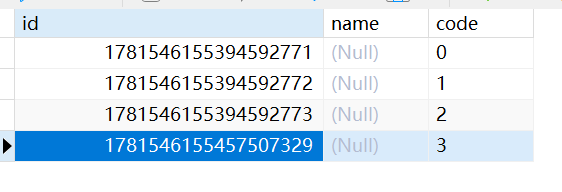
test1的事务不会因为test2的报错而受到影响,执行的10次test2每次都是一个新的事务
当code=4时,发生异常,当前事务回滚,程序返回,所以code=4的数据回滚了,后面的5-9根本没有执行新增插入
test2传播机制设置为REQUIRED_NEW,开启@Async注解
@Async
@Transactional(rollbackFor = Exception.class, propagation = Propagation.REQUIRES_NEW)
    public void test2(TestBaseEntity entity, int i) {
        testBaseService.save(entity);
        if (i == 4) {
            throw new RuntimeException("异常");
        }
    }
调用接口,结果如下
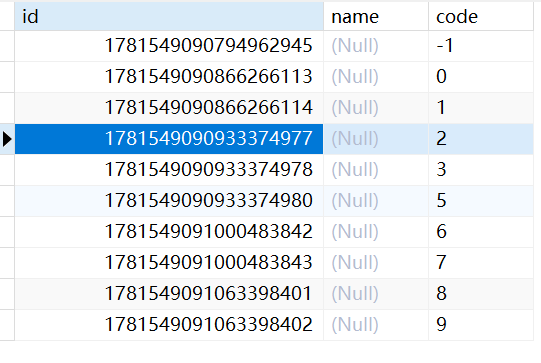
可以看到除了code=4其他的都新增成功了
因为在每个test2方法新开启了事务,而且方法是异步的,报错异常对本方法以外没有任何影响


 748
748


 被折叠的 条评论
为什么被折叠?
被折叠的 条评论
为什么被折叠?
 到【灌水乐园】发言


