


1.为什么需要多数据源?
多数据源既动态数据源,项目开发逐渐扩大,单个数据源、单一数据源已经无法满足需求项目的支撑需求。本文采用dynamic-datasource-spring-boot-starter实现多数据源,
主要特性
- 支持 数据源分组 ,适用于多种场景 纯粹多库 读写分离 一主多从 混合模式。
- 支持数据库敏感配置信息 加密 ENC()。
- 支持每个数据库独立初始化表结构schema和数据库database。
- 支持无数据源启动,支持懒加载数据源(需要的时候再创建连接)。
- 支持 自定义注解 ,需继承DS(3.2.0+)。
- 提供并简化对Druid,HikariCp,BeeCp,Dbcp2的快速集成。
- 提供对Mybatis-Plus,Quartz,ShardingJdbc,P6sy,Jndi等组件的集成方案。
- 提供 自定义数据源来源 方案(如全从数据库加载)。
- 提供项目启动后 动态增加移除数据源 方案。
- 提供Mybatis环境下的 纯读写分离 方案。
- 提供使用 spel动态参数 解析数据源方案。内置spel,session,header,支持自定义。
- 支持 多层数据源嵌套切换 。(ServiceA >>> ServiceB >>> ServiceC)。
- 提供 **基于seata的分布式事务方案。
- 提供 本地多数据源事务方案
2.环境搭建
本文使用2个mysql作为数据源,表都是一样的结构
第一个数据库
docker run --name docker-mysql -e MYSQL_ROOT_PASSWORD=123456 -p 3306:3306 -d mysql第二个数据库
docker run --name docker-mysql-2 -e MYSQL_ROOT_PASSWORD=123456 -p 3307:3306 -d mysql初始化数据
create database demo;
create table user_info
(
user_id     varchar(64)          not null primary key,
username    varchar(100)         null ,
age         int(3)               null ,
gender      tinyint(1)           null ,
remark      varchar(255)         null ,
create_time datetime             null ,
create_id   varchar(64)          null ,
update_time datetime             null ,
update_id   varchar(64)          null ,
enabled     tinyint(1) default 1 null
);
备注说明
msyql account:root
mysql password:123456
3.代码工程
实验目标:实现数据源的切换
pom.xml
<?xml version="1.0" encoding="UTF-8"?>
<project xmlns="http://maven.apache.org/POM/4.0.0"
         xmlns:xsi="http://www.w3.org/2001/XMLSchema-instance"
         xsi:schemaLocation="http://maven.apache.org/POM/4.0.0 http://maven.apache.org/xsd/maven-4.0.0.xsd">
    <parent>
        <artifactId>springboot-demo</artifactId>
        <groupId>com.et</groupId>
        <version>1.0-SNAPSHOT</version>
    </parent>
    <modelVersion>4.0.0</modelVersion>

    <artifactId>dynamic-datasource</artifactId>

    <properties>
        <maven.compiler.source>8</maven.compiler.source>
        <maven.compiler.target>8</maven.compiler.target>
    </properties>
    <dependencies>

        <dependency>
            <groupId>org.springframework.boot</groupId>
            <artifactId>spring-boot-starter-web</artifactId>
        </dependency>

        <dependency>
            <groupId>org.springframework.boot</groupId>
            <artifactId>spring-boot-autoconfigure</artifactId>
        </dependency>
        <dependency>
            <groupId>org.springframework.boot</groupId>
            <artifactId>spring-boot-starter-test</artifactId>
            <scope>test</scope>
        </dependency>
        <!-- dynamic-datasource -->
        <dependency>
            <groupId>com.baomidou</groupId>
            <artifactId>dynamic-datasource-spring-boot-starter</artifactId>
            <version>3.3.2</version>
        </dependency>
        <!-- mybatis-plus -->
        <dependency>
            <groupId>com.baomidou</groupId>
            <artifactId>mybatis-plus-boot-starter</artifactId>
            <version>3.3.1</version>
        </dependency>
        <!-- mysql -->
        <dependency>
            <groupId>mysql</groupId>
            <artifactId>mysql-connector-java</artifactId>
        </dependency>
        <!-- lombok -->
        <dependency>
            <groupId>org.projectlombok</groupId>
            <artifactId>lombok</artifactId>
            <version>1.18.10</version>
        </dependency>
        <dependency>
            <groupId>com.baomidou</groupId>
            <artifactId>mybatis-plus-generator</artifactId>
            <version>3.3.1</version>
        </dependency>

        <dependency>
            <groupId>org.freemarker</groupId>
            <artifactId>freemarker</artifactId>
            <version>2.3.31</version>
        </dependency>

    </dependencies>
</project>
代码生成crud操作
package com.et.dynamic.datasource;

import com.baomidou.mybatisplus.annotation.IdType;
import com.baomidou.mybatisplus.core.exceptions.MybatisPlusException;
import com.baomidou.mybatisplus.core.toolkit.StringPool;
import com.baomidou.mybatisplus.core.toolkit.StringUtils;
import com.baomidou.mybatisplus.generator.AutoGenerator;
import com.baomidou.mybatisplus.generator.InjectionConfig;
import com.baomidou.mybatisplus.generator.config.*;
import com.baomidou.mybatisplus.generator.config.po.TableInfo;
import com.baomidou.mybatisplus.generator.config.rules.NamingStrategy;
import com.baomidou.mybatisplus.generator.engine.FreemarkerTemplateEngine;

import java.util.ArrayList;
import java.util.List;
import java.util.Scanner;


public class GeneratorCode {
    /**
     * database connect
     * */
    private static final String dbUrl = "jdbc:mysql://localhost:3306/demo?useUnicode=true&useSSL=false&characterEncoding=utf8";
    /**
     * username
     * */
    private static final String username = "root";
    /**
     * pasword
     * */
    private static final String password = "123456";
    /**
     * moduleName
     * */
    private static final String moduleName = "/dynamic-datasource";

    /**
     * <p>
     * read console content
     * @param
     * </p>
     */
    public static String scanner(String tip) {
        Scanner scanner = new Scanner(System.in);
        StringBuilder help = new StringBuilder();
        help.append("please input:" + tip + ":");
        System.out.println(help.toString());
        if (scanner.hasNext()) {
            String ipt = scanner.next();
            if (StringUtils.isNotBlank(ipt)) {
                return ipt;
            }
        }
        throw new MybatisPlusException("please right conntent:" + tip + "!");
    }

    public static void main(String[] args) {
        // Code Generateor
        AutoGenerator mpg = new AutoGenerator();
        String module = scanner(" module");
        // GlobalCOnfig
        GlobalConfig gc = new GlobalConfig();
        //D:\IdeaProjects\ETFramework
        String basedir ="D:/IdeaProjects/ETFramework/";
        String projectPath = basedir+moduleName;
        System.out.println(projectPath);
        //OutputDir
        gc.setOutputDir(projectPath+"/src/main/java");
        gc.setAuthor("stopping");
        //some generate rule
        gc.setMapperName("%sMapper");
        gc.setServiceName("%sService");
        gc.setServiceImplName("%sServiceImp");
        gc.setControllerName("%sController");
        gc.setXmlName("%sMapper");
        gc.setIdType(IdType.AUTO);
        gc.setOpen(false);
        //IsOverride
        gc.setFileOverride(true);
        //isSwagger2
        gc.setSwagger2(false);
        mpg.setGlobalConfig(gc);

        //datasource
        DataSourceConfig dsc = new DataSourceConfig();
        dsc.setUrl(dbUrl);
        dsc.setDriverName("com.mysql.cj.jdbc.Driver");
        dsc.setUsername(username);
        dsc.setPassword(password);
        mpg.setDataSource(dsc);

        // PackageConfig
        PackageConfig pc = new PackageConfig();
        //package path
        pc.setParent("com.et.dynamic.datasource");
        //subpackage path
        pc.setMapper("mapper."+module);
        pc.setController("controller."+module);
        pc.setService("service."+module);
        pc.setServiceImpl("service."+module+".imp");
        pc.setEntity("model.entity");
        pc.setXml("Mapper");
        mpg.setPackageInfo(pc);

        //custom config
        InjectionConfig cfg = new InjectionConfig() {
            @Override
            public void initMap() {
                // to do nothing
            }
        };

        //  freemarker
        String templatePath = "/templates/mapper.xml.ftl";

        // FileOutConfig
        List<FileOutConfig> focList = new ArrayList<>();
        focList.add(new FileOutConfig(templatePath) {
            @Override
            public String outputFile(TableInfo tableInfo) {
                // Mapper
                String xmlUrl = projectPath + "/src/main/resources/mapper/" + module
                        + "/" + tableInfo.getEntityName() + "Mapper" + StringPool.DOT_XML;
                System.out.println("xml path:"+xmlUrl);
                return xmlUrl;
            }
        });

        cfg.setFileOutConfigList(focList);
        mpg.setCfg(cfg);

        // templateConfig
        TemplateConfig templateConfig = new TemplateConfig();
        templateConfig.setXml(null);
        mpg.setTemplate(templateConfig);

        // StrategyConfig
        StrategyConfig strategy = new StrategyConfig();
        strategy.setNaming(NamingStrategy.underline_to_camel);
        strategy.setColumnNaming(NamingStrategy.underline_to_camel);
        strategy.setEntityLombokModel(true);
        strategy.setRestControllerStyle(true);
        // common file
        //strategy.setSuperEntityColumns("id");
        strategy.setInclude(scanner("tablename,multi can be seperated ,").split(","));
        strategy.setControllerMappingHyphenStyle(true);
        strategy.setTablePrefix(pc.getModuleName() + "_");
        //isAnnotationEnable
        strategy.setEntityTableFieldAnnotationEnable(true);
        mpg.setStrategy(strategy);
        mpg.setTemplateEngine(new FreemarkerTemplateEngine());
        mpg.execute();
    }
}
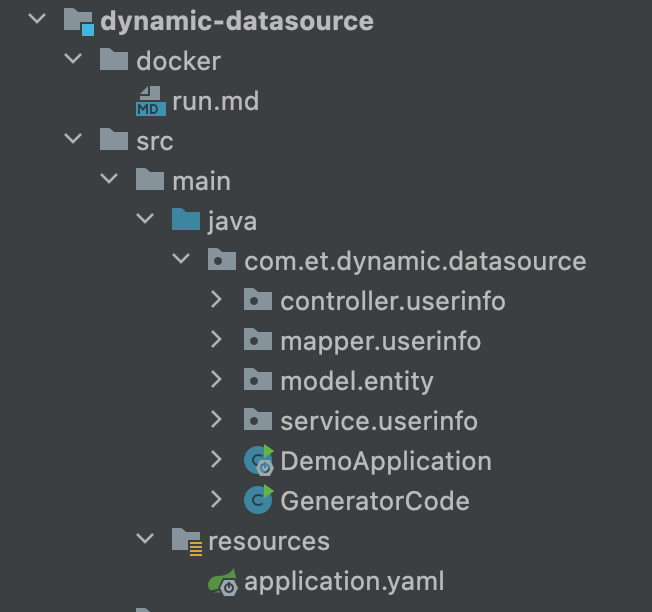
生成代码如下
然后修改service,增加切换数据源注解@DS 可以注解在方法上或类上,同时存在就近原则 方法上注解 优先于 类上注解。
| 注解 | 结果 |
|---|---|
| 没有@DS | 默认数据源 |
| @DS("dsName") | dsName可以为组名也可以为具体某个库的名称 |
package com.et.dynamic.datasource.service.userinfo.imp;

import com.baomidou.dynamic.datasource.annotation.DS;
import com.baomidou.mybatisplus.core.conditions.query.QueryWrapper;
import com.et.dynamic.datasource.model.entity.UserInfo;
import com.et.dynamic.datasource.mapper.userinfo.UserInfoMapper;
import com.et.dynamic.datasource.service.userinfo.UserInfoService;
import com.baomidou.mybatisplus.extension.service.impl.ServiceImpl;
import org.springframework.beans.factory.annotation.Autowired;
import org.springframework.stereotype.Service;

import javax.annotation.Resource;
import java.util.List;

/**
 * @author stopping
 * @since 2024-05-13
 */
@Service
@DS("slave_1")
public class UserInfoServiceImp extends ServiceImpl<UserInfoMapper, UserInfo> implements UserInfoService {
    @Resource
    UserInfoMapper userInfoMapper;
    @Override
    @DS("master")
    public List<UserInfo> testQueryWrapper(int age) {
        QueryWrapper<UserInfo> userQueryWrapper = new QueryWrapper<>();
        userQueryWrapper.ge("age", age);
        List<UserInfo> userList = userInfoMapper.selectList(userQueryWrapper);
        return userList;
    }
}
application.yaml
配置下格式支持这几种
# 多主多从                      纯粹多库(记得设置primary)                   混合配置
spring:                               spring:                               spring:
  datasource:                           datasource:                           datasource:
    dynamic:                              dynamic:                              dynamic:
      datasource:                           datasource:                           datasource:
        master_1:                             mysql:                                master:
        master_2:                             oracle:                               slave_1:
        slave_1:                              sqlserver:                            slave_2:
        slave_2:                              postgresql:                           oracle_1:
        slave_3:                              h2:                                   oracle_2:
本文配置如下
server:
  port: 8088
spring:
  datasource:
    dynamic:
      primary: master
      strict: false
      datasource:
        master:
          url: jdbc:mysql://localhost:3306/demo?serverTimezone=Asia/Shanghai
          username: root
          password: 123456
          driver-class-name: com.mysql.cj.jdbc.Driver
        slave_1:
          url: jdbc:mysql://localhost:3307/demo?serverTimezone=Asia/Shanghai
          username: root
          password: 123456
          driver-class-name: com.mysql.cj.jdbc.Driver
4.测试
测试插入
@Test
public void insert()  {
    log.info("your method test Code");

    for(int i =1;i<10;i++) {
        UserInfo ui =  new UserInfo();
        ui.setUserId(i+"id");
        userInfoService.removeById(i+"id");
        ui.setUsername("HBLOG"+i);
        ui.setAge(i);
        userInfoService.save(ui);
    }
由于类上@DS("slave_1"),所以预期插入的slave_1mysql库。
测试查询
@Test
public void testQueryWrapper()  {
    log.info("your method test Code");
    userInfoService.testQueryWrapper(3).forEach(System.out::println);
}
查询方法注解的@DS("master"),所以在mater库上根本查不到数据


 1万+
1万+


 被折叠的 条评论
为什么被折叠?
被折叠的 条评论
为什么被折叠?
 到【灌水乐园】发言


