


1.下载Spring、fastjson的jar包以及jQuery和json2的js文件,向项目的WEB-INF/lib目录加入Spring和fastjson的jar包,在WebContent目录下创建一个js文件夹,向js文件夹中加入jQuery和json2的js文件。
2.配置web.xml:配置SpringMVC前端控制器
<?xml version="1.0" encoding="UTF-8"?>
<web-app xmlns:xsi="http://www.w3.org/2001/XMLSchema-instance" xmlns="http://java.sun.com/xml/ns/javaee" xsi:schemaLocation="http://java.sun.com/xml/ns/javaee http://java.sun.com/xml/ns/javaee/web-app_3_0.xsd" id="WebApp_ID" version="3.0">
  <display-name>FastjsonRequestTest</display-name>
  <welcome-file-list>
    <welcome-file>index.html</welcome-file>
    <welcome-file>index.htm</welcome-file>
    <welcome-file>index.jsp</welcome-file>
    <welcome-file>default.html</welcome-file>
    <welcome-file>default.htm</welcome-file>
    <welcome-file>default.jsp</welcome-file>
  </welcome-file-list>
     <servlet>
  <servlet-name>springmvc</servlet-name>
  <servlet-class>org.springframework.web.servlet.DispatcherServlet</servlet-class>
  <init-param>
  	<param-name>contextConfigLocation</param-name>
  	<param-value>classpath:springmvc.xml</param-value>
  </init-param>
  <!-- 让servlet随服务启动 -->
  <load-on-startup>1</load-on-startup>
  </servlet>
  <servlet-mapping>
  <servlet-name>springmvc</servlet-name>
  <url-pattern>*.action</url-pattern>
  </servlet-mapping>
</web-app>
3.编写实体类(bean):
package com.domain;

import java.io.Serializable;

public class Book implements Serializable{

	private Integer id;
	private String name;
	private String author;
	public Book() {
		// TODO Auto-generated constructor stub
	}
	public Book(Integer id,String name, String author) {
		this.id = id;
		this.name = name;
		this.author = author;
	}
	public Integer getId() {
		return id;
	}
	public void setId(Integer id) {
		this.id = id;
	}
	public String getName() {
		return name;
	}
	public void setName(String name) {
		this.name = name;
	}
	public String getAuthor() {
		return author;
	}
	public void setAuthor(String author) {
		this.author = author;
	}
	@Override
	public String toString() {
		return "Book [id=" + id + ", name=" + name + ", author=" + author + "]";
	}

}
4.编写index.jsp:
<%@ page language="java" contentType="text/html; charset=UTF-8"
    pageEncoding="UTF-8"%>
<!DOCTYPE html PUBLIC "-//W3C//DTD HTML 4.01 Transitional//EN" "http://www.w3.org/TR/html4/loose.dtd">
<html>
<head>
<meta http-equiv="Content-Type" content="text/html; charset=UTF-8">
<title>测试接收JSON格式的数据</title>
<script type="text/javascript" src="js/jquery-3.2.0.min.js"></script>
<script type="text/javascript" src="js/json2.js"></script>
<script type="text/javascript">
$(document).ready(function(){
	$("#btn").click(testRequestBody);
});
function testRequestBody(){
	$.ajax("testRequestBody.action",
	{
		dataType : "json",
		type : "post",
		contentType : "application/json",
		data : JSON.stringify({"id" : 1, "name" : "Spring MVC学习"}),
		async : true,
		success : function(data){
			console.log(data);
			$("#id").html(data.id);
			$("#name").html(data.name);
			$("#author").html(data.author);
		},
		error:function(){
			alert("数据发送失败");
		}
	});
}
</script>
</head>
<body>
<button id="btn">点击</button><br>
编号:<span id="id"></span><br>
书名:<span id="name"></span><br>
作者:<span id="author"></span><br>
</body>
</html>
5.编写handler处理器:BookController.java
package com.controller;

import java.io.IOException;
import java.io.PrintWriter;

import javax.servlet.http.HttpServletResponse;

import org.springframework.stereotype.Controller;
import org.springframework.web.bind.annotation.RequestBody;
import org.springframework.web.bind.annotation.RequestMapping;

import com.alibaba.fastjson.JSONObject;
import com.domain.Book;

@Controller
public class BookController {

	@RequestMapping(value="/testRequestBody")
	public void setJson(
			@RequestBody Book book,
			HttpServletResponse response
			) throws IOException{
		book.setAuthor("张三");
		response.setContentType("text/html;charset=UTF-8");
		//JSONobject-lib包是一个beans,collections,maps,java arrays和xml与JSON互相转换的包
		//使用JSONobject将book对象转换成json写出到客户端
		PrintWriter out =  response.getWriter();
		out.println(JSONObject.toJSONString(book));
	}
}
6.配置SpringMVC配置文件:springmvc.xml
<?xml version="1.0" encoding="UTF-8"?>
<beans xmlns="http://www.springframework.org/schema/beans"
	xmlns:xsi="http://www.w3.org/2001/XMLSchema-instance"
	xmlns:tx="http://www.springframework.org/schema/tx"
	xmlns:context="http://www.springframework.org/schema/context"
	xmlns:mvc="http://www.springframework.org/schema/mvc"
	xmlns:c="http://www.springframework.org/schema/c"
	xsi:schemaLocation="
		http://www.springframework.org/schema/beans
  		http://www.springframework.org/schema/beans/spring-beans-4.1.xsd
  		http://www.springframework.org/schema/mvc
  		http://www.springframework.org/schema/mvc/spring-mvc-4.0.xsd
  		http://www.springframework.org/schema/context
  		http://www.springframework.org/schema/context/spring-context-4.1.xsd">
	<!-- 自动扫描base-package所指定包下面的java文件,如果扫描到右Spring相关注解的类,则把这些类注册为Spring的bean -->
	<context:component-scan base-package="com.controller"/>
	<!-- 实际开发中使用<mvc:annotation-driven/>代替注解适配器和映射器 -->
	<mvc:annotation-driven>
		<!-- 设置不使用默认的消息转换器 -->
		<mvc:message-converters register-defaults="false">
			<!-- 配置Spring的转换器 -->
			<bean class="org.springframework.http.converter.StringHttpMessageConverter"/>
			<bean class="org.springframework.http.converter.xml.XmlAwareFormHttpMessageConverter"/>
			<bean class="org.springframework.http.converter.ByteArrayHttpMessageConverter"/>
			<bean class="org.springframework.http.converter.BufferedImageHttpMessageConverter"/>
			<!-- 配置fastjson中实现HttpMessageConverter接口的转换器 -->
			<!-- FastJsonHttpMessageConverter是fastjson中实现了HttpMessageConverter接口的转换器 -->
			<bean id="fastJsonHttpMessageConverter" class="com.alibaba.fastjson.support.spring.FastJsonHttpMessageConverter">
				<!-- 加入支持的媒体类型:返回contentType -->
				<property name="supportedMediaTypes">
					<list>
						<!-- 这里顺序不能写反,一定要先写text/html,否则IE下会出现下载提示 -->
						<value>text/html;charset=UTF-8</value>
						<value>application/json;charset=UTF-8</value>
					</list>
				</property>
			</bean>
		</mvc:message-converters>
	</mvc:annotation-driven>
	<!-- 加载静态文件 -->
	<mvc:default-servlet-handler/>
	<!-- 配置视图解析器 -->
	<bean class="org.springframework.web.servlet.view.InternalResourceViewResolver">
		<!-- 前缀
		<property name="prefix">
			<value>/WEB-INF/</value>
		</property>-->
		<!-- 后缀 -->
		<property name="suffix">
			<value>.jsp</value>
		</property>
	</bean>

</beans>
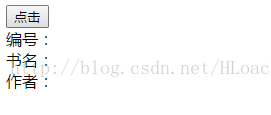
执行前index.jsp显示如下:
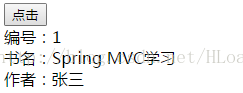
执行点击后,结果如下:


 1万+
1万+

 被折叠的 条评论
为什么被折叠?
被折叠的 条评论
为什么被折叠?
 到【灌水乐园】发言


