


原创Blog,转载请注明出处
http://blog.csdn.net/hello_hwc?viewmode=list
我的stackoverflow

我的Github
https://github.com/LeoMobileDeveloper
前言:当我们去修改一个CALayer的属性的时候,通常是会自动创建渐变的动画。但是,很多时候,默认的属性并不能满足我们的要求,我们希望自定义的属性也有动画。这就是本文要讲解的内容
先看看效果
动画
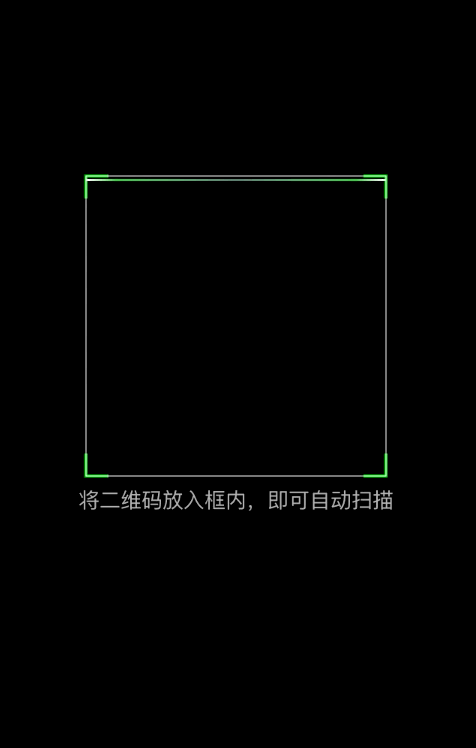
在实际设备上如图

核心步骤
添加一个自定义的属性
本文中,就是感兴趣的扫描区域
@property (nonatomic)CGRect focusRect;设置为@dynamic ,这样做是为了让CoreAnimation自动帮我门计算,在切换动画的时候每一帧对应focusRect的值
@implementation LHBackgroundLayer

@dynamic focusRect;
//****
@end
调用drawInContext或者display来绘制想要的图形
在这个例子中,四个边角,包括绘制明暗相间的区域,都是调用CoreGraphics的代码绘制的
-(void)drawInContext:(CGContextRef)ctx{
    UIBezierPath * focusPath = [self createBezierPathWithBounds:self.bounds focusRect:self.focusRect];
    CGContextAddPath(ctx, focusPath.CGPath);
    CGContextSetFillColorWithColor(ctx, [UIColor colorWithRed:0 green:0 blue:0 alpha:0.5].CGColor);
    CGContextEOFillPath(ctx);

    CGContextSetStrokeColorWithColor(ctx, [UIColor greenColor].CGColor);
    CGContextSetLineWidth(ctx,2.0);


    CGContextMoveToPoint(ctx, self.focusRect.origin.x + CORNERLENGTH, self.focusRect.origin.y);
    CGContextAddLineToPoint(ctx, self.focusRect.origin.x,self.focusRect.origin.y);
    CGContextAddLineToPoint(ctx, self.focusRect.origin.x, self.focusRect.origin.y + CORNERLENGTH);
    CGContextStrokePath(ctx);

    CGContextMoveToPoint(ctx, self.focusRect.origin.x + self.focusRect.size.width - CORNERLENGTH, self.focusRect.origin.y);
    CGContextAddLineToPoint(ctx, self.focusRect.origin.x + self.focusRect.size.width, self.focusRect.origin.y);
    CGContextAddLineToPoint(ctx, self.focusRect.origin.x + self.focusRect.size.width, self.focusRect.origin.y + CORNERLENGTH);
    CGContextStrokePath(ctx);

    CGContextMoveToPoint(ctx, self.focusRect.origin.x + self.focusRect.size.width, self.focusRect.origin.y + self<
最低0.47元/天 解锁文章


 被折叠的 条评论
为什么被折叠?
被折叠的 条评论
为什么被折叠?
 到【灌水乐园】发言


