


 本文围绕Spring Boot展开,介绍了其通过整合Spring Data简化数据访问层操作,如使用JdbcTemplate访问数据库;还讲述了整合Druid数据源,利用其监控功能排查问题;同时说明了整合MyBatis框架实现灵活数据库操作,以及Spring Boot中使用@Transactional注解进行事务管理。
✨✨个人主页:沫洺的主页
📚📚系列专栏: 📖 JavaWeb专栏📖 JavaSE专栏 📖 Java基础专栏📖vue3专栏
📖MyBatis专栏📖Spring专栏📖SpringMVC专栏📖SpringBoot专栏
📖Docker专栏📖Reids专栏📖MQ专栏📖SpringCloud专栏
💖💖如果文章对你有所帮助请留下三连✨✨
🍃Spring Boot JDBC访问数据库
对于数据访问层,无论是 SQL(关系型数据库) 还是 NOSQL(非关系型数据库),Spring Boot 都默认采用整合 Spring Data 的方式进行统一处理,通过大量自动配置,来简化我们对数据访问层的操作,我们只需要进行简单的设置即可实现对书层的访问。
引入JDBC启动器
<!--导入JDBC的启动器-->
<dependency>
    <groupId>org.springframework.boot</groupId>
    <artifactId>spring-boot-starter-data-jdbc</artifactId>
</dependency>
数据库驱动
     <dependency>
            <groupId>mysql</groupId>
            <artifactId>mysql-connector-java</artifactId>
            <scope>runtime</scope>
     </dependency>
配置数据源application.yml
spring:
  datasource:
    driver-class-name: com.mysql.cj.jdbc.Driver
    url: jdbc:mysql://localhost:3306/db5?useSSL=false&useServerPrepStmts=true
    username: root
    password: 123456
测试
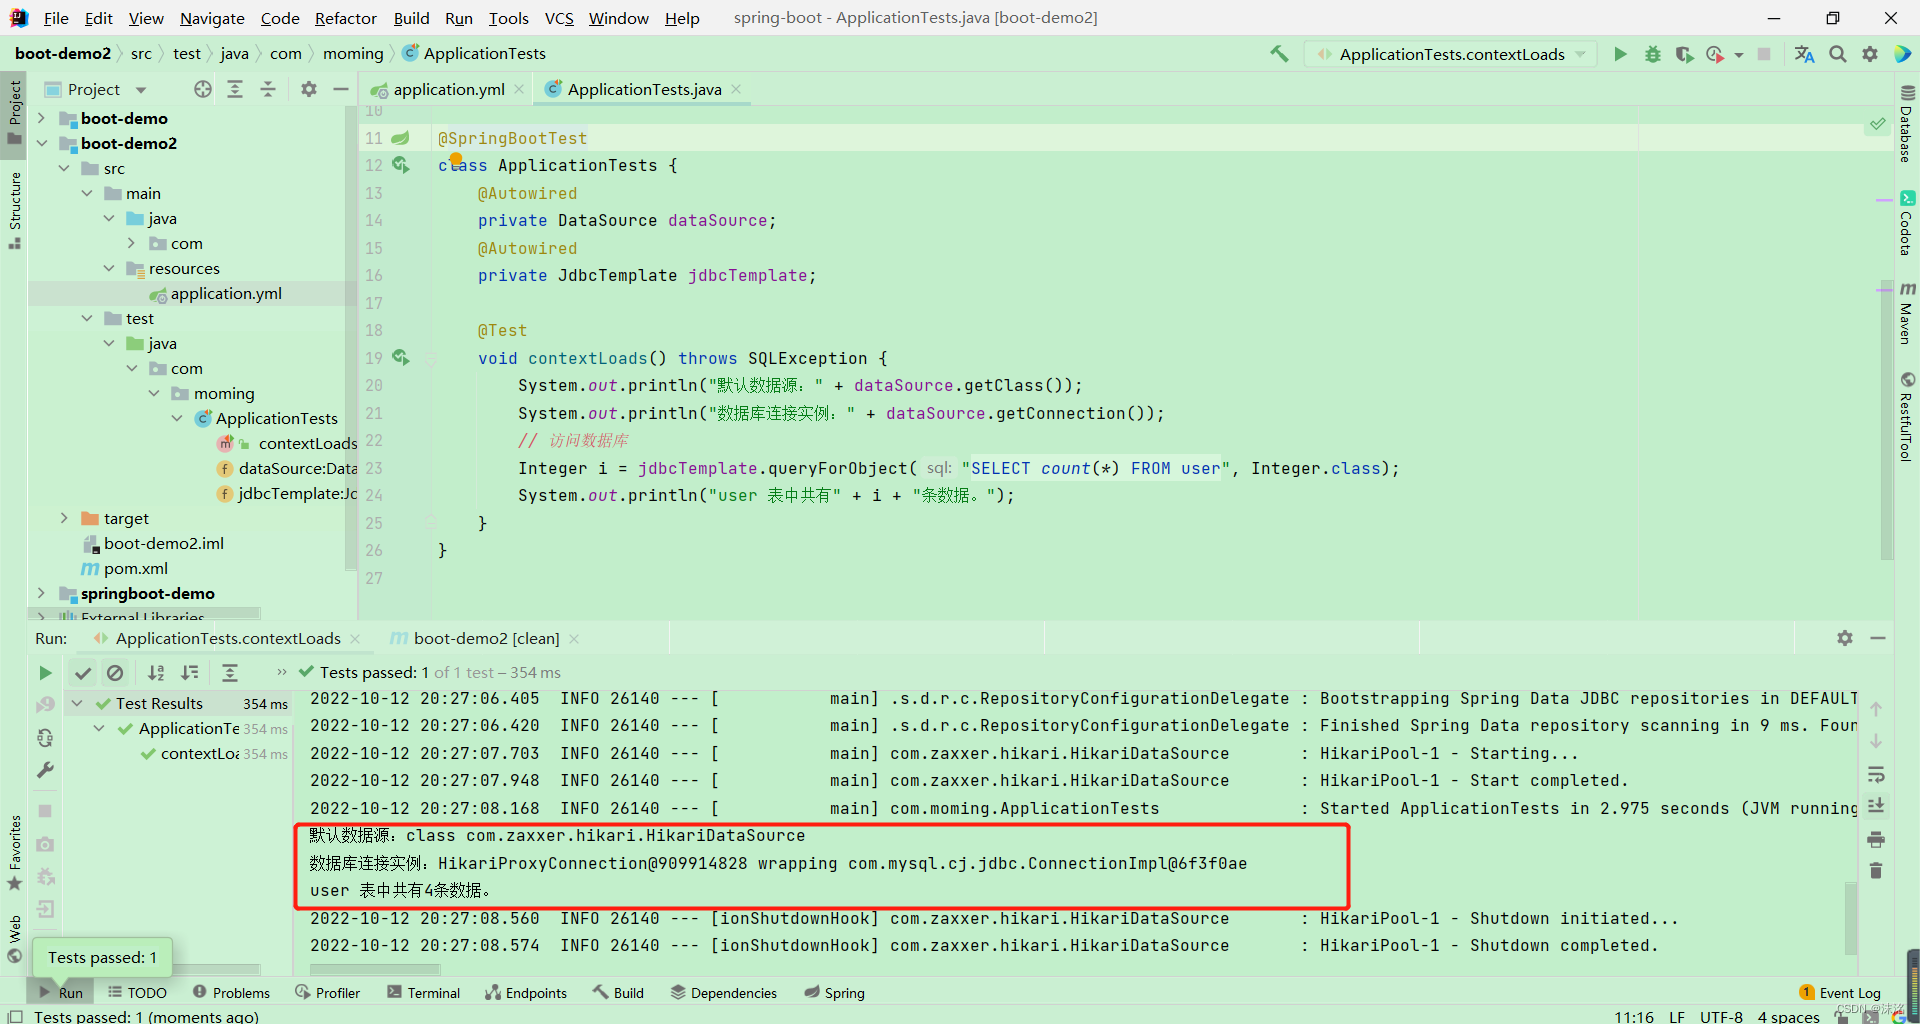
Spring Boot 提供了一个名为 JdbcTemplate 的轻量级数据访问工具,它是对 JDBC 的封装。Spring Boot 对 JdbcTemplate 提供了默认自动配置,我们可以直接使用 @Autowired 或构造函数将它注入到 bean 中使用。
单元测试
@SpringBootTest
class ApplicationTests {
    @Autowired
    private DataSource dataSource;
    @Autowired
    private JdbcTemplate jdbcTemplate;

    @Test
    void contextLoads() throws SQLException {
        System.out.println("默认数据源:" + dataSource.getClass());
        System.out.println("数据库连接实例:" + dataSource.getConnection());
        // 访问数据库
        Integer i = jdbcTemplate.queryForObject("SELECT count(*) FROM user", Integer.class);
        System.out.println("user 表中共有" + i + "条数据。");
    }
}
🍂Spring Boot整合Druid数据源
Druid 是阿里巴巴推出的一款开源的高性能数据源产品,Druid 支持所有 JDBC 兼容的数据库,包括 Oracle、MySQL、SQL Server 和 H2 等等。Druid 不仅结合了 C3P0、DBCP 和 PROXOOL 等数据源产品的优点,同时还加入了强大的监控功能。通过 Druid 的监控功能,可以实时观察数据库连接池和 SQL 的运行情况,帮助用户及时排查出系统中存在的问题。
使用 Druid Spring Boot Starter 将 Druid 与 Spring Boot 整合
引入 Druid Spring Boot Starter 依赖
<dependency>
    <groupId>com.alibaba</groupId>
    <artifactId>druid-spring-boot-starter</artifactId>
    <version>1.2.9</version>
</dependency>
配置属性
#数据库连接信息配置
spring:
  datasource:
      driver-class-name: com.mysql.cj.jdbc.Driver
      username: root
      password: 123456
      url: jdbc:mysql://localhost:3306/db5
      druid:
        initial-size: 10 # 初始化时建立物理连接的个数。初始化发生在显示调用init方法,或者第一次getConnection时
        min-idle: 10 # 最小连接池数量 最小空闲数量
        maxActive: 200 # 最大连接池数量 最大活跃连接数
        maxWait: 60000 # 获取连接时最大等待时间,单位毫秒。配置了maxWait之后,缺省启用公平锁,并发效率会有所下降,如果需要可以通过配置
        timeBetweenEvictionRunsMillis: 60000 # 检查空闲连接的频率.Destroy线程会检测连接的间隔时间,如果连接空闲时间大于等于minEvictableIdleTimeMillis则关闭物理连接。
        minEvictableIdleTimeMillis: 300000 # 连接的最小生存时间.连接保持空闲而不被驱逐的最小时间
        validationQuery: SELECT 1  # 验证数据库服务可用性的sql.用来检测连接是否有效的sql 因数据库方言而差, 例如 oracle 应该写成 SELECT 1 FROM DUAL
        testWhileIdle: true # 申请连接时检测空闲时间,根据空闲时间再检测连接是否有效.建议配置为true,不影响性能,并且保证安全性。申请连接的时候检测,如果空闲时间大于timeBetweenEvictionRun
        testOnBorrow: false # 申请连接时直接检测连接是否有效.申请连接时执行validationQuery检测连接是否有效,做了这个配置会降低性能。
        testOnReturn: false # 归还连接时检测连接是否有效.归还连接时执行validationQuery检测连接是否有效,做了这个配置会降低性能。
        poolPreparedStatements: true # 开启PSCache
        maxPoolPreparedStatementPerConnectionSize: 20 #设置PSCache值
        connectionErrorRetryAttempts: 3 # 连接出错后再尝试连接三次
        breakAfterAcquireFailure: true # 数据库服务宕机自动重连机制
        timeBetweenConnectErrorMillis: 300000 # 连接出错后重试时间间隔
        asyncInit: true # 异步初始化策略
        remove-abandoned: true # 是否自动回收超时连接
        remove-abandoned-timeout: 1800 #  超时时间(以秒数为单位) 超过此值后,druid将强制回收该连接
        transaction-query-timeout: 6000 # 事务超时时间
        filters: stat,wall,log4j2
        connectionProperties: druid.stat.mergeSql=true;druid.stat.slowSqlMillis=5000
        stat-view-servlet:
          enabled: true            #是否开启内置监控页面,默认值为 false
          url-pattern: "/druid/*"    #StatViewServlet 的映射路径,即内置监控页面的访问地址
          allow: 127.0.0.1    #白名单
          deny:     #黑名单
          reset-enable: false       #是否启用重置按钮
          login-username: admin     #内置监控页面的登录页用户名 username
          login-password: admin     #内置监控页面的登录页密码 password
        web-stat-filter:
          enabled: true            #是否开启内置监控中的 Web-jdbc 关联监控的数据
          url-pattern: "/*"        #匹配路径
          exclusions: "*.js,*.gif,*.jpg,*.bmp,*.png,*.css,*.ico,/druid/*"  #排除路径
          session-stat-enable: true                             #是否监控session
🍁Spring Boot整合MyBatis
MyBatis 是一个半自动化的 ORM 框架,所谓半自动化是指 MyBatis 只支持将数据库查出的数据映射到 POJO 实体类上,而实体到数据库的映射则需要我们自己编写 SQL 语句实现,相较于Hibernate 这种完全自动化的框架,Mybatis 更加灵活,我们可以根据自身的需求编写 sql 语句来实现复杂的数据库操作。
随着 Spring Boot 越来越流行,越来越多的被厂商及开发者所认可,MyBatis 也开发了一套基于 Spring Boot 模式的 starter:mybatis-spring-boot-starter。
引入依赖
<dependency>
    <groupId>org.mybatis.spring.boot</groupId>
    <artifactId>mybatis-spring-boot-starter</artifactId>
    <version>2.1.4</version>
</dependency>
(jdbc,mysql驱动,druid)
<dependency>
    <groupId>org.springframework.data</groupId>
    <artifactId>spring-data-jdbc</artifactId>
</dependency>
<dependency>
    <groupId>com.alibaba</groupId>
    <artifactId>druid-spring-boot-starter</artifactId>
    <version>1.2.9</version>
</dependency>
<dependency>
    <groupId>mysql</groupId>
    <artifactId>mysql-connector-java</artifactId>
    <scope>runtime</scope>
</dependency>
application.yml配置 MyBatis
#数据库连接信息配置
spring:
  datasource:
    driver-class-name: com.mysql.cj.jdbc.Driver
    url: jdbc:mysql://localhost:3306/db5?useSSL=false&useServerPrepStmts=true
    username: root
    password: 123456
    druid:
      initial-size: 10 # 初始化时建立物理连接的个数
      min-idle: 10 # 最小连接池数量
      maxActive: 200 # 最大连接池数量
      maxWait: 60000 # 获取连接时最大等待时间,单位毫秒
#映射文件所在位置
mybatis:
  mapper-locations: classpath:mapper/*Mapper.xml
  #别名
  type-aliases-package: com.moming.entity

#配置日志级别
logging:
  level:
    com.moming: debug
示例
AccountEntity
package com.moming.entity;

import lombok.Data;

import java.math.BigDecimal;
@Data
public class AccountEntity {
    private Integer id;
    private String name;
    private BigDecimal money;
}
AccountDto
package com.moming.dto;

import lombok.Data;

import java.math.BigDecimal;

@Data
public class AccountDto {
    private Integer id;
    private String name;
    private BigDecimal money;
}
AccountMapper.xml
<?xml version="1.0" encoding="UTF-8" ?>
<!DOCTYPE mapper
        PUBLIC "-//mybatis.org//DTD Mapper 3.0//EN"
        "https://mybatis.org/dtd/mybatis-3-mapper.dtd">
<mapper namespace="com.moming.dao.AccountDao">
    <select id="select" resultType="AccountEntity">
        select id,name,money from account
    </select>
</mapper>
AccountDao
package com.moming.dao;

import com.moming.entity.AccountEntity;
import org.apache.ibatis.annotations.Mapper;

import java.util.List;

@Mapper
public interface  AccountDao{

    List<AccountEntity> select();

}
AccountService
package com.moming.service;

import com.moming.dto.AccountDto;

import java.util.List;

public interface AccountService {
    List<AccountDto> select();
}
AccountServiceImpl
package com.moming.service.impl;

import cn.hutool.core.bean.BeanUtil;
import com.moming.dao.AccountDao;
import com.moming.dto.AccountDto;
import com.moming.entity.AccountEntity;
import com.moming.service.AccountService;
import org.springframework.beans.factory.annotation.Autowired;
import org.springframework.stereotype.Service;

import java.util.List;
@Service
public class AccountServiceImpl implements AccountService {
    @Autowired
    private AccountDao accountDao;
    @Override
    public List<AccountDto> select() {
        List<AccountEntity> entityList  = accountDao.select();
        List<AccountDto> accountDtoList = BeanUtil.copyToList(entityList, AccountDto.class);
        return accountDtoList;
    }
}
AccountController
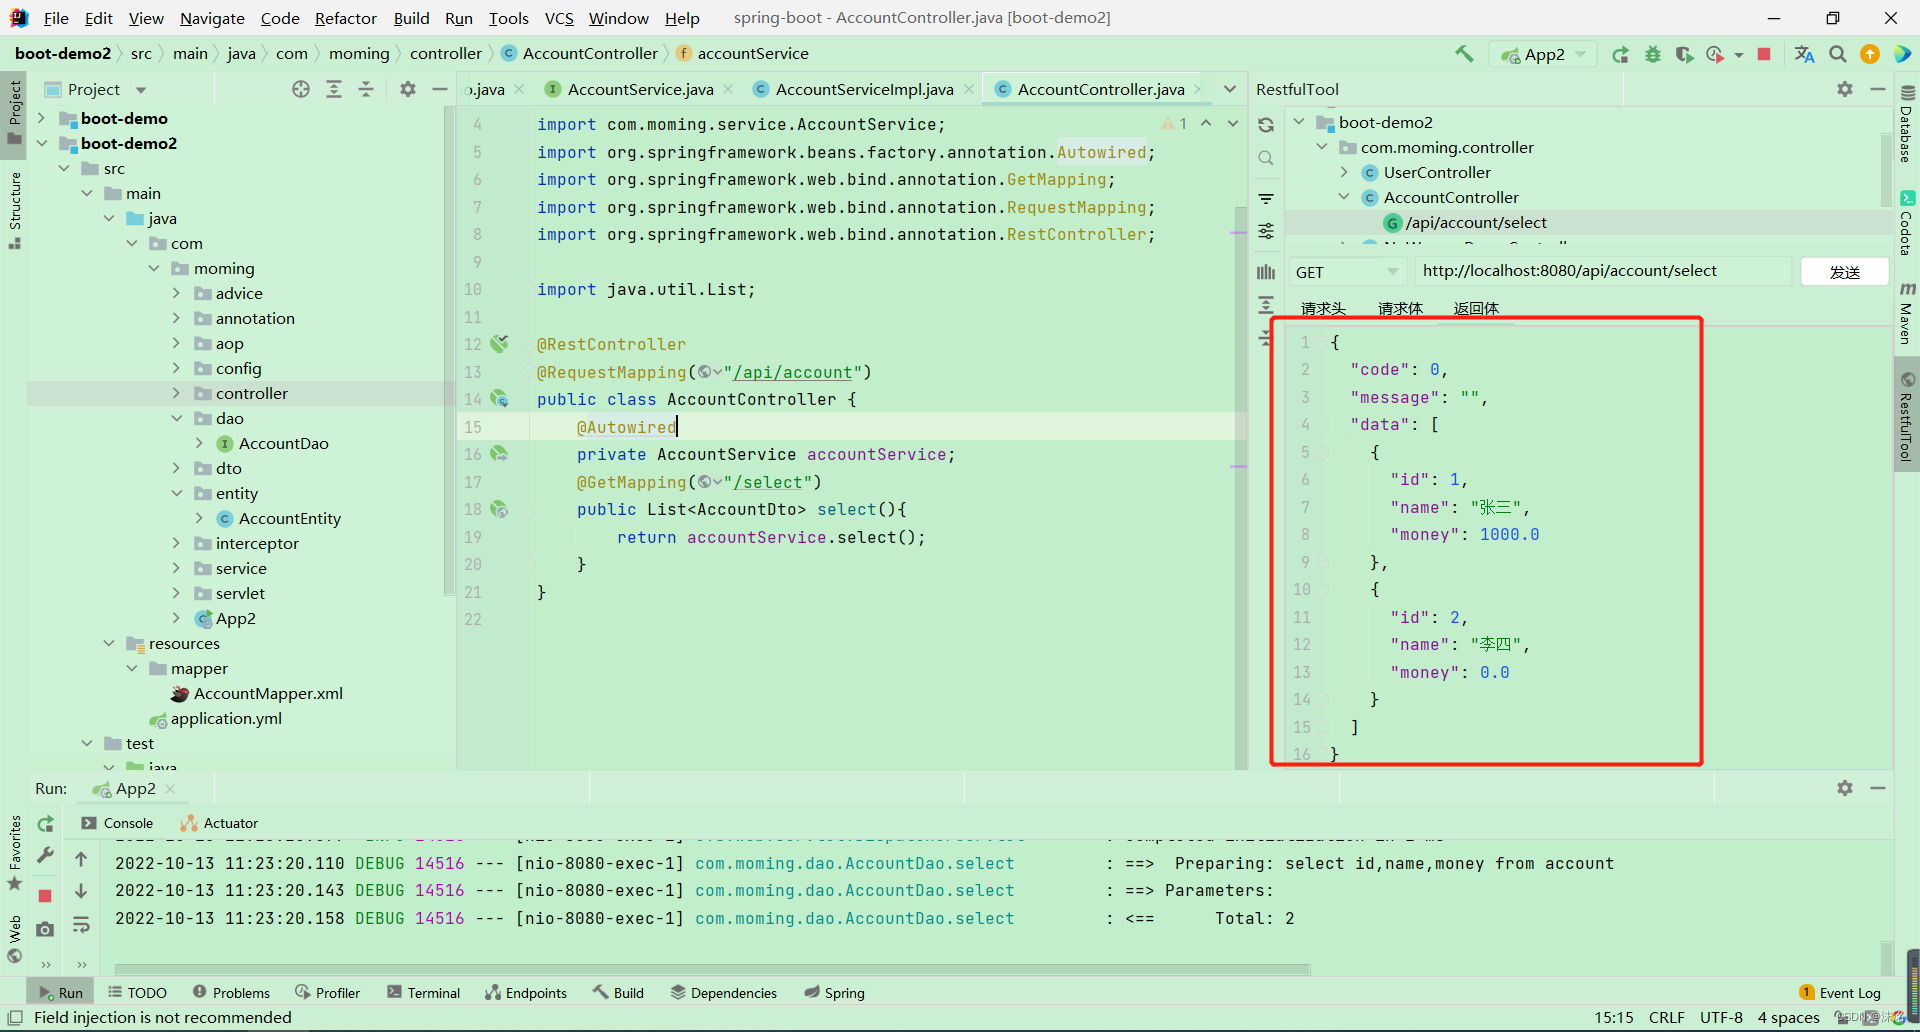
package com.moming.controller;

import com.moming.dto.AccountDto;
import com.moming.service.AccountService;
import org.springframework.beans.factory.annotation.Autowired;
import org.springframework.web.bind.annotation.GetMapping;
import org.springframework.web.bind.annotation.RequestMapping;
import org.springframework.web.bind.annotation.RestController;

import java.util.List;

@RestController
@RequestMapping("/api/account")
public class AccountController {
    @Autowired
    private AccountService accountService;
    @GetMapping("/select")
    public List<AccountDto> select(){
        return accountService.select();
    }
}
补充
启动类@MapperScan
在不使用@MapperScan前,我们需要直接在Mapper/Dao接口类上面添加注解@Mapper,这种方式要求每一个Mapper/Dao接口类都需要添加此注解,非常麻烦,属于重复劳动。通过使用@MapperScan注解,可以让我们不用为每个Mapper/Dao接口类都添加@Mapper注解
package com.moming;

import org.mybatis.spring.annotation.MapperScan;
import org.springframework.boot.SpringApplication;
import org.springframework.boot.autoconfigure.SpringBootApplication;

@SpringBootApplication
@MapperScan("com.moming.dao")
public class App2 {
    public static void main(String[] args) {
        SpringApplication.run(App2.class, args);
    }
}
package com.moming.dao; import com.moming.entity.AccountEntity; import org.apache.ibatis.annotations.Mapper import java.util.List; //@Mapper public interface AccountDao{ List<AccountEntity> select(); }
🍀Spring Boot事务
在spring boot中 要使用事务 直接使用注解@Transactional既可,无需要做其它任何配置。是因为默认已经开启,下图可以看到默认true,这个注解是用来声明这个类或者方法需要开启事务。
@EnableTransactionManagement // 等同于xml配置方式的<tx:annotation-driven/>
这个注解可以放在springboot的启动类上,也可以放在配置类上。他的作用是开启事务管理。他是spring-tx中的注解,不是springboot中的注解。如果你添加的是 spring-boot-starter-jdbc 依赖(mybatis框架也会依赖jdbc),框架会默认注入 DataSourceTransactionManager 实例。如果你添加的是 spring-boot-starter-data-jpa 依赖,框架会默认注入 JpaTransactionManager 实例。springboot的autoconfigure是默认已经有这个注解的,所以在springboot中不需要再次使用这个注解。
详情可参考:@Transactional事务管理可以不使用@EnableTransactionalManagement开启
所以启动类上不加@EnableTransactionManagement注解,也可以进行事务管理
测试
AccountDao
@Mapper
public interface  AccountDao{
    @Update("update account set money=money-#{money} where name=#{fromName}")
    Integer minusMoney(String fromName, BigDecimal money);
    @Update("update account set money=money+#{money} where name=#{toName}")
    Integer addMoney(String toName, BigDecimal money);
}
AccountService
public interface AccountService {
    void transfer();
}
AccountServiceImpl
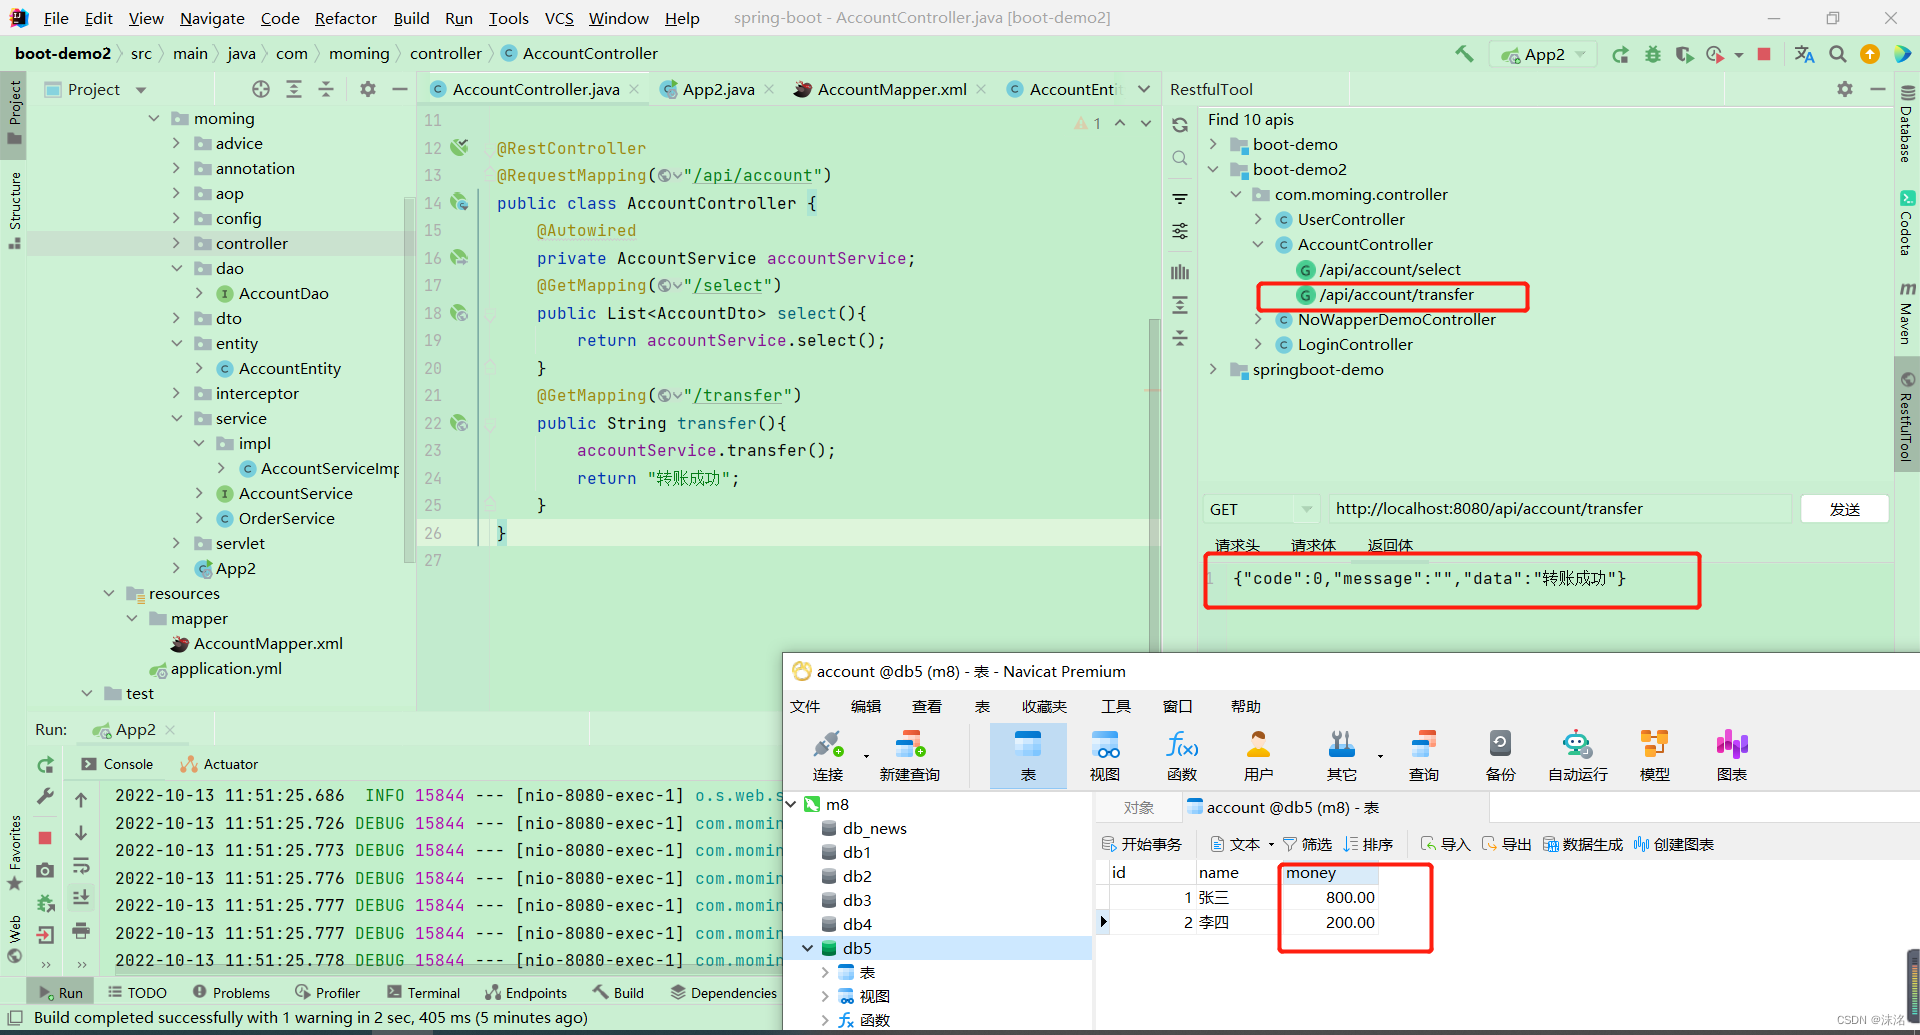
@Service
public class AccountServiceImpl implements AccountService {
    @Autowired
    private AccountDao accountDao;

    @Transactional
    @Override
    public void transfer() {
        accountDao.minusMoney("张三", BigDecimal.valueOf(200));
        //int a = 1/0;
        accountDao.addMoney("李四", BigDecimal.valueOf(200));
    }
}
AccountController
@RestController
@RequestMapping("/api/account")
public class AccountController {
    @Autowired
    private AccountService accountService;

    @GetMapping("/transfer")
    public String transfer(){
        accountService.transfer();
        return "转账成功";
    }
}
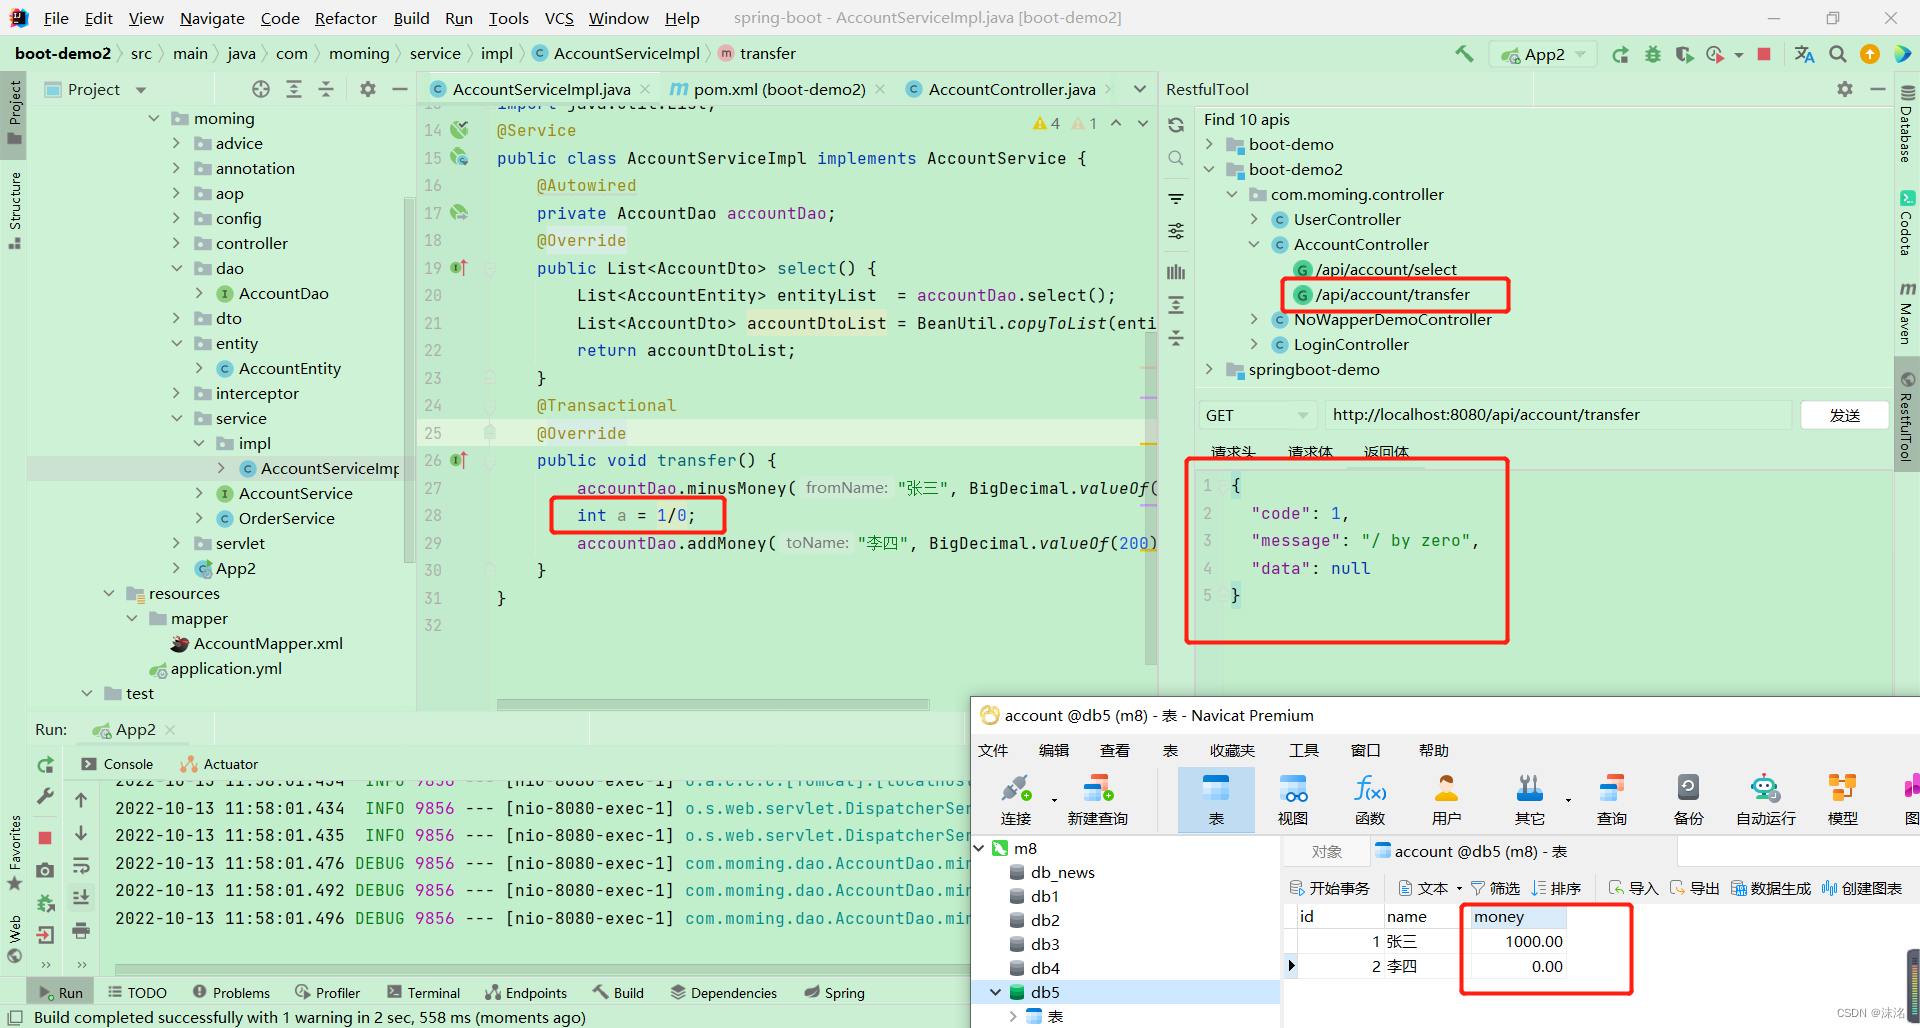
转账异常,事务回滚
@Service public class AccountServiceImpl implements AccountService { @Autowired private AccountDao accountDao; @Transactional @Override public void transfer() { accountDao.minusMoney("张三", BigDecimal.valueOf(200)); int a = 1/0; accountDao.addMoney("李四", BigDecimal.valueOf(200)); } }


 1378
1378

 被折叠的 条评论
为什么被折叠?
被折叠的 条评论
为什么被折叠?
 到【灌水乐园】发言


