


选择器分为class选择器和ID选择器,属性选择器,派生选择器、伪类和伪元素。其中class和ID选择器,大都非常清楚,这里就不在展开。本节重点梳理一下属性选择器、伪类和伪元素,相信通过本文的重新整理能够对选择器的相关观念能够有一个全面而系统的认识,以便在将来的实践中带来便利。
1,属性选择器
1.1 简单属性选择器:选择具有特定属性的元素而不管其属性值。
h1[class] {color: silver;} // 选择单个属性
a[href][title] {font-weight: bold;} // 选择多个属性
选择具有class属性的h1标签,
选择具有href和title属性的a标签。
1.2 属性值选择器:根据具体的属性值进行筛选
a[href="http://www.w3.org/"][title="W3C Home"] {font-size: 200%;}

// 相应的以下超链接就会被加粗

<a href="http://www.w3.org/" title="W3C Home">W3C</a>
注意一下可能的问题: 属性值选择器,当然可以选择class,比如 div[class="a"] 但比如有
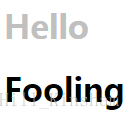
h1[class='hoopla'] {color: silver;}

<h1 class="hoopla">Hello</h1>
<h1 class="hoopla fancy">Fooling</h1>
第二个h1是不会被选择的。因为此时的属性值是‘hoopla fancy’
1.3 部分属性值选择器。
就是根据属性值得一部分进行选择。用法类似于基本的正则匹配
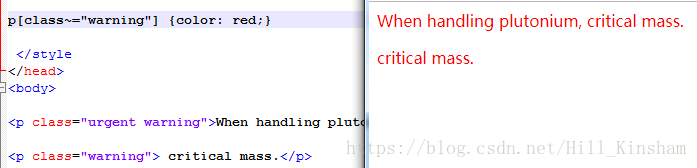
[foo~="bar"] 空格分开的(包括只有bar值得情况)
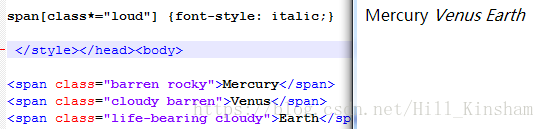
[foo*="bar"] 属性值中包含子串bar
[foo^="bar"] bar打头的
[foo$="bar"] bar结尾的
[foo|="bar"] bar打头后接短线“bar-”,或者就是bar下面分别举个例子:
情况1:属性值是warings,或者属性值中有用空格隔开的warnings部分。
情况2:属性值中匹配到子串loud,就会匹配到。类似的 ^ $用法很直白,就不举例子了。
情况5:短线的情况,或者值为en
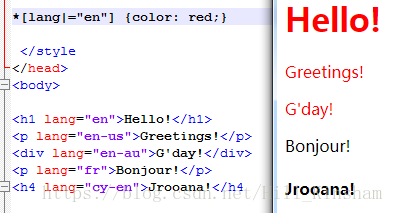
是en,或者en- 形式的会被匹配到。所以第一二三个可以被匹配。
2,派生选择器
也叫作上下文选择器,分为后代选择器,子选择器,相邻兄弟选择器等。
派生选择器在实际场景中应用非常广泛。而且根据派生选择器也能很方便的定位到目标元素。
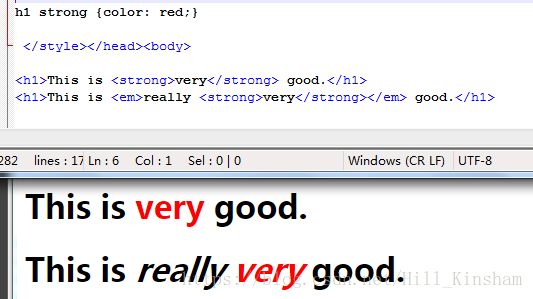
2.1 后代选择器:
两个选择器之间用空格隔开,比如:
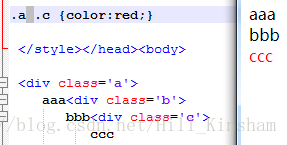
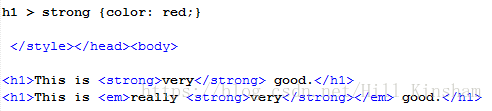
2.2 子选择器:
就是选择子元素,用 “>” 表示:

2.2p 后代选择器和子选择器的关系:
子选择器包含于后代选择器
2.3 相邻兄弟选择器:+
h1 + p {margin-top: 0;}选择所有h1之后的第一个p元素。
2.3p 一般弟弟选择器:~
(这个名字我自己取得,但却非常合适)
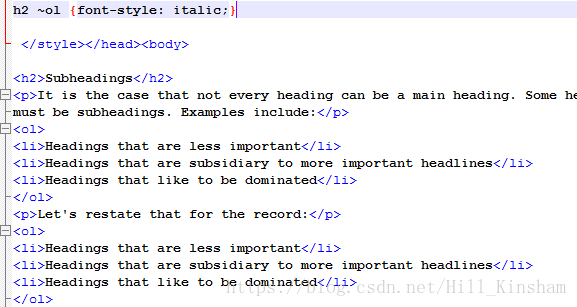
如上面例子,首先两者是兄弟关系,那么选择 h2的所有ol弟弟(没有哥哥)
3,伪类:
这里仅介绍伪类中具有选择器功能的一部分伪类。其他的各种伪类简单且分散,也没有很强的逻辑性,在平时用时去查就足够了。
3.1 选择唯一的子元素。:only-child 和 only-of-type。
比如有一个img,外面是一个超链接。当点击图片时,会跳转到一个页面。
那么,如果你想选中所有这样的图片给他们加上特殊格式便可以使用 :only-child伪类。
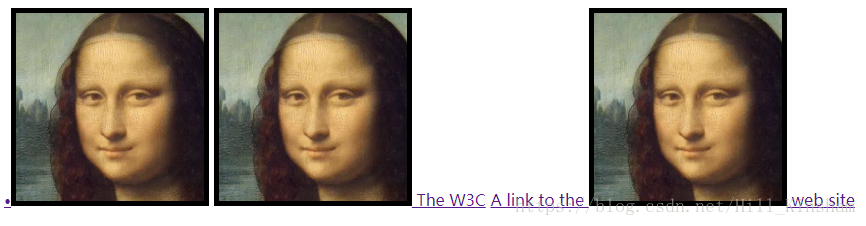
<a href="http://w3.org/"><img src="w3.png" alt="W3C"></a>例子如下:
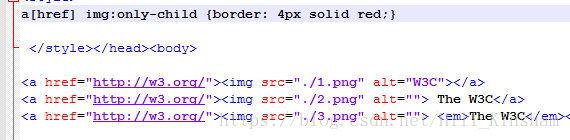
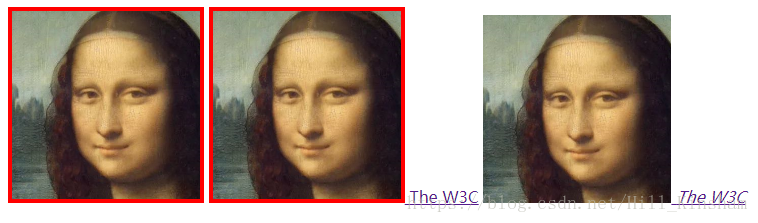
第三种情况下,除了img还有个em元素,故不是only-child。
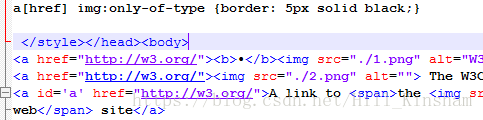
现在我们继续观察上面的例子,尽管第三种情况img不是only-child,但img也只有一个,能不能条件稍稍放开,也匹配到这类的img呢。此时用 :only-of-type
这两个伪类的区别是only-of-type是在兄弟节点中,只要自己这个类型唯一就可以。拿上面的例子来说,img的兄弟元素em不是img,故此时的:only-of-type 能够选择到该img。如下图
3.2 :first-child last-child 和first-of-type last-of-type
选择第一个子元素。例子如下:
p:first-child {font-weight: bold;}
li:first-child {text-transform: uppercase;}

<body>
<div>
	<p>These are the necessary steps:</p>
	<ul>
		<li>Insert key</li>
		<li>Turn key <strong>clockwise</strong></li>
		<li>Push accelerator</li>
	</ul>
	<p>
	    Do <em>not</em> pus the accelerator.
	</p>
</div>
</body>
可以看到此时第一个p元素bold,第一个li元素转成大写。
:first-child有一点让人容易弄错的是,比如 div:first-child 会让人以为div是父元素,选择div的第一个子元素。这就犯了望文生义的错误。正确的理解是第一个出现的div
类似的还有:last-child,
根据链式调用,
p:first-child:last-child == p:only-child
3.3 nth-child() 每隔n选择一个。
nth-child(1) == first-child
nth-child(2n) 选择第2 4 6个,
nth-child(2n+1) 选择第1 3 5
同样道理,也有从最后开始选 nth-last-child() 用法和nth-child一样,顺序是从最后的位置开始。
:nth-of-type() and :nth-last-oftype()
first-of-type, last-of-type
与only-child类似,first-of-type选择的是第一个该类型的元素。如下图:
table:first-of-type {border-top: 2px solid gray;}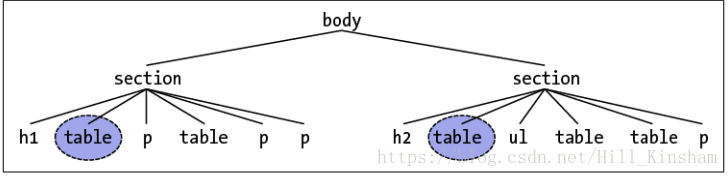
3.4 这两种选择方式的区别
first-of-type在每个section中,匹配到第一个table。
first-child是只有该父元素下第一个为指定元素时,才会匹配成功
情况1:h1是第一个子元素情况
h1:first-child {color:green;}

 </style></head><body>
<div>
<h1>h1h1h1h1</h1>
	<p>These are the necessary steps:</p>
	<ul>
		<li>Insert key</li>
		<li>Turn key <strong>clockwise</strong></li>
		<li>Push accelerator</li>
	</ul>
	<p>
	    Do <em>not</em> pus the accelerator.
	</p>
	<h1>h1h1h1h1</h1>
</div>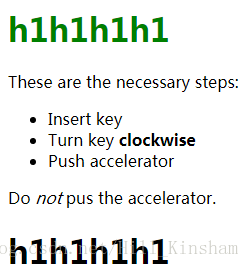
h1是div的第一个子元素,故匹配成功
情况2:h1不是第一个子元素情况
h1:first-child {color:green;}

 </style></head><body>
<div>

	<p>These are the necessary steps:</p>
	<h1>h1h1h1h1</h1>
	<ul>
		<li>Insert key</li>
		<li>Turn key <strong>clockwise</strong></li>
		<li>Push accelerator</li>
	</ul>
	<p>
	    Do <em>not</em> pus the accelerator.
	</p>
	<h1>h1h1h1h1</h1>
</div>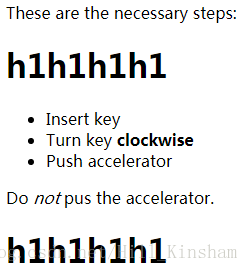
h1不是div的第一个子元素,不匹配
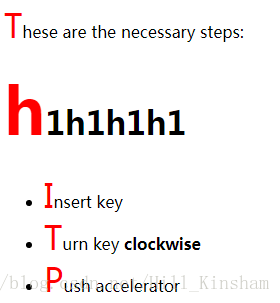
情况3:h1不是第一个子元素,使用first-of-type情况
h1:first-of-type {color:green;}

 </style></head><body>
<div>

	<p>These are the necessary steps:</p>
	<h1>h1h1h1h1</h1>
	<ul>
		<li>Insert key</li>
		<li>Turn key <strong>clockwise</strong></li>
		<li>Push accelerator</li>
	</ul>
	<p>
	    Do <em>not</em> pus the accelerator.
	</p>
	<h1>h1h1h1h1</h1>
</div> 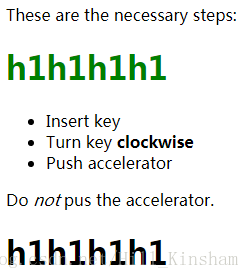
h1在div中的第一个,会被匹配到
4. 伪元素
伪元素有4个:first-letter,first-line,before和after
4.1 first-letter
::first-letter {color: red; font-size: 200%;}

 </style></head><body>
<div>

	<p>These are the necessary steps:</p>
	<h1>h1h1h1h1</h1>
	<ul>
		<li>Insert key</li>
		<li>Turn key <strong>clockwise</strong></li>
		<li>Push accelerator</li>
	</ul>
</div>
效果:
4.2 first-line匹配第一行,
如下图,第一段是p元素的情况

first-line和first-letter只用于块元素,对行内元素则没有效果
3,before和after
在一个元素的前或者后面加一个元素
h2::before {content: "]]"; color: silver;}
h2::after {content: "The End.";}

<h2>h2h2h2</h2> ![]()
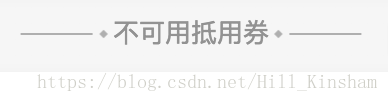
伪元素的应用
比如我想实现一个如下的常见效果,用伪元素就特别的合适
.split-line {
  display: inline-block;
  font-size:26px;
  color:rgba(146,146,146,1);
  line-height:37px;
  text-align: center;
  position: relative;
  margin-bottom: 20px;
}
.split-line:before {
  position: absolute;
  top: 50%;
  left: 0;
  transform: translate(-105%,-50%);
  content: " ";
  display: inline;
  height: 10px;
  width: 88px;
  background: url('./Group@left.png') no-repeat;
  background-size: 100%;
}
.split-line::after {
  top: 50%;
  right: 0;
  transform: translate(105%,-50%);
  position: absolute;
  content: " ";
  display: inline;
  height: 10px;
  width: 88px;
  background: url('./Group@right.png') no-repeat;
  background-size: 100%;
}
<div style='text-align:center;'>
	<div class="split-line">不可用抵用券</div>
</div>
给目标div设置为行内块元素,然后将两个伪元素加在两侧。
注意一些小细节,比如两个伪元素的图片是用作背景。因此需要给该元素加个定位。


 935
935

 被折叠的 条评论
为什么被折叠?
被折叠的 条评论
为什么被折叠?
 到【灌水乐园】发言


