


修改pom.xml 文件
- 引入坐标:
      <dependency>
          <groupId>org.springframework.boot</groupId>
          <artifactId>spring-boot-starter-tomcat</artifactId>
         <scope>provided</scope>
           </dependency>
-
修改打包的方式:
war -
添加打包插件配置:
org.springframework.boot
spring-boot-maven-plugin
org.apache.maven.plugins
maven-war-plugin
3.1.0
false
${project.artifactId}
修改启动类
public class YtWebApplicationOutTomcat extends SpringBootServletInitializer {public YtWebApplicationOutTomcat() {
super();
setRegisterErrorPageFilter(false);
}
@Override
protected SpringApplicationBuilder configure(SpringApplicationBuilder builder) {
builder.sources(this.getClass());
return super.configure(builder);
}public static void main(String[] args) {
TimeZone.setDefault(TimeZone.getTimeZone(“Asia/Shanghai”));
SpringApplication.run(YtWebApplicationOutTomcat.class, args);
System.out.println("(♥◠‿◠)ノ゙ 启动成功! ლ(´ڡ`ლ)゙ ");
}
}
注意:
框架使用了Shiro 必须加以下代码:
super();
setRegisterErrorPageFilter(false);
}
如果不加的话,请求接口的时候会报错:
报错:后面response 为 errorPage
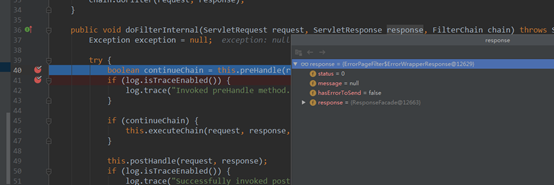
后台报错:

外置Tomcat启动项目配置
-


-

-
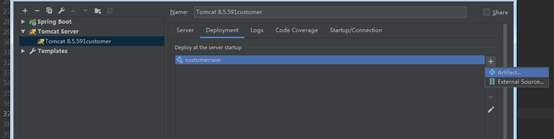
配置完成,启动打包即可。


 109
109


 被折叠的 条评论
为什么被折叠?
被折叠的 条评论
为什么被折叠?
 到【灌水乐园】发言


