


介绍
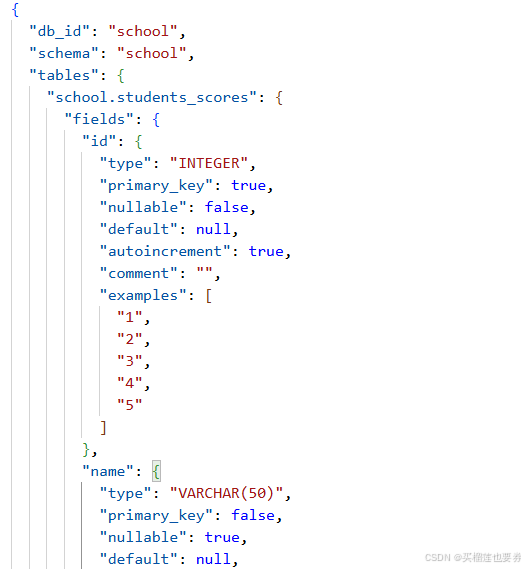
M-Schema 是数据库模式的半结构化表示,可用于文本转SQL(Text2SQL、NL2SQL) 等多种场景。支持多种关系数据库,如MySQL、PostgreSQL、Oracle等。M-schema的表征实例如下:

实战
1、配置环境
- 环境要求:python>3.9
- 软件&库&包:MySQL、llama-index、numpy、sqlalchemy、pymysql
步骤1:安装MySQL
Ubuntu 20.04 LTS默认安装版本为mysql 8.0:
sudo apt install -y mysql-server-8.0
步骤2:启动MySQL服务:
安装完成后,MySQL服务会自动启动,未成功启动则可以使用命令启动MySQL服务:
sudo systemctl start mysql
将MySQL设置为开机自启动(可选):
sudo systemctl enable mysql
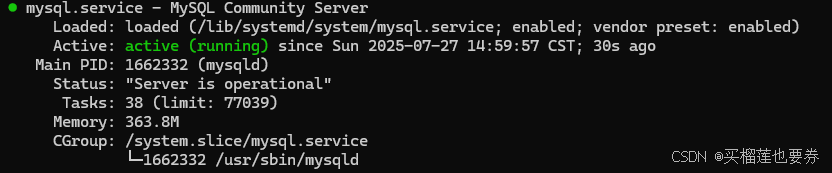
检查MySQL服务状态,是否运行成功:
sudo systemctl status mysql
如显示以下输出表面MySQL安装且成功启动!
2、数据库准备
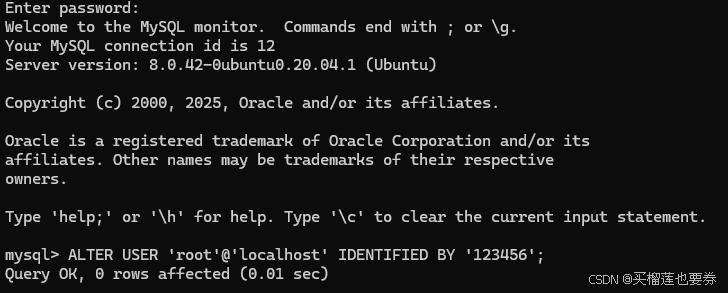
步骤1:连接数据库并设置密码
sudo mysql -uroot -p
连接成功后设置初始密码,使用如下命令修改密码(可根据实际需求设置,这里以123456为例):
ALTER USER 'root'@'localhost' IDENTIFIED BY '123456';
步骤2:创建数据库及表
新建一个数据库school并进入该库:
CREATE DATABASE school;
USE school;
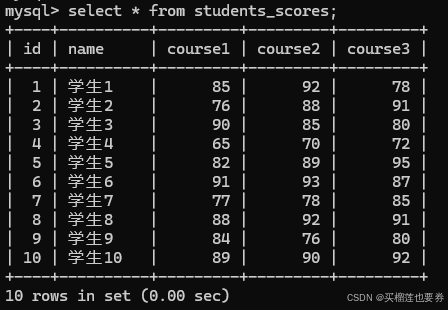
在该库下新建表格,里面包含了10位同学各自3门课程的分数。
建表:
CREATE TABLE students_scores (
id INT AUTO_INCREMENT PRIMARY KEY,
name VARCHAR(50),
course1 INT,
course2 INT,
course3 INT
);
插入数据:
INSERT INTO students_scores (name, course1, course2, course3)
 VALUES
 ('学生1', 85, 92, 78),
 ('学生2', 76, 88, 91),
 ('学生3', 90, 85, 80),
 ('学生4', 65, 70, 72),
 ('学生5', 82, 89, 95),
 ('学生6', 91, 93, 87),
 ('学生7', 77, 78, 85),
 ('学生8', 88, 92, 91),
 ('学生9', 84, 76, 80),
 ('学生10', 89, 90, 92);
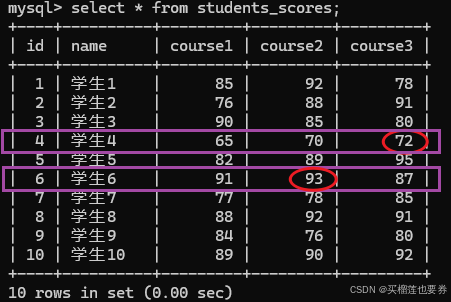
查看数据表基本情况:
SELECT * FROM students_scores;
此外,还需要刷新身份验证,使得其他库(如pymysql)可以通过密码验证登录:
ALTER USER 'root'@'localhost' IDENTIFIED WITH mysql_native_password BY '123456';
至此,基本数据已经准备完成!!!
3、Text2SQL案例实战
步骤1:连接MySQL数据库:
import os
from schema_engine import SchemaEngine
from sqlalchemy import create_engine

db_user_name = 'root'  #数据库用户
db_pwd='123456'        #数据库用户密码
db_host = 'localhost'  #数据库主机
port = '3306'          #端口
db_name = 'school'     #数据库名称
db_engine = create_engine(f"mysql+pymysql://{db_user_name}:{db_pwd}@{db_host}:{port}/{db_name}?charset=utf8")
print(db_engine)
运行上述程序,如果输出下面信息,即说明连接成功。
Engine(mysql+pymysql://root:***@localhost:3306/school?charset=utf8)
步骤2:构建M-schema表征并保存:
table_name = ["students_scores"] #按需指定要进行表征的表名
schema_engine = SchemaEngine(engine=db_engine,schema='school',db_name=db_name,include_tables=table_name)
mschema = schema_engine.mschema
mschema_str = mschema.to_mschema()
print(mschema_str)
mschema.save(f'./{db_name}.json')
输出显示以下内容则表面构建成功:
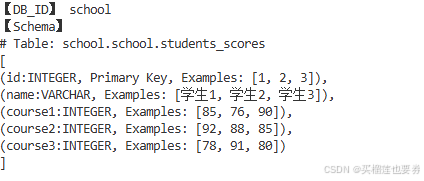
同时会将构建的M-schema表征保存在当前工作目录下的school.json文件中:
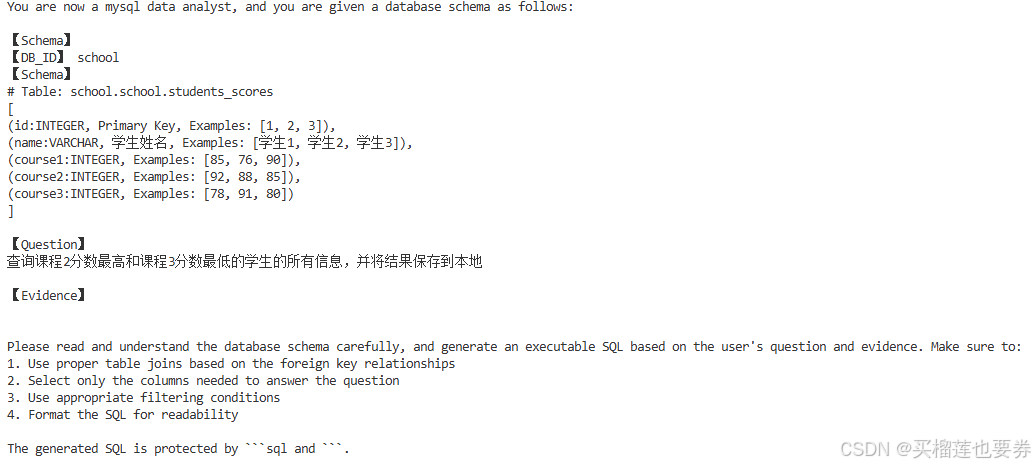
步骤3:构建 Text2SQL 提示词模板
文本到 SQL 提示生成是 M-Schema 提供的结构化数据库表示和大语言模型(LLM) 之间的关键桥梁,LLM 将解释用户的问题并生成适当的 SQL。构建提示词能使LLM理解数据库结构,并通过标准化格式提供必要的上下文来生成准确的 SQL 查询。
dialect = db_engine.dialect.name
question = '查询课程2分数最高和课程3分数最低的学生的所有信息,并将结果保存到本地'
evidence = '' #支持证据(可能有助于生成更准确的 SQL 的其他上下文,可选)
user_prompt = """You are now a {dialect} data analyst, and you are given a database schema as follows:

【Schema】
{db_schema}

【Question】
{question}

【Evidence】
{evidence}
Please read and understand the database schema carefully, and generate an executable SQL based on the user's question and evidence. Make sure to:
1. Use proper table joins based on the foreign key relationships
2. Select only the columns needed to answer the question
3. Use appropriate filtering conditions
4. Format the SQL for readability

The generated SQL is protected by ```sql and ```.
""".format(dialect=dialect, question=question, db_schema=mschema_str, evidence=evidence)
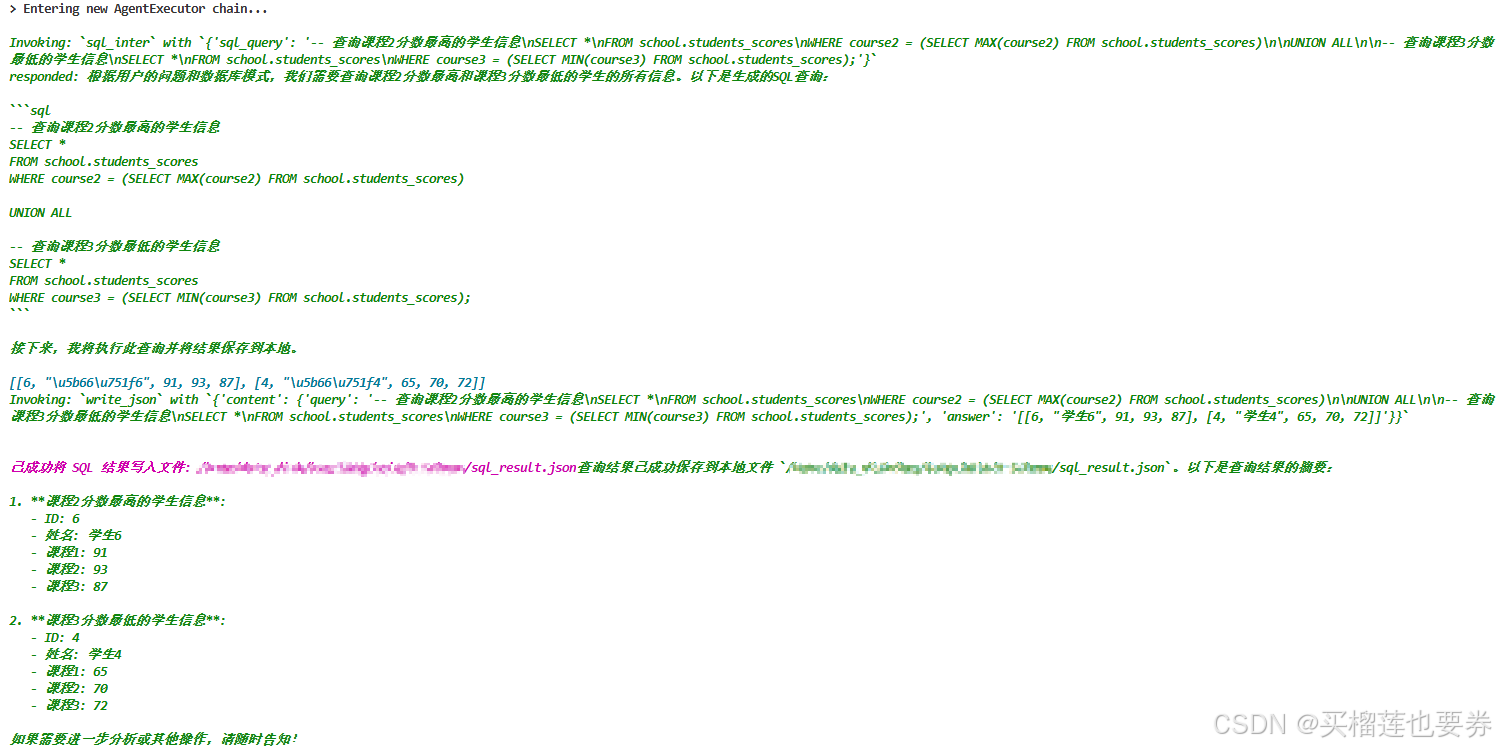
步骤4:集成 LLM执行Text2SQL
此处以 Langchain 框架为例搭建Agent ,调用deepseek-v3模型,Agent架构中包含两个Tool:
- sql_inter:执行生成的 sql 语句
- write_json:将执行结果以json格式保存在本地。
执行sql工具(sql_inter)
@tool
def sql_inter(sql_query):
    """
    查询本地MySQL数据库,通过运行一段SQL代码来进行数据库查询。\
    :param sql_query: 字符串形式的SQL查询语句,用于执行对MySQL中school数据库中各张表进行查询,并获得各表中的各类相关信息
    :return:sql_query在MySQL中的运行结果。
    """

    connection = pymysql.connect(
            host='localhost',  # 数据库主机地址
            user='root',       # 数据库用户名
            passwd='123456',   # 数据库密码
            db='school',       # 数据库名
            charset='utf8'     # 字符集选择utf8
        )

    try:
        with connection.cursor() as cursor:
            # SQL查询语句
            sql = sql_query
            cursor.execute(sql)

            # 获取查询结果
            results = cursor.fetchall()

    finally:
        connection.close()


    return json.dumps(results)
保存执行结果工具(write_json):
@tool
def write_json(content: Dict[str, str]) -> str:
    """
    将 SQL 查询结果写入本地 JSON 文件,文件包含 query 和 answer 两个字段。

    :param content: 必要参数,字典类型,必须包含两个键:
        - "query": SQL 查询语句
        - "answer": SQL 查询结果
    :return: 操作结果描述
    """
    try:
        # 验证输入格式
        if not isinstance(content, dict):
            return "错误:输入必须是字典类型"

        if "query" not in content or "answer" not in content:
            return "错误:输入字典必须包含 'query' 和 'answer' 两个键"

        # 准备要写入的数据
        result_data = {
            "query": content["query"],
            "answer": content["answer"]
        }

        # 写入 JSON 文件
        file_path = os.path.join(os.getcwd(), "sql_result.json")
        with open(file_path, 'w', encoding='utf-8') as f:
            json.dump(result_data, f, ensure_ascii=False, indent=2)

        return f"已成功将 SQL 结果写入文件: {file_path}"

    except Exception as e:
        return f"写入文件时出错: {str(e)}"
集成LLM
prompt = ChatPromptTemplate.from_messages([
    ("human", "{user_prompt}"),
    ("placeholder", "{agent_scratchpad}"),
])

model =ChatDeepSeek(
        model="deepseek-chat",
        temperature=0,
        max_tokens=1024,
)

tools = [sql_inter, write_json]
# 创建 agent 和 executor
agent = create_tool_calling_agent(model, tools, prompt)
agent_executor = AgentExecutor(
            agent=agent,
            tools=tools,
            verbose=True
    )

response = agent_executor.invoke({"prompt":user_prompt})
print(response['output'])
输出结果:
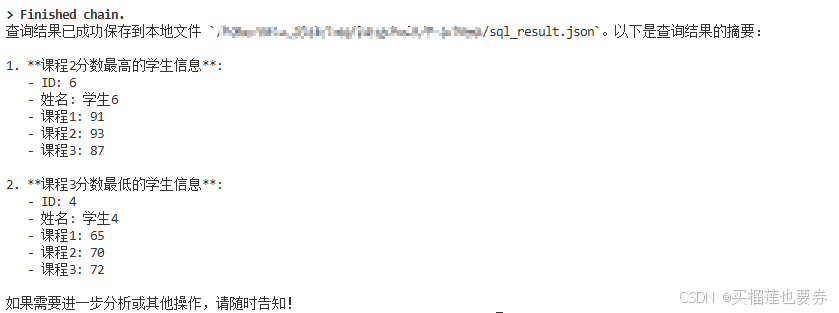
保存的结果:

原始表内容为:
由此可验证LLM执行的sql语句执行正确,大功告成!!!
后面有时间和需要的话再更新下优化策略。
参考资料
- https://blog.csdn.net/weixin_45626288/article/details/133220238
- https://github.com/XGenerationLab/M-Schema
- https://deepwiki.com/XGenerationLab/M-Schema
- https://www.bilibili.com/video/BV1L3ZDYDEnE


 2917
2917

 被折叠的 条评论
为什么被折叠?
被折叠的 条评论
为什么被折叠?
 到【灌水乐园】发言


