


 本文详细介绍了从图像处理到解出数独的全过程。首先,使用图像预处理,包括高斯滤波、自适应阈值、二值化和膨胀操作,凸显数独网格线。接着,通过检测轮廓找到数独边框并进行透视变换,得到正方形数独图像。然后,去除噪点和边框,获取纯净的数字图像,并将9*9数独分割成单个数字。最后,利用神经网络识别数字并解出数独。测试结果显示,方法在部分复杂图像上表现不佳,但对多数情况有效。
整个解数独问题可以大致分为3个部分:
- 从图片中提取出完整的数独【本文的部分】
- 从数独中提取出数字并传入神经网络进行预测
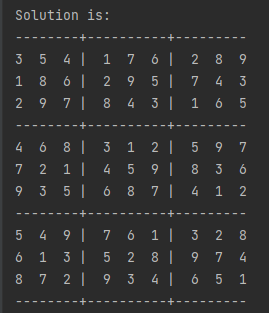
- 解出数独
【环境】
- Python:3.8.5
- OpenCV:4.5.1
- Keras:2.4.3
下面是每一步的效果:

【第一部分】图像处理
个人认为图像处理是这个问题的重点和难点,如果图像处理的结果不好,会十分影响后续的数字切分和神经网络预测,网上有许多处理方法,我参考对比了多种方法后,最终选择了这种方法,步骤如下:
- 图像预处理
- 图像矫正
- 去除噪点和边框,获取纯净的数字图像
- 把单个的数字图像拼接在一起,得到最终的数独
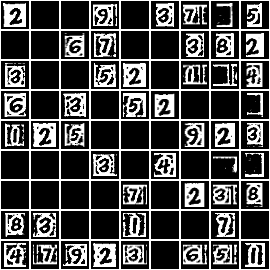
【一】图像预处理:
读入灰度图,使用高斯滤波进行降噪处理,使用自适应阈值对图像进行二值化处理,对图像进行取反和膨胀操作来凸显数独中的网格线,效果如下:(通过下图我们知道,接下来应该对图片进行矫正,然后去除噪点以获取纯净的数字图像)

# 预处理图片
def pre_process_image(img, skip_dilate=False):
    """
    Uses a blurring function, adaptive thresholding
    and dilation to expose the main features of an image.
    """
    # 高斯滤波
    img_process = cv2.GaussianBlur(img.copy(), (9, 9), 0)

    # Adaptive threshold using 11 nearest neighbour pixels
    img_process = cv2.adaptiveThreshold(img_process, 255,
                                        cv2.ADAPTIVE_THRESH_GAUSSIAN_C,
                                        cv2.THRESH_BINARY, 11, 2)

    # Invert colours, so gridlines have non-zero pixel values.
    # Necessary to dilate the image, otherwise will look like erosion instead.
    img_process = cv2.bitwise_not(img_process, img_process)

    if not skip_dilate:
        # Dilate the image to increase the size of the grid lines.
        kernel = cv2.getStructuringElement(cv2.MORPH_ELLIPSE, (3, 3))
        img_process = cv2.dilate(img_process, kernel)

    return img_process
【二】对图像进行矫正:
1.使用 cv2.findContours 检测轮廓,通过对轮廓面积进行排序找到的最大轮廓就是数独的边框,通过遍历找到该边框的 4 个顶点坐标作为后续 cv2.getPerspectiveTransform 的src参数。
# 找到数独的4个边界点
def find_corners(img):
    """
    Finds the 4 extreme corners of the largest contour in the image.
    """
    # OpenCV版本问题,cv2.findContours 版本3返回值有3个,版本4只有2个
    opencv_version = cv2.__version__.split('.')[0]
    if opencv_version == '3':
        _, contours, _ = cv2.findContours(img.copy(), cv2.RETR_EXTERNAL,
                                          cv2.CHAIN_APPROX_SIMPLE)
    else:
        contours, _ = cv2.findContours(img.copy(), cv2.RETR_EXTERNAL,
                                       cv2.CHAIN_APPROX_SIMPLE)
    # 找到最大的轮廓
    contours = sorted(contours, key=cv2.contourArea, reverse=True)
    polygon = contours[0]

    # bottom-right point has the largest (x + y) value
    # top-left has point smallest (x + y) value
    # bottom-left point has smallest (x - y) value
    # top-right point has largest (x - y) value

    """
    方法1:
    """
    # 初始化
    val_br = polygon[0][0][0] + polygon[0][0][1]
    val_tl = polygon[0][0][0] + polygon[0][0][1]
    val_bl = polygon[0][0][0] - polygon[0][0][1]
    val_tr = polygon[0][0][0] - polygon[0][0][1]
    bottom_right = polygon[0][0]
    top_left = polygon[0][0]
    bottom_left = polygon[0][0]
    top_right = polygon[0][0]

    # 寻找最大轮廓的4个边界点坐标
    for i in range(1, len(polygon)):
        val_add = polygon[i][0][0] + polygon[i][0][1]
        val_minus = polygon[i][0][0] - polygon[i][0][1]
        if val_add > val_br:
            val_br = val_add
            bottom_right = polygon[i][0]
        if val_add < val_tl:
            val_tl = val_add
            top_left = polygon[i][0]
        if val_minus < val_bl:
            val_bl = val_minus
            bottom_left = polygon[i][0]
        if val_minus > val_tr:
            val_tr = val_minus
            top_right = polygon[i][0]
    # 返回数独的4个边界点坐标
    return [top_left, top_right, bottom_right, bottom_left]

    # """
    # 方法2
    # """
    # # Use of `operator.itemgetter` with `max` and `min` allows us to get the index of the point
    #
    # bottom_right, _ = max(enumerate([pt[0][0] + pt[0][1] for pt in polygon]), key=operator.itemgetter(1))
    # top_left, _ = min(enumerate([pt[0][0] + pt[0][1] for pt in polygon]), key=operator.itemgetter(1))
    # bottom_left, _ = min(enumerate([pt[0][0] - pt[0][1] for pt in polygon]), key=operator.itemgetter(1))
    # top_right, _ = max(enumerate([pt[0][0] - pt[0][1] for pt in polygon]), key=operator.itemgetter(1))
    #
    # # Return an array of all 4 points using the indices
    # # Each point is in its own array of one coordinate
    # return [polygon[top_left][0], polygon[top_right][0],
# polygon[bottom_right][0], polygon[bottom_left][0]]2.使用数独边框中最长的那条边来建立一个正方形,构建 cv2.getPerspectiveTransform 的dst参数,获得变换矩阵后,使用cv2.warpPerspective 进行透视变换,得到只含数独的图片,效果如下:
(注意,在透视变换时,使用的是未进行预处理的灰度图,原因是,在图像预处理阶段我们使用了膨胀操作来凸显边框以方便检测,但是膨胀操作会有副作用比如增大噪点等等,所以在检测出边框后,后续的操作不需要膨胀操作了,那么我们重新进行一次无膨胀的图像预处理就可以了)

# 两点间距离
def distance_between(p1, p2):
    """
    Returns the scalar distance between two points
    """
    a = p2[0] - p1[0]
    b = p2[1] - p1[1]
    return np.sqrt((a ** 2) + (b ** 2))

# 得到只含数独的正方形
def crop_and_warp(img, crop_rect):
    """
    Crops and warps a rectangular section from an image into a square of similar size.
    """
    # 数独的4个边界点坐标
    top_left, top_right, bottom_right, bottom_left = \
        crop_rect[0], crop_rect[1], crop_rect[2], crop_rect[3]

    # Explicitly set the data type to float32 or 'getPerspectiveTransform' will throw an error
    # 原始坐标
    src = np.array([top_left, top_right, bottom_right, bottom_left], dtype='float32')

    # 得到数独的最长边界
    side = max([
        distance_between(bottom_right, top_right),
        distance_between(top_left, bottom_left),
        distance_between(bottom_right, bottom_left),
        distance_between(top_left, top_right)
    ])

    # 使用数独的最长边界来构建新的坐标
    """
    top_left = [0,0], top_right = [side-1,0]
    bottom_right = [side-1,side-1], bottom_left = [0,side-1]
    """
    dst = np.array([[0, 0], [side - 1, 0], [side - 1, side - 1], [0, side - 1]], dtype='float32')

    # Gets the transformation matrix for skewing the image to fit a square by comparing the 4 before and after points
    matrix = cv2.getPerspectiveTransform(src, dst)

    # Performs the transformation on the original image
    img = cv2.warpPerspective(img, matrix, (round(side), round(side)))

    return img
【三】去除噪点和边框,获取纯净的数字图像:
1.首先获取 9*9 数独81个方格的坐标位置,本文直接使用最简单粗暴的方法,即把正方形数独图的边长进行9等分,获取81个小正方形的左上角坐标和右下角坐标,储存起来后续使用,切分后部分效果如下:


# 把数独分成81个小正方形
def infer_grid(img):
    """
    Infers 81 cell grid from a square image.
    """
    # 数独图片是正方形,把 边长/9 作为步长来确定数独中每个方框的坐标
    squares = []
    side = img.shape[:1]
    step = side[0] / 9

    # 从左到右,再从上到下
    for j in range(9):
        for i in range(9):
            p1 = (i * step, j * step)  # Top left corner of a bounding box
            p2 = ((i + 1) * step, (j + 1) * step)  # Bottom right corner of bounding box
            squares.append((p1, p2))
    return squares
2.然后去除噪点和去除边框,用到了 cv2.floodfill 函数。在本文中,可以简单的认为此函数是一个连通区域的填充函数,该函数会根据用户输入的起始点和像素值来填充和该起始点相连的区域,并返回填充区域的面积值。
比如用户输入起始点为A点,那么该函数会填充A点所在的白色连通区域,即图像上面和右面的白色部分,左边和中间的白色部分和A点是不连通的不会被填充。
如果用户输入的起始点为B点,那么该函数会填充B点所在的白色连通区域,即数字2。

那么为了去除噪点和边框,获取纯净的数字图像,我们希望 cv2.floodfill 把数字区域填充为255,把所有其他区域填充为0。
为了达到这样的效果,我们做了一个假设,即所有的数字大概位于图片的中间位置,这样用户可以通过把起始点设置在中间区域(绿色区域),来使得 cv2.floodfill 函数填充时避开边框区域,从而达到去除边框的效果。

去除噪点问题就简单一些,因为 cv2.floodfill 会返回填充区域的面积,那么在填充过程中,记录一个最大值就可以了,这个最大值就是数字区域。效果如下:
![]()
![]()
![]()
![]()
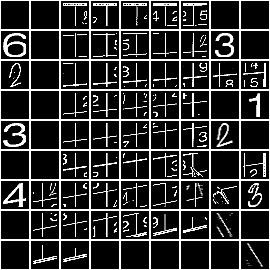
3.最后把数字图像进行尺度变换、居中、添加黑色边框,效果如下:


# 处理单个数字
def extract_digit(img, rect, size):
"""
Extracts a digit (if one exists) from a Sudoku square.
"""
# 根据81个格子的坐标粗切分出数字
digit = cut_from_rect(img, rect)
# Use fill feature finding to get the largest feature in middle of the box
# m used to define an area in the middle we would expect to find a pixel belonging to the digit
"""
1、问题:如果从topleft [0,0]开始搜索,那么边缘区域面积可能大于数字区域面积,会把边缘区域误识别为数字区域
2、解决方案:因为数独中的数字一般都位于格子的中间位置,所以从topleft [m,m]一直搜索到bottomright[w-m,h-m],
从而避开边缘区域,这样搜索到的最大面积的区域一定是数字区域
"""
h, w = digit.shape[:2]
m = round(np.mean([h, w]) / 2.5)
bbox = find_largest_feature(digit, [m, m], [w - m, h - m])
# 使用获取的数字区域的精确 bbox 重新切分出数字
digit = cut_from_rect(digit, bbox)
# Scale and pad the digit so that it fits a square of the digit size we're using for machine learning
w = bbox[1][0] - bbox[0][0]
h = bbox[1][1] - bbox[0][1]
# Ignore any small bounding boxes
if w > 0 and h > 0 and (w * h) > 100 and len(digit) > 0:
return scale_and_centre(digit, size, 4)
else:
return np.zeros((size, size), np.uint8)
# 裁剪图片
def cut_from_rect(img, rect):
"""
Cuts a rectangle from an image using the top left and bottom right points.
"""
return img[round(rect[0][1]):round(rect[1][1]), round(rect[0][0]):round(rect[1][0])]
# 寻找数字
def find_largest_feature(inp_img, scan_tl=None, scan_br=None):
"""
Uses the fact the `floodFill` function returns a bounding box of the area it filled to find the biggest
connected pixel structure in the image. Fills this structure in white, reducing the rest to black.
"""
img = inp_img.copy() # Copy the image, leaving the original untouched
height, width = img.shape[:2]
# 最大区域和起始像素点
max_area = 0
seed_point = (None, None)
# 如果没有传入左上角topleft和右下角bottomright的值,则分别初始化为[0,0]和[w,h]
if scan_tl is None:
scan_tl = [0, 0]
if scan_br is None:
scan_br = [width, height]
# 遍历topleft 到 bottomright,记录搜索出来的区域最大值
for x in range(scan_tl[0], scan_br[0]):
for y in range(scan_tl[1], scan_br[1]):
if img.item(y, x) == 255 and x < width and y < height: # Note that .item() appears to take input as y, x
# 通过cv2.floodfill填充图片中的区域为64,并返回填充区域(area[0]是区域面积)
# 同时记录最大区域的起始像素点
area = cv2.floodFill(img, None, (x, y), 64)
if area[0] > max_area:
max_area = area[0]
seed_point = (x, y)
# 把所有像素值为255的区域填充为64
for x in range(width):
for y in range(height):
if img.item(y, x) == 255 and x < width and y < height:
cv2.floodFill(img, None, (x, y), 64)
# 初始化mask
mask = np.zeros((height + 2, width + 2), np.uint8)
# 把数字区域填充为255
if all([p is not None for p in seed_point]):
cv2.floodFill(img, None, seed_point, 255)
top, bottom, left, right = height, 0, width, 0
for x in range(width):
for y in range(height):
# 把其他区域填充为0
if img.item(y, x) == 64:
cv2.floodFill(img, mask, (x, y), 0)
# 寻找数字的bbox
if img.item(y, x) == 255:
if y < top:
top = y
if y > bottom:
bottom = y
if x < left:
left = x
if x > right:
right = x
bbox = [[left, top], [right, bottom]]
return bbox
# 对图片进行尺度变换和居中
def scale_and_centre(img, size, margin=0, background=0):
"""
Scales and centres an image onto a new background square.
"""
h, w = img.shape[:2]
# 获取居中位置
def centre_pad(length):
"""
Handles centering for a given length that may be odd or even.
"""
if length % 2 == 0:
side1 = round((size - length) / 2)
side2 = side1
else:
side1 = round((size - length) / 2)
side2 = side1 + 1
return side1, side2
def scale(r, x):
return round(r * x)
if h > w:
t_pad = round(margin / 2)
b_pad = t_pad
ratio = (size - margin) / h
w, h = scale(ratio, w), scale(ratio, h)
l_pad, r_pad = centre_pad(w)
else:
l_pad = round(margin / 2)
r_pad = l_pad
ratio = (size - margin) / w
w, h = scale(ratio, w), scale(ratio, h)
t_pad, b_pad = centre_pad(h)
img = cv2.resize(img, (w, h))
# 给数字添加黑色边框
img = cv2.copyMakeBorder(img, t_pad, b_pad, l_pad, r_pad,
cv2.BORDER_CONSTANT, None, background)
img = cv2.resize(img, (size, size))
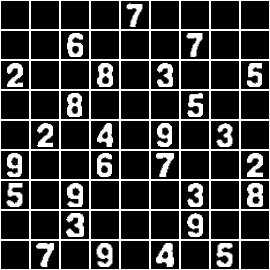
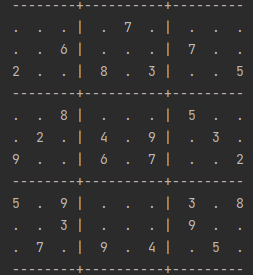
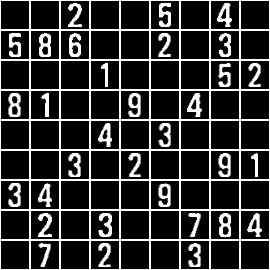
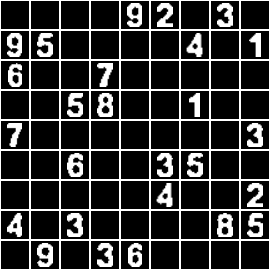
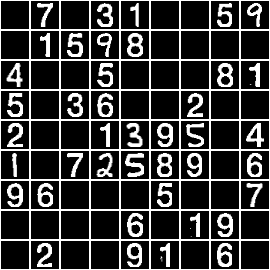
return img【四】把单个的数字图像拼接在一起,得到最终的数独,效果如下:

# 把单独的数字图片拼成完整的数独
def show_digits(digits, colour=255):
    """
    Shows list of 81 extracted digits in a grid format
    """
    rows = []
    # 给每一个数字添加白色边框
    with_border = [cv2.copyMakeBorder(img.copy(), 1, 1, 1, 1,
                                      cv2.BORDER_CONSTANT, None, colour) for img in digits]

    for i in range(9):
        # axis=1 沿着水平方向进行拼接,把数组拼接成单独的9行
        row = np.concatenate(with_border[i * 9:((i + 1) * 9)], axis=1)
        rows.append(row)
    # axis=0沿着垂直方向进行拼接,把每一行拼在一起
    img = np.concatenate(rows, axis=0)
    return img
【第一部分总结】
In knowing a technology, it's helpful to know where its limits are.
本文的数独提取方法并不适用于所有图片,对于情况比较复杂的图片,效果很差,这也是为什么发这篇文章的原因,希望共同学习不断进步。
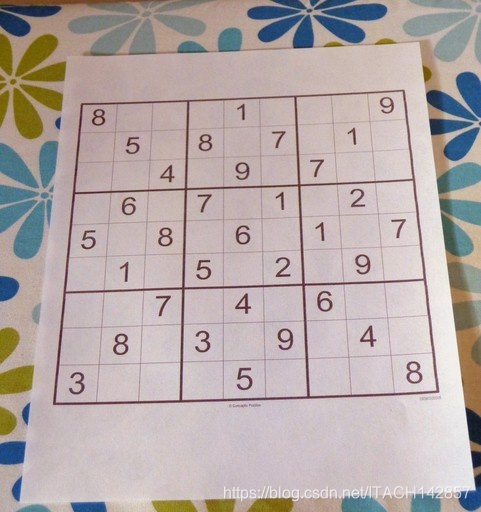
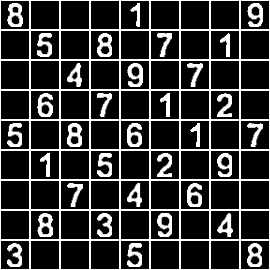
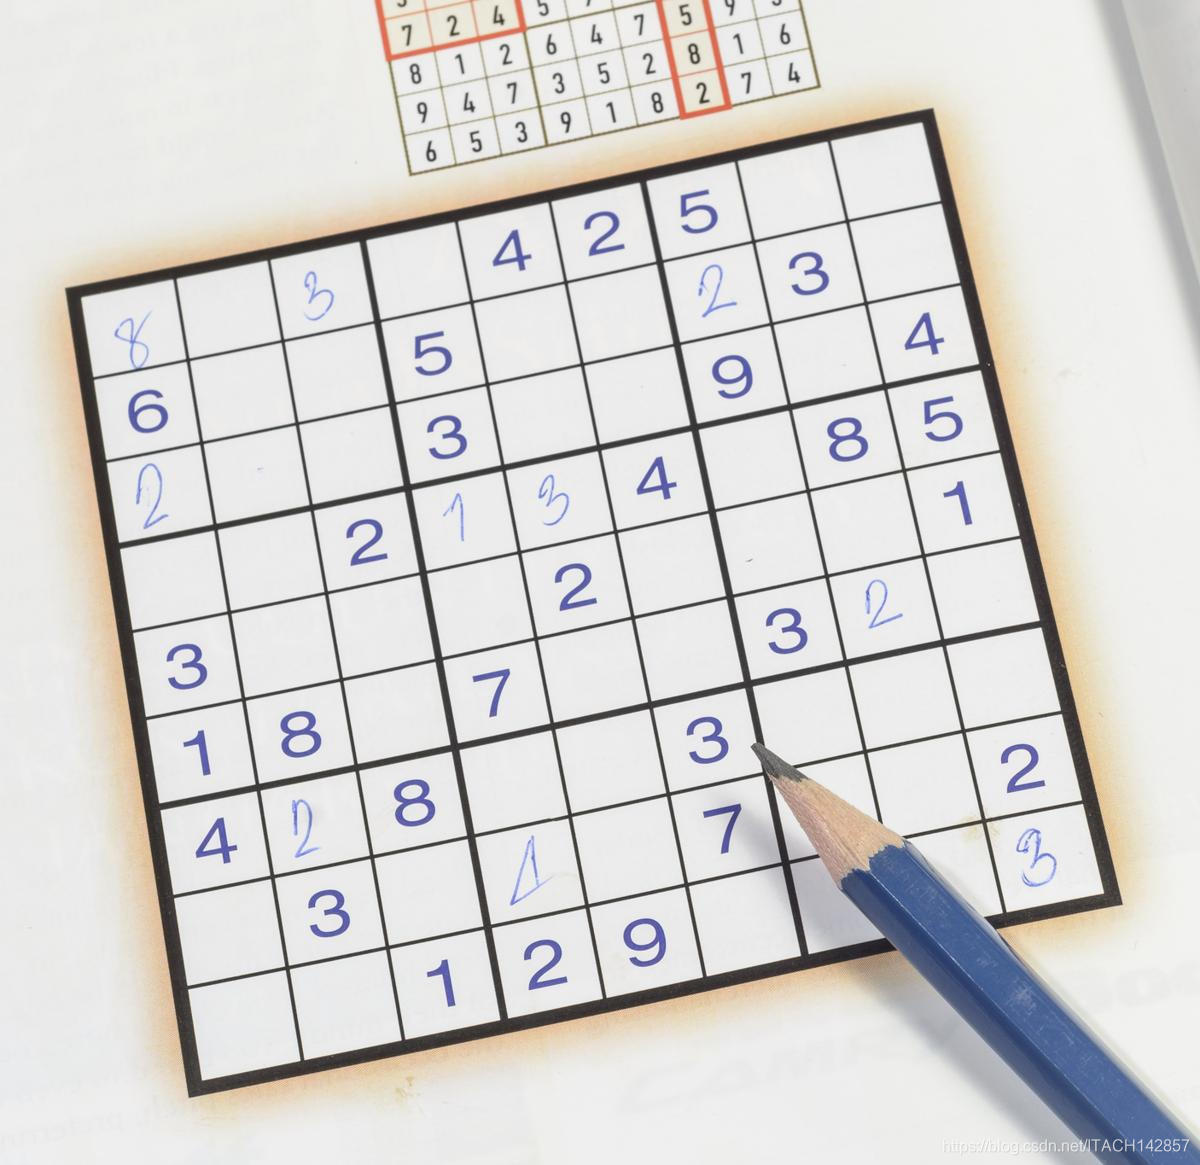
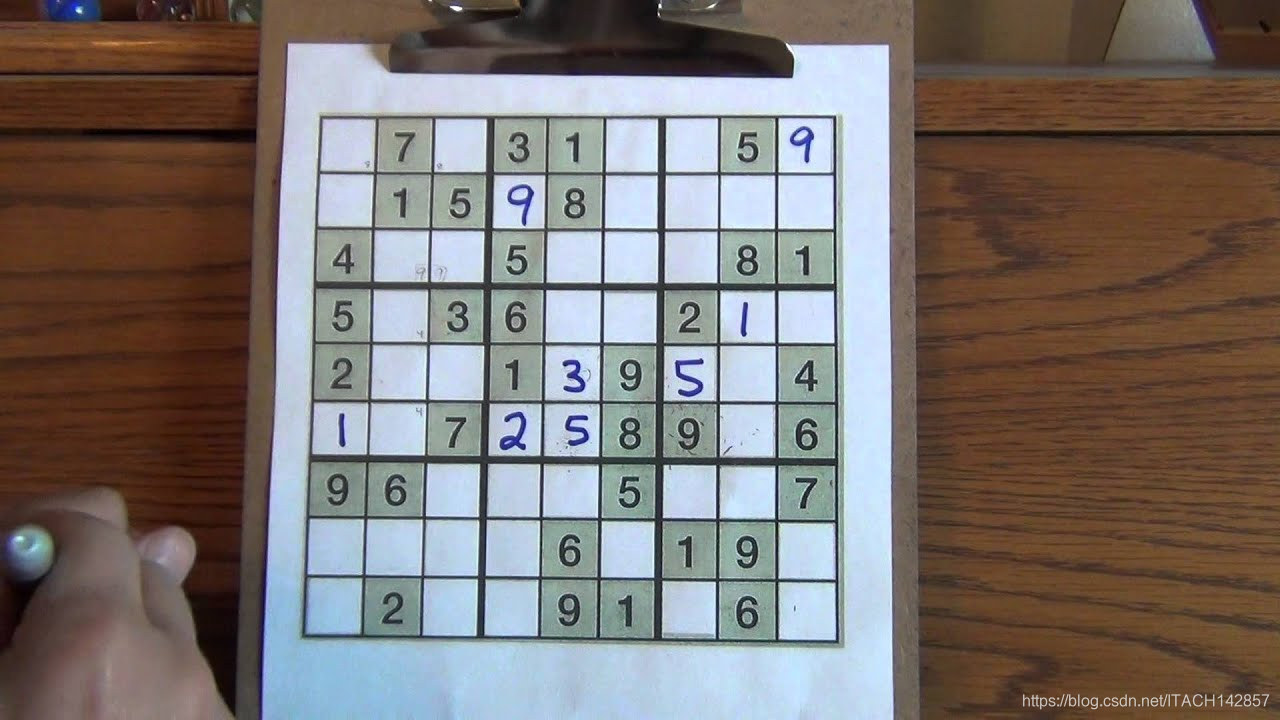
我自己找了一些数独图片进行测试,效果如下:
【正确的】
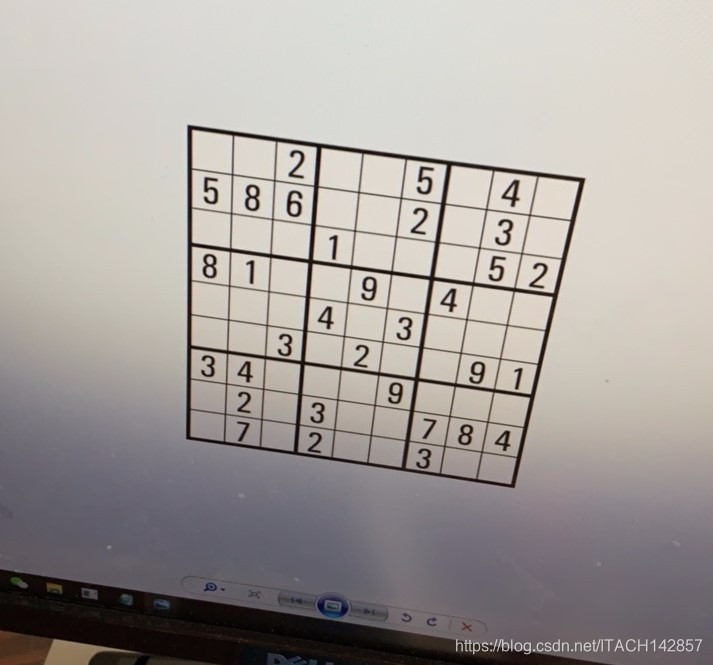
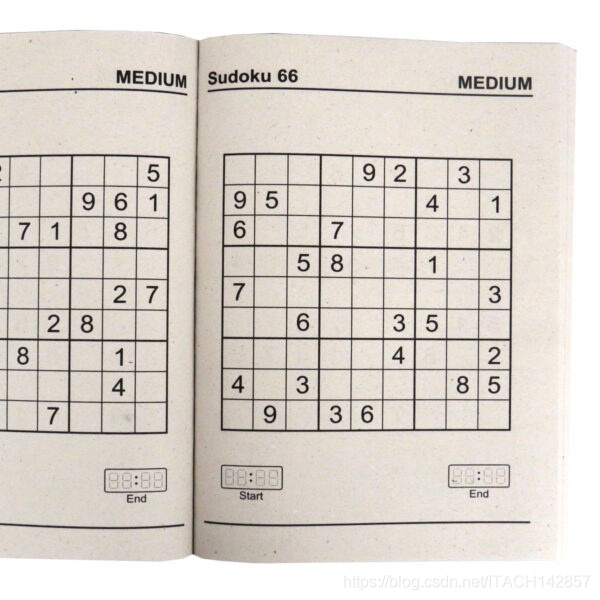
【错误的】
【源码】
【GitHub链接】:GitHub - ITACHI142857/SudokuSolving: sudoku solver using python\opencv\deep learning


 395
395

 被折叠的 条评论
为什么被折叠?
被折叠的 条评论
为什么被折叠?
 到【灌水乐园】发言


