


Spring Boot视图技术(二)
Thymeleaf基本使用
Thymeleaf模板基本配置
Thymeleaf在Spring Boot中的使用
想要使用Thymeleaf,首先创建一个Spring Boot工程,并且在该工程中添加Thymeleaf的启动依赖。
- 在Spring Boot项目中使用Thymeleaf模板,必须保证引入Thymeleaf依赖。
<dependency>
            <groupId>org.springframework.boot</groupId>
            <artifactId>spring-boot-starter-thymeleaf</artifactId>
        </dependency>
在创建项目的时候,可以直接添加。

2. 其次在全局配置文件中配置Thymeleaf模板的一些参数。如设置模板缓存、模板编码、模板样式、指定模板页面存档路径、指定模板页面名称的后缀。
#模板缓存:开启
spring.thymeleaf.cache=true
#模板编码
spring.thymeleaf.encoding=utf-8
#模板样式
spring.thymeleaf.mode=HTML5
#指定模板页面存放路径
spring.thymeleaf.prefix=classpath:/templates/
#指定模板页面名称的后缀
spring.thymeleaf.suffix=.html
静态资源的访问
开发Web应用时,难免需要使用静态资源。Spring Boot默认设置了静态资源的访问路径,Spring Boot默认将/**所有访问映射到以下目录:
- classpath:/META-INF/resources/:项目类路径下的META-INF文件夹下的resources文件夹下的所有文件。
- classpath:/resources/:项目类路径下的resources文件夹下的所有文件。
- classpath:/static/:项目类路径下的static文件夹下的所有文件。
- classpath:/public/:项目类路径下的public文件夹下的所有文件。
使用Spring Initializr方式创建的Spring Boot项目,默认生成了一个resources目录,在resources目录中新建public、resources、static三个子目录下,Spring boot默认会挨个从public、resources、static里面查找静态资源。
使用Thymeleaf完成数据的页面展示
搭建步骤
- 创建Spring Boot项目,引入Thymeleaf依赖
- 编写配置文件,对Thymeleaf模板的页面数据缓存进行设置
thymeleaf页面缓存设置(默认为true),开发中方便调试应设置为false,上线稳定后应保持默认true。
spring.thymeleaf.cache=false
- 创建控制类:@Controller
创建一个用于前端模板页面动态数据替换效果测试的访问实体类LoginController
@Controller
public class LoginController {
    @GetMapping("/toLoginPage")
    public String toLoginPage(Model model){
        model.addAttribute("currentYear",Calendar.getInstance().get(Calendar.YEAR));
        return "login";
    }
}
- 创建模板页面并引入静态资源文件
创建一个用户登陆的模板页面login.html,部分参考代码如下:
<!DOCTYPE html>
<!--引入Thymeleaf的模板标签-->
<html lang="en" xmlns:th="http://www.thymeleaf.org">
<head>
    <meta http-equiv="Content-Type" content="text/html; charset=UTF-8">
    <meta name="viewport" content="width=device-width, initial-scale=1,shrink-to-fit=no">
    <title>用户登录界面</title>
    <link th:href="@{/login/css/bootstrap.min.css}" rel="stylesheet">
    <link th:href="@{/login/css/signin.css}" rel="stylesheet">
</head>
<body class="text-center">
<!--  用户登录form表单 -->
<form class="form-signin">
    <img class="mb-4" th:src="@{/login/img/login.jpg}" width="72" height="72">
    <h1 class="h3 mb-3 font-weight-normal" th:text="#{login.tip}">请登录</h1>
    <input type="text" class="form-control"
           th:placeholder="#{login.username}" required="" autofocus="">
    <input type="password" class="form-control"
           th:placeholder="#{login.password}" required="">
    <div class="checkbox mb-3">
        <label>
            <input type="checkbox" value="remember-me"> [[#{login.rememberme}]]
        </label>
    </div>
    <button class="btn btn-lg btn-primary btn-block" type="submit" th:text="#{login.button}">登录</button>
    <p class="mt-5 mb-3 text-muted">© <span th:text="${currentYear}">2018</span>-<span th:text="${currentYear}+1">2019</span></p>
    <a class="btn btn-sm" th:href="@{/toLoginPage(l='zh_CN')}">中文</a>
    <a class="btn btn-sm" th:href="@{/toLoginPage(l='en_US')}">English</a>
</form>
</body>
</html>
使用Thymeleaf配置国际化页面
搭建步骤
- 编写多语言国际化文件以及配置文件
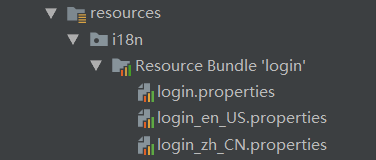
以下是配置文件的代码内容:
#login.properties & login_zh_CN.properties
login.tip=请登录
login.username=用户名
login.password=密码
login.rememberme=记住我
login.button=登录
#login_en_US.properties
login.tip=Please sign in
login.username=Username
login.password=Password
login.rememberme=Remember me
login.button=Login
- 编写配置文件
打开项目的application.properties全局配置文件,在该文件中添加国际化文件基础名设置
# thymeleaf页面缓存设置(默认为true),开发中方便调试应设置为false,上线稳定后应保持默认true
spring.thymeleaf.cache=false

# 配置国际化文件基础名
spring.messages.basename=i18n.login
根据国际化配置文件位置和名称,在项目全局配置文件中使用"spring.messages.basename=i18n.login"设置了自定义国际化文件的基础名。其中i18n表示国际化文件相对项目类路径resources的位置,login表示多语言文件的前缀名。
3. 定制区域信息解析器
在完成上一步中多语言国际化的编写和配置后,就可以正式在前端页面中结合Thymeleaf模板相关属性进行国际化语言设置和展示了。
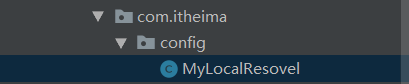
创建一个用于定制国际化功能区域信息解析器的自定义配置类MyLocalResovel,MyLocaleResolver自定义区与解析器配置类实现了LocalResolver接口,并重写了其中的resolveLocale()方法进行自定义语言解析,最后使用@Bean注解将当前配置类注册成Spring容器中的一个类型为LocaleResolver的Bean组件,这样就可以覆盖默认的LocaleResolver组件。
@Configuration
public class MyLocalResovel implements LocaleResolver {
    // 自定义区域解析方式
    @Override
    public Locale resolveLocale(HttpServletRequest httpServletRequest) {
        // 获取页面手动切换传递的语言参数l
        String l = httpServletRequest.getParameter("l");
        // 获取请求头自动传递的语言参数Accept-Language
        String header = httpServletRequest.getHeader("Accept-Language");
        Locale locale=null;
        // 如果手动切换参数不为空,就根据手动参数进行语言切换,否则默认根据请求头信息切换
        if(!StringUtils.isEmpty(l)){
            String[] split = l.split("_");
            locale=new Locale(split[0],split[1]);
        }else {
            // Accept-Language: en-US,en;q=0.9,zh-CN;q=0.8,zh;q=0.7
            String[] splits = header.split(",");
            String[] split = splits[0].split("-");
            locale=new Locale(split[0],split[1]);
        }
        return locale;
    }
    @Override
    public void setLocale(HttpServletRequest httpServletRequest, @Nullable
            HttpServletResponse httpServletResponse, @Nullable Locale locale) {
    }
    // 将自定义的MyLocalResovel类重新注册为一个类型LocaleResolver的Bean组件
    @Bean
    public LocaleResolver localeResolver(){
        return new MyLocalResovel();
    }
}
- 页面国际化使用
用户登录页面login.html结合Thymeleaf模板引擎实现国际化功能,核心代码如下:
 <h1 class="h3 mb-3 font-weight-normal" th:text="#{login.tip}">请登录</h1>
    <input type="text" class="form-control"
           th:placeholder="#{login.username}" required="" autofocus="">
    <input type="password" class="form-control"
           th:placeholder="#{login.password}" required="">
    <div class="checkbox mb-3">
        <label>
            <input type="checkbox" value="remember-me"> [[#{login.rememberme}]]
        </label>
    </div>
- 整合效果测试


 630
630


 被折叠的 条评论
为什么被折叠?
被折叠的 条评论
为什么被折叠?
 到【灌水乐园】发言


