


本篇博客将介绍使用rabbitmq消息中间件和springboot的整合使用;
安装配置rabbitmq
请参考笔者另一篇博客,有详细介绍:https://jsbintask.cn/2019/01/25/middleware/docker-rabbitmq-install/#more
整合springboot
新建项目
新建一个springboot项目,并且修改application.yml文件,pom如下:
spring:
  rabbitmq:
    host: yourhostaddress
    username: jsbintask
    password: jsbintask
host和password修改成自己的服务器用户名密码。pom:
<?xml version="1.0" encoding="UTF-8"?>
<project xmlns="http://maven.apache.org/POM/4.0.0" xmlns:xsi="http://www.w3.org/2001/XMLSchema-instance"
         xsi:schemaLocation="http://maven.apache.org/POM/4.0.0 http://maven.apache.org/xsd/maven-4.0.0.xsd">
    <modelVersion>4.0.0</modelVersion>
    <parent>
        <groupId>org.springframework.boot</groupId>
        <artifactId>spring-boot-starter-parent</artifactId>
        <version>2.1.2.RELEASE</version>
        <relativePath/> <!-- lookup parent from repository -->
    </parent>
    <groupId>cn.jsbintask</groupId>
    <artifactId>springboot-rabbitmq-learning</artifactId>
    <version>0.0.1-SNAPSHOT</version>
    <name>springboot-rabbitmq-learning</name>
    <description>Demo project for Spring Boot</description>

    <properties>
        <java.version>1.8</java.version>
    </properties>

    <dependencies>
        <dependency>
            <groupId>org.springframework.boot</groupId>
            <artifactId>spring-boot-starter-amqp</artifactId>
        </dependency>

        <dependency>
            <groupId>org.projectlombok</groupId>
            <artifactId>lombok</artifactId>
            <optional>true</optional>
        </dependency>
        <dependency>
            <groupId>org.springframework.boot</groupId>
            <artifactId>spring-boot-starter-test</artifactId>
            <scope>test</scope>
        </dependency>
    </dependencies>

    <build>
        <plugins>
            <plugin>
                <groupId>org.springframework.boot</groupId>
                <artifactId>spring-boot-maven-plugin</artifactId>
            </plugin>
        </plugins>
    </build>

</project>
消息消费者(接收者)
编写一个消息消费者类:
@Component
@Log
public class RabbitmqMsgReceiver {
    @Autowired
    private CountDownLatch countDownLatch;

    public void receivedMsg(String msg) {
        log.info("received rabbitmq msg: " + msg);
        countDownLatch.countDown();
    }
}
并且加入@Component注解,将其作为bean归spring管理,并且通过@Autowried注入了一个CountdownLatch类。
配置exchange,queue,route,加入监听:
@Configuration
public class RabbitmqConfig {
    public static final String TOPIC_EXCHANGE_NAME = "jsbintask-exchange";
    public static final String ROUTE_KEY = "cn.jsbintask.key";

    private static final String QUEUE_NAME = "jsbintask-queue";


    @Bean
    public Queue queue() {
        return new Queue(QUEUE_NAME, false);
    }

    @Bean
    public CountDownLatch countDownLatch() {
        return new CountDownLatch(1);
    }

    @Bean
    public TopicExchange exchange() {
        return new TopicExchange(TOPIC_EXCHANGE_NAME);
    }

    /**
     * 将queue和exchange绑定,并且已 route_key暴漏出去
     */
    @Bean
    public Binding binding(Queue queue, TopicExchange exchange) {
        return BindingBuilder.bind(queue).to(exchange).with(ROUTE_KEY);
    }

    @Bean
    public SimpleMessageListenerContainer container(ConnectionFactory connectionFactory,
                                             MessageListenerAdapter listenerAdapter) {
        SimpleMessageListenerContainer container = new SimpleMessageListenerContainer();
        container.setConnectionFactory(connectionFactory);
        container.setQueueNames(QUEUE_NAME);
        container.setMessageListener(listenerAdapter);
        return container;
    }

    @Bean
    public MessageListenerAdapter listenerAdapter(RabbitmqMsgReceiver receiver) {
        return new MessageListenerAdapter(receiver, "receivedMsg");
    }
}
启动测试类,发送消息
@SpringBootApplication
@Log
public class SpringbootRabbitmqLearningApplication {

    public static void main(String[] args) throws Exception{
        ConfigurableApplicationContext context = SpringApplication.run(SpringbootRabbitmqLearningApplication.class, args);
        CountDownLatch countDownLatch = context.getBean(CountDownLatch.class);
        RabbitTemplate rabbitTemplate = context.getBean(RabbitTemplate.class);

        log.info("Sending msg....");
        rabbitTemplate.convertAndSend(RabbitmqConfig.TOPIC_EXCHANGE_NAME, RabbitmqConfig.ROUTE_KEY, "hello from jsbintask.");
        countDownLatch.await();

        System.exit(-1);
    }

}
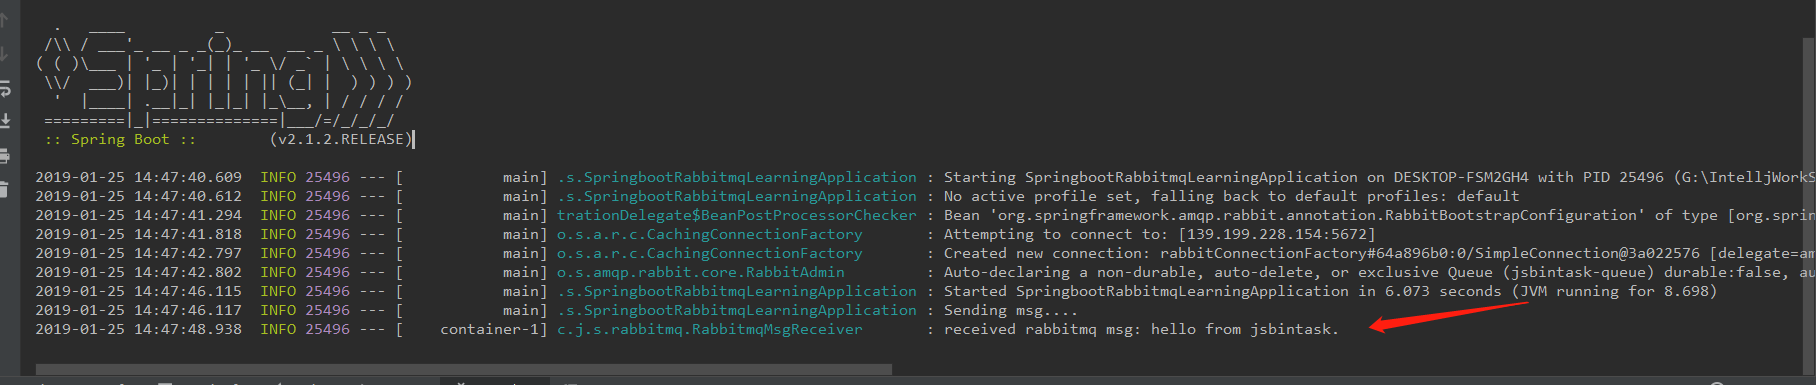
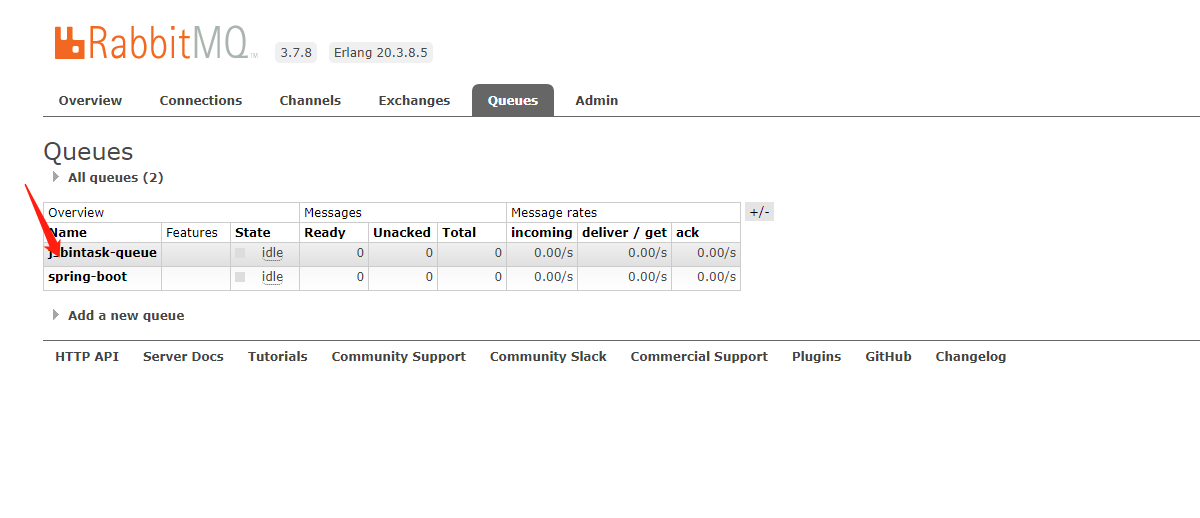
启动,查看rabbitmq控制台以及idea控制台:收到消息并且打印:
这样rabitmq和springboot整合案例就完成了。 源码地址: https://github.com/jsbintask22/springboot-rabbitmq-learning.git
本文原创地址:https://jsbintask.cn/2019/01/25/springboot/springboot-rabbitmq-jms/,未经允许,禁止转载。


 21万+
21万+

 被折叠的 条评论
为什么被折叠?
被折叠的 条评论
为什么被折叠?
 到【灌水乐园】发言


