


1. CUDA配置:
先鼠标右键查看对应的CUDA的版本:

2.安装CUDA:
1.点击 CUDA去官网来下载安装包。

这里我选择的是我电脑支持的9.0的版本:
2.下载CUDA安装包:

3. 安装CUDA的过程:
自定义安装路径:

安装过程:

系统检查完成: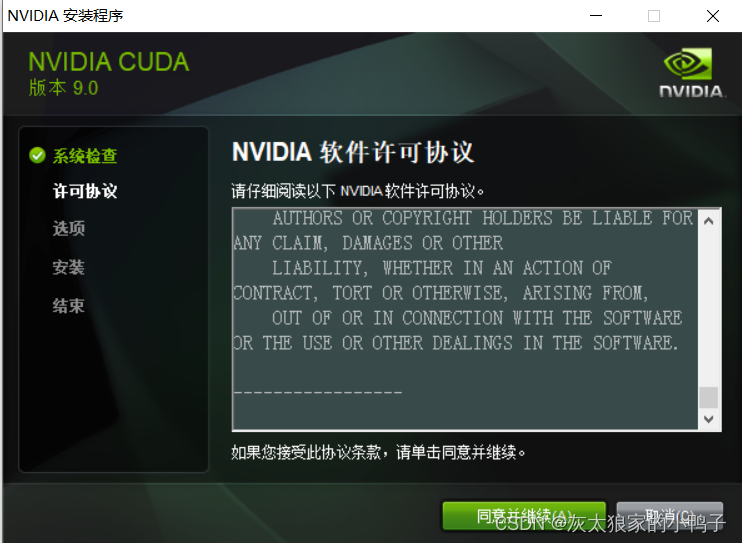

选择自定义安装:


下一步:
 下一步:
下一步:

等待一会:
完成:


4. 查看是否安装成功:打开cmd 输入nvcc --version ;出现下面的信息说明完成

3.根据本机的CUDA驱动版本确定cuDNN版本。
根据本机的CUDA、cuDNN版本确定python及TensorFlow版本。如下表所示:
tensorflow_gpu版本 Python 版本 cuDNN CUDA
tensorflow_gpu-2.4.0 3.6-3.8 8.0 11.0
tensorflow_gpu-2.3.0 3.5-3.8 7.6 10.1
tensorflow_gpu-2.2.0 3.5-3.8 7.6 10.1
tensorflow_gpu-2.1.0 3.5-3.7 7.6 10.1
tensorflow_gpu-2.0.0 3.5-3.7 7.4 10
tensorflow_gpu-1.15.0 3.5-3.7 7.4 10
tensorflow_gpu-1.14.0 3.5-3.7 7.4 10
tensorflow_gpu-1.13.0 3.5-3.7 7.4 10
tensorflow_gpu-1.12.0 3.5-3.6 7 9
tensorflow_gpu-1.11.0 3.5-3.6 7 9
tensorflow_gpu-1.10.0 3.5-3.6 7 9
tensorflow_gpu-1.9.0 3.5-3.6 7 9
tensorflow_gpu-1.8.0 3.5-3.6 7 9
tensorflow_gpu-1.7.0 3.5-3.6 7 9
tensorflow_gpu-1.6.0 3.5-3.6 7 9
tensorflow_gpu-1.5.0 3.5-3.6 7 9
tensorflow_gpu-1.4.0 3.5-3.6 6 8
tensorflow_gpu-1.3.0 3.5-3.6 6 8
tensorflow_gpu-1.2.0 3.5-3.6 5.1 8
tensorflow_gpu-1.1.0 3.5 5.1 8
tensorflow_gpu-1.0.0 3.5 5.1 8

我的CUDA版本是9 所以只能选择对应9 的版本进行安装
1.点击cudnn进入官网,根据电脑系统选择合适的版本,从官网下载(首次下载需要注册NVIDIA账号)。首先需要注册登录。

cuDNN安装步骤:
2.先下载cuDNN的安装包
下载地址:cuDNN Download | NVIDIA Developer


3. 安装:
解压:解压包显示内容

4.打开CUDA的安装路径:

5.将cuDNN的包对应的文件,都移动到CUDA包对应的文件中。不是替换是复制。


6.复制对应的文件:


4. 安装tensorflow-gpu版本
1.找到anaconda Prompt这个环境:

2. 配置清华源:
conda config --add channels https://mirrors.tuna.tsinghua.edu.cn/anaconda/pkgs/free/
conda config --set show_channel_urls yes
conda create -n tensorflow-gpu python=3.6.5

如果出现下面:错误,因为该源已经不支持该环境了
You will need to adjust your conda configuration to proceed. Use `conda config --show channels` to view your configuration's current state, and use `conda config --show-sources` to view config file locations.输入:先移除源
conda config --remove-key channels然后再输入:再重新输入一遍
conda config --add channels https://mirrors.tuna.tsinghua.edu.cn/anaconda/pkgs/free/
conda config --set show_channel_urls yes
conda create -n tensorflow-gpu python=3.6.5
3.创建tensorflow-gpu的环境:
(1)点击y:上面环境出现y/no: 直接点y出现下面的结果:

(2) 然后输入激活环境:conda activate tensorflow-gpu


(3) 先升级pip到最新版,防止稍后安装出现错误,输入指令
python -m pip install --upgrade pip
(4) 安装tensorflow-gpu: 一定要指定对应版本;安装好之前与CUDA匹配的版本。
pip3 install -i https://pypi.tuna.tsinghua.edu.cn/simple/ --upgrade tensorflow-gpu==1.9
(5) 完成:

(6) 测试:
import tensorflow as tf
a = tf.constant([1.0, 2.0, 3.0, 4.0, 5.0, 6.0], shape=[2, 3], name='a')
b = tf.constant([1.0, 2.0, 3.0, 4.0, 5.0, 6.0], shape=[3, 2], name='b')
c = tf.matmul(a, b)
sess = tf.Session(config=tf.ConfigProto(log_device_placement=True))
print(sess.run(c))
出现:gpu devices :0 表示成功: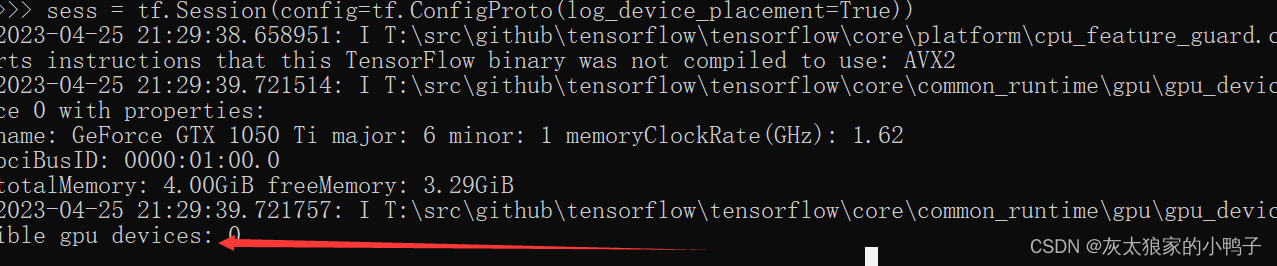
tensorflow 2以上的版本输入:
import tensorflow as tf
tf.compat.v1.disable_eager_execution()
a = tf.constant([1.0, 2.0, 3.0, 4.0, 5.0, 6.0], shape=[2, 3], name='a')
b = tf.constant([1.0, 2.0, 3.0, 4.0, 5.0, 6.0], shape=[3, 2], name='b')
c = tf.matmul(a, b)
sess= tf.compat.v1.Session(config=tf.compat.v1.ConfigProto(log_device_placement=True))
print(sess.run(c))
4. 如果再次进入anaconda的环境中的tensorflow-gpu的环境:
activate tensorflow-gpu


 被折叠的 条评论
为什么被折叠?
被折叠的 条评论
为什么被折叠?
 到【灌水乐园】发言


