


- LinearLayout
我们称其为线性布局,也是我们最常用的布局。此布局会把它所包含的控件在线性方向上依次排列。那决定是水平排列还是垂直排列就要依靠android:orientation属性来决定:vertical和horizontal。
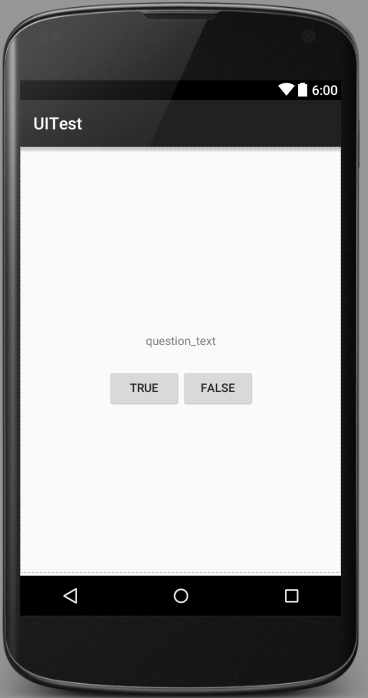
下面通过一个实例来说明:
activity_main.xml
<LinearLayout xmlns:android="http://schemas.android.com/apk/res/android"
    xmlns:tools="http://schemas.android.com/tools" android:layout_width="match_parent"
    android:layout_height="match_parent"
    android:orientation="vertical"
    android:gravity="center"
    >

    <TextView
        android:padding="24dp"
        android:text="@string/question_text"
        android:layout_width="wrap_content"
        android:layout_height="wrap_content" />

    <LinearLayout
        android:layout_width="wrap_content"
        android:layout_height="wrap_content">

        <Button
            android:text="@string/true_button"
            android:layout_width="wrap_content"
            android:layout_height="wrap_content" />

        <Button
            android:text="@string/false_button"
            android:layout_width="wrap_content"
            android:layout_height="wrap_content" />

    </LinearLayout>


</LinearLayout>
strings.xml
<resources>
    <string name="app_name">UITest</string>

    <string name="hello_world">Hello world!</string>
    <string name="action_settings">Settings</string>
    <string name="question_text">question_text</string>
    <string name="true_button">true</string>
    <string name="false_button">false</string>
</resources>
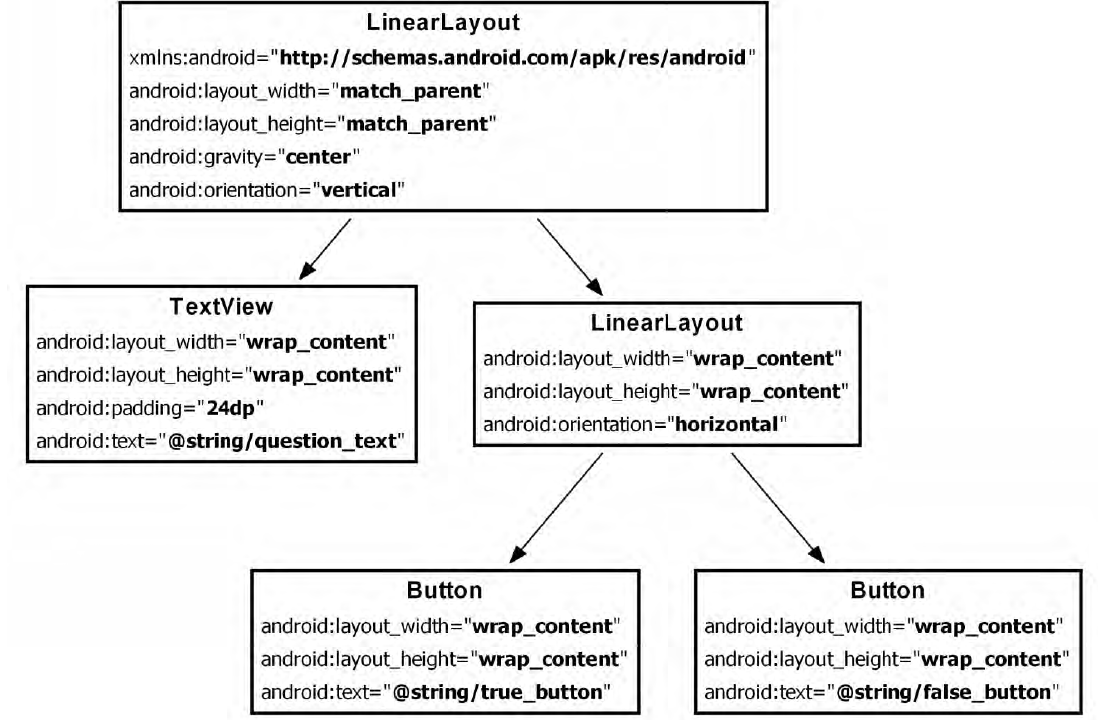
从布局的视图层级能更清晰的看出各个组件之间的联系与上下结构。
下面我们一起来看看组件的基本属性:
1.android:layout_width和android:layout_height
几乎所有组件都需要用到这两种属性。可以通常设置为以下两种属性之一:
match_parent:视图与其父视图大小相同
wrap_content:视图会根据其内容自动调整大小
(以前还有一个fill_parent,作用等同于match_parent,目前已经废弃不用)
2.android:padding
在TextView组件中,android:padding=”24dp”会使得组件除了给内容留出空间并且会额外指定定量的空间。
3.android:orientation
决定了二者的子组件是水平放置的还是垂直放置的。上述实例中根LinearLayout中是垂直的,子LinearLayout是水平的。
4.android:text
该属性指定组件显示的文字内容。这里android:text属性值不是字符串字面值而是对字符串资源的引用。字符串资源包含在strings.xml文件中。
5.android:gravity
其实控件属性中还有一个很相似的属性就是android:layout_gravity,有时这两者总是让我搞混掉。这里不在这里介绍,会在另一篇文章中详细的通过实例进行区分。http://blog.csdn.net/jkerving/article/details/48770321
6.android:layout_weight
这也是一个比较重要的属性,它可以使我们通过比例的方式来指定控件的大小。上述的例子中并没有用到这个属性,我们把上一个实例中的两个Button组件通过layout_weight控制大小:
activity_main.xml
<LinearLayout xmlns:android="http://schemas.android.com/apk/res/android"
xmlns:tools="http://schemas.android.com/tools" android:layout_width="match_parent"
android:layout_height="match_parent"
android:orientation="vertical"
android:gravity="center"
>
<TextView
android:padding="24dp"
android:text="@string/question_text"
android:layout_width="wrap_content"
android:layout_height="wrap_content" />
<LinearLayout
android:layout_width="match_parent"
android:layout_height="wrap_content">
<Button
android:text="@string/true_button"
android:layout_width="0dp"
android:layout_weight="3"
android:layout_height="wrap_content" />
<Button
android:text="@string/false_button"
android:layout_width="0dp"
android:layout_weight="1"
android:layout_height="wrap_content" />
</LinearLayout>
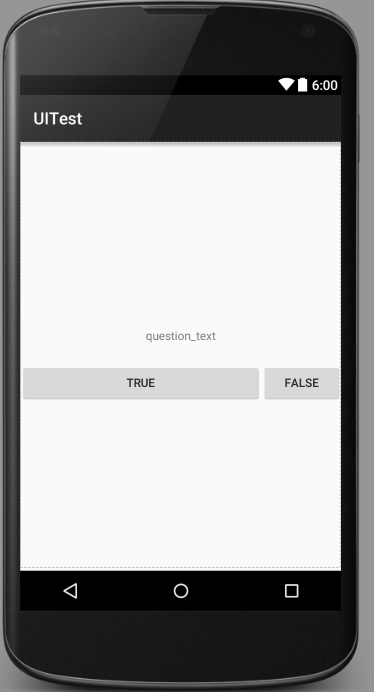
</LinearLayout>layout_weight属性分别设置为3、1。这样两个Button控件分别占屏幕的3/4和1/4。由下图可以明显的看出来此属性的作用。
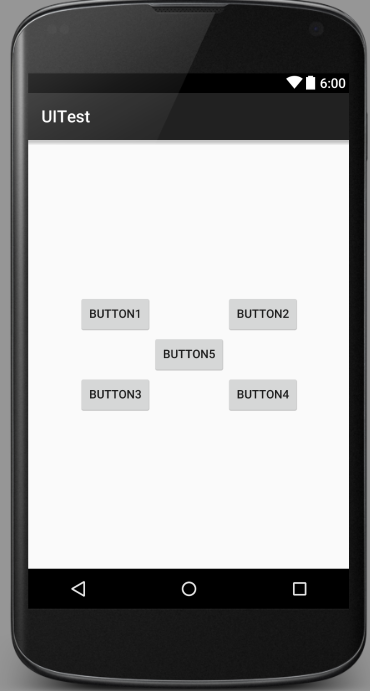
- RelativeLayout
我们称为相对布局。这种布局方式主要通过相对定位的方式让控件出现在随意的位置。
activity_main.xml
<RelativeLayout xmlns:android="http://schemas.android.com/apk/res/android"
xmlns:tools="http://schemas.android.com/tools" android:layout_width="match_parent"
android:layout_height="match_parent"
android:gravity="center"
>
<Button
android:id="@+id/button1"
android:text="Button1"
android:layout_alignParentLeft="true"
android:layout_alignParentTop="true"
android:layout_width="wrap_content"
android:layout_height="wrap_content" />
<Button
android:id="@+id/button2"
android:text="Button2"
android:layout_alignParentRight="true"
android:layout_alignParentTop="true"
android:layout_width="wrap_content"
android:layout_height="wrap_content" />
<Button
android:id="@+id/button3"
android:text="Button3"
android:layout_alignParentLeft="true"
android:layout_alignParentBottom="true"
android:layout_width="wrap_content"
android:layout_height="wrap_content" />
<Button
android:id="@+id/button4"
android:text="Button4"
android:layout_alignParentRight="true"
android:layout_alignParentBottom="true"
android:layout_width="wrap_content"
android:layout_height="wrap_content" />
<Button
android:id="@+id/button5"
android:text="Button5"
android:layout_centerInParent="true"
android:layout_width="wrap_content"
android:layout_height="wrap_content" />
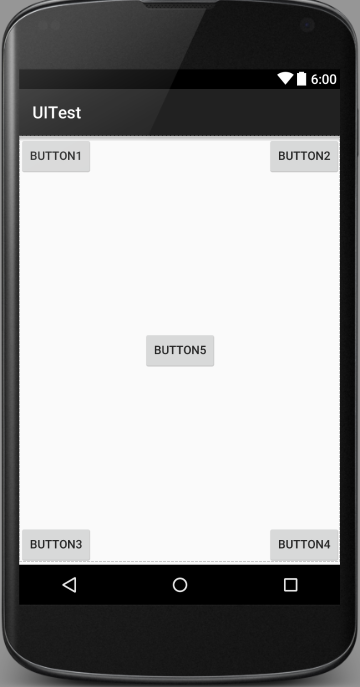
</RelativeLayout>从android:alignParentBottom、android:alignParentTop、android:alignParentLeft、android:alignParentRight、android:centerInParent这几个属性中可以看出这些都是相对于父布局的定位。
不仅仅可以相对于父布局定位,还以相对于其他控件定位:
<RelativeLayout xmlns:android="http://schemas.android.com/apk/res/android"
    xmlns:tools="http://schemas.android.com/tools" android:layout_width="match_parent"
    android:layout_height="match_parent"
    android:gravity="center"
    >

    <Button
        android:id="@+id/button1"
        android:text="Button1"
        android:layout_above="@+id/button5"
        android:layout_toLeftOf="@+id/button5"
        android:layout_width="wrap_content"
        android:layout_height="wrap_content" />

    <Button
        android:id="@+id/button2"
        android:text="Button2"
        android:layout_above="@+id/button5"
        android:layout_toRightOf="@+id/button5"
        android:layout_width="wrap_content"
        android:layout_height="wrap_content" />

    <Button
        android:id="@+id/button3"
        android:text="Button3"
        android:layout_toLeftOf="@+id/button5"
        android:layout_below="@+id/button5"
        android:layout_width="wrap_content"
        android:layout_height="wrap_content" />

    <Button
        android:id="@+id/button4"
        android:text="Button4"
        android:layout_toRightOf="@+id/button5"
        android:layout_below="@+id/button5"
        android:layout_width="wrap_content"
        android:layout_height="wrap_content" />

    <Button
        android:id="@+id/button5"
        android:text="Button5"
        android:layout_centerInParent="true"
        android:layout_width="wrap_content"
        android:layout_height="wrap_content" />

</RelativeLayout>
我们以Button5为中心,其他按钮组件相对于它布局。
3. FrameLayout
这是布局方式较为少用,其控件均会位于左上方。不过在使用Fragment时应用此布局较多。
<FrameLayout xmlns:android="http://schemas.android.com/apk/res/android"
    xmlns:tools="http://schemas.android.com/tools" android:layout_width="match_parent"
    android:layout_height="match_parent"
    >


    <ImageView
        android:id="@+id/image_view"
        android:src="@drawable/ic_launcher"
        android:layout_width="wrap_content"
        android:layout_height="wrap_content" />

    <Button
        android:id="@+id/button"
        android:text="Button"
        android:layout_width="wrap_content"
        android:layout_height="wrap_content" />


</FrameLayout>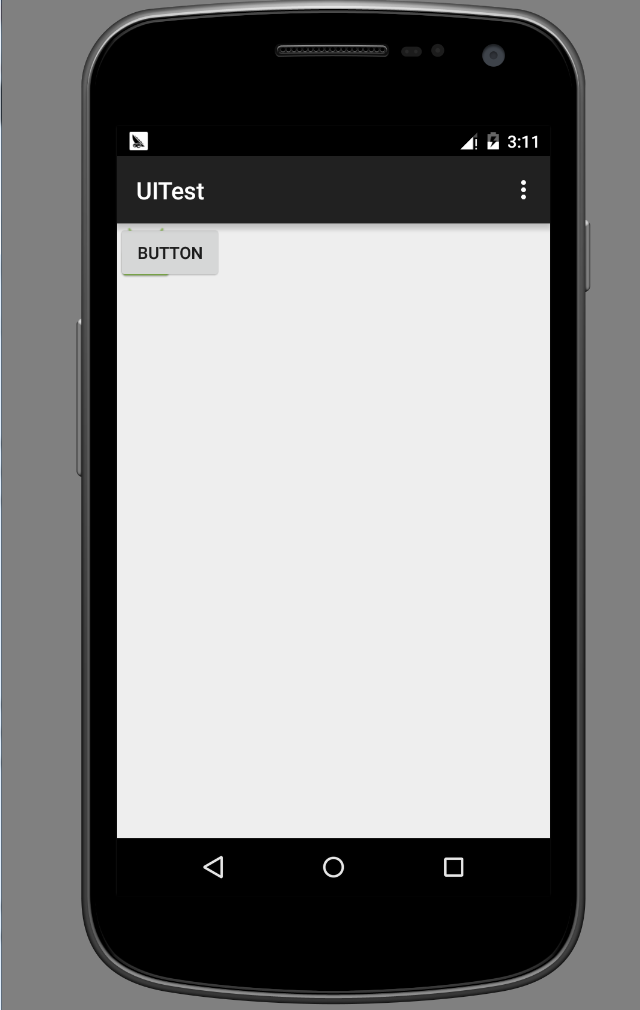
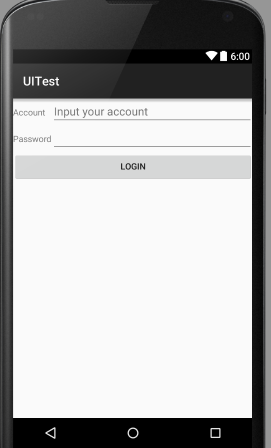
4. TableLayout
此布局允许我们使用表格的形式来排列控件。
<TableLayout xmlns:android="http://schemas.android.com/apk/res/android"
    xmlns:tools="http://schemas.android.com/tools" android:layout_width="match_parent"
    android:layout_height="match_parent"
    android:stretchColumns="1"
    >

    <TableRow>

        <TextView android:layout_height="wrap_content"
            android:text="Account"
            />

        <EditText
            android:id="@+id/account"
            android:layout_height="wrap_content"
            android:hint="Input your account"
            />

    </TableRow>

    <TableRow>

        <TextView android:layout_height="wrap_content"
            android:text="Password"
            />

        <EditText
            android:id="@+id/password"
            android:layout_height="wrap_content"
            android:inputType="textPassword"
            />

    </TableRow>

    <TableRow>

        <Button
            android:id="@+id/login"
            android:layout_height="wrap_content"
            android:layout_span="2"
            android:text="Login"
            />

    </TableRow>

</TableLayout>
这种布局与之前较大的不同就是Button组件那一行只有一列,这时就需要合并单元格,通过android:layout_span = 2合并单元格。
这些讲的都比较基础,主要是作为自己的随笔总结在博客上记录下来。


 1646
1646

 被折叠的 条评论
为什么被折叠?
被折叠的 条评论
为什么被折叠?
 到【灌水乐园】发言


