


http://blog.csdn.net/believefym/article/details/1780509
1,编写filter
2,在debug模式下build
3,注册filter:控制台cd到工程的debug目录下,即欲注册的filter(.ax文件)目录,xx:>regsvr32 contrast.ax,提示注册成功,否则请检查
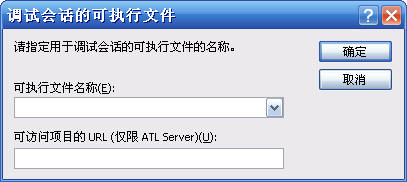
4,vs下按F5,出来如下对话框,在可执行文件名称下面选择graphedit.exe的路径
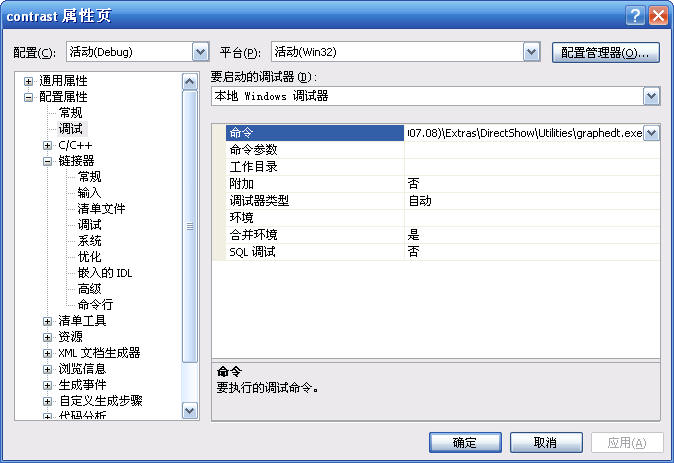
或者直接在工程属性进行设置,如下:
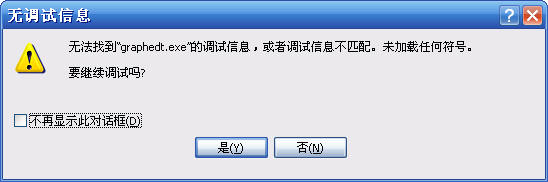
运行之后有如下提示窗口,选“是”即可
5,在graphedit中建立需要的graph:
graphedit.exe菜单-graph-insert filter-选择需要调试的filter双击即可加入graph中
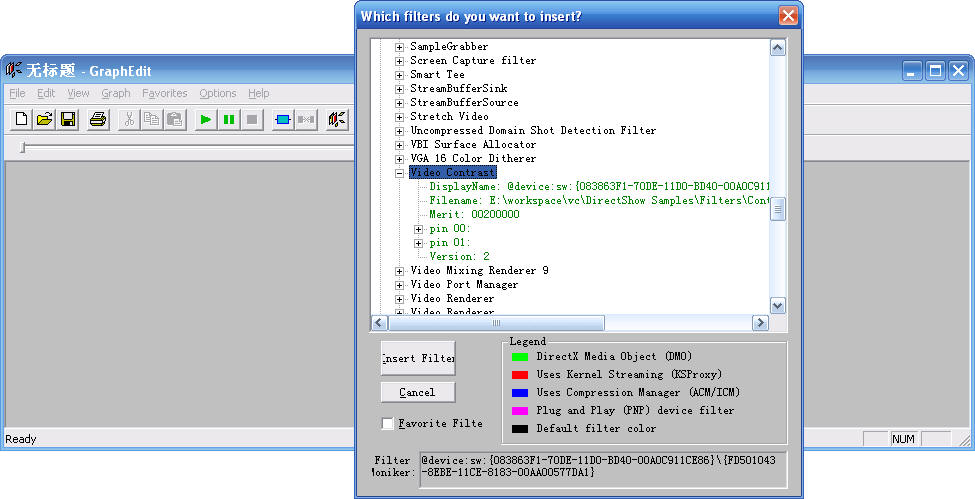
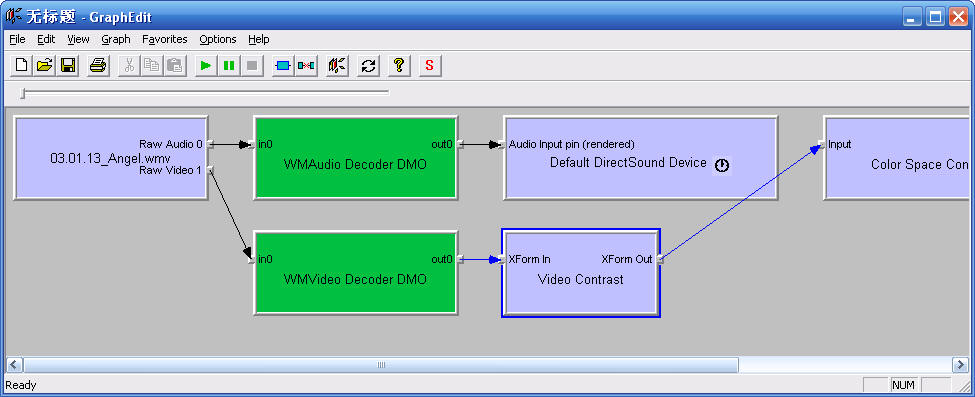
可以简单的从file菜单中选择render file,如果filter正确且可以正常加入到链中则graph会自动建立完整,如下图:
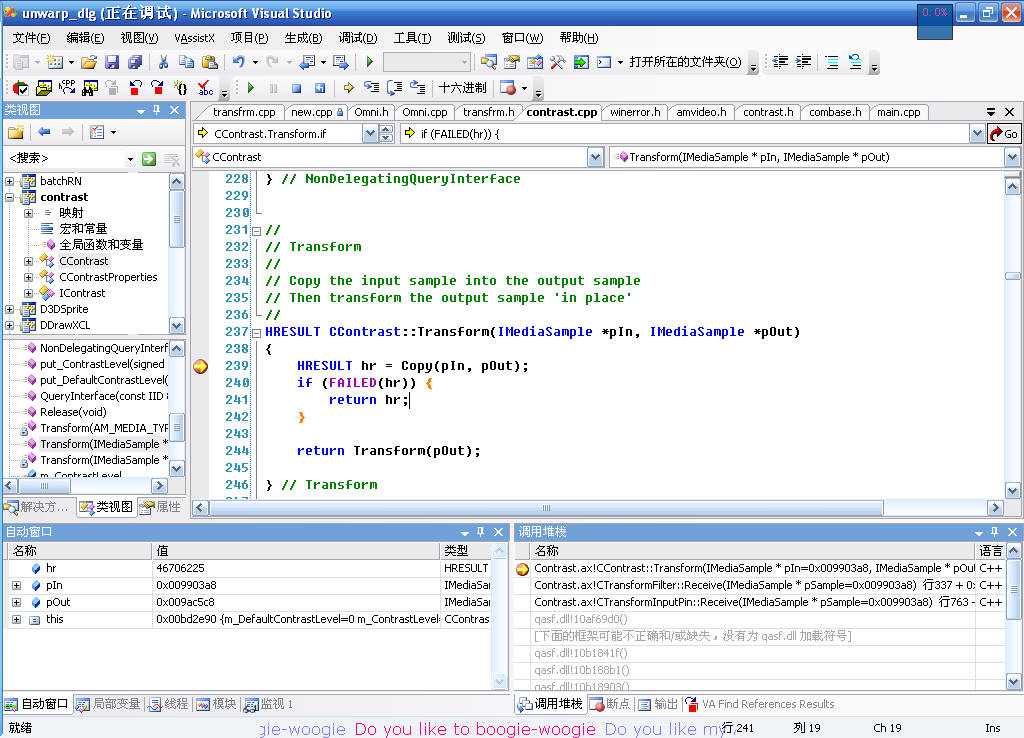
6,在vs中断点调试,其实从添加filter开始就已经可以调试了,如可以在filter的CreateInstance函数上添加一个断点。
2,在debug模式下build
3,注册filter:控制台cd到工程的debug目录下,即欲注册的filter(.ax文件)目录,xx:>regsvr32 contrast.ax,提示注册成功,否则请检查
4,vs下按F5,出来如下对话框,在可执行文件名称下面选择graphedit.exe的路径
或者直接在工程属性进行设置,如下:
运行之后有如下提示窗口,选“是”即可
5,在graphedit中建立需要的graph:
graphedit.exe菜单-graph-insert filter-选择需要调试的filter双击即可加入graph中
可以简单的从file菜单中选择render file,如果filter正确且可以正常加入到链中则graph会自动建立完整,如下图:
6,在vs中断点调试,其实从添加filter开始就已经可以调试了,如可以在filter的CreateInstance函数上添加一个断点。


 1万+
1万+

 被折叠的 条评论
为什么被折叠?
被折叠的 条评论
为什么被折叠?
 到【灌水乐园】发言


