分析登录请求
- 教务处登录页面
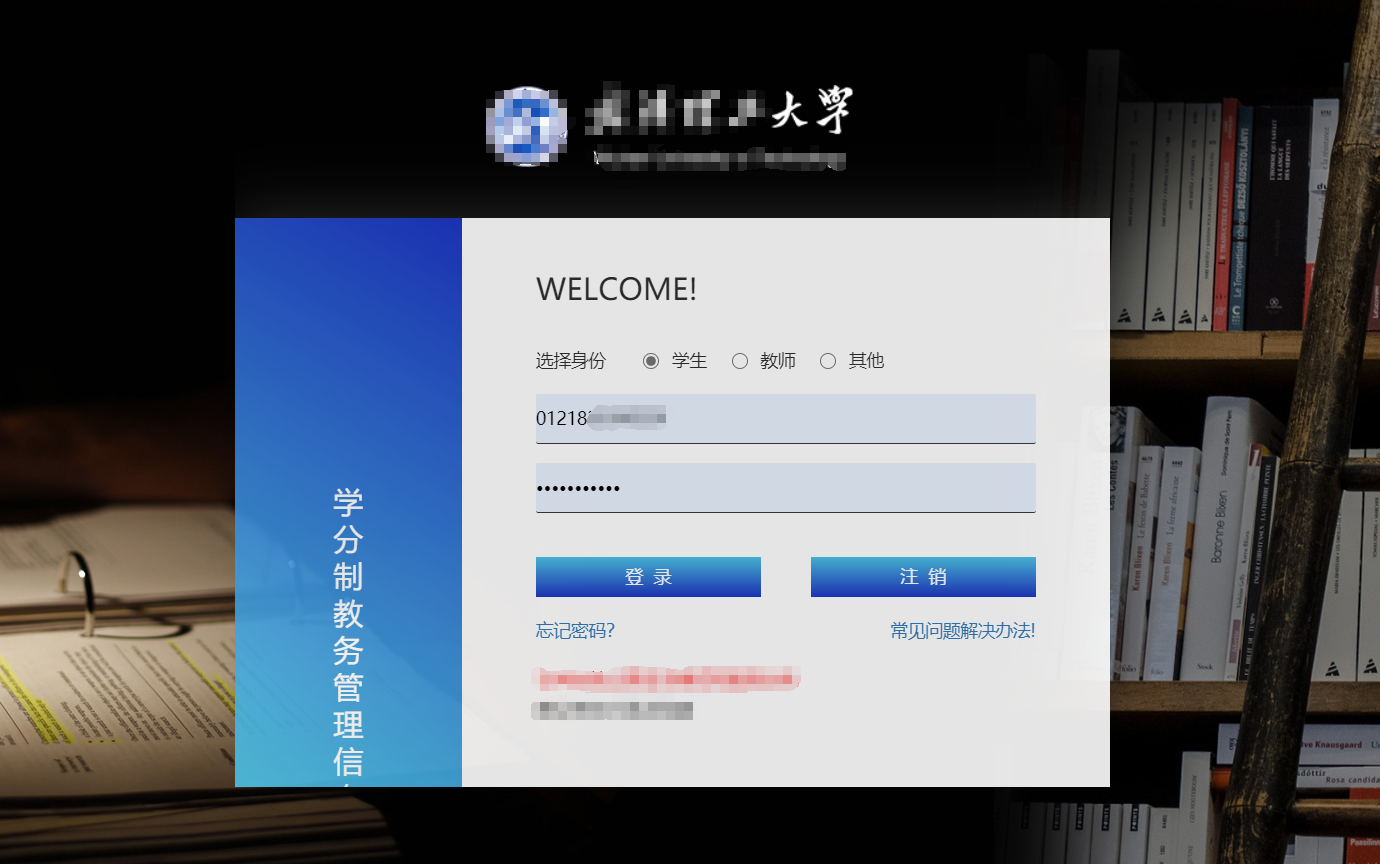
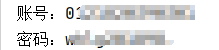
- 输入账号和密码,点击登录
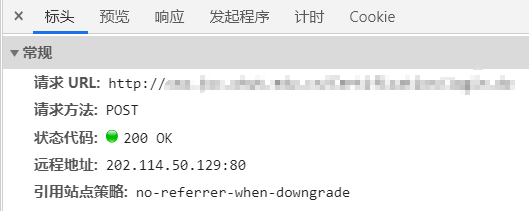
- 浏览器抓取登录的请求信息如下,可以得出点击登录时发送的是
Post请求,而且登录时的状态码为200而不是302,说明登录时没有发生重定向,而是直接通过响应传回登录后的页面数据,在通过解析呈现出来
- 请求所带的表单信息如下
userName和password携带的是我之前登录输入的用户名和密码- 经过多次尝试和分析,我发现
rnd和code的值是通过JS动态成对生成的,可以多登录几次并记录rnd和code的值,在模拟登录时随机调用即可,用其他账号尝试发现是可行的 - 我尝试用不同的账号和密码登录,发现
webfinger的值是固定的,所以直接用就可以了
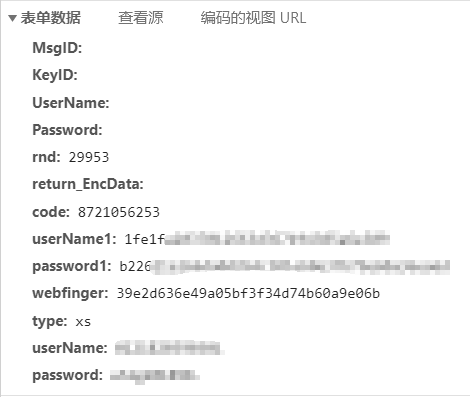
userName1和password1的值是一个难点了,下面我来分析一下
- 首次看到这两个参数这么一大长串,我真的是搞蒙了
- 经分析,既然这两个参数叫
userName1和password1,那么这两个参数的值肯定和输入的userName和password值有关 - 所以那肯定就是经过加密得到的了,可是是怎么加密的呢?
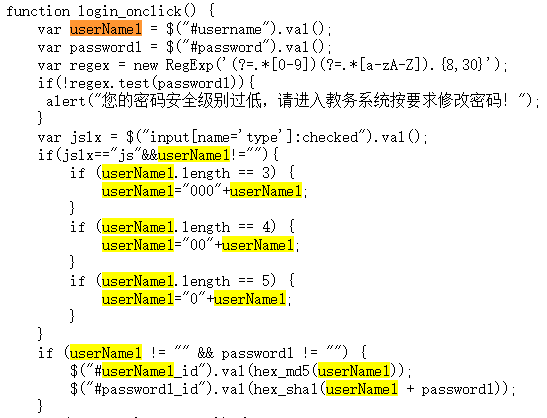
- 我重新查看登录页面,在里面搜索这两个参数,结果被我在JS语句中找到了,如下
- 分析JS代码,可以得出
userName1的值是用userName的值经过hex_md5加密算法得到的;而password的值是由userName+password经过hex_sha1算法得到的 - 既然得到加密算法了,那么最后这两个参数就搞定了
处理登陆响应
- 登陆请求问题已经解决,下面处理登陆响应问题
- 查看浏览器抓取的响应数据,如下,正是登录成功后的教务处的部分页面源码
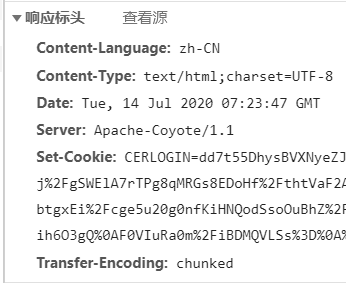
- 查看抓取的响应标头信息,如下
- 有用的就是
Content-Type的值,它告诉我们如何解析响应的数据 - 如
text/html;charset=UTF-8告诉我们登陆返回的响应数据是一段HTML代码,编码为UTF-8,这在解析中都是要用到的
- 至此,教务处登录的整个过程就分析完毕,下面就是通过整个的分析设计程序
整个项目的创建和需要加入的依赖(pom.xml)
- 项目是先创建一个Maven工程,在在Maven工程中加入Tomcat和Web配置
- 下面是项目中需要加入的依赖:
<dependencies>
<dependency>
<groupId>org.apache.httpcomponents</groupId>
<artifactId>httpclient</artifactId>
<version>4.5.2</version>
</dependency>
<dependency>
<groupId>org.slf4j</groupId>
<artifactId>slf4j-log4j12</artifactId>
<version>1.7.25</version>
</dependency>
<dependency>
<groupId>org.jsoup</groupId>
<artifactId>jsoup</artifactId>
<version>1.10.3</version>
</dependency>
<dependency>
<groupId>junit</groupId>
<artifactId>junit</artifactId>
<version>4.12</version>
</dependency>
<dependency>
<groupId>org.apache.commons</groupId>
<artifactId>commons-lang3</artifactId>
<version>3.7</version>
</dependency>
<dependency>
<groupId>commons-io</groupId>
<artifactId>commons-io</artifactId>
<version>2.6</version>
</dependency>
<dependency>
<groupId>commons-codec</groupId>
<artifactId>commons-codec</artifactId>
<version>1.12</version>
</dependency>
</dependencies>
userName1和password1参数值加密算法
- 上文的分析已经得出求情表单中这两个参数是怎么来的,下面代码就要进行实现
import org.apache.commons.codec.digest.DigestUtils;
public class Encrypt {
public static String digestString(String str, String alg){
String newStr = null;
if ("MD5".equals(alg)) {
newStr = DigestUtils.md5Hex(str);
} else if ("SHA_1".equals(alg)) {
newStr = DigestUtils.sha1Hex(str);
}
return newStr;
}
}
- 可以在类中写一个
@Test测试方法,传入字符串得到加密后的字符串并输出,与原登录页面的进行对比,发现是一样的,说明加密算法没有问题
用HttpClient爬虫技术来处理登陆请求和相应
- 解决了两个加密参数值的问题后,所有登录所需的请求信息和数据都解决了,接着要解决的问题就是用账号和密码如何实现像浏览器那样进行登录
- 这就需要利用网络爬虫技术来解决了,所以我选择用
HttpClient技术进行登录 - 请求、相应和爬取的步骤都在代码注释中给出了详细的解释
- 代码:
public class LoginHttpClient {
public String loginSystem(String userName,String passWord){
CloseableHttpClient httpClient = HttpClients.createDefault();
HttpPost httpPost = new HttpPost("http://sso.jwc.whut.edu.cn/Certification/login.do");
String userName1 = Encrypt.digestString(userName,"MD5");
String password1 = Encrypt.digestString(userName + passWord,"SHA_1");
int index = RandomNum.RandomInt();
String rnd = RandomNum.RandomStr(index,"rnd");
String code = RandomNum.RandomStr(index,"code");
List<NameValuePair> nvpr = new ArrayList<NameValuePair>();
nvpr.add(new BasicNameValuePair("MsgID",""));
nvpr.add(new BasicNameValuePair("KeyID",""));
nvpr.add(new BasicNameValuePair("UserName",""));
nvpr.add(new BasicNameValuePair("Password",""));
nvpr.add(new BasicNameValuePair("rnd",rnd));
nvpr.add(new BasicNameValuePair("return_EncData",""));
nvpr.add(new BasicNameValuePair("code",code));
nvpr.add(new BasicNameValuePair("userName1",userName1));
nvpr.add(new BasicNameValuePair("password1",password1));
nvpr.add(new BasicNameValuePair("webfinger","1a3e30d026066c5da6b3d6b5f7c1e644"));
nvpr.add(new BasicNameValuePair("type","xs"));
nvpr.add(new BasicNameValuePair("userName",userName));
nvpr.add(new BasicNameValuePair("password",passWord));
try {
httpPost.setEntity(new UrlEncodedFormEntity(nvpr,"utf-8"));
} catch (UnsupportedEncodingException e) {
e.printStackTrace();
}
CloseableHttpResponse response = null;
String data = null;
try {
response = httpClient.execute(httpPost);
if(response.getStatusLine().getStatusCode() == 200){
HttpEntity entity = response.getEntity();
data = EntityUtils.toString(entity,"utf-8");
if(data.indexOf("选择身份") != -1){
data = "failed";
}
}else{
data = "failed";
}
} catch (IOException e) {
e.printStackTrace();
} finally {
try {
response.close();
httpClient.close();
} catch (IOException e) {
e.printStackTrace();
}
}
return data;
}
}
设计模拟登录的页面
- 实现了登录的请求、相应和爬取,接下来就要想的问题是我怎么输入账号和密码呢?在那个页面进行登录呢?
- 所以接下来就要自己设计一个模拟登陆的页面了,代码如下:
<!DOCTYPE html>
<html lang="en">
<head>
    <meta charset="UTF-8">
    <link type="text/css" rel="stylesheet" href="style.css">
    <title>登录</title>
</head>
<body>
    <h2>输入账号和密码以登录教务管理系统</h2>
    <form action="/crawler/loginServlet" method="post">
        学号:<input type="text" name="userName">
        <br>
        密码:<input type="password" name="passWord">
        <br>
        <input type="submit" value="登录">
        <input type="button" value="注销">
    </form>
</body>
</html>
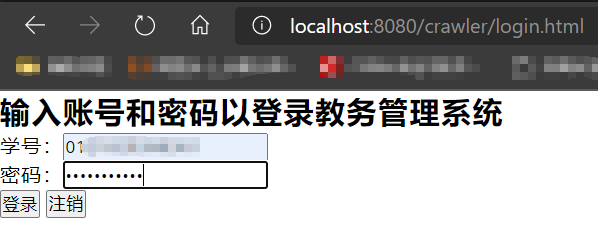
- 页面:
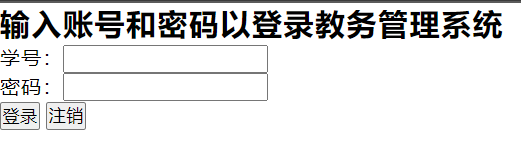
- 有点丑,哈哈,没事,一开始就是设计一个框架实现基本的功能就可以了,最后可以加入CSS进行渲染的,这样会更加美观
登录失败跳转的页面
<!DOCTYPE html>
<html lang="en">
<head>
    <meta charset="UTF-8">
    <title>登录失败</title>
</head>
    <body>
        <h1>登录失败!</h1>
        <h2>请检查账号和密码是否正确</h2>
        <a href="login.html">点击此处以重新登录</a>
    </body>
</html>
- 页面

用HttpServlet来对接模拟登陆页面
- 模拟登录页面写好了,那么怎么将我输入的账号和密码传入后端进行登录和爬取呢?
- 所以紧接着就是用
HttpServlet来处理模拟登录页面的请求,将请求中的账号和密码传入HttpClient进行登录爬虫的操作,获取响应后在返回给页面,代码如下:
import httpclient.LoginHttpClient;
import utils.JsoupUtil;
import javax.servlet.ServletException;
import javax.servlet.annotation.WebServlet;
import javax.servlet.http.HttpServlet;
import javax.servlet.http.HttpServletRequest;
import javax.servlet.http.HttpServletResponse;
import java.io.*;
@WebServlet("/system")
public class LoginServlet extends HttpServlet {
protected void doPost(HttpServletRequest request, HttpServletResponse response) throws ServletException, IOException {
String userName = request.getParameter("userName");
String passWord = request.getParameter("passWord");
LoginHttpClient httpClient = new LoginHttpClient();
String webData = httpClient.loginSystem(userName,passWord);
if("failed".equals(webData)){
response.sendRedirect("./login_failed.html");
}else {
response.setContentType("text/html;charset=utf-8");
PrintWriter pw = response.getWriter();
pw.write(JsoupUtil.tableExtract(webData));
}
}
protected void doGet(HttpServletRequest request, HttpServletResponse response) throws ServletException, IOException {
this.doPost(request, response);
}
}
- 测试在模拟登陆页面输入账号和密码是否能够接收到
- 成功接收到并在控制台输出
完成并测试
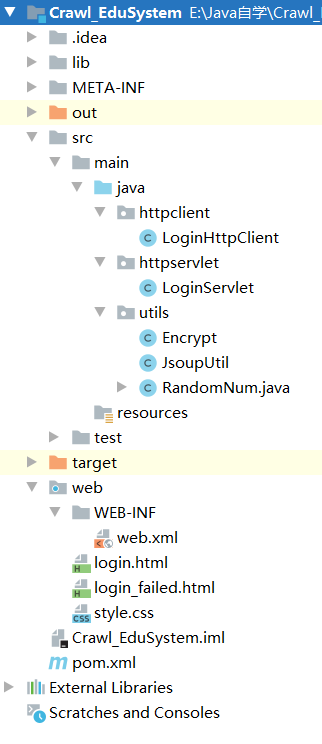
- 这是整个项目的文件分布
- 前后端的设计全部完成
- 测试一次
- 运行Tomcat服务器,访问模拟登录页面,输入账号和密码,登录
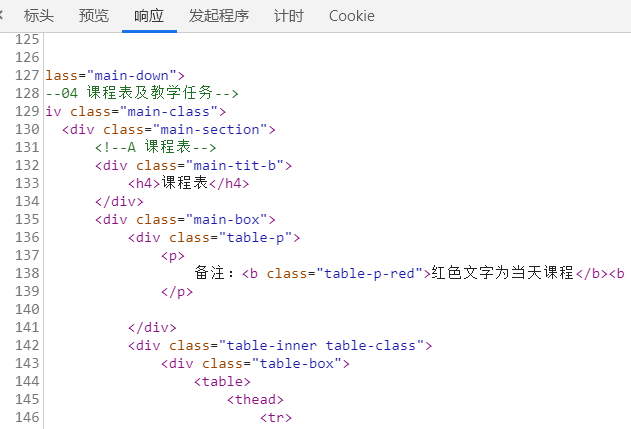
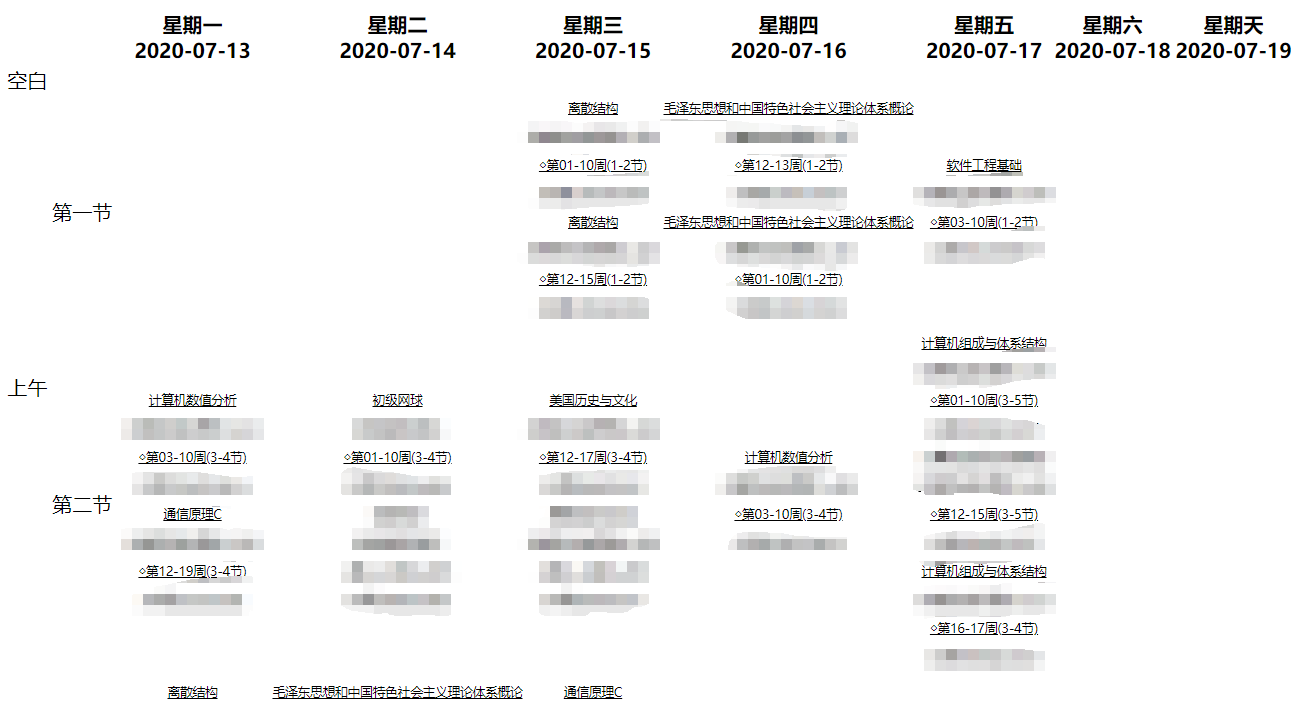
- 获取登录后的页面,这是部分课表信息
- 至此我已经完成了教务系统的登录,最后工作就是对爬取的数据进行解析,例如将课表分离出来,进行渲染,可以美观方便地查看自己的课表,也可以将选课信息提取出来,查看自己的选课情况等等
- 当然,也可以在登录后教务系统的页面上进行进一步的爬取,爬取自己的成绩、学分等等信息,这就看自己如何实现了
CSS渲染
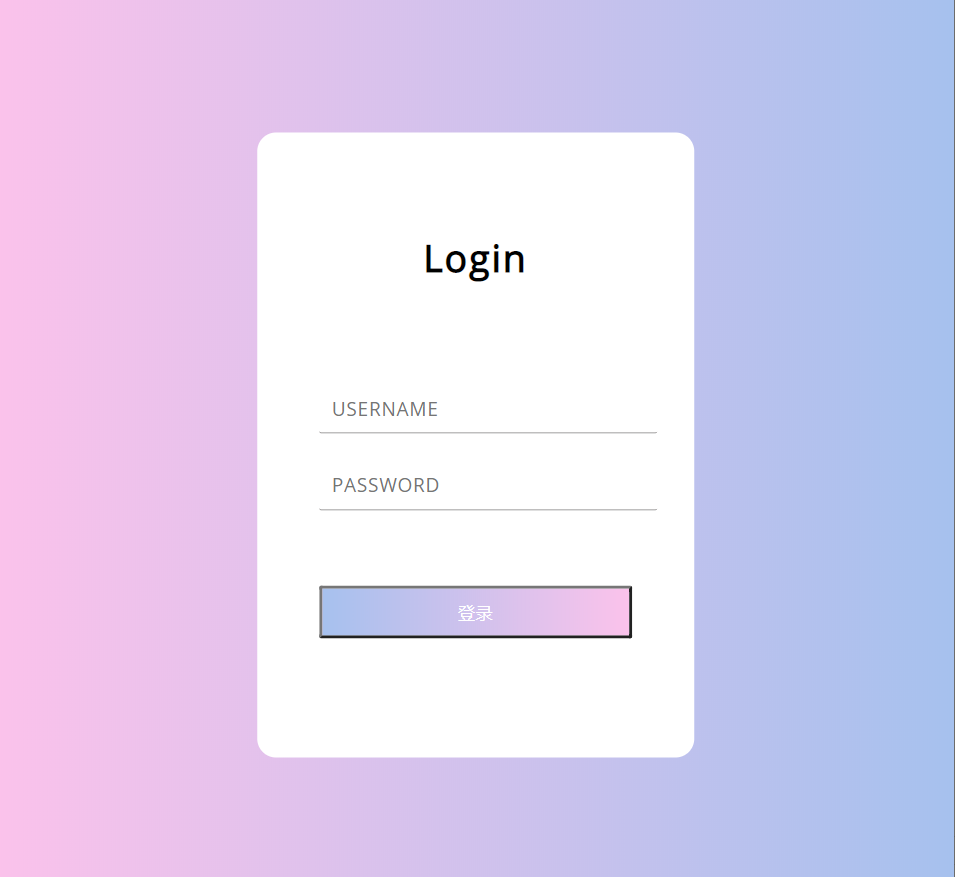
- 用网上的模板给登录页面加了个渲染,效果如下(还挺好看的)
声明


 227
227


 被折叠的 条评论
为什么被折叠?
被折叠的 条评论
为什么被折叠?
 到【灌水乐园】发言


