


首先我们要判断一个界面是否需要优化布局,这个很简单,标准上面已经说了,要尽量控制在16ms以内!
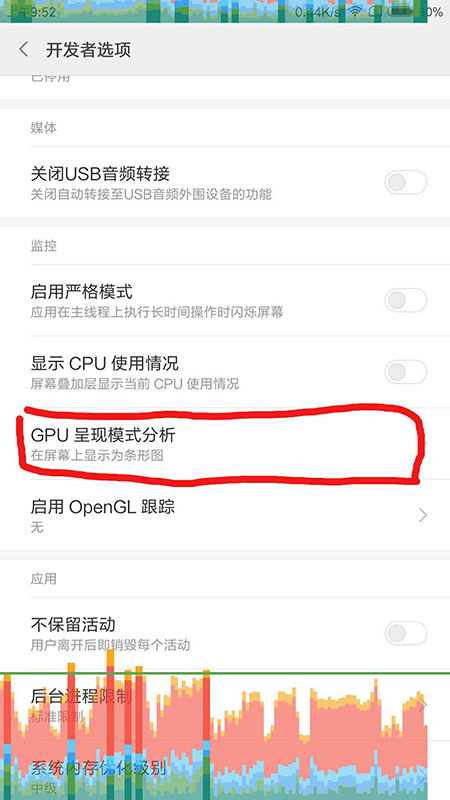
手机开发者选项—>GPU呈模式分析。 (测试机小米Max)
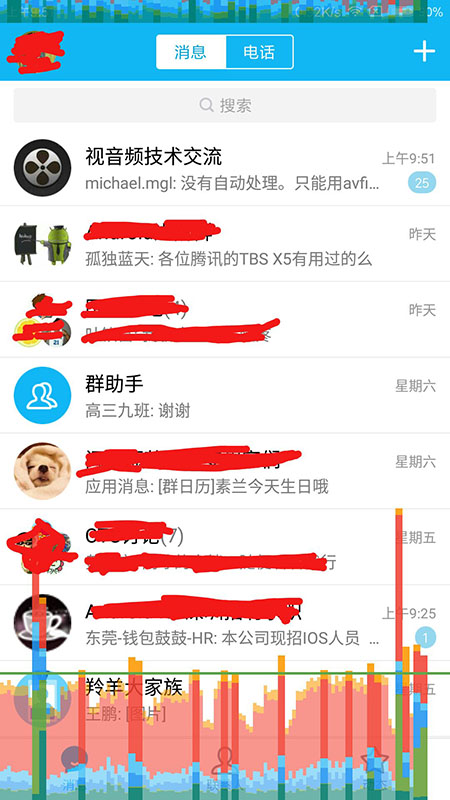
绿色是基线也就是16ms ,要尽量让条形柱状图控制在绿色基线以下。可以看看国内做的比较好的应用QQ,基本都控制在基线以下。
判断的标准有了,接下来我们将按照如下的方法进行优化:
1.布局的选择。
2.减少布局的嵌套层次。
3.防止过度重绘。
4.使用Hierarchy View 工具进行布局优化。
一、布局的选择:
android官方给我提供的布局常用的要数LinearLayout、FrameLayout以及RelativeLayout用的是最多的也是最常用的,但是它们之间就没有性能的上的差别?在能满足布局需求的情况又如何选择?(比如实现子控件居中显示)
<A xmlns:android="http://schemas.android.com/apk/res/android"
    xmlns:tools="http://schemas.android.com/tools"
    android:id="@+id/activity_main"
    android:layout_width="match_parent"
    android:layout_height="match_parent"
    >

    <TextView
        android:layout_width="wrap_content"
        android:layout_height="wrap_content"
        android:text="Hello World!" />
</A>经测试的得数据:(金立手机 android 5.1系统 测试6次):
LinearLayout 平均耗时:908.7ms 平均消耗内存:3.227M
FrameLayout 平均耗时:950.8ms 平均消耗内存:3.504M
RelativeLayout 平均耗时:998.5ms 平均消耗内存:5.083M
从数据我们可以的出一个初步的结论(在同等条件下):它们3个的性能排行榜:LinearLayout>FrameLayout>RelativeLayout
二、减少布局的嵌套:
众所周知,android的视图需要经过测量,布局,以及绘制三个步骤。那么你嵌套的层次越多,布局需要递归查找子View的时间消耗就越多,最后整体完成measure,layout,draw的总时间就越长,那么画面将变得越卡顿。
<A xmlns:android="http://schemas.android.com/apk/res/android"
    android:id="@+id/activity_main"
    android:layout_width="match_parent"
    android:layout_height="match_parent"
    >

    <A xmlns:android="http://schemas.android.com/apk/res/android"
        android:id="@+id/activity_main"
        android:layout_width="match_parent"
        android:layout_height="match_parent"
        >
        ...

    <View
        android:layout_width="wrap_content"
        android:layout_height="wrap_content"
        android:text="Hello World!" />
        ...
    </A>
</A>嵌套1层:
A=LinearLayout
View measure 2 layout 2 draw 1
A=FrameLayout
View measure 2 layout 2 draw 1
A=RelativeLayout
View measure 4 layout 2 draw 1
嵌套2层:
A=LinearLayout
View measure 2 layout 2 draw 1
A=FrameLayout
View measure 2 layout 2 draw 1
A=RelativeLayout
View measure 8 layout 2 draw 1
嵌套三层:A=LinearLayout
View measure 2 layout 2 draw 1
A=FrameLayout
View measure 2 layout 2 draw 1
A=RelativeLayout
View measure 16 layout 2 draw 1
由数据可以得出结论:LinearLayout和Framelayout无论嵌套多少层View的都只会measure 2次,layout 2次,draw 1次,而RelativeLayout 则是measure 2的(n+1)幂次方次,layout 2次,draw 1次:
也可初步得嵌套性能结论:LinearLayout=FrameLayout>RelativeLayout (尤其是RelativeLayout需要慎用)。
减少布局的嵌套层次主要通过<include> 、<merge>(主)、 <ViewStub> 三大标签以及控件的属性来减少嵌套层次:
1.<inclue>标签:这个没什么好讲的主要是重用布局,一定程度上减小apk的大小以及和<merge>标签配合使用。但是需要注意的是如果,在使用<include>标签时,如果给<include>标签添加了属性,那么它会覆盖被引入的布局的根布局的相同属性。另外如给<include>标签添加了id属性那么就不直接使用findViewById了,需要找到先inflate<include>标签的跟布局,然后通过这个View进行findViewById。
2.<merge>标签:这个标签是主要用来减少嵌套层次的,比如如下布局:
<LinearLayout xmlns:android="http://schemas.android.com/apk/res/android"
    android:id="@+id/activity_main"
    android:layout_width="match_parent"
    android:layout_height="match_parent"
    >
    <View
        android:layout_width="wrap_content"
        android:layout_height="wrap_content"
        android:text="Hello World!" />
</LinearLayout >①子控件没有对根布局有任何的属性依赖,父布局也没有background等一些特殊属性,对子控件而言完全就是个容器。
②在LinearLayout里面嵌入一个布局(或者视图),而恰恰这个布局(或者视图)的根节点也是LinearLayout。
需要注意的是<merge />只能作为XML布局的根标签使用。当Inflate以<merge />开头的布局文件时,必须指定一个父ViewGroup,并且必须设定attachToRoot为true。
3.<ViewSub>标签:这个标签虽然不是用来减少嵌套层次的,但是却能起到布局优化的作用。ViewStub是一个轻量级的View,没有尺寸,不绘制任何东西,因此绘制或者移除时更省时。(ViewStub不可见,大小为0),实现View的延迟加载,避免资源的浪费,减少渲染时间,在需要的时候才加载View。在加载完后会被移除,或者说是被加载进来的layout替换掉了。需要注意的是:ViewStub所要替代的layout文件中不能有<merge>标签。
<ViewStub
    android:id="@+id/stub"
    android:inflatedId="@+id/aim_layout”
    android:layout="@layout/include_layout"
    android:layout_width="fill_parent"
    android:layout_height="wrap_content"
android:layout_gravity="bottom" />((ViewStub) findViewById(R.id.stub)).setVisibility(View.VISIBLE);
// or
View root = ((ViewStub) findViewById(R.id.stub)).inflate();4.尽量使用控件的属性完成需求
比如要完成左右两端是图片中间是文字的布局,使用组合控件组合能完成,但是这绝对是下下之策。这个需求使用TextView的 android:drawableLeft=""和android:drawableRight=""
同样也是能完成的!同样利用这些属性能完成 Android 自定义自动清空EditText。
三、防止过度重绘:
多次对同一个区域进行onDraw重新绘制,同样是比较消耗性能和时间的,因为我们看见的视图就像Photoshop视图层一样最上面的颜色会覆盖下面的,如果没有必要的话是需要减少重绘的。首先我们需要看怎样才是重绘?重绘的标准是什么?
通过手机开发者选项可以看手机重回结果:手机开发者选项—>过度重绘调试。
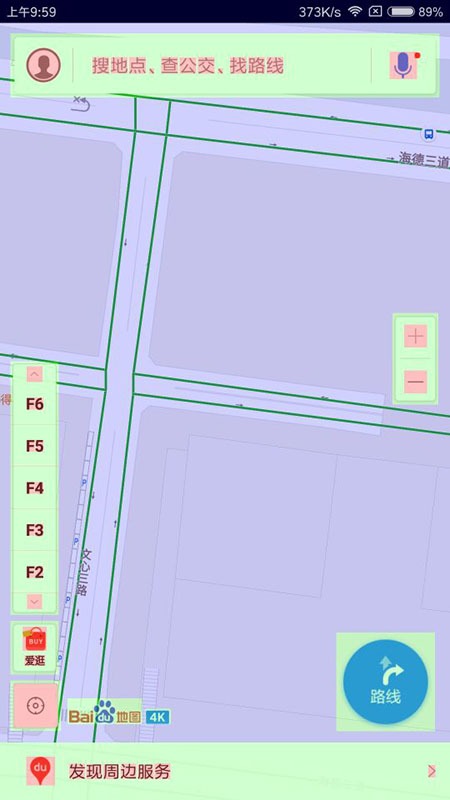
可以看见百度地图的重绘是控制在1次和2次之内的,很少有淡红色和深红色的。这是比较好的,也是我们要达到的目标,减少淡红色和深红色,防止过度重绘。
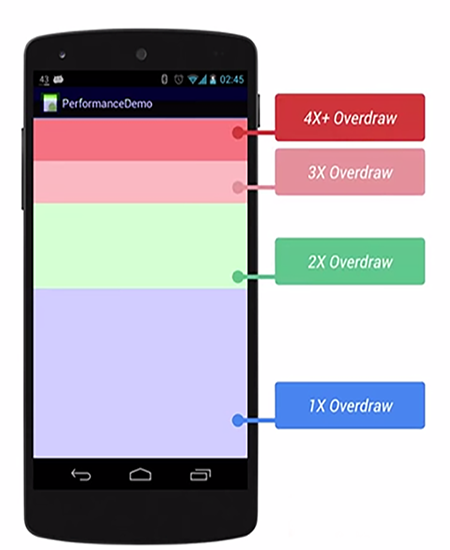
白色表示没有重复绘制(只绘制了1次),淡蓝色表示重绘1次(绘制了2次),淡绿色表示重绘2次(绘制了3次)淡红色表示重绘制3次(绘制了4次),深红色表示重绘4次活更多(绘制5次或者更多)。 PS:设置Activty的背景颜色为空或者透明都可以减少过度重绘!
造成重绘的原因主要有 1.嵌套的过多 2.自定View没有使用好invalidate或者requestLayout方法,主要从这2个方面进行优化!
四、Hierarchy View优化布局:
<RelativeLayout xmlns:android="http://schemas.android.com/apk/res/android"
    android:id="@+id/activity_main"
    android:layout_width="match_parent"
    android:layout_height="match_parent"
    android:background="@color/colorPrimary"
    >
    <TextView
        android:id="@+id/first"
        android:layout_width="wrap_content"
        android:layout_height="wrap_content"
        android:text="使用Hierarchy View"/>

    <LinearLayout
        android:layout_width="match_parent"
        android:layout_height="match_parent"
        android:layout_below="@id/first"
        android:layout_marginTop="10dp"
        android:orientation="vertical">
        <TextView
            android:layout_width="wrap_content"
            android:layout_height="wrap_content"
            android:text="Android Logo"/>
        <ImageView
            android:layout_width="wrap_content"
            android:layout_height="wrap_content"
            android:layout_marginTop="5dp"
            android:src="@mipmap/ic_launcher"/>

    </LinearLayout>
</RelativeLayout>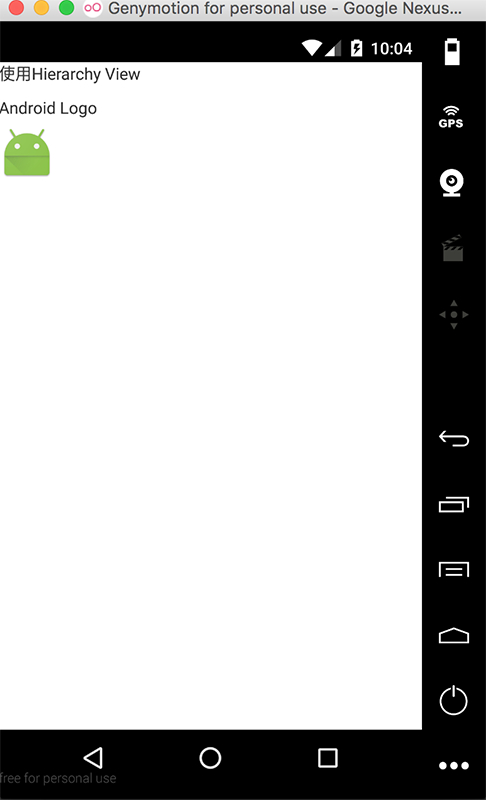
接下来我们来看看Hierarchy View的使用:
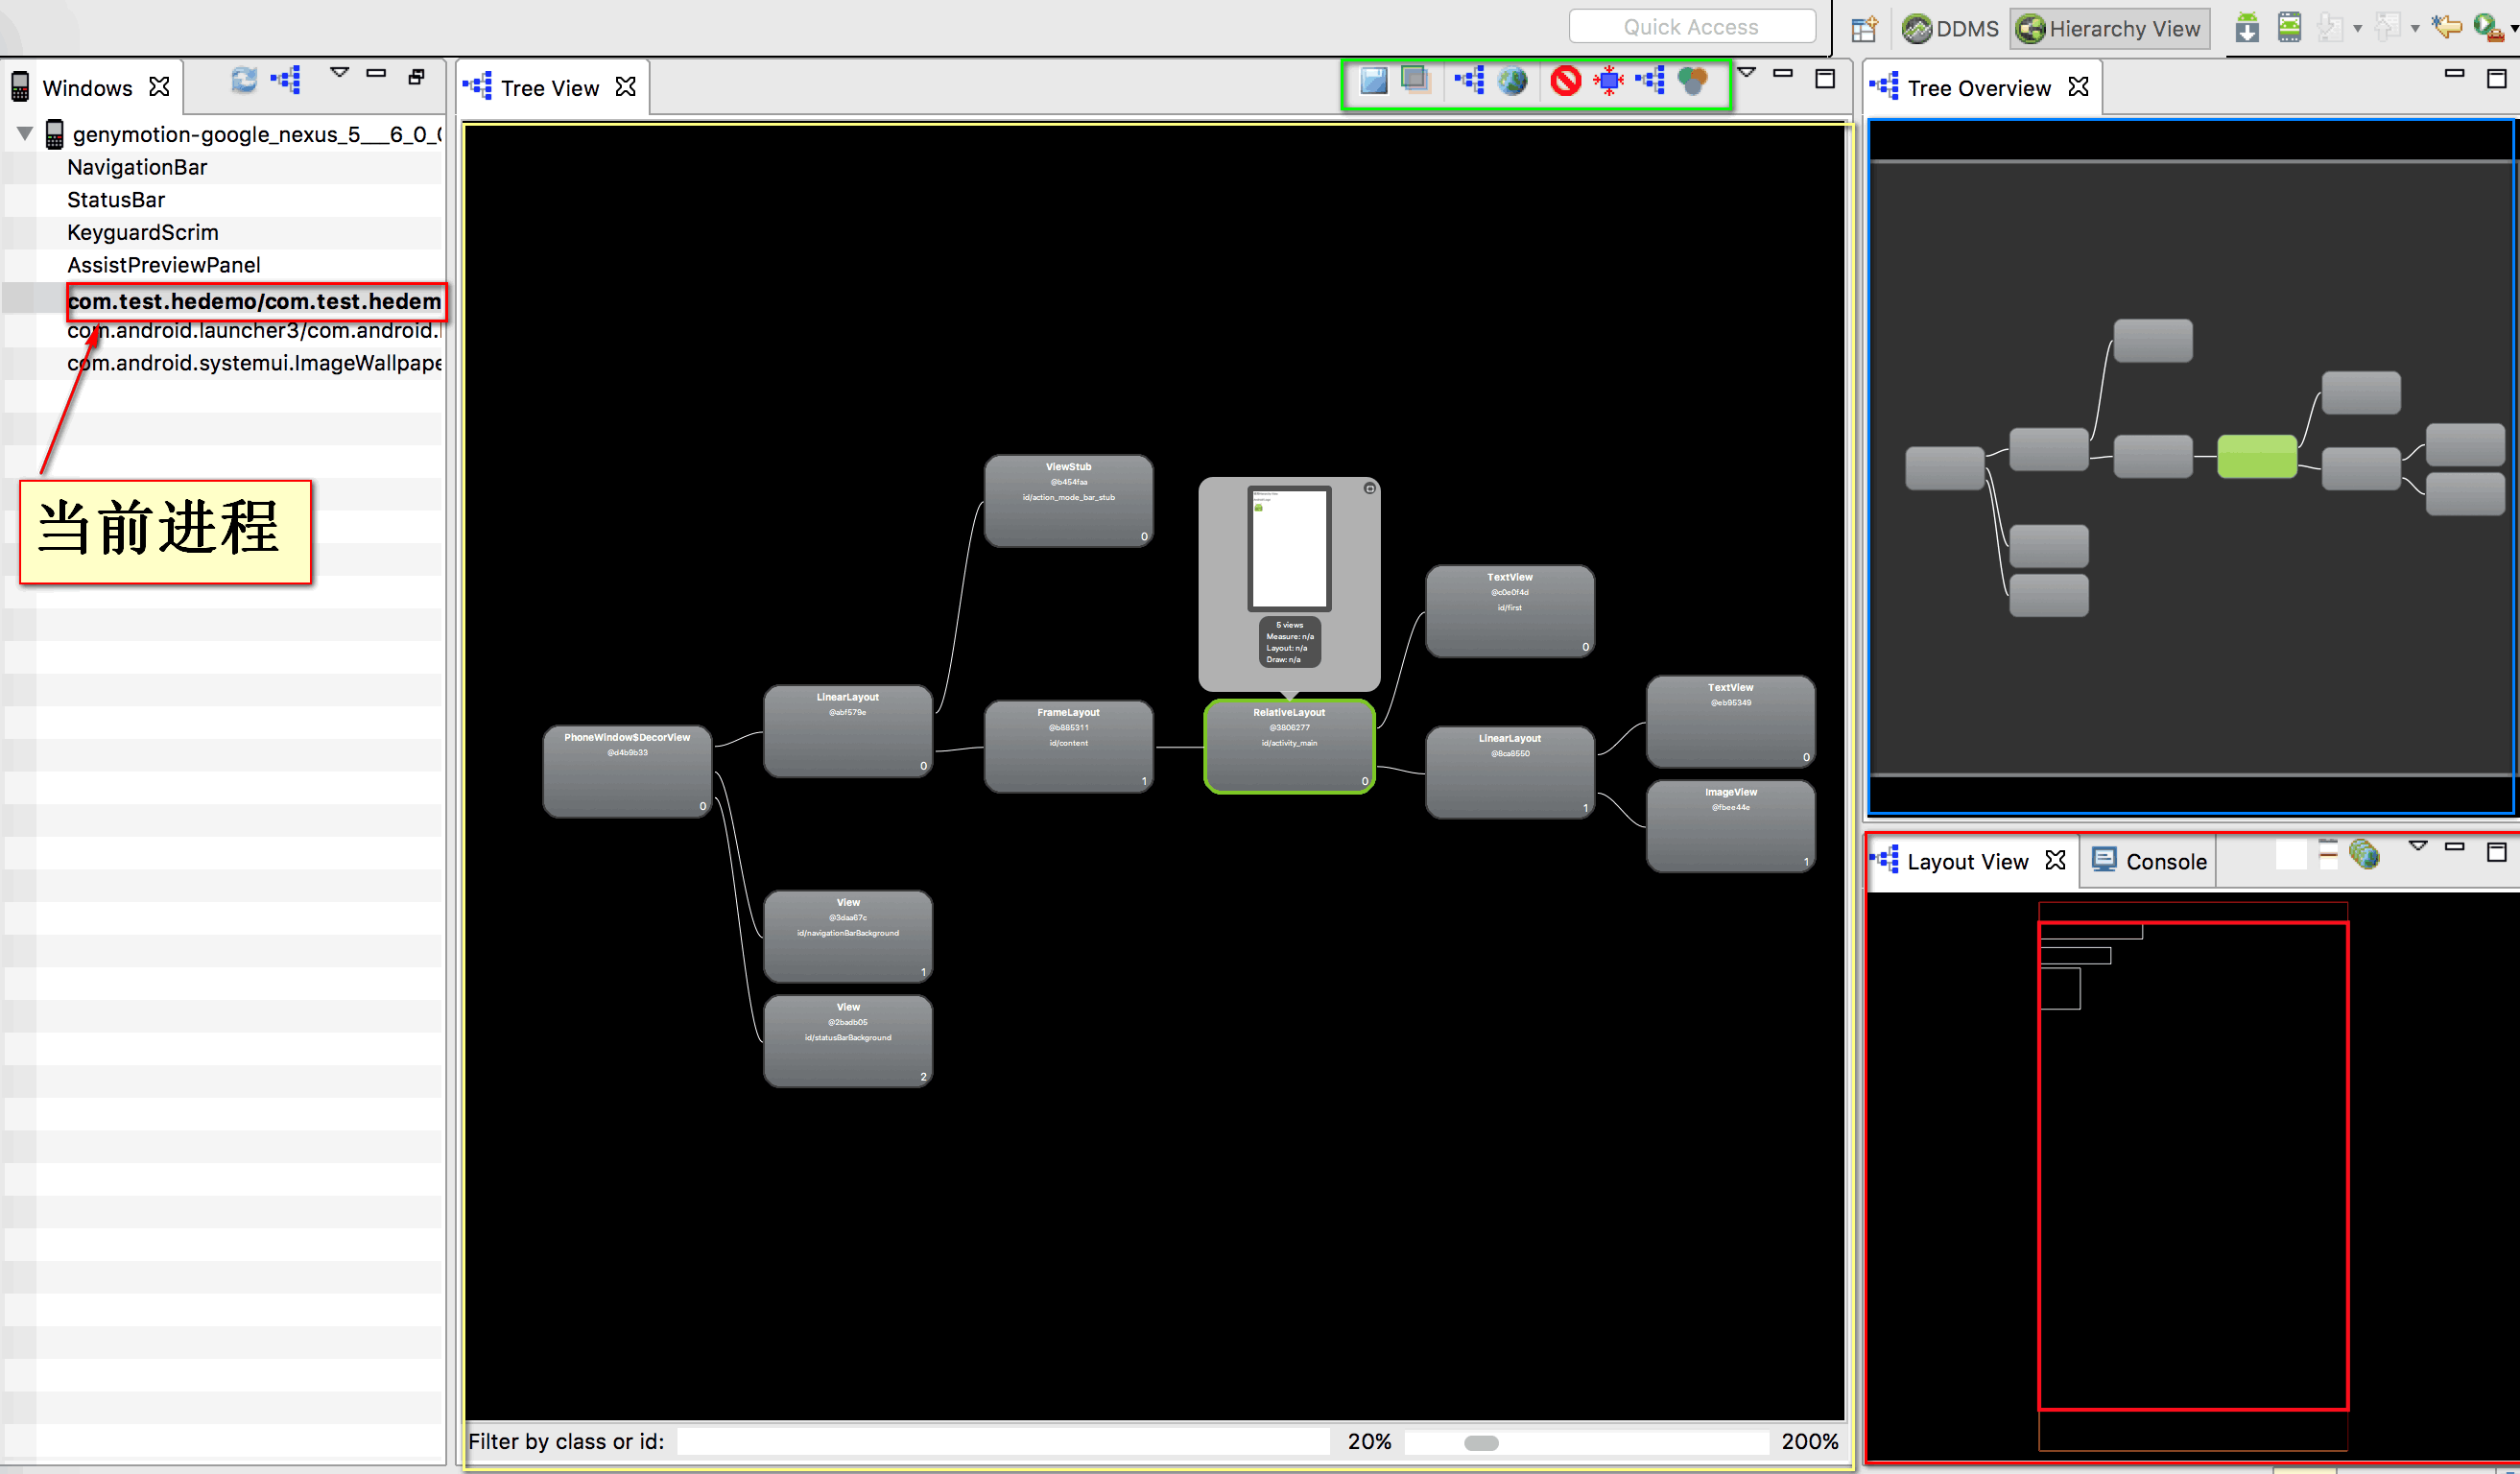
Windows窗口下表示的当前的手机运行进程,加粗的表示当前正在执行的进程。
黄色框内的TreeView视图可以查看每个布局的详细信息。
红色方框的LayoutView视图可以查看布局的大致情况。
蓝色方框的TreeOverview是所有布局控件的缩略图。拖动它,然后在TreeView查看详细的信息。
TreeView中的绿色方框依次是保存成一张图片,以及保存成photoshop形式的文件,
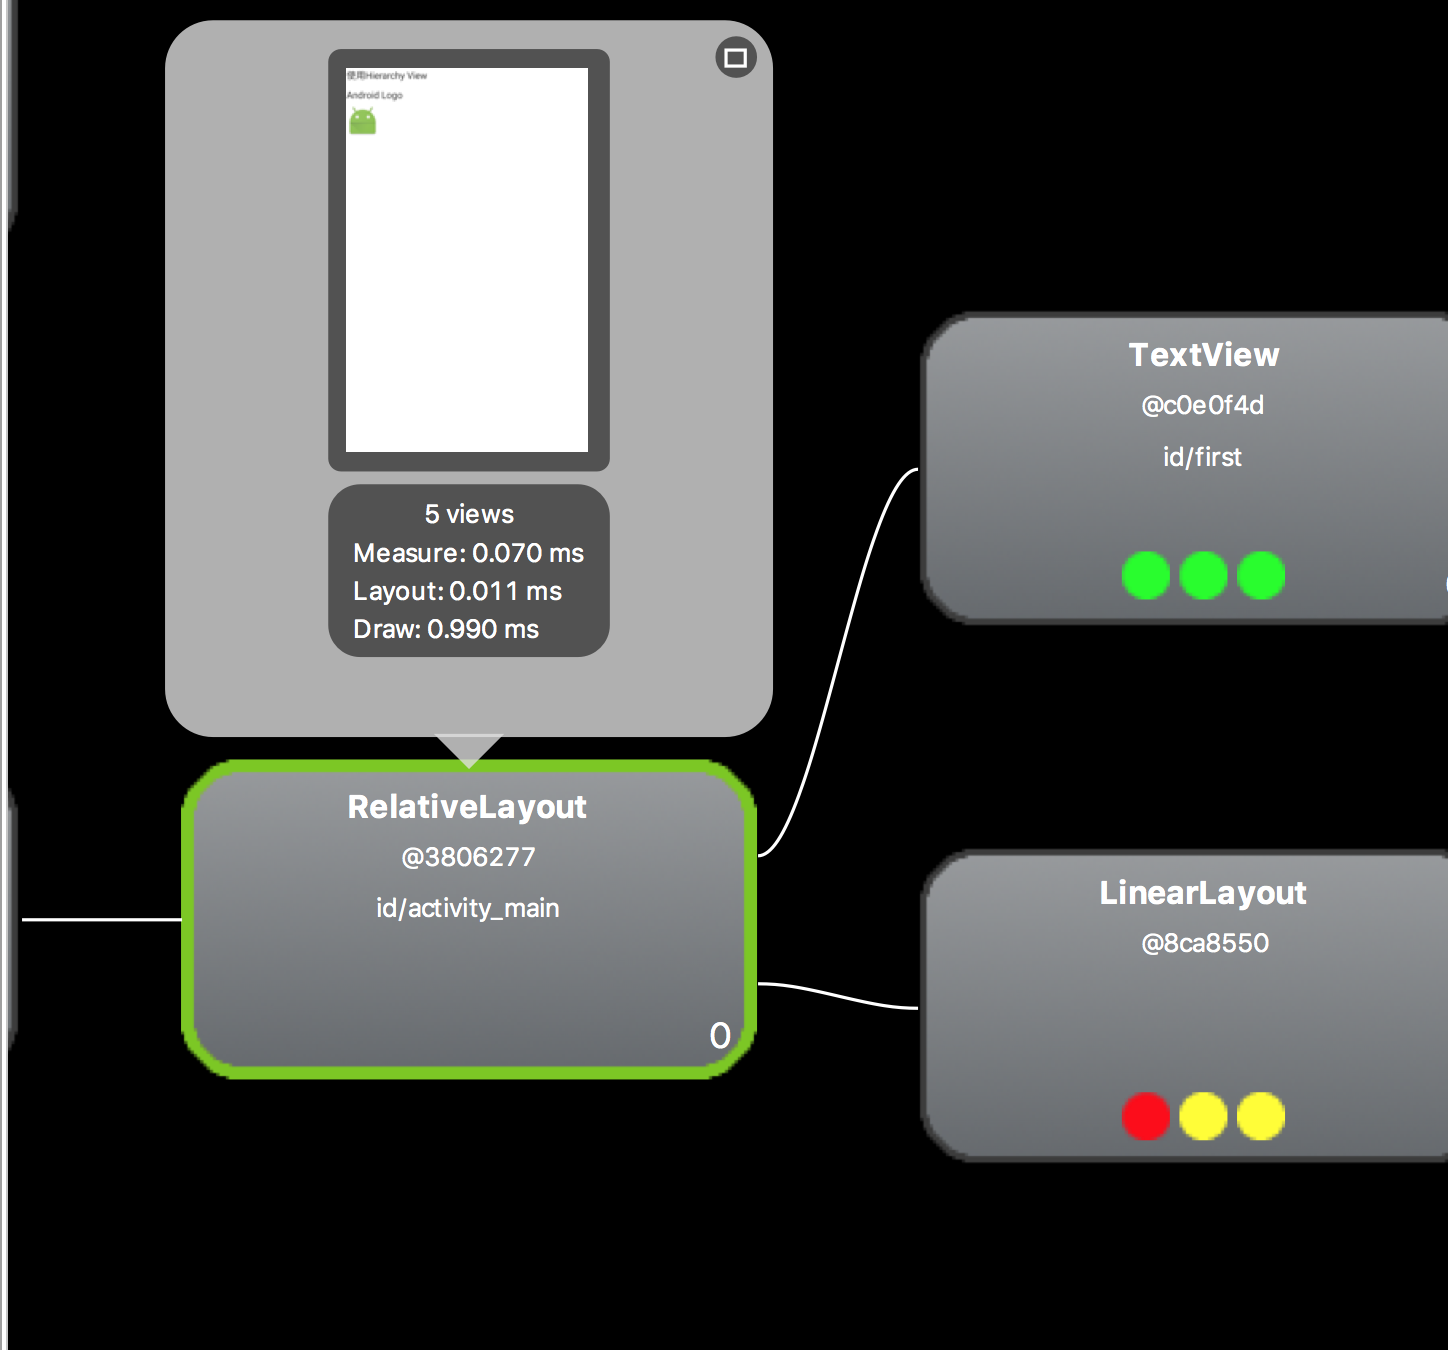
可以看出布局的measure、layout、draw的时间,下面的三个颜色圆圈点依次对应。绿色表示最快的前50%,黄色表示最慢的前50%,红色表示那一层里面最慢的view。显然,红色的部分是我们优先优化的对象。右下角的数据表示该View在同一层View中的序号,0表示至于它自己!可以看出上面的布局加载依次的总耗时:0.07+0.011+0.990=1.071ms ,显然我们的布局里面红色的圆圈是可以优化的,RelativeLayout其实只是起到一个容器的作用,可以用LinearLayout替代。而里面的那个LinearLayoutt同样可以去除掉,这样优化之后结果如下图:

现在的总时间:0.051+0.009+0.956=1.016ms 这样相对于优化前快了0.055ms 。
经过以上的优化方法,就能打造出一个比较高性能的布局了,当然性能优化的方法远不止这些,后续将会对性能优化进一步的探讨。


 被折叠的 条评论
为什么被折叠?
被折叠的 条评论
为什么被折叠?
 到【灌水乐园】发言


