


整合Mybatis(重点)
步骤
1.引入依赖
 <!--引入相关依赖-->
        <!-- spring jdbc -->
        <dependency>
            <groupId>org.springframework</groupId>
            <artifactId>spring-jdbc</artifactId>
            <version>${spring.version}</version>
        </dependency>
        <!-- mybatis-->
        <dependency>
            <groupId>org.mybatis</groupId>
            <artifactId>mybatis</artifactId>
            <version>3.4.5</version>
        </dependency>
        <!-- 与spring整合 -->
        <dependency>
            <groupId>org.mybatis</groupId>
            <artifactId>mybatis-spring</artifactId>
            <version>1.3.1</version>
        </dependency>
        <!-- 数据库驱动 -->
        <dependency>
            <groupId>mysql</groupId>
            <artifactId>mysql-connector-java</artifactId>
            <version>8.0.12</version>
        </dependency>
        <!-- 连接池 -->
        <dependency>
            <groupId>com.alibaba</groupId>
            <artifactId>druid</artifactId>
            <version>1.1.7</version>
        </dependency>
2.创建mybatis 配置文件 文件名字 mybatis-config.xml
如果想改名字就去Spring 配置文件中 如图所示

mybatis 配置文件如下
<?xml version="1.0" encoding="UTF-8" ?>
<!DOCTYPE configuration
        PUBLIC "-//mybatis.org//DTD Config 3.0//EN"
        "http://mybatis.org/dtd/mybatis-3-config.dtd">
<configuration>
//创建别名
    <typeAliases>
        <!--几十个实体类-->
        <!--        <typeAlias type="com.tledu.erp.model.User" alias="User"/>-->
        <package name="com.wxx.SpringDay04.entity"/>
    </typeAliases>
//包路径下所有的文件起别名
//注意:配置mapper接口能找到对应的xml文件(同级目录并且名字相同)
    <mappers>
        <package name="com.wxx.SpringDay04.mapper"/>
    </mappers>
</configuration>
将XML文件放到JAVA下需要在poom.xml文件<build>标签下
<build>
        <resources>
            <resource>
                <!-- directory:指定资源文件的位置 -->
                <directory>src/main/java</directory>
                <includes>
                    <!-- “**” 表示任意级目录    “*”表示任意任意文件 -->
                    <!-- mvn resources:resources :对资源做出处理,先于compile阶段  -->
                    <include>**/*.properties</include>
                    <include>**/*.xml</include>
                </includes>
                <!--  filtering:开启过滤,用指定的参数替换directory下的文件中的参数(eg. ${name}) -->
                <filtering>false</filtering>
            </resource>
            <resource>
                <directory>src/main/resources</directory>
            </resource>
        </resources>
    </build>
3.添加applicationContext.xml 配置文件
如果想修改名字也要修改Test中读取的文件名如图所示

配置代码如下
<?xml version="1.0" encoding="UTF-8"?>
<beans xmlns="http://www.springframework.org/schema/beans"
       xmlns:xsi="http://www.w3.org/2001/XMLSchema-instance"
       xmlns:context="http://www.springframework.org/schema/context"
       xmlns:aop="http://www.springframework.org/schema/aop"
       xsi:schemaLocation="http://www.springframework.org/schema/beans
       http://www.springframework.org/schema/beans/spring-beans.xsd
       http://www.springframework.org/schema/context
       http://www.springframework.org/schema/context/spring-context.xsd
       http://www.springframework.org/schema/aop
        http://www.springframework.org/schema/aop/spring-aop-2.5.xsd">
    <!--配置扫描注解-->
    <context:annotation-config/>
    <!--告诉spring,要扫描com.tledu包下面的注解-->
    <context:component-scan base-package="com.wxx.SpringDay04"/>
    <!--开启切面支持-->
    <aop:aspectj-autoproxy/>

    <!-- 1) 读取properties中的内容-->
    <context:property-placeholder location="classpath:jdbc.properties"/>

    <!-- 2) 数据库连接池 -->
    <bean id="dataSource" class="com.alibaba.druid.pool.DruidDataSource">
        <property name="driverClassName" value="${jdbc.driver}"/>
        <property name="url" value="${jdbc.url}"/>
        <property name="username" value="${jdbc.username}"/>
        <property name="password" value="${jdbc.password}"/>
        <property name="maxActive" value="${jdbc.max}"/>
        <property name="minIdle" value="${jdbc.min}"/>
    </bean>

    <!-- 3) 获取 SqlSessionFactory 工厂类-->
    <bean id="sessionFactory" class="org.mybatis.spring.SqlSessionFactoryBean">
        <property name="dataSource" ref="dataSource"/>
        <property name="configLocation" value="classpath:mybatis-config.xml" />
    </bean>

    <!-- 4) 搜索有哪些 mapper 实现类,把mapper接口自动配置成 spring 中的 <bean>-->
    <bean id="scannerConfigurer" class="org.mybatis.spring.mapper.MapperScannerConfigurer">
        <!-- name="basePackage":(起始)包名, 从这个包开始扫描-->
        <property name="basePackage" value="com.wxx.SpringDay04.mapper"/>
    </bean>

</beans>
SQL高版本连接依赖的解决
1.驱动需要加一个cj
jdbc.driver=com.mysql.cj.jdbc.Driver
2.地址需要加一个时区
jdbc.url=jdbc:mysql://localhost:3306/mybatis_24?serverTimezone=UTC&useSSL=false
自增id的自动注入
在XML文件中编写SQL语句时加上keyProperty="user.id" useGeneratedKeys="true" 就会解决自动注入,但是主键必须是自增的.

  <insert id="userAndAddress" parameterType="User" keyProperty="user.id" useGeneratedKeys="true">
        insert into
            t_user(username,`password`,nickname)
        VALUES
            (#{user.username},#{user.password},#{user.nickname})
    </insert>
Spring的事务回滚(了解)
步骤
1引入依赖在poom.xml中引入
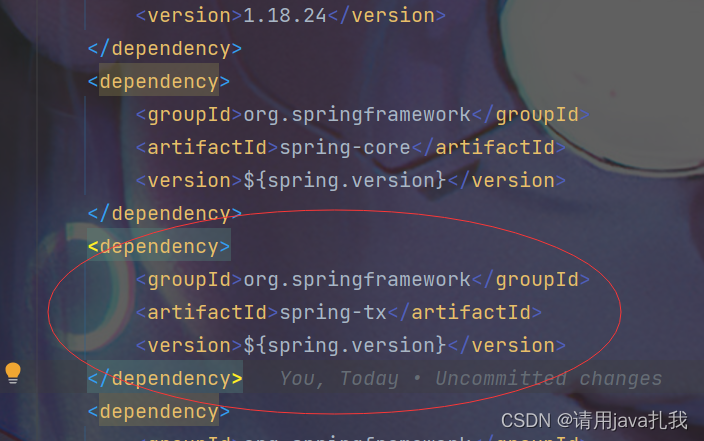
     <dependency>
            <groupId>org.springframework</groupId>
            <artifactId>spring-tx</artifactId>
            <version>${spring.version}</version>
        </dependency>
2.在bean的配置
<!-- 使使用注解配置的事务行为生效 -->
<tx:annotation-driven transaction-manager="txManager"/><!-- 仍然需要一个PlatformTransactionManager -->
<bean id="txManager" class="org.springframework.jdbc.datasource.DataSourceTransactionManager">
    <!-- (这个需要的对象是在其他地方定义的) -->
    <property name="dataSource" ref="dataSource"/>
</bean>
3.使用注释
@Transactional(rollbackFor = Exception.class) 错误一定要抛最大的
该方法遇到任意异常时,回滚到事务刚开始的时候,也就是方法调用之前
4.Spring整合jdbcTemplate(不常用,会让数据库和Java代码产生耦合)
1.引入依赖
<dependency>
    <groupId>org.springframework</groupId>
    <artifactId>spring-jdbc</artifactId>
    <version>${spring.version}</version>
</dependency>
2.添加Spring的配置文件
<!-- 配置一个数据库的操作模板:JdbcTemplate -->
<bean id="jdbcTemplate" class="org.springframework.jdbc.core.JdbcTemplate">
    <property name="dataSource" ref="dataSource" />
</bean>
3.开始手撕代码(复制宇哥的)
@Test
    public void jdbcT(){
        ClassPathXmlApplicationContext applicationContext = new ClassPathXmlApplicationContext("applicationContext.xml");
        JdbcTemplate jdbcTemplate = applicationContext.getBean(JdbcTemplate.class);


//        jdbcTemplate执行更新操作
//        jdbcTemplate.execute("update t_user set username='腾达兄' where id=16");

//        RowMapper相当于Mybatis中的ResultMap
        UserRowMapper userRowMapper=new UserRowMapper();
//        query用来查询
        List<User> userList = jdbcTemplate.query("select * from t_user where id=?", userRowMapper,16);
        for (User eve:userList) {
            System.out.println(eve.getUsername());
        }
//        update用来增删改
        jdbcTemplate.update("update t_user set username='腾达兄' where id=16");
自定义类型转换器
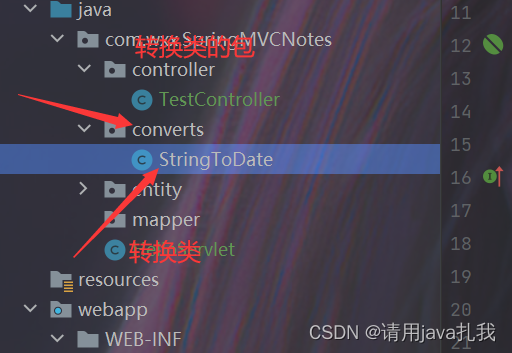
想要实现自动类型转换就必须是先Converter接口 后边的泛型<泛型1,泛型2>
泛型1转换泛型2 
代码如下
 @Override
    public Date convert(String s) {
        Date parse;
        if (s == null) {
         throw new RuntimeException("参数不能为空");
        }

        try {
            DateFormat df = new SimpleDateFormat("yyyy-MM-dd-HH:mm");
            parse = df.parse(s);
        } catch (ParseException e) {
            throw new RuntimeException("参数转换错误");
        }

      return parse;
    }
JSON 格式传参会自动转化,但是时间会+8小时所
解决方法
1.在实体类需要转换的类型上加一下代码
@JsonFormat(pattern="YYYY-MM-DD-HH:mm",timezone = "GMT+8")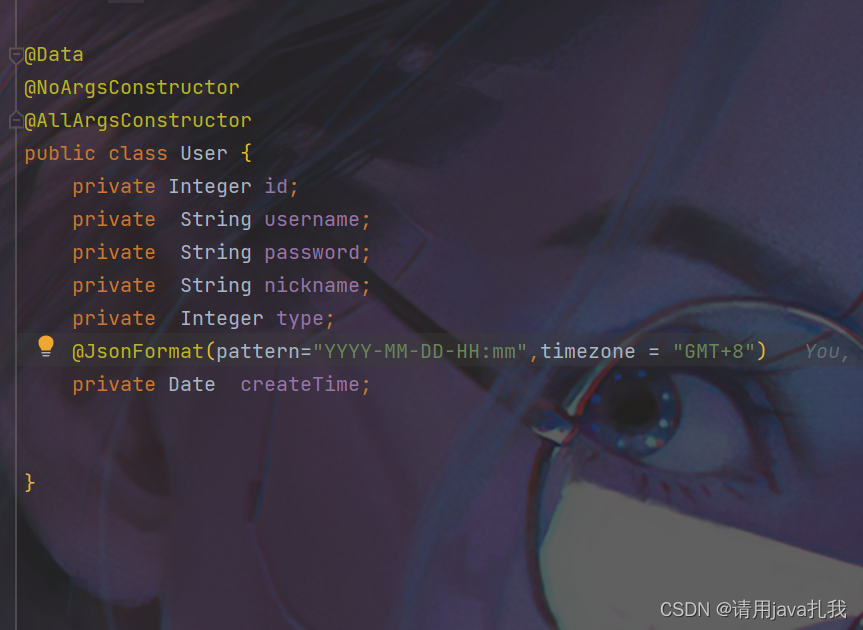
为了方便向视图层传值,提供了 Model 专门向视图层传递数据
@SessionAttributes(value = {"username","nickname","age"},types = {String.class,Integer.class})
该注解,规定的value是key,当model存放这些key时,session中也会存放对应的值,同步  请求域和seesion域的值
value 是通过key的值来同步,types是通过类型来同步  请求域和seesion域的值
重定向
1.重定向 路径/接口/请求,不能再重定向到页面
2.如果是对本控制层(本类)的方法发起请求,就不需要在redirect:后面加/ 相对路径 相对本层
3.对其他控制层的方法发起请求,需要在redirect:后面加/ 绝对路径


 158
158


 被折叠的 条评论
为什么被折叠?
被折叠的 条评论
为什么被折叠?
 到【灌水乐园】发言


