


-
kill掉进程还是占用显存:
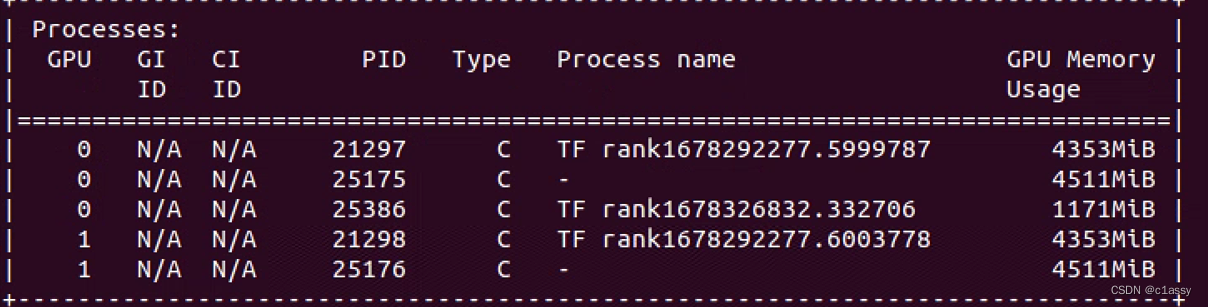
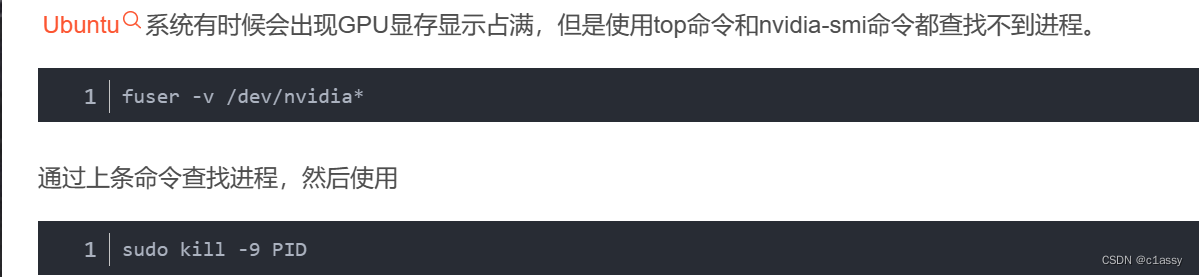
kill掉所有占显存的进程:sudo fuser -v /dev/nvidia* |awk ‘{for(i=1;i<=NF;i++)print "kill -9 " $i;}’ | sudo sh
-
将下载的tar包,先cat拼接 再解压缩数据
按照ReadMe 采用命令 cat glint360k* | tar -xzvf - 来解压缩,报如下错误
gzip: stdin: not in gzip format
tar: Child died with signal 13
tar: Error is not recoverable: exiting now
解决方法:注意一定要加最后的 “-”, 去掉xzvf中的z, 即采用命令cat glint360k* | tar -xvf -来解压 -
zip分卷解压

-
Tensorboard报错解决:tensorboard: command not found
首先保证当前环境下安装了 Tensorflow

-
向日葵传文件后,权限
chmod -R 777 WhoJoy/ -
运行pysot_toolkit出现找不到region
python setup.py build_ext --inplace running build_ext
将numpy.ndarray转为图片
from PIL import Image
#my_array=my_array.transpose(1,2,0) 维度是(H,W,C)或(H,W)
#squeeze(1).cpu().numpy(): # 删除第二维度,只有第二维度是1才可去掉该维
t=Image.fromarray(np.uint8(my_array))
t.save("t.jpg")
Visdom可视化
先使用命令python -m visdom.server开启服务
viz = visdom.Visdom()#env="image test"

img = cv2.imread("flower.jpg")
img = cv2.cvtColor(img, cv2.COLOR_BGR2RGB)
img = np.transpose(img, (2, 0, 1))
# img = img.astype(np.float32) / 255
print(img.shape, img.dtype)
# image demo
viz.image(
    img,
    opts={'title': 'Random!', 'caption': 'Click me!'},
)
viz.image(tensor)#tensor是[C,H,W]的张量
解决OSError: [Errno 98] Address already in use)
lsof -i tcp:8097 查看占用该端口的PID
kill -9 22215 杀死该PID
lsof -i tcp:8097 检查一下是否仍被占用
import matplotlib
import matplotlib.pyplot as plt
plt.imshow(X=data)
# plt.savefig('e_imshow.png')
plt.show()
CAM可视化
Grad CAM
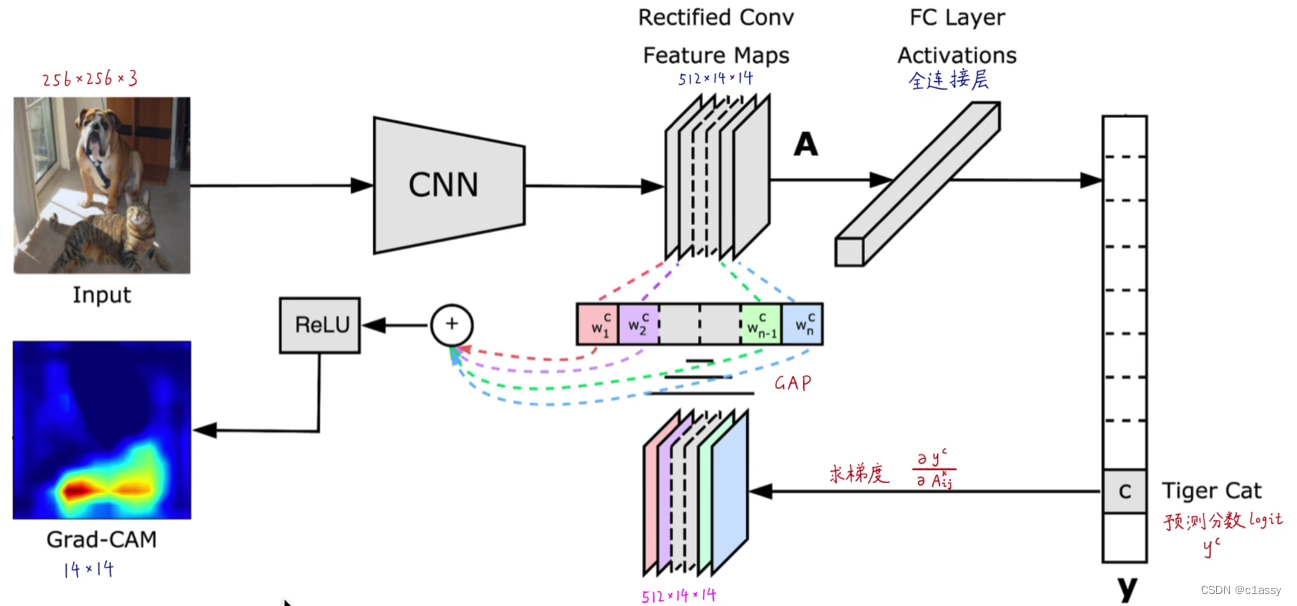
14x14的Grad-CAM经过双线性插值,和256x256的Guided Backprop逐元素相乘,得到256x256的Guided Grad-CAM
The target layer to compute CAM for. Some common choices are:
- FasterRCNN: model.backbone
- Resnet18 and 50: model.layer4[-1]
- VGG and densenet161: model.features[-1]
- mnasnet1_0: model.layers[-1]
- ViT: model.blocks[-1].norm1
- SwinT: model.layers[-1].blocks[-1].norm1
import torch
import torch.nn as nn
from torchvision import models
import cv2
from pytorch_grad_cam import GradCAM

# Define your model
model = models.resnet18(pretrained=True)
model.eval()

# Load the image and preprocess it
img = cv2.imread('path/to/your/image.jpg')
img = cv2.cvtColor(img, cv2.COLOR_BGR2RGB)
img = cv2.resize(img, (224, 224))
tensor_img = torch.tensor(img).unsqueeze(0).permute(0, 3, 1, 2).float()
normalize = transforms.Normalize(mean=[0.485, 0.456, 0.406], std=[0.229, 0.224, 0.225])
tensor_img = normalize(tensor_img)

# Load the model weights
model.load_state_dict(torch.load('path/to/your/model/weights.pth'))

# Define the target layer
target_layer = model.layer4[-1]

# Create a GradCAM object
grad_cam = GradCAM(model=model, target_layer=target_layer, use_cuda=True)

# Compute the Grad-CAM heatmap
heatmap = grad_cam.generate(input_tensor=tensor_img)

# Visualize the heatmap
vis = grad_cam.visualize_cam(heatmap=heatmap, target_tensor=tensor_img)
cv2.imshow('Grad-CAM', vis)
cv2.waitKey(0)
cv2.destroyAllWindows()
Apply CAM methods for Object Detection:
from pytorch_grad_cam import AblationCAM, EigenCAM
from pytorch_grad_cam.ablation_layer import AblationLayerFasterRCNN
from pytorch_grad_cam.utils.model_targets import FasterRCNNBoxScoreTarget
from pytorch_grad_cam.utils.reshape_transforms import fasterrcnn_reshape_transform
from pytorch_grad_cam.utils.image import show_cam_on_image, scale_accross_batch_and_channels, scale_cam_image

targets = [FasterRCNNBoxScoreTarget(labels=labels, bounding_boxes=boxes)]
target_layers = [model.backbone]#取平均了
cam = AblationCAM(model,
                  target_layers,
                  use_cuda=torch.nn.cuda.is_available(),
                  reshape_transform=fasterrcnn_reshape_transform,
                  ablation_layer=AblationLayerFasterRCNN(),
                  ratio_channels_to_ablate=1.0)

# or a very fast alternative:

cam = EigenCAM(model,
              target_layers,
              use_cuda=torch.nn.cuda.is_available(),
              reshape_transform=fasterrcnn_reshape_transform)
- Typically the outputs from object detection package are not differentiable, so need
Gradient Free Methods(EigenCAM, AblationCAM) - What faster-rcnn layer should we target?
The first part of faster-rcnn, is the Feature Pyramid Network (FPN) backbone: model.backbone. This part is what computes the meaningful activations, and we are going to work with these. - The output from model.backbone is in a very custom format
takes these tensors with different sizes, resizes them to a common shape, and concatenates them:def fasterrcnn_reshape_transform(x): target_size = x['pool'].size()[-2 : ] activations = [] for key, value in x.items(): activations.append(torch.nn.functional.interpolate(torch.abs(value), target_size, mode='bilinear')) activations = torch.cat(activations, axis=1) return activations
CAM可视化for 分类:
from pytorch_grad_cam.utils.model_targets import ClassifierOutputTarget
from torchvision.models import resnet50
import numpy as np
import cv2
from PIL import Image
import matplotlib.pyplot as plt
%matplotlib inline
import torch
device = torch.device('cuda:0' if torch.cuda.is_available() else 'cpu')
model = resnet50(pretrained=True).eval().to(device)
from torchvision import transforms
# 测试集图像预处理-RCTN:缩放、裁剪、转 Tensor、归一化
test_transform = transforms.Compose([transforms.Resize(512),
# transforms.CenterCrop(512),
transforms.ToTensor(),
transforms.Normalize(
mean=[0.485, 0.456, 0.406],
std=[0.229, 0.224, 0.225])
])
img_path = '/content/drive/MyDrive/0007.jpg'
img_pil = Image.open(img_path)
input_tensor = test_transform(img_pil).unsqueeze(0).to(device) # 预处理
# 如果 targets 为 None,则默认为最高置信度类别
targets = [ClassifierOutputTarget(232)]
# Grad-CAM
from pytorch_grad_cam import GradCAM
target_layers = [model.layer4[-1]]
cam = GradCAM(model=model, target_layers=target_layers, use_cuda=True)
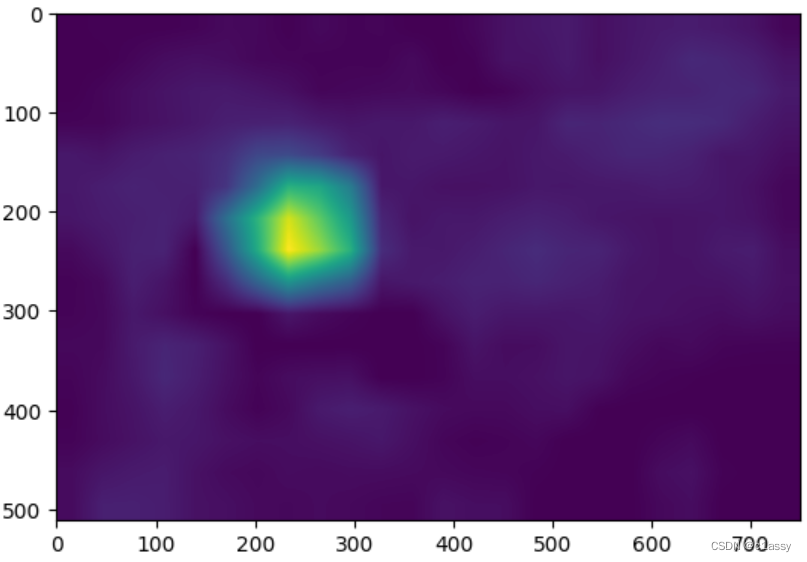
cam_map = cam(input_tensor=input_tensor, targets=targets)[0] #(512, 750)
plt.imshow(cam_map)
plt.show()
import torchcam
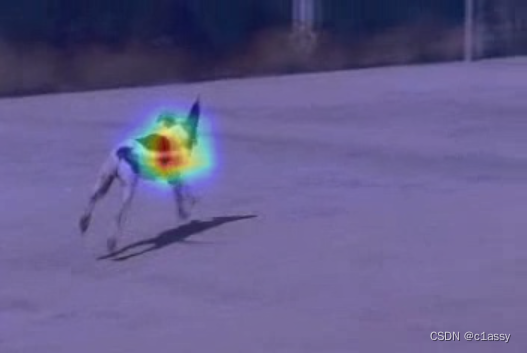
from torchcam.utils import overlay_mask
result = overlay_mask(img_pil, Image.fromarray(cam_map), alpha=0.6) # alpha越小,原图越淡
result.save('B1.jpg')
result
CAM可视化for object detection:
from pytorch_grad_cam import AblationCAM, EigenCAM
from pytorch_grad_cam.ablation_layer import AblationLayerFasterRCNN
from pytorch_grad_cam.utils.model_targets import FasterRCNNBoxScoreTarget
from pytorch_grad_cam.utils.reshape_transforms import fasterrcnn_reshape_transform
from pytorch_grad_cam.utils.image import show_cam_on_image, scale_accross_batch_and_channels, scale_cam_image
import torchvision
from PIL import Image
image = Image.open('/content/drive/MyDrive/0010.jpg')
image = np.array(image.resize((224,224)))
image_float_np = np.float32(image) / 255
# define the torchvision image transforms
transform = torchvision.transforms.Compose([
torchvision.transforms.ToTensor(),
])
input_tensor = transform(image)
device = torch.device('cuda' if torch.cuda.is_available() else 'cpu')
input_tensor = input_tensor.to(device)
# Add a batch dimension:
input_tensor = input_tensor.unsqueeze(0)
model = torchvision.models.detection.fasterrcnn_resnet50_fpn(pretrained=True)
model.eval().to(device)
def predict(input_tensor, model, device, detection_threshold):
outputs = model(input_tensor)
pred_classes = [coco_names[i] for i in outputs[0]['labels'].cpu().numpy()]
pred_labels = outputs[0]['labels'].cpu().numpy()
pred_scores = outputs[0]['scores'].detach().cpu().numpy()
pred_bboxes = outputs[0]['boxes'].detach().cpu().numpy()
boxes, classes, labels, indices = [], [], [], []
for index in range(len(pred_scores)):
if pred_scores[index] >= detection_threshold:
boxes.append(pred_bboxes[index].astype(np.int32))
classes.append(pred_classes[index])
labels.append(pred_labels[index])
indices.append(index)
boxes = np.int32(boxes)
return boxes, classes, labels, indices
def draw_boxes(boxes, labels, classes, image):
for i, box in enumerate(boxes):
color = COLORS[labels[i]]
cv2.rectangle(
image,
(int(box[0]), int(box[1])),
(int(box[2]), int(box[3])),
color, 2
)
cv2.putText(image, classes[i], (int(box[0]), int(box[1] - 5)),
cv2.FONT_HERSHEY_SIMPLEX, 0.8, color, 2,
lineType=cv2.LINE_AA)
return image
coco_names = ['__background__', 'person', 'bicycle', 'car', 'motorcycle', 'airplane', \
'bus', 'train', 'truck', 'boat', 'traffic light', 'fire hydrant', 'N/A',
'stop sign', 'parking meter', 'bench', 'bird', 'cat', 'dog', 'horse', 'sheep',
'cow', 'elephant', 'bear', 'zebra', 'giraffe', 'N/A', 'backpack', 'umbrella',
'N/A', 'N/A', 'handbag', 'tie', 'suitcase', 'frisbee', 'skis', 'snowboard',
'sports ball', 'kite', 'baseball bat', 'baseball glove', 'skateboard',
'surfboard', 'tennis racket', 'bottle', 'N/A', 'wine glass', 'cup', 'fork',
'knife', 'spoon', 'bowl', 'banana', 'apple', 'sandwich', 'orange',
'broccoli', 'carrot', 'hot dog', 'pizza', 'donut', 'cake', 'chair', 'couch',
'potted plant', 'bed', 'N/A', 'dining table', 'N/A', 'N/A', 'toilet',
'N/A', 'tv', 'laptop', 'mouse', 'remote', 'keyboard', 'cell phone', 'microwave',
'oven', 'toaster', 'sink', 'refrigerator', 'N/A', 'book', 'clock', 'vase',
'scissors', 'teddy bear', 'hair drier', 'toothbrush']
# This will help us create a different color for each class
COLORS = np.random.uniform(0, 255, size=(len(coco_names), 3))
# Run the model and display the detections
boxes, classes, labels, indices = predict(input_tensor, model, device, 0.9)
image = draw_boxes(boxes, labels, classes, image)
# Show the image:
Image.fromarray(image)
target_layers = [model.backbone]
targets = [FasterRCNNBoxScoreTarget(labels=labels, bounding_boxes=boxes)]
cam = EigenCAM(model,
target_layers,
use_cuda=torch.cuda.is_available(),
reshape_transform=fasterrcnn_reshape_transform)
grayscale_cam = cam(input_tensor, targets=targets)
# Take the first image in the batch:
grayscale_cam = grayscale_cam[0, :]
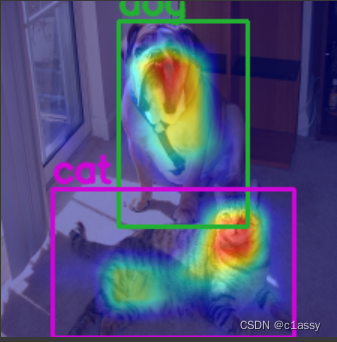
cam_image = show_cam_on_image(image_float_np, grayscale_cam, use_rgb=True)
# And lets draw the boxes again:
image_with_bounding_boxes = draw_boxes(boxes, labels, classes, cam_image)
Image.fromarray(image_with_bounding_boxes)


 301
301


 被折叠的 条评论
为什么被折叠?
被折叠的 条评论
为什么被折叠?
 到【灌水乐园】发言


