


 本文详细介绍了如何将Linux驱动封装成Android驱动,并通过JNI技术将其与Android框架层进行集成,实现Android服务的开发。重点包括Linux驱动的代理编写、结构体封装、JNI接口函数的实现以及框架层的调用流程。
转载注明出处,作者:K_Linux_Man, 薛凯 山东中医药大学,给文章内容引入个人毕业设计。
开发平台:farsight s5pc100-a
内核:linux2.6.29
环境搭配:有博文介绍
开发环境:Ubuntu 、Eclipse
首先强调一下要点:
1.编写android驱动时,首先先要完成linux驱动,因为android驱动其实是在linux驱动基础之上完成了HAL层(硬件抽象层),如果想要测试的话,自己也要编写java程序来测试你的驱动。
2.android的根文件系统是eclair_2.1版本。我会上传做好的根文件系统提供大家。这里要说的是,android底层内核还是linux的内核,只是进行了一些裁剪。做好的linux内核镜像,这个我也会上传给大家。android自己做了一套根文件系统,这才是android自己做的东西。android事实上只是做了一套根文件系统罢了。
假设linux驱动大家都已经做好了。我板子上有四个灯,通过ioctl控制四个灯,给定不同的参数,点亮不同的灯。
linux驱动代码因平台不同而有所不同,这就不黏代码了。
这是我测试linux驱动编写的驱动,代码如下:
#include <stdio.h>
#include <stdlib.h>
#include <unistd.h>
#include <fcntl.h>
#include <string.h>
#include <sys/types.h>
#include <sys/stat.h>
#include <sys/ioctl.h>
#define LED_ON _IO ('k',1)
#define LED_OFF _IO ('k',2)
int main()
{
	int i = 0;
	int dev_fd;
	dev_fd = open("/dev/led",O_RDWR);
	if ( dev_fd == -1 ) {
		printf("Cann't open file /dev/led\n");
		exit(1);
	}
	while(1)
	{
	 ioctl(dev_fd,LED_ON,1);
	 sleep(1);
	 ioctl(dev_fd,LED_OFF,1);
	 sleep(1);
	 ioctl(dev_fd,LED_ON,2);
	 sleep(1);
	 ioctl(dev_fd,LED_OFF,2);
	 sleep(1);
	 ioctl(dev_fd,LED_ON,3);
	 sleep(1);
	 ioctl(dev_fd,LED_OFF,3);
	 sleep(1);
	 ioctl(dev_fd,LED_ON,4);
	 sleep(1);
	 ioctl(dev_fd,LED_OFF,4);
	 sleep(1);

	}
	return 0;
}
下面开始把linux驱动封装成android驱动。
首先介绍一下android驱动用到的三个重要的结构体,
struct hw_module_t;
struct hw_device_t;
struct hw_module_methods_t;
android源码里面结构体的声明
typedef struct hw_module_t {

uint 32_t   tag;

uint16_t    version_major;

uint16_t    version_minor;

const char *id;

const char *name;

const char *author;

const hw_module_methods_t  *methods;

void* dso;

uint32_t reserved[32-7];

} hw_module_t;
typedef struct hw_device_t {

uint32_t tag;

uint32_t version;

struct hw_module_t* module;

uint32_t reserved[12];

int (*close) (struct hw_device_t  *device);

}hw_device_t;
typedef struct hw_module_methods_t {

 int (*open) (const struct hw_module_t *module, const char *id,

                      struct hw_device_t **device);

} hw_module_methods_t;
我们经常会用到这三个结构体。
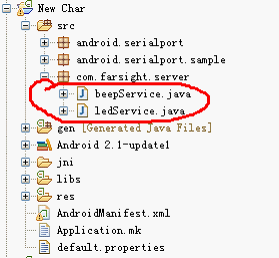
android驱动目录结构:
led
|--- hal
| |----jni
| |----- Android.mk
| |----com_farsgiht_server_ledServer.cpp
| |----stub
| |---- include
| | |-----led.h
| |-----module
| |-----Android.mk
| |-----led.c
|--- linux_drv
首先我们要编写一个stub(代理),代理的意思是,针对你所特有的设备,你找一个代理人就可以帮你完成,它是操作linux驱动的第一层。
编写头文件,名字led.h
代码如下;
#include <hardware/hardware.h>
#include <fcntl.h>
#include <errno.h>
#include <cutils/log.h>
#include <cutils/atomic.h>


#define LED_HARDWARE_MODULE_ID "led"


struct led_module_t {
	struct hw_module_t common;
};

struct led_control_device_t {
	struct hw_device_t common;

	int (*set_on) (struct led_control_device_t *dev, int arg);
	int (*set_off)(struct led_control_device_t *dev, int arg);
};


struct led_control_context_t {
	struct led_control_device_t device;
};
struct hw_module_t sturct hw_device_t 这两个结构体不能直接使用,所以进行了一下封装(继承)。
led_module_t 继承 hw_module_t
led_control_device_t 继承 hw_device_t
led_control_context_t 继承 led_control_device_t
在led_control_device_t 结构体有函数指针的声明,因为后面代码中会给这些函数指针赋值
编写led.c
代码如下:
#define LOG_TAG "LedStub"
#include <hardware/hardware.h>
#include <fcntl.h>
#include <errno.h>
#include <cutils/log.h>
#include <cutils/atomic.h>
#include <sys/ioctl.h>
#include "../include/led.h"


#define LED_ON 	_IO ('k',1)
#define LED_OFF 	_IO ('k',2)

int fd;

static int led_set_on(struct led_control_device_t *dev, int arg)
{
	LOGI("led_set_on");
	ioctl(fd, LED_ON, arg);
	return 0;
}

static int led_set_off(struct led_control_device_t *dev, int arg)
{
	LOGI("led_set_off");
	ioctl(fd, LED_OFF, arg);
	return 0;
}

static int led_device_close(struct hw_device_t *device)
{
	struct led_control_context_t *context = (struct led_control_context_t *)device;
	if(context) free(context);
	close(fd);
	return 0;
}


static int led_device_open(const struct hw_module_t *module, const char *name,
	struct hw_device_t **device)
{
	struct led_control_context_t *context;
	LOGD("led_device_open");
	context = (struct led_control_context_t *)malloc(sizeof(*context));
	memset(context, 0, sizeof(*context));

	context->device.common.tag = HARDWARE_DEVICE_TAG;
	context->device.common.version = 0;
	context->device.common.module= module;
	context->device.common.close = led_device_close;

	context->device.set_on = led_set_on;
	context->device.set_off = led_set_off;

	*device = (struct hw_device_t *)&(context->device);

	if((fd = open("/dev/led",O_RDWR)) == -1)
	{
		LOGI("ERROR: open");
	}else {
		LOGI("open led device ok\n");
	}

	return 0;
}

static struct hw_module_methods_t led_module_methods = {
open:led_device_open
};


const struct led_module_t HAL_MODULE_INFO_SYM = {
common:{
tag: HARDWARE_MODULE_TAG,
	  version_major:1,
	  version_minor:0,
	  id:LED_HARDWARE_MODULE_ID,
	  name:"led_stub",
	  author:"K_Linux_Man",
	  methods: &led_module_methods,
		 },
};
首先先看 struct led_module_t HAL_MODULE_INFO_SYM。这个结构体的名字必须是这个名字,否则系统无法找到led_module_t这个结构体。
然后对led_module_t 里的成员hw_module_t结构体赋值。最关键的为id和methods两个成员的赋值,id必须要赋值,因为后面有个函数要找到hw_module_t就是通过id号去找的。 methods被赋值之后,上层的jni才能去调用。
接着看methods 结构体里的成员就一个,open函数指针,对这个函数指针进行了赋值,赋了led_device_open函数,这个函数实现的主要就是分配led_control_context_t结构体空间,并对成员进行赋值。注意hw_device_t 里的成员module、close必须赋值。
函数指针赋值:
context->device.set_on = led_set_on;
context->device.set_off = led_set_off;
下面这句话的用意是,传进来的device指针赋予新的值,只要调用这个函数,传进来的二级指针所指向的一级指针就有值了(二级指针改变了一级指针的指向,你可以看我写的 int*p 和 int **p 博文)。
*device = (struct hw_device_t *)&(context->device);
接着就是打开设备文件,得到fd
led_set_on();里面调用ioctl;
led_set_off();里面调用ioctl;
接下来写jni了。。com_farsight_server_ledServer.cpp文件
文件代码:
#define LOG_TAG "ledService"

#include "utils/Log.h"
#include <stdlib.h>
#include <string.h>
#include <unistd.h>
#include <assert.h>
#include <jni.h>
#include "../stub/include/led.h"


static led_control_device_t *sLedDevice = NULL;


static jint led_set_on(JNIEnv *env, jobject thiz, jint arg)
{
	if(sLedDevice) {
		LOGI("led_set_on");
		sLedDevice->set_on(sLedDevice, (int)arg);
	}else {
		LOGI("sLedDevice is NULL");
	};
	return 0;
}

static jint led_set_off(JNIEnv *env, jobject thiz, jint arg)
{
	if(sLedDevice) {
		LOGI("led_set_off");
		sLedDevice->set_off(sLedDevice, (int)arg);
	}else {
		LOGI("sLedDevice is null");
	}
	return 0;
}


static inline int led_control_open(const struct hw_module_t *module,
	struct led_control_device_t **device)
{
	LOGI("led_control_open");
	return module->methods->open(module, LED_HARDWARE_MODULE_ID,
		(struct hw_device_t **)device);
}


static jint led_init(JNIEnv *env, jclass clazz)
{
	led_module_t const *module;
	LOGI("led_init");

	if(hw_get_module(LED_HARDWARE_MODULE_ID, (const hw_module_t **)&module) == 0) {
		LOGI("get Module OK");
		if (led_control_open(&module->common, &sLedDevice) != 0) {
			LOGI("led_init error");
			return -1;
		}
	}
		LOGI("led_init success");
		return 0;

}


static const JNINativeMethod gMethods[] = {
	{"_init",			"()Z",			(void *)led_init},
	{"_set_on",			"(I)I",			(void *)led_set_on},
	{"_set_off",		"(I)I",			(void *)led_set_off},
};

static int registerMethods(JNIEnv *env) {
	static const char * const kClassName =
		"com/farsight/server/ledService";
	jclass clazz;
	clazz = env->FindClass(kClassName);
	if(clazz == NULL) {
		LOGE("Can't find class %s\n", kClassName);
		return -1;
	}

	if(env->RegisterNatives(clazz, gMethods,
			sizeof(gMethods)/sizeof(gMethods[0])) !=  JNI_OK)
	{
		LOGE("failed registering methods for %s\n", kClassName);
		return -1;
	}

	return 0;
}


jint JNI_OnLoad(JavaVM *vm, void *reserved) {
	JNIEnv *env = NULL;
	jint result = -1;
	LOGI("JNI_onLoad");

	if(vm->GetEnv((void **)&env, JNI_VERSION_1_4) != JNI_OK) {
		LOGE("ERROR: jni_onload()\n");
		goto fail;
	}

	assert(env != NULL);
	if(registerMethods(env) != 0) {
		LOGE("ERROR: registerMethod()\n");
		goto fail;
	}

	result = JNI_VERSION_1_4;

fail:
	return result;
}
在jni里首先加载jni库文件的时候先要调用JNI_OnLoad函数,通过系统函数GetEnv让env指针获得有效的值。然后接着调用registerMethods函数,这个函数是自己定义一个函数。
static const char * const kClassName = "com/farsight/server/ledService"; 类名与Eclipse下开发对应的包一致。不过点换成了下划线。
然后找到对应的类,接着就是向系统注册Native函数(Native Interface即本地接口函数),函数列表gMethods里 _init是上层framework去加载库时候调用的,当上层调用_init时,与之对应调用的函数就是led_init, ()Z的意思是函数led_init参数为空,返回为空。这里其实就是做了一个函数的映射,上层用的java函数,在这里与之对应成c 函数。
同理,其余的_set_on _set_off就不必赘述。
在调用led_init()函数时,系统是如何找到与之对应的stub的呢(也就是如何找到hw_module_t结构体的呢)?主要的函数就是hw_get_module这个函数是通过第一个参数ID号,找到系统里已经存在的与之对应id号的stub(即led_module_t HAL_MODULE_INFO_SYM 结构体变量),第二个参数就传进去的二级指针,让module获取有效的值,
接着调用 led_control_open,这个函数是内联函数,函数里面接着调用了HAL_MODULE_INFO_SYM 里的methods,methods里就一个成员open,其实呢就是调用了led.c(stub)的led_device_open函数,sLedDevice指针是一个全局变量,经过这个函数的调用,sLedDevice就获得了hw_deive_t的地址(sLedDevice指向了hw_device_t)。
本来一个指针没有值,但是通过传进去二级指针,就能让原来为空的指针获得有效的值,你可以参考我写的博文 int*p和 int **p,对你们理解二级指针改变一级指针指向有帮助。既然在jni层能够获得stub里的hw_module_t 和 hw_device_t,那么去调用stub里的函数也就不是问题了。
接下来就是去实现framework层了,framew层里的service去调用jni的。framework层里的service是在eclipse下开发的。
文件名:ledService.java
代码:
package com.farsight.server;

import android.util.Log;

public class ledService {
	static {
		Log.i("ledService", "Load Native service LIB");
		System.loadLibrary("led_runtime");
	}
	public ledService() {
		Log.i ( "Java Service" , "do init Native Call" );
		_init ();
	}
	public boolean set_on(int arg) {
		if(0 == _set_on(arg)) {
			return true;
		}else {
			return false;
		}
	}

	public boolean set_off(int arg) {
		if(0 == _set_off(arg)) {
			return true;
		}else {
			return false;
		}
	}

	private static native boolean _init();
	private static native int _set_on(int arg);
	private static native int _set_off(int arg);
}
private static native boolean _init();
private static native int _set_on(int arg);
private static native int _set_off(int arg);
这里的三个函数,就是在jni里声明的native interface接口函数。
当声明一个ledService 的对象时,static里的函数库会加载,默认的路径就是去加载/system/lib下与之对应的库,强调一点就是,led_runtime省去了前面的lib和后缀.so。
这样,我们去调用jni的时候就能成功,否则会失败。
其余的就是在应用程序里声明一个ledService对象,然后调用对象里的set_on 和 set_off 就可以了。可以自己写一个应用程序去测试一下。
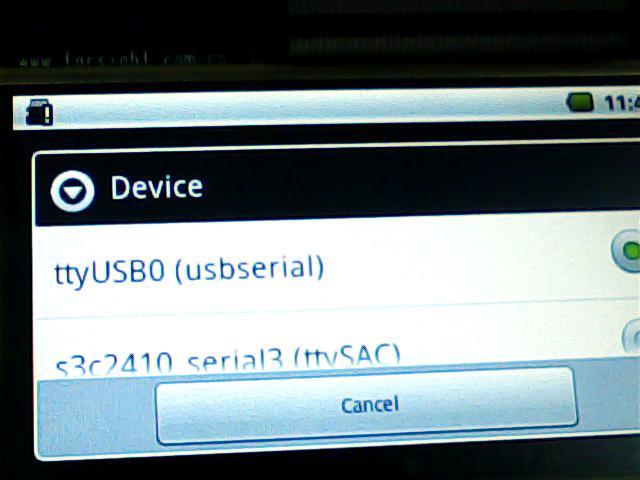
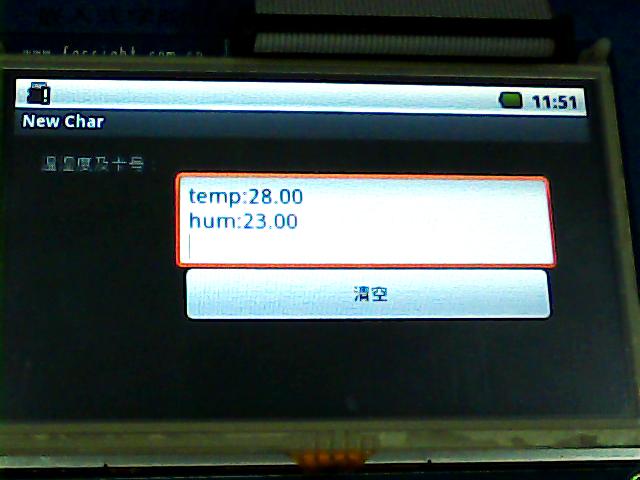
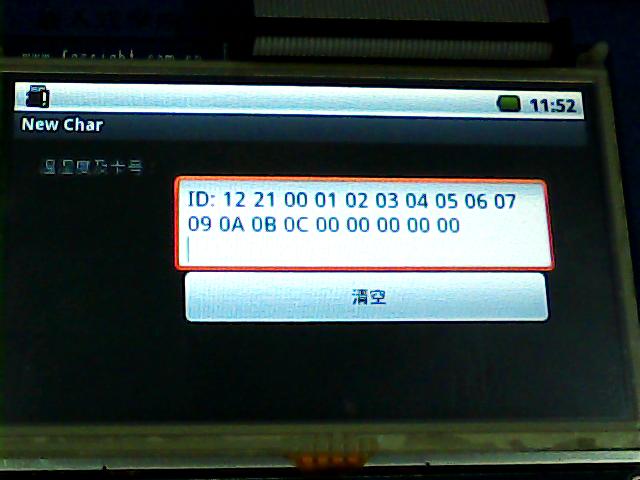
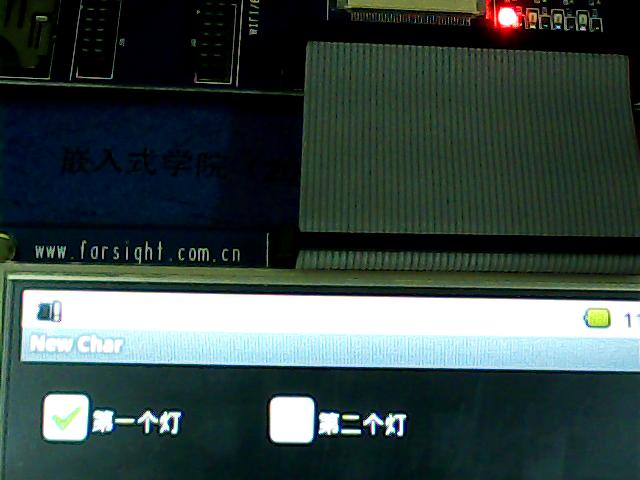
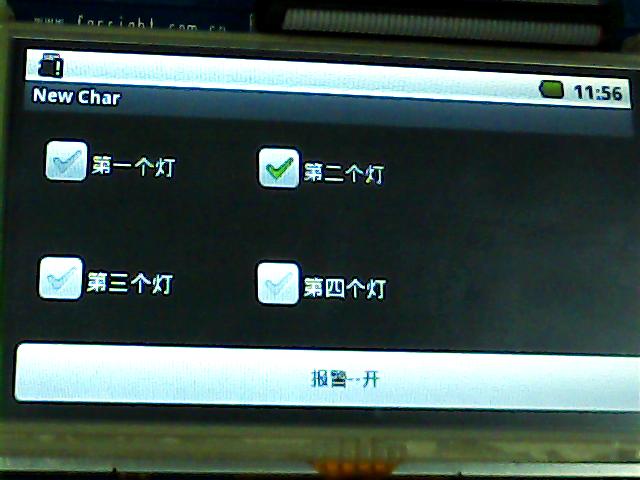
下面是我的一个项目的截图:
因为设计到M0开发板,所以会有温湿度以及RFID卡的截图。


源码下载地址:http://download.csdn.net/detail/k_linux_man/3865567
Android根文件系统、内核zIamge下载;http://download.csdn.net/detail/k_linux_man/3865826


 860
860


 到【灌水乐园】发言


