


 本教程详细介绍了如何使用Django框架创建一个论坛应用,包括需求分析、模型设计、数据库迁移、视图编写、单元测试及静态文件配置等核心步骤。
本节内容:
- 我们为项目定义了一些需求,创建了第一个模型,迁移了数据库,开始使用模型API。
- 我们创建了第一个视图并编写了一些单元测试。
- 我们还配置了Django模板引擎、静态文件,并将Bootstrap 4库添加到项目中。
- 最后,我们非常简要地介绍了Django管理界面。
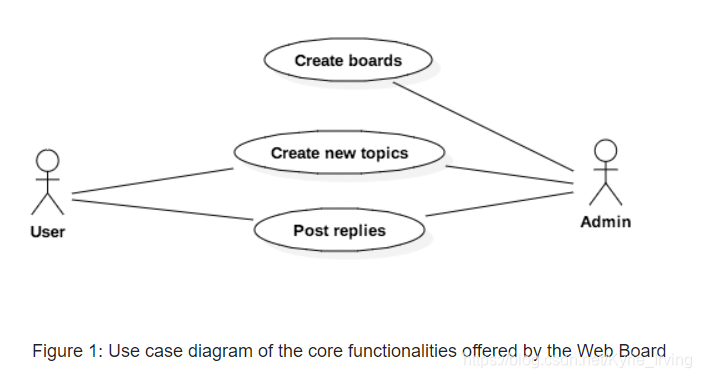
用例图
我们的项目是一个讨论区(论坛)。整个想法是维护几个董事会,它们将像类别一样运作。然后,在一个特定的面板中,用户可以通过创建一个新主题来开始一个新的讨论。在这个话题中,其他用户可以参与讨论发帖回复。
我们需要找到一种方法来区分普通用户和管理员用户,因为只有管理员应该创建新的董事会。以下是我们的主要用例和每种用户角色的概述:
类图
从用例图中,我们可以开始考虑项目的实体。实体是我们将要创建的模型,它与Django应用程序将要处理的数据密切相关。
为了能够实现上一节描述的用例,我们至少需要实现以下模型:Board、Topic、Post和User。
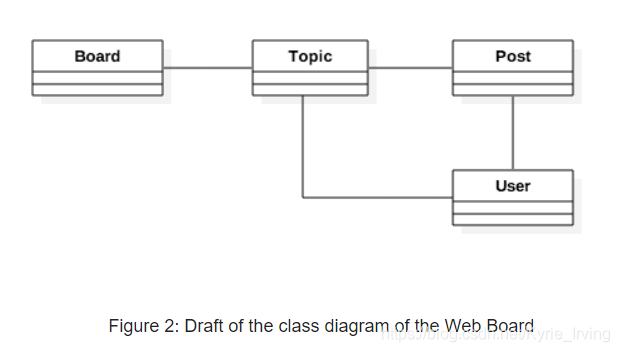
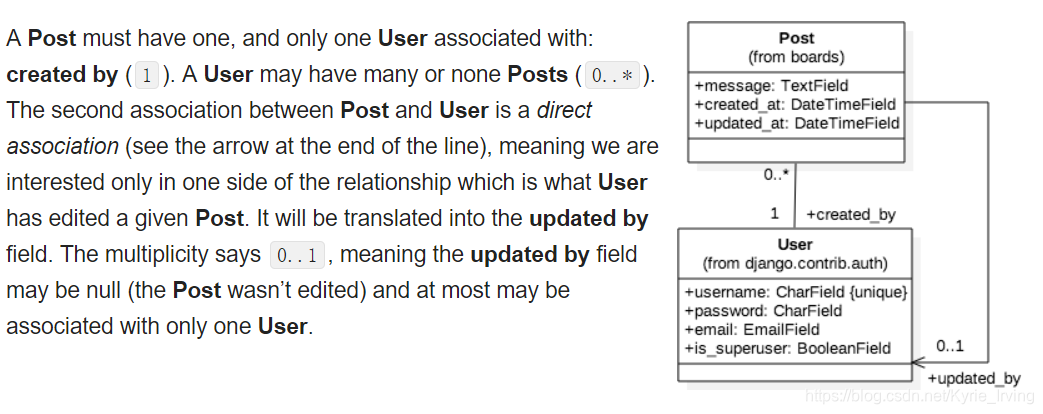
It’s also important to take the time to think about how do models will relate to each other. What the solid lines are telling us is that, in a Topic, we will need to have a field to identify which Board it belongs to. Similarly, the Post will need a field to represent which Topic it belongs so that we can list in the discussions only Posts created within a specific Topic. Finally, we will need fields in both the Topic to know who started the discussion and in the Post so we can identify who is posting the reply.
We could also have an association with the Board and the User model, so we could identify who created a given Board. But this information is not relevant for the application. There are other ways to track this information, you will see later on.
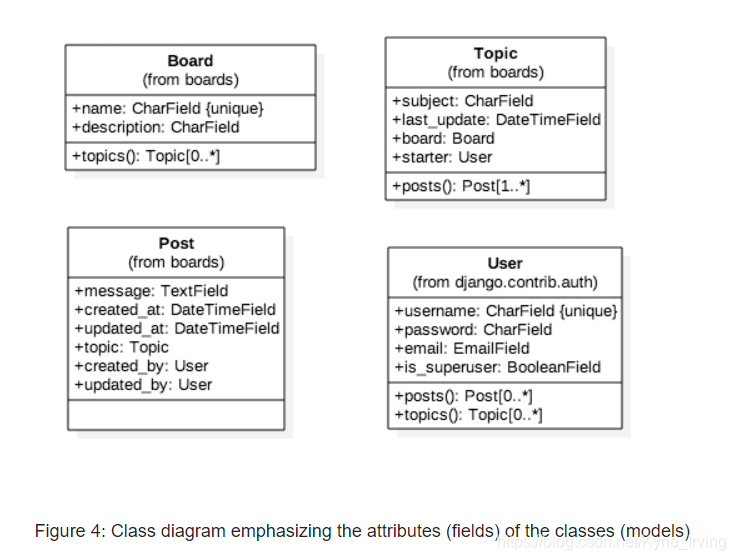
Now that we have the basic class representation, we have to think what kind of information each of those models will carry. This sort of thing can get complicated very easily. So try to focus on the important bits. The information that you need to start the development. Later on, we can improve the model using migrations, which you will see in great detail in the next tutorial.
但现在,这将是我们的模型字段的基本表示:
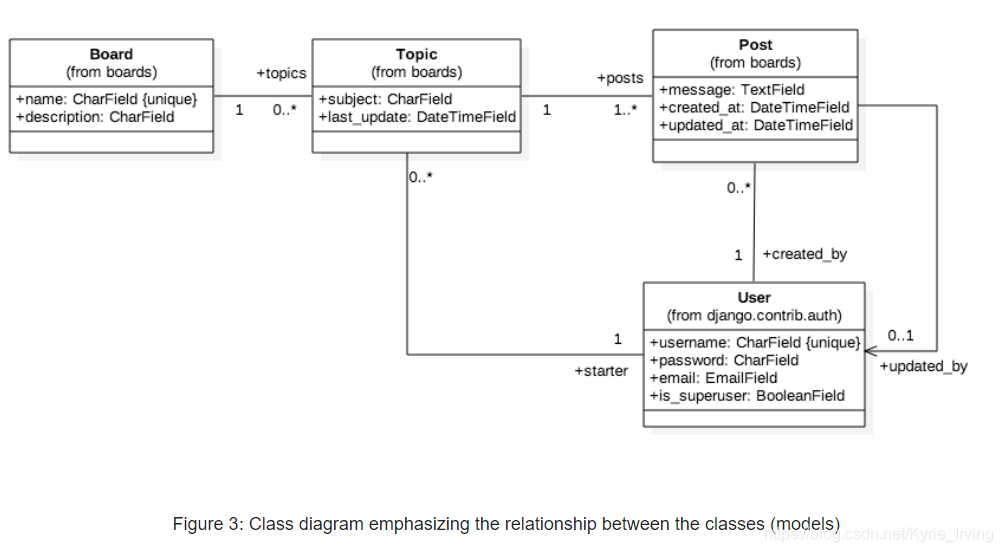
这个类图强调模型之间的关系。这些线条和箭头最终将被翻译成字段。
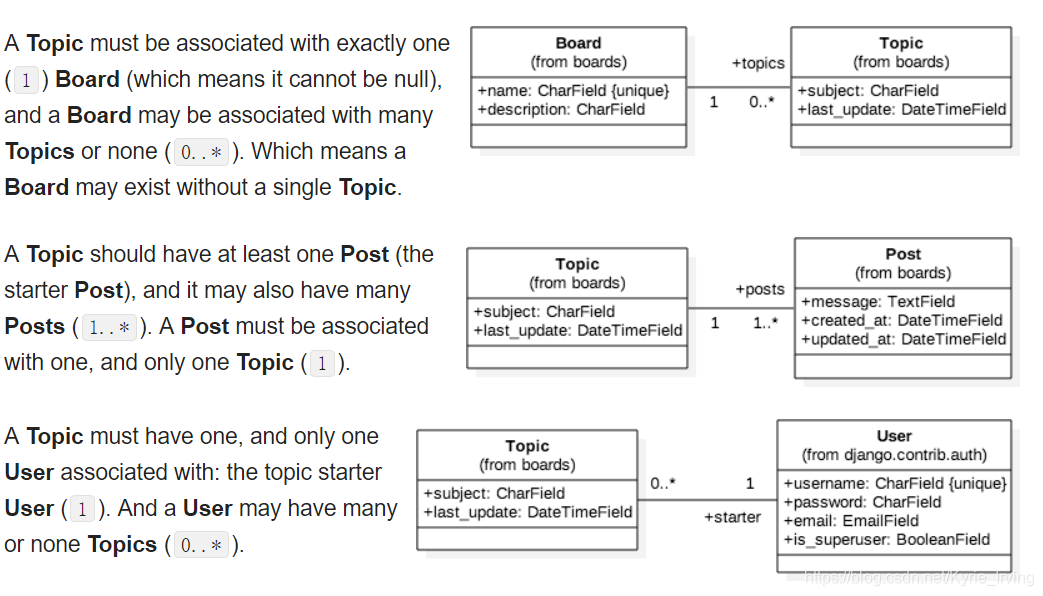
Regarding the multiplicity in the class diagram (the numbers 1, 0…*, etc.), here’s how you read it:
绘制类图的另一种方法是强调字段而不是模型之间的关系:
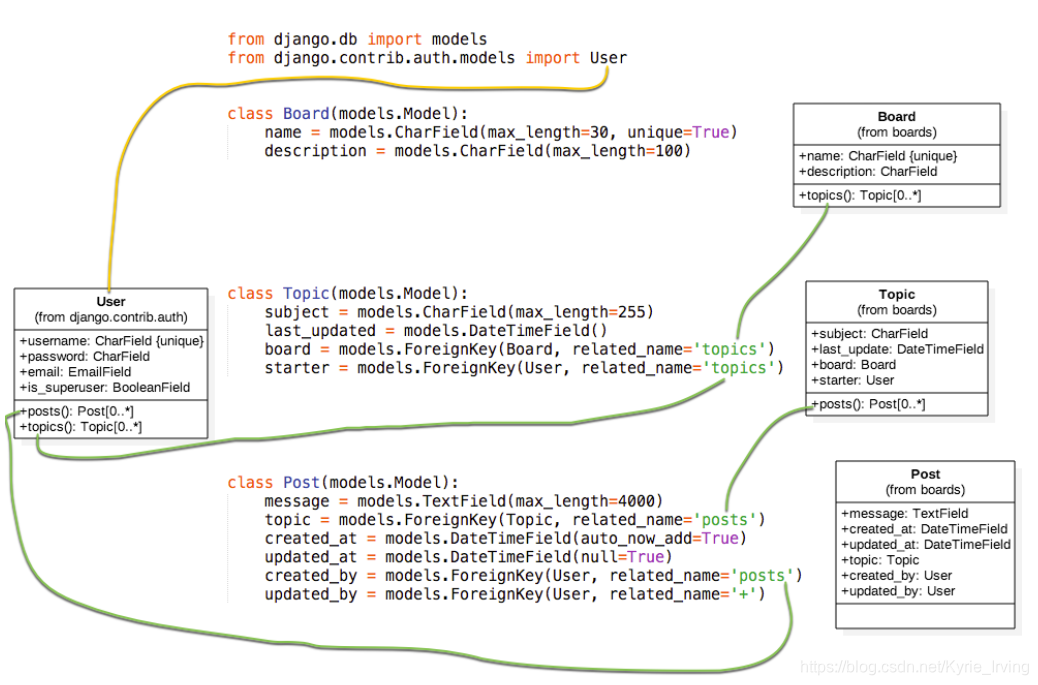
上面的表示法与前面的表示法相同,它也更接近于我们将使用Django Models API进行的设计。在这个表示中,我们可以更清楚地看到,在Post模型中,由已成为模型的字段创建和更新的关联主题。另一件值得注意的事情是,在主题模型中,我们现在有一个名为posts()的操作(一个类方法)。我们将通过实现反向关系来实现这一点,Django将在数据库中自动执行一个查询,以返回属于特定主题的所有文章的列表。
models.py
from django.db import models
from django.contrib.auth.models import User


class Board(models.Model):
    name = models.CharField(max_length=30, unique=True)
    description = models.CharField(max_length=100)


class Topic(models.Model):
    subject = models.CharField(max_length=255)
    last_updated = models.DateTimeField(auto_now_add=True)
    board = models.ForeignKey(Board, related_name='topics')
    starter = models.ForeignKey(User, related_name='topics')


class Post(models.Model):
    message = models.TextField(max_length=4000)
    topic = models.ForeignKey(Topic, related_name='posts')
    created_at = models.DateTimeField(auto_now_add=True)
    updated_at = models.DateTimeField(null=True)
    created_by = models.ForeignKey(User, related_name='posts')
    updated_by = models.ForeignKey(User, null=True, related_name='+')
Below you can see the comparison between the class diagram and the source code to generate the models with Django. The green lines represent how we are handling the reverse relationships.
Migrating the Models
python manage.py makemigrations
python manage.py migrate
Experimenting with the Models API
One of the great advantages of developing with Python is the interactive shell. I use it all the time. It’s a quick way to try things out and experiment libraries and APIs.
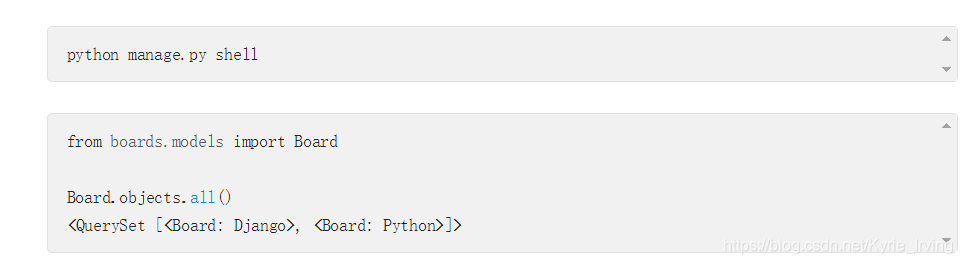
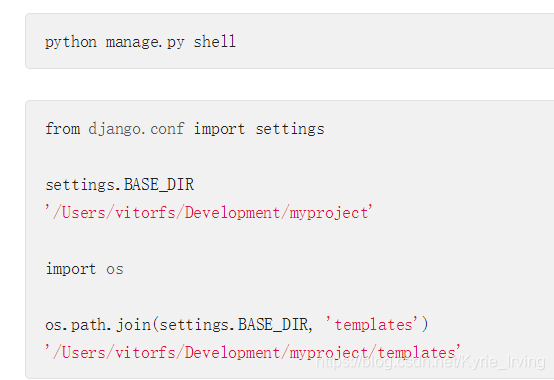
You can start a Python shell with our project loaded using the manage.py utility:
python manage.py shell
from boards.models import Board
board = Board(name='Django', description='This is a board about Django.')
board.save()
board = Board.objects.create(name='Python', description='General discussion about Python.')
models.py
class Board(models.Model):
    name = models.CharField(max_length=30, unique=True)
    description = models.CharField(max_length=100)

    def __str__(self):
        return self.name
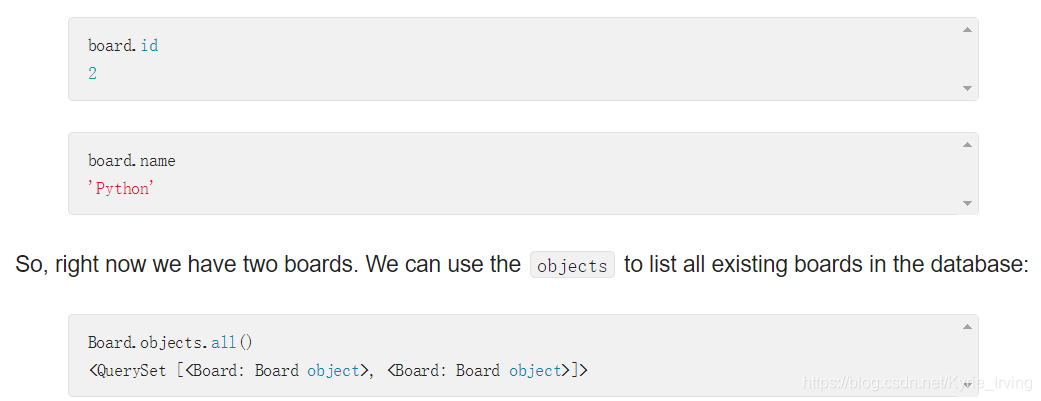
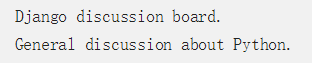
We can treat this QuerySet like a list. Let’s say we wanted to iterate over it and print the description of each board:
boards_list = Board.objects.all()
for board in boards_list:
    print(board.description)
Similarly, we can use the model Manager to query the database and return a single object. For that we use the get method:
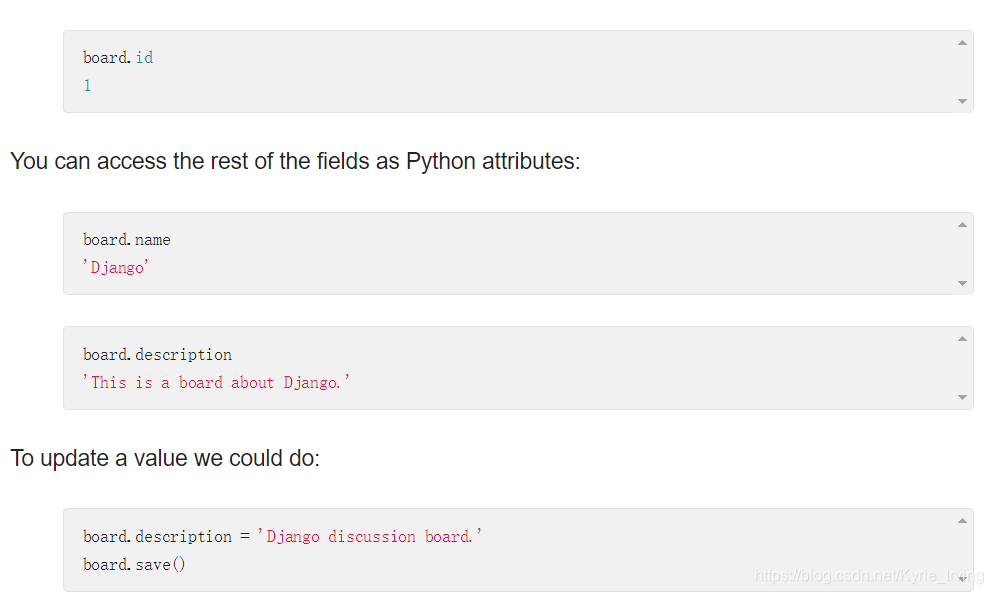
django_board = Board.objects.get(id=1)

django_board.name
'Django'
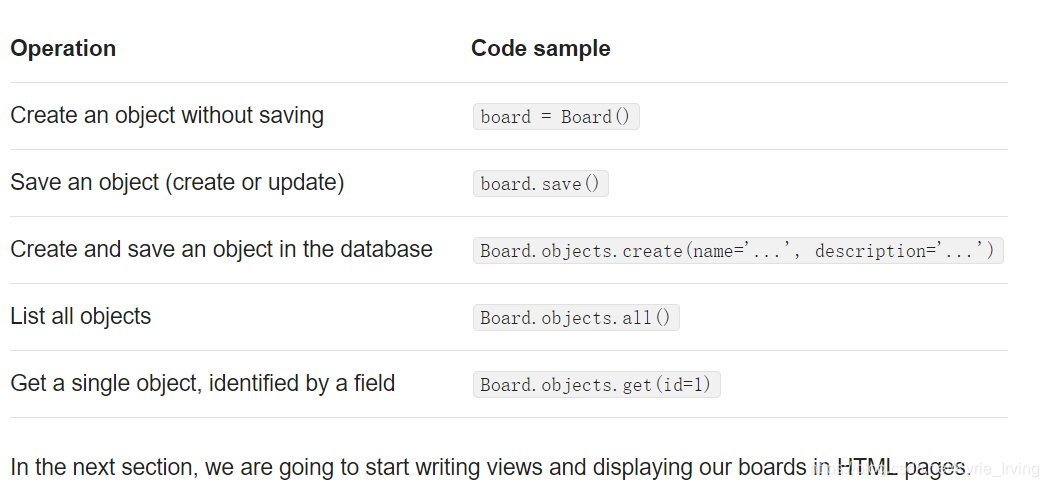
Summary of Model’s Operations
Find below a summary of the methods and operations we learned in this section, using the Board model as a reference. Uppercase Board refers to the class, lowercase board refers to an instance (or object) of the Board model class:
Views, Templates, and Static Files
myproject/urls.py
from django.conf.urls import url
from django.contrib import admin

from boards import views

urlpatterns = [
    url(r'^$', views.home, name='home'),
    url(r'^admin/', admin.site.urls),
]
boards/views.py
from django.http import HttpResponse

def home(request):
    boards=Board.objects.all()
    # descriptions=[board.description for board in boards]
    # response_html='<br>'.join(descriptions)
    # print(boards)
    return render(request,'home.html',{'boards':boards})
settings.py
TEMPLATES = [
    {
        'BACKEND': 'django.template.backends.django.DjangoTemplates',
        'DIRS': [
            os.path.join(BASE_DIR, 'templates')
        ],
        'APP_DIRS': True,
        'OPTIONS': {
            'context_processors': [
                'django.template.context_processors.debug',
                'django.template.context_processors.request',
                'django.contrib.auth.context_processors.auth',
                'django.contrib.messages.context_processors.messages',
            ],
        },
    },
]
We can debug this using the Python shell:
Go to getbootstrap.com and download the latest version:
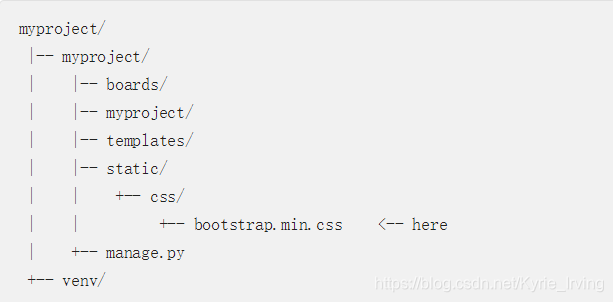
settings.py
STATIC_URL = '/static/'

STATICFILES_DIRS = [
    os.path.join(BASE_DIR, 'static'),
]
templates/home.html
{% load static %}<!DOCTYPE html>
<html>
  <head>
    <meta charset="utf-8">
    <title>Boards</title>
    <link rel="stylesheet" href="{% static 'css/bootstrap.min.css' %}">
  </head>
  <body>
    <div class="container">
      <ol class="breadcrumb my-4">
        <li class="breadcrumb-item active">Boards</li>
      </ol>
      <table class="table">
        <thead class="thead-inverse">
          <tr>
            <th>Board</th>
            <th>Posts</th>
            <th>Topics</th>
            <th>Last Post</th>
          </tr>
        </thead>
        <tbody>
          {% for board in boards %}
            <tr>
              <td>
                {{ board.name }}
                <small class="text-muted d-block">{{ board.description }}</small>
              </td>
              <td class="align-middle">0</td>
              <td class="align-middle">0</td>
              <td></td>
            </tr>
          {% endfor %}
        </tbody>
      </table>
    </div>
  </body>
</html>
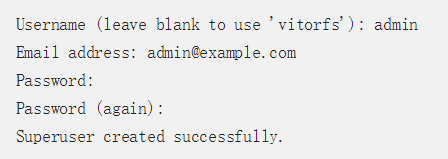
Introduction to Django Admin
python manage.py createsuperuser
boards/admin.py
from django.contrib import admin
from .models import Board

admin.site.register(Board)
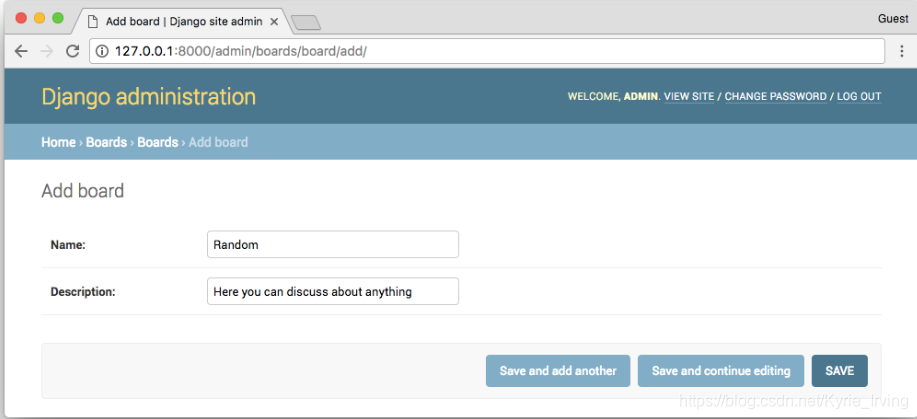
We can add a new board by clicking on the Add Board button:
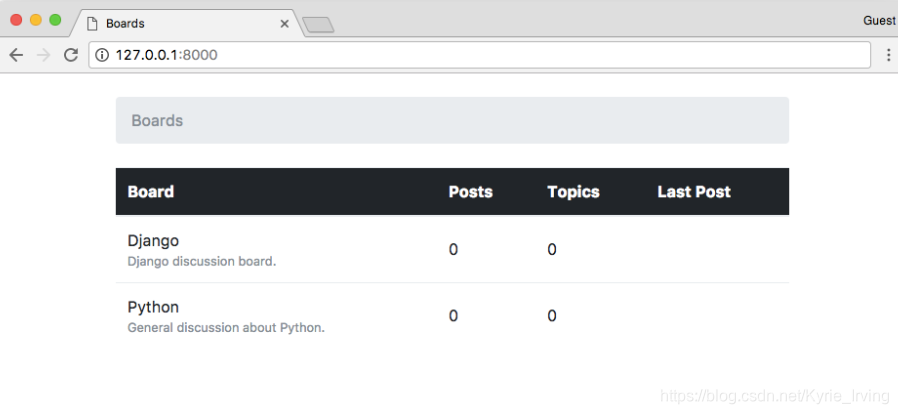
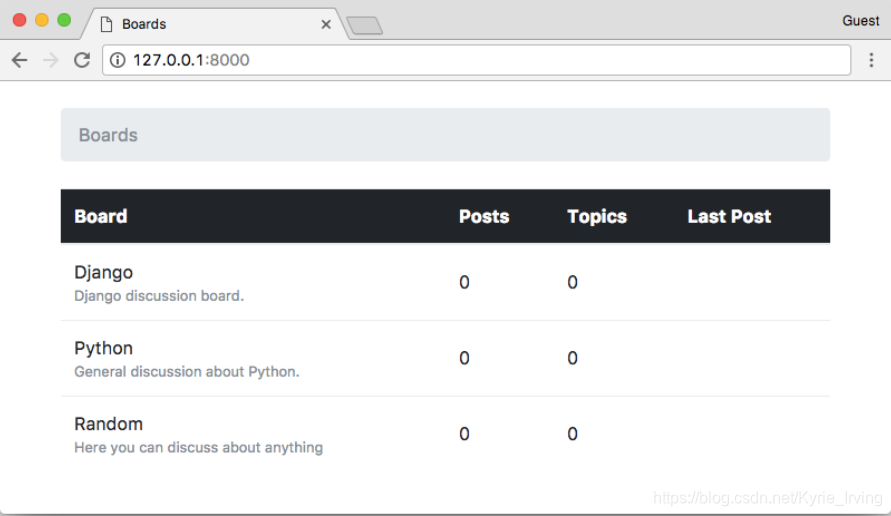
We can check if everything is working be opening the http://127.0.0.1:8000 URL:


 被折叠的 条评论
为什么被折叠?
被折叠的 条评论
为什么被折叠?
 到【灌水乐园】发言


