


1. vue中使用scss,/deep/ 不能用
首先要符合scss的结构样式,比如父子结构然后添加 ::v-deep
<style lang='scss' scoped>
.el-form{
    ::v-deep .el-form-item__label-wrap{
    margin-left: 45px!important;
    }
    ::v-deep .el-form-item__content{
    margin-left: 135px!important;
    }
    ::v-deep .el-form-item__label{
        padding: 0;
    }
}
</style>
不使用scss或less的情况下,/deep/写在class选择器之前,但是会标红所以前面加一个div
<style scoped>
div /deep/.el-table__footer-wrapper tbody td{
  background-color: #3B68FF!important;
  color: white!important;
}
</style>
在scss中用::v-deep 但是最新版本node-scss包中 要用:deep(类名)的方式代替
less中深度选择器为 /deep/
2. 路由传参问题
项目中 this.$route 是获取当前路由的实例,
$route.path 是当前路由路径地址
$route.params 动态片段和全匹配片段的路由参数
$route.query 是url查询参数
$router是获取整个vue项目的路由
$router.push({name:123,pramas:321})
$router.push({path:/user,query:321}) 在url中携带
3. el-form验证问题
可以在rules中定义匹配规则如
rules:{
     firmCode:[
        {pattern:/^[@/'\"#$%&^*A-Za-z0-9]+$/, message: '不可录入汉字', trigger:['blur','change']},
        {max:50, message:'最大字符长度50', trigger:['blur','change']}
     ]
     }
在根据 表单查询的时候 点击按钮要验证是否通过 rules,通过了 才能继续
this.$refs.searchObject.validate((valid) => {
        if(!valid){
            // 如果验证不通过
            console.log(1);
            that.$message({message: "请提交正确表单",type:'error'})
        }else{
            // 验证通过
            console.log(2);
        }
        })
也就是 el-form必须绑定一个ref,
4. el-table每页显示固定的数目,并能正常切换页面
<el-table
  :data="tableDataList.slice((currentPage-1)*pagesize,currentPage*pagesize)"
  style="100%"
  stripe

  :header-cell-style="{'background': '#40424B','color':'#ffffff','font-size':'14px','text-align':'center'}"
  :cell-style="{'text-align':'center'}"
  >
</el-table>
核心是:
:data="tableDataList.slice((currentPage-1)*pagesize,currentPage*pagesize)"
tableDataList是 绑定的所有数据,slice两个参数是 当前页*每页条数
5. vue的计算属性computed和监听器watch
computed:
- 支持缓存,只有依赖数据发生改变,才会重新进行计算
- 不支持异步,当computed内有异步操作时无效,无法监听数据的变化
- computed 属性值会默认走缓存,计算属性是基于它们的响应式依赖进行缓存的,也就是基于data中声明过或者父组件传递的props中的数据通过计算得到的值
- 如果一个属性是由其他属性计算而来的,这个属性依赖其他属性,是一个多对一或者一对一,一般用computed
5.如果computed属性属性值是函数,那么默认会走get方法;函数的返回值就是属性的属性值;在computed中的,属性都有一个get和一个set方法,当数据变化时,调用set方法。

watch:
- 不支持缓存,数据变,直接会触发相应的操作;
2.watch支持异步;
3.监听的函数接收两个参数,第一个参数是最新的值;第二个参数是输入之前的值; - 当一个属性发生变化时,需要执行对应的操作;一对多;
- 监听数据必须是data中声明过或者父组件传递过来的props中的数据,当数据变化时,触发其他操作,函数有两个参数,
immediate:组件加载立即触发回调函数执行,
deep: 深度监听,为了发现对象内部值的变化,复杂类型的数据时使用,例如数组中的对象内容的改变,注意监听数组的变动不需要这么做。注意:deep无法监听到数组的变动和对象的新增,参考vue数组变异,只有以响应式的方式触发才会被监听到。

监听的对象也可以写成字符串的形式

6. git 命令相关
git clone <地址>
git add . 跟踪所有的文件
git commit -m ‘版本名字’ 在本地缓存文件
git pull origin <远程分支名>:<本地分支名> 把指定远程分支的代码 拉取到 指定的本地分支
git pull origin <远程分支名> 把指定远程分支的代码 拉取到 当前本地分支
git pull 把 与本地当前分支 同名 的远程分支 拉取到本地当前分支上。
遇到蓝色的 先冒号 :在输入 wq 回车
git push origin <本地分支名>:<远程分支名> 指定当前分支代码 推送到 指定远程分支上
git push orgin <本地分支> 把指定本地分支代码 推送到 远程同名的分支上。
git push 把当前分支代码 推送到 远程与当前本地同名的分支上。
7. el-form使用lable-width=“auto” 会和v-show 冲突
解决方法:v-show改成 v-if, 或者 auto改成一个数值。
8. 绑定事件加 括号和不加括号的区别


9. 路由权限控制设计方案
- 方案一:登录的时候,调用后台返回权限标识,储存在sessionStorage中,在侧边栏导航菜单组件里的钩子函数中,判断this.$router.options.routes 的标识符 是否存在于sessionStorage中,把存在的放入一个变量,el-menu中 v-for这个变量。

- 方案二: router.addRoutes 在路由的meta属性里添加参数以确定是否授权

 与元属性meta 搭配使用的是
r
o
u
t
e
.
m
a
t
c
h
e
d
属性,我们要遍历
route.matched 属性,我们要遍历
route.matched属性,我们要遍历route.matched来检查路由记录里的meta字段,比如:
与元属性meta 搭配使用的是
r
o
u
t
e
.
m
a
t
c
h
e
d
属性,我们要遍历
route.matched 属性,我们要遍历
route.matched属性,我们要遍历route.matched来检查路由记录里的meta字段,比如:
router.beforeEach((to, from, next) => {
  if (to.matched.some(record => record.meta.requiresAuth)) {
    // this route requires auth, check if logged in
    // if not, redirect to login page.
    if (!auth.loggedIn()) {
      next({
        path: '/login',
        query: { redirect: to.fullPath }
      })
    } else {
      next()
    }
  } else {
    next() // 确保一定要调用 next()
  }
})
10. JS中call的使用
call 可以说是改变this指向,也可以理解为借用别的对象里的方法
let obj1={
    a:222
};
let obj2={
    a:111,
    fn:function(参数){
        alert(this.a);
    }
};
obj2.fn.call(obj1,参数);
// obj1借用了obj2对象里的fn方法,后面可以传入参数。
// 如
11. this.$set的使用
什么时候使用:
当vue的data里边声明或者已经赋值过的对象或者数组(数组里边的值是对象)时,向对象中添加新的属性,如果更新此属性的值,是不会更新视图的。
<template>
 <div id="app">
  <p v-for="item in items" :key="item.id">{{item.message}}</p>
  <button class="btn" @click="handClick()">更改数据</button>
 </div>
</template>

<script>
export default {
 name: 'App',
 data () {
  return {
   items: [
        { message: "one", id: "1" },
        { message: "two", id: "2" },
        { message: "three", id: "3" }
      ]
  }
 },
 mounted () {
   this.items[0] = { message:'first',id:'4'} //此时对象的值更改了,但是视图没有更新
  // let art = {message:'first',id:"4"}
  // this.$set(this.items,0,art) //$set 可以触发更新视图
 },
 methods: {
  handClick(){
   let change = this.items[0]
   change.message="shen"
   this.$set(this.items,0,change)
  }
 }
}
</script>

<style>

</style>
语法:
调用方法: Vue.set( target , key , value)
target: 要更改的数据源(可以是一个对象或者数组)
key 要更改的具体数据 (索引)
value 重新赋的值
<template>
<el-checkbox v-model="insurerChecked" style="margin-left:50px;" @change="checkYN" v-if="$route.query.type==0" >同投保人</el-checkbox>
</template>
<script>
data(){
	return{
		dataList:{
	        assuredEnterpriseName:undefined,
	        assuredCreditCode:undefined,
	        assuredAddress:undefined,
	        assuredName:undefined,
	        assuredPhone:undefined,
	        assuredTel:undefined,
	        assuredEmail:undefined
      },
	}
}
// 点击同投保人多选框的事件
    checkYN(v){
      if(v){//true
          this.$nextTick(()=>{
              this.$refs.lists.clearValidate()
          })
          this.$set(this.dataList,'assuredEnterpriseName',this.dataList.enterpriseName)
          this.$set(this.dataList,'assuredCreditCode',this.dataList.applicantCreditCode)
          this.$set(this.dataList,'assuredAddress',this.dataList.contactsAddress)
          this.$set(this.dataList,'assuredName',this.dataList.contactsName)
          this.$set(this.dataList,'assuredPhone',this.dataList.contactsPhone)
          this.$set(this.dataList,'assuredTel',this.dataList.contactsTel)
          this.$set(this.dataList,'assuredEmail',this.dataList.contactsEmail)
      }
</script>
12. elementui picker不跟随input的问题
因为页面过长所以必须设置el-main overflow:auto; // 就是默认超出滚动
但是这样就和el-data-picker和el-option冲突,如下图

		<el-select
          :popper-append-to-body='false' // 设置下拉框picker跟随input
          v-model="searchForm.cityCode"
          filterable
          placeholder="请选择项目所在市"
          style="width: 100%"
          @focus="getCity"
        >
        <el-date-picker
          :append-to-body='false' // 设置日期选择器的picker跟随input
          v-model="searchForm.insureDate"
          type="datetimerange"
          range-separator="至"
          start-placeholder="开始日期"
          style="width: 100%"
          end-placeholder="截止日期"
          :default-time="['00:00:00', '23:59:59']"
          format
          value-format="yyyy-MM-dd HH:mm:ss"
        >
         </el-date-picker>
13. vue-quill-editor使用
使用该富文本编辑器,预览的时候和输入时的富文本内容,格式不一致。
解决方法:
在前端显示富文本内容的div盒子 加class="ql-snow ql-editor"即可。

其他问题:
- 回显格式不一致,比如em strong标签不生效。是因为在全局css或者js中统一设置了font-style和font-weight。还有可能在fixble.js中设置了。

- 要设置富文本的字体

详情见下方链接:
https://www.jianshu.com/p/3a96f9469c03
14. el-table问题汇总
- 首先是“总计”和表格头的固定需要加show-summary和高度height,但是刷新后“总计”会隐藏
解决方法:
updated(){
    this.$nextTick(()=>{
      this.$refs.firstTable.doLayout() // doLayout()方法对 Table 进行重新布局。
      //当 Table 或其祖先元素由隐藏切换为显示时使用
    })
  },
- 其次是需要表格头和总计固定,给el-table设置height = “100%”,外层加一个div 设置高度。这样缩小窗口也能自适应固定“总计行”。
<div class="fiTable">
	  <el-table
	    ref="firstTable"
	    :data="listData"
	    height="100%"
	    stripe
	    show-summary
	    style="width: 100%">```
	  </el-table>
 </div>
15. vue中文字段落需要空格
- v-html="&emsp, "&emsp加;就是一个空格
- ``两个反引号中加\xa0 ,半个空格。
16. forEach中的return无效
要用for循环代替才可以,some也不行

17. 复杂数据类型某字段不存在的判断
因为在vue的data中只定义了insuredData:[],这个里面都是对象,对象里的contactAddress是在v-model中绑定的。所以直接使用this.insuredData[index].contactAddress
报错undefined
if(this.coveredManLabel[index]&&this.coveredManLabel[index].fieldCode=="address"&&!this.insuredData[index].contactAddress){
		this.$toast("请选择地址")
		return flagCheck = false;
}
解决方法是拆分,或者可选链式调用?.
if(this.coveredManLabel[index]&&this.coveredManLabel[index].fieldCode=="address"&&this.insuredData[index]){
		if(!this.insuredData[index].contactAddress){
				this.$toast("请选择地址")
				return flagCheck = false;
		}
}
18. 项目部署到环境上需要清理缓存
每次更新项目部署到测试环境都需要清理缓存 才能显示最新的更改。
解决方法是:
首先,在静态资源文件夹(public或static)的index.html中的 head标签中
    <meta http-equiv="Cache-Control" content="no-cache, no-store, must-revalidate" />
    <meta http-equiv="Pragma" content="no-cache" />
    <meta http-equiv="Expires" content="0" />
    <meta http-equiv="Cache" content="no-cache">
然后,在vue.config.js中 给css文件和js文件重命名加时间戳
const path = require('path')
const timeStamp = new Date().getTime() //时间戳
module.exports = {
    // 基本路径
    publicPath: process.env.NODE_ENV === 'production' ? './' : './',
    // 输出文件目录
    outputDir: 'dist',
    assetsDir: 'static', //静态资源目录
    // eslint-loader 是否在保存的时候检查
    lintOnSave: false,
    // webpack配置
    // see https://github.com/vuejs/vue-cli/blob/dev/docs/webpack.md
    chainWebpack: config => {
        config.module
            .rule("css")
            .test(/\.css$/)
            .oneOf("vue")
            .resourceQuery(/\?vue/)
            .use("px2rem")
            .loader("px2rem-loader")
            .options({
                remUnit: 192
            });
    },
    configureWebpack: (config) => {
    // js文件名
        config.output.filename = `js/[name].${timeStamp}.js?t=[hash]`;
        config.output.chunkFilename = `js/[id].${timeStamp}.js?t=[hash]`;
        if (process.env.NODE_ENV === 'production') {
            // 为生产环境修改配置...
            config.mode = 'production'
            if (process.env.NODE_ENV === 'test') {
                config.mode = 'test'
            }
        } else {
            // 为开发环境修改配置...
            config.mode = 'development'
        }
        Object.assign(config, {
            // 开发生产共同配置
            resolve: {
                alias: {
                    '@': path.resolve(__dirname, './src'),
                    '@c': path.resolve(__dirname, './src/components'),
                    '@m': path.resolve(__dirname, './src/modules'),
                },
            },
        })
    },
    // 生产环境是否生成 sourceMap 文件
    productionSourceMap: false,
    // css相关配置
    css: {
        extract: { // 打包后css文件名称添加时间戳
            filename: `css/[name].${timeStamp}.css`,
            chunkFilename: `css/chunk.[id].${timeStamp}.css`,
        },
        // 是否使用css分离插件 ExtractTextPlugin
        // extract: false, //false为开启css热更新 true为关闭 打包时置为true即可
        // 开启 CSS source maps?
        sourceMap: false,
        // css预设器配置项
        // loaderOptions: {

        // },
        // 启用 CSS modules for all css / pre-processor files.
        requireModuleExtension: true,
    },
    // 构建时开启多进程处理 babel 编译
    parallel: require('os').cpus().length > 1,
    // PWA 插件相关配置
    // see https://github.com/vuejs/vue-cli/tree/dev/packages/%40vue/cli-plugin-pwa
    pwa: {},
    runtimeCompiler: true,
    // webpack-dev-server 相关配置
    devServer: {
        open: true, //配置自动启动浏览器
        port: 8081,
        https: false,
        hotOnly: false,
        proxy: {
            // 设置代理
            '/api': {
                changeOrigin: true,
                pathRewrite: {
                    '`/api': '',
                },
            }
        },
        // eslint-disable-next-line no-unused-vars
        before: (app) => {},
    },
    // 第三方插件配置
    pluginOptions: {
        // ...
    },
}
configureWebpack 有两种类型,对象 函数。函数的写法在上面,对象的写法为:
configureWebpack{
    // js文件重命名
    outpust:{
       		filename = `js/[name].${timeStamp}.js?t=[hash]`;
       		chunkFilename = `js/[id].${timeStamp}.js?t=[hash]`;
       }
}
后端nginx也需要配置
server {
    listen 80;
    server_name yourdomain.com;
    location / {
        try_files $uri $uri/ /index.html;
        root /yourdir/;
        index index.html index.htm;

        if ($request_filename ~* .*\.(?:htm|html)$){
            add_header Cache-Control no-cache;
            add_header Pragma no-cache;
        }
    }
}
19. el-table el-form 里给el-input绑定v-model
效果如下图,点击新增 增加一行,并且要有校验。

<el-table ref="multipleTable"
              stripe
              :data="searchObjectB.list"
              :header-cell-style="{ 'background-color': '#9999','color':'#fff'}">

              <el-table-column align="center">
                <template slot="header">
                  <span>计算条件</span>
                  <el-popover
                    ref="popover"
                    placement="right"
                    width="200"
                    trigger="click"
                    popper-class="specialPopo"
                    :content="content1">
                  </el-popover>
                    <i v-popover:popover class='el-icon-question tableI'></i>
                </template>
                <template slot-scope="scope" >
                  <el-form-item label="" label-width="0" :prop="'list.'+scope.$index+'.calculateCondition'" :rules="{required:true, message:'请输入规则计算条件',trigger:'blur'}">
                    <el-input v-model="searchObjectB.list[scope.$index].calculateCondition" placeholder="请输入计算条件"></el-input>
                  </el-form-item>
                </template>
              </el-table-column>
重点是
<el-table-column align="center">
<template slot-scope="scope" >
    <el-form-item label="" label-width="0" :prop="'list.'+scope.$index+'.calculateCondition'" :rules="{required:true, message:'请输入规则计算条件',trigger:'blur'}">
        <el-input v-model="searchObjectB.list[scope.$index].calculateCondition" placeholder="请输入计算条件"></el-input>
    </el-form-item>
</el-table-column>
用表格包裹 作用域插槽,插槽里再放form,form的校验prop 要动态绑定
20. tinymce的使用
组件中:
<template>
    <div class="tinymce-editor">
        <Editor
            :id="tinymceId"
            :init="init"
            v-model="myValue"
            @input="inputValue"
        ></Editor>
    </div>
</template>

<script>
import axios from '../../utils/requestImg'
import tinymce from 'tinymce/tinymce' //tinymce默认hidden,不引入不显示
import Editor from '@tinymce/tinymce-vue'//编辑器引入
import 'tinymce/themes/silver/theme'//编辑器主题
import 'tinymce/icons/default'  //引入编辑器图标icon,不引入则不显示对应图标
// 引入编辑器插件(基本免费插件都在这儿了)
import 'tinymce/plugins/advlist'  //高级列表
import 'tinymce/plugins/autolink'  //自动链接
import 'tinymce/plugins/link'  //超链接
import 'tinymce/plugins/image'  //插入编辑图片
import 'tinymce/plugins/lists' //列表插件
import 'tinymce/plugins/charmap'  //特殊字符
import 'tinymce/plugins/media' //插入编辑媒体
import 'tinymce/plugins/wordcount'// 字数统计
import 'tinymce/plugins/table'// 表格
import 'tinymce/plugins/code'// 源码显示

  const fonts = [
    "宋体=宋体",
    "微软雅黑=微软雅黑",
    "新宋体=新宋体",
    "黑体=黑体",
    "楷体=楷体",
    "隶书=隶书",
    "Courier New=courier new,courier",
    "AkrutiKndPadmini=Akpdmi-n",
    "Andale Mono=andale mono,times",
    "Arial=arial,helvetica,sans-serif",
    "Arial Black=arial black,avant garde",
    "Book Antiqua=book antiqua,palatino",
    "Comic Sans MS=comic sans ms,sans-serif",
    "Courier New=courier new,courier",
    "Georgia=georgia,palatino",
    "Helvetica=helvetica",
    "Impact=impact,chicago",
    "Symbol=symbol",
    "Tahoma=tahoma,arial,helvetica,sans-serif",
    "Terminal=terminal,monaco",
    "Times New Roman=times new roman,times",
    "Trebuchet MS=trebuchet ms,geneva",
    "Verdana=verdana,geneva",
    "Webdings=webdings",
    "Wingdings=wingdings,zapf dingbats"
  ];
  export default {
    components: {
      Editor
    },
    props: {
      //插件
      plugins: {
        type: [String, Array],
        default: 'table advlist autolink link image lists charmap  media wordcount code'
      },
      contentVal:String,
      id:{
        type: String,
        default: function(){
          return 'vue-tinymce-' + +new Date() + ((Math.random() * 1000).toFixed(0) + '')
        }
      }
    },
    data() {
      return {
        //初始化配置
        tinymceId: this.id,
        myValue :'',
        init: {
          selector: '#tinymce',
          language_url: process.env.NODE_ENV=='development'?'/tinymce/langs/zh_CN.js':'/homePage/tinymce/langs/zh_CN.js',//汉化路径是自定义的,一般放在public或static里面
          language: 'zh_CN',
          skin_url: process.env.NODE_ENV=='development'?'/tinymce/skins/ui/oxide':'/homePage/tinymce/skins/ui/oxide',//皮肤
          statusbar: false,
          content_style: "img {max-width:100%;}",
          content_css: process.env.NODE_ENV=='development'?'/tinymce/skins/content/default/content.css':"/homePage/tinymce/skins/content/default/content.css",
          plugins: this.plugins,//插件
          //工具栏
          toolbar: ['code undo redo restoredraft | forecolor backcolor bold italic underline strikethrough link anchor | alignleft aligncenter alignright alignjustify outdent indent | styleselect formatselect fontselect fontsizeselect | bullist numlist | blockquote subscript superscript removeformat |',
            'table image media charmap emoticons hr pagebreak insertdatetime print preview | fullscreen | bdmap indent2em lineheight formatpainter axupimgs'],
          toolbar_location: '/',
          fontsize_formats: '12px 14px 16px 18px 20px 22px 24px 28px 32px 36px 48px 56px 72px',  //字体大小
          font_formats: fonts.join(";"),
          readonly: true,
          height: 500,//高度
          width: 900,
          placeholder: '在这里输入文字',
          branding: false,//隐藏右下角技术支持
          //图片上传
        //   images_upload_url: '/web/index-web-api/file/upload/public',
        //   images_upload_base_path: process.env.VUE_APP_BASE_API,
          images_upload_handler: function (blobInfo, success, failure) {
            //文件上传的formData传递,忘记为什么要用这个了
            const isAccord = blobInfo.blob().type === 'image/jpeg' || blobInfo.blob().type === 'image/png' || blobInfo.blob().type === 'image/GIF' || blobInfo.blob().type === 'image/jpg' || blobInfo.blob().type === 'image/BMP';
            if (blobInfo.blob().size/1024/1024>10) {
              failure("上传失败,图片大小请控制在 10M 以内")
            } else if (blobInfo.blob().type == isAccord) {
              failure('图片格式错误')
            } else {
              let formData = new FormData()
              // 服务端接收文件的参数名,文件数据,文件名
              formData.append('file', blobInfo.blob(), blobInfo.filename())
              console.log(blobInfo.blob(), blobInfo.filename(),"blobInfo");
              formData.append("module","webusersys")
              axios.post('index-web-api/file/upload/public',formData).then((res) => {
                console.log(res)
                // 这里返回的是你图片的地址
                let a = `https://zbx-dev.oss-cn-beijing.aliyuncs.com/${res.data}`
                success(a)
              }).catch(() => {
                failure('上传失败')
              })
            }
          }
        }
      }
    },
    watch: {
      //监听内容变化
      contentVal (newValue) {
          this.myValue = this.contentVal
        // this.$emit('change', newValue)
      }
    },
    mounted () {
      tinymce.init({})
    },
    methods:{
      inputValue(){
        this.$emit('change', this.myValue)
      },
      // 设置只读
      setReadonly(){
        tinymce.editors[this.tinymceId].setMode('readonly');
      },
      // 移除只读
      moveRead(){
        tinymce.editors[this.tinymceId].setMode('design')
      }
    }
  }
</script>
还需要在静态文件放汉化和皮肤文件
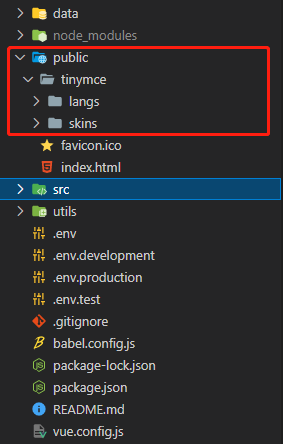
文件在
链接: https://pan.baidu.com/s/146lVe7NJVxTcfIuWgEfedA?pwd=dt7c 提取码: dt7c 复制这段内容后打开百度网盘手机App,操作更方便哦
21. vue-cli4配置问题
-
vue.config.js文件需要自己手动添加并配置
-
配置环境变量process.env.NODE_ENV
1.在根目录添加.env.test .env.develop .env.product文件
2.在package.json文件配置 --mode 环境名

3.使用:
process.env是关键
console.log(process.env.NODE_ENV,“地址名”);
console.log(process.env.VUE_APP_URL,“地址url”); -
ESlint默认安装,使用在package.json文件下的"eslintConfig"配置
比如代码结尾必须加分号,具体规则在reles中配,并且还需要vscode下载eslint扩展才可以使用。

22. css module 模块化的使用
下面说的可能不太准确 以vue-loader官网为准 CSS Module
- 先要在vue.config.js文件中配置
module.exports = {
  publicPath: './',
  outputDir: 'dist'

  // css相关配置
  css: {
    extract: false, // 是否使用css分离插件 ExtractTextPlugin
    sourceMap: true, // 开启 CSS source maps?
    requireModuleExtension: true,
    loaderOptions: {
      css: {
        // 注意:以下配置在 Vue CLI v4 与 v3 之间存在差异。
        // Vue CLI v3 用户可参考 css-loader v1 文档
        // https://github.com/webpack-contrib/css-loader/tree/v1.0.1
        modules: {
          localIdentName: '[local]_[hash:base64:8]'
        }
      }
    }
  }
}
- 使用
// 两种写法
<h1 :class="$style.col">测试1</h1>
<h1 :class="$style["abc-col"]">测试2</h1>
<h1 :class="$style.text_One">测试3</h1>
// 多类名
<h1 :class="[$style.col, $style.text_One]">测试4</h1>
// 动态类名 - 1
<h1 :class="[imgIndex===8 ? $style.hoverBox : '', $style['box-item']]">测试5</h1>
// 动态类名 - 2
<h1 :class="[{$style.hoverBox:boolean}, $style['box-item']]">测试6</h1>

// style标签中 要加上module
<style lang="less" module>
    .col { color: red }
	.abc-col { color: black }
	.text_One{ color: pink }
</style>
注意
:class=“
s
t
y
l
e
[
"
a
b
c
−
c
o
l
"
]
"
的写法是因为
:
c
l
a
s
s
=
"
style["abc-col"]" 的写法是因为 :class="
style["abc−col"]"的写法是因为:class="style.abc-col” 不能识别-号
23. 动态组件
- 写法 - 1
<template>
	<!--动态绑定的is 接收一个字符串-->
	<component :is="isCom"></component>
</template>

<script>
import GF2 from '@/components/satelliteTables/GF2guidao'
export default {
	components: {
		GF2,
	}
	data(){
		return {
			isCom: 'GF2', // 此处字符串必须和组件名一致才行
		}
	}
}
</script>
- 写法 - 2
使用的组件中:
<template>
	<!--动态绑定的is 接受一个组件-->
	<component :is="isCom"></component>
</template>

<script>
import obj from '@/assets/test.js'
export default {
	computed:{
		isCom(){
			return obj.table
		}
	},
	data(){
		return {
			obj,
		}
	}

}
</script>
@/assets/test.js文件中
export const obj = {
	table: () => ('@/components/satelliteTables/GF2chuan'),
}
24. vue-cli在index.html中使用环境变量
在public文件夹中的index.html中有时候会用到环境变量 比如<%= BASE_URL =%>,但是其他的怎么使用呢?只需要以VUE_APP开头即可。比如VUE_APP_TITLE。
<!DOCTYPE html>
<html lang="en">
  <head>
    <meta charset="utf-8">
    <meta http-equiv="X-UA-Compatible" content="IE=edge">
    <meta name="viewport" content="width=device-width,initial-scale=1.0">
    <link rel="icon" href="<%= BASE_URL %>favicon.ico">
    <title><%= VUE_APP_TITLE %></title>
  </head>
  <body ondragstart="return false">
    <script> window.CESIUM_BASE_URL = '<%= VUE_APP_HTML_URL %>/Cesium' </script>
    <noscript>
      <strong>We're sorry but green-house-frontend doesn't work properly without JavaScript enabled. Please enable it to continue.</strong>
    </noscript>
    <div id="app"></div>
  </body>
</html>


 3788
3788


 被折叠的 条评论
为什么被折叠?
被折叠的 条评论
为什么被折叠?
 到【灌水乐园】发言


