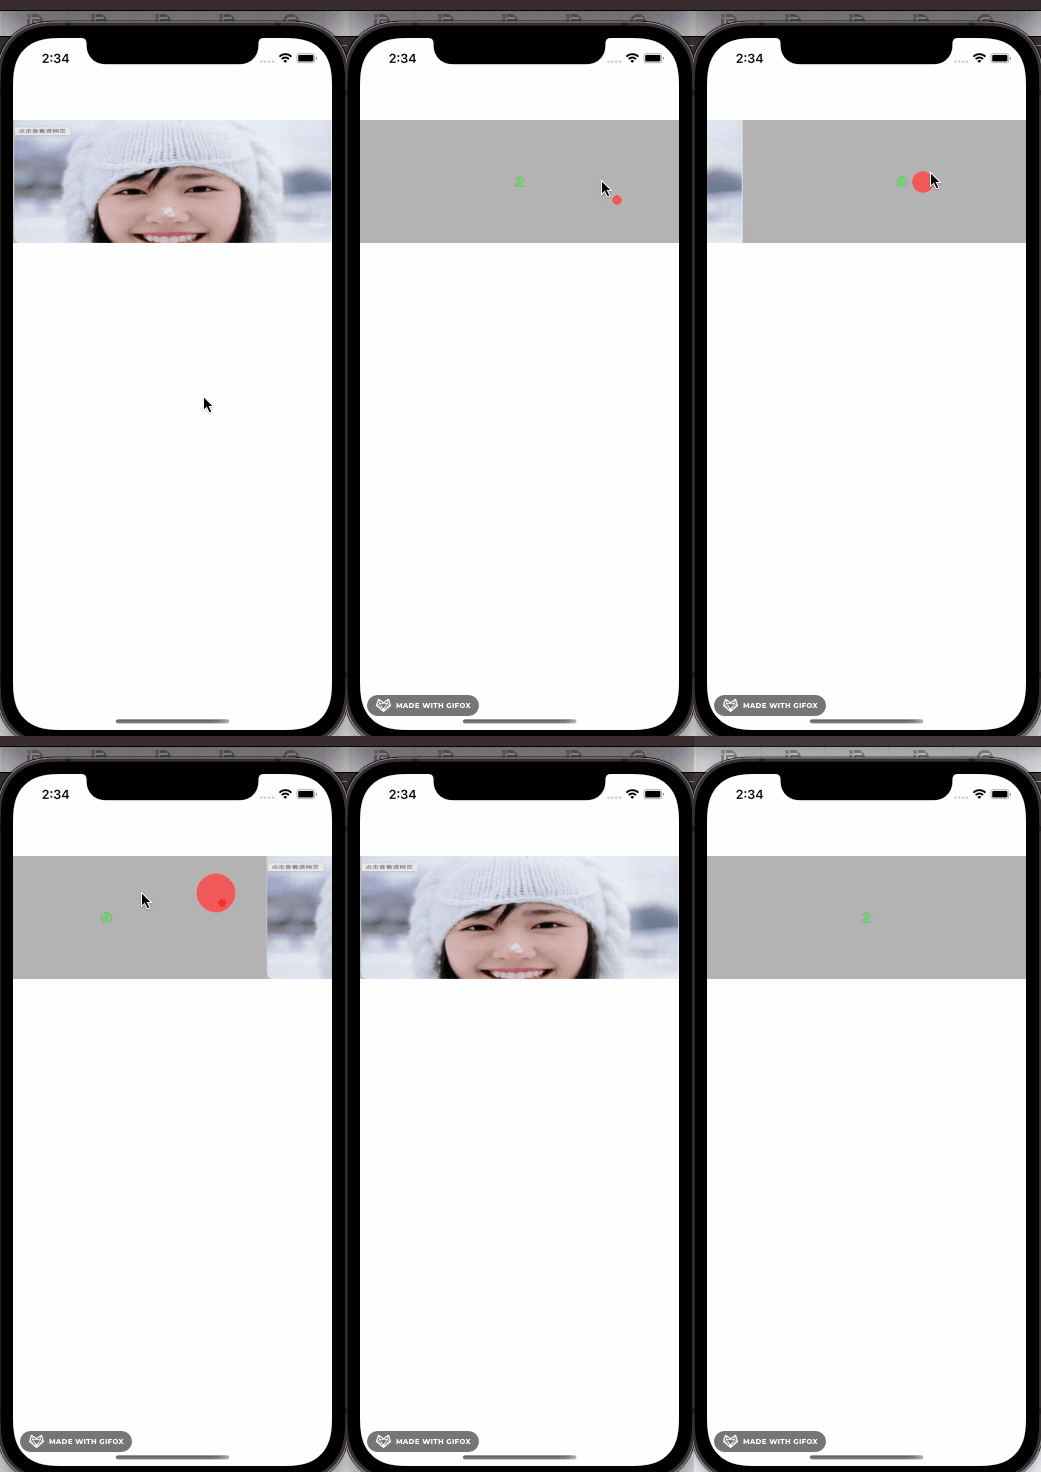
首先看效果图

一
本框架使用三个视图实现轮播效果原理
底部有一个s c rolllview , scrollview的内容宽度为3 * 视图宽度
首次展示第一个展示在中间,左边展示最后一个,右边展示第二个
,当向右拖动一次之后,迅速将scrollView的偏移量
恢复到中间,并且当前索引增加一,并根据当前索引刷新三个子视图
,这样就达到了轮播的效果,并且该框架支持多种内容视图同时展示,
扩展性更好
二 核心代码
///这里是结束滚动之后需要将改变当前索引,并恢复偏移量,并刷新数据
- (void)scrollViewDidEndDecelerating:(UIScrollView *)scrollView
{
    NSInteger count = self.numberOfLoopView;
    NSInteger index = scrollView.contentOffset.x / CGRectGetWidth(self.bounds);
    if (index == 2) {
        if (self.currentIndex < count - 1) {
            self.currentIndex ++;
        } else {
            self.currentIndex = 0;
        }
    } else if (index == 0) {
        if (self.currentIndex > 0) {
            self.currentIndex --;
        } else {
            self.currentIndex = count - 1;
        }
    }
    [self reloadAfterTranslation];
    if (self.delegate &&
        [self.delegate respondsToSelector:@selector(loopView:didScrollToCellAtIndex:)]) {
        [self.delegate loopView:self didScrollToCellAtIndex:self.currentIndex];
    }
    self.isDragging = NO;
}
///这里是为了修复快速拖动导致的不能滚动的问题
- (void)scrollViewWillBeginDragging:(UIScrollView *)scrollView
{
    self.isDragging = YES;
    [self pause];
    NSInteger count = self.numberOfLoopView;
    /*
     注意
     1这里如果 scrollView.contentOffset.x 不等于 CGRectGetWidth(scrollView.bounds),说明
     开始拖动的时候scrollView还没有回归到中间位置,而我们每次都是
     在 scrollViewDidEndDecelerating 方法中进行修改当前索引并且重置回中间偏移量CGRectGetWidth(scrollView.bounds)的,
     这里偏移量 不是CGRectGetWidth(scrollView.bounds) ,说明拖动过之后, scrollViewDidEndDecelerating 还没有执行
     就立即进行下一次拖动了,这就需要我们手动调用一下 scrollViewDidEndDecelerating 要进行但尚未进行的的操作,保证我们的 当前展示数据正确。

     2这里不需要担心第二次的scrollViewWillBeginDragging 开始执行之后 ,上一次的 scrollViewDidEndDecelerating 执行问题
     因为经过验证发现,scrollViewWillBeginDragging 和 scrollViewDidEndDecelerating 并不是一对应的关系,
     就是我们快速滑动的时候,如果我们开始执行第二次的 scrollViewWillBeginDragging ,那么第一次 scrollViewDidEndDecelerating
     方法是会被跳过不执行的,所以我们不用担心 重复执行的问题
    */
    if (scrollView.contentOffset.x > CGRectGetWidth(scrollView.bounds)) {
        if (self.currentIndex < count - 1) {
            self.currentIndex ++;
        } else {
            self.currentIndex = 0;
        }
        [self reloadAfterTranslation];
    } else if (scrollView.contentOffset.x < CGRectGetWidth(scrollView.bounds)) {
        if (self.currentIndex > 0) {
            self.currentIndex --;
        } else {
            self.currentIndex = count - 1;
        }
        [self reloadAfterTranslation];
    }
}
///恢复偏移量,刷新数据
- (void)reloadAfterTranslation
{
      ///注意,这里需要先刷新中间视图,再恢复偏移量,为了实现无缝过渡的效果
    [self reloadMiddleCell];
    self.contentScrollView.contentOffset = CGPointMake(CGRectGetWidth(self.bounds), 0);
//    [self.contentScrollView setContentOffset:CGPointMake(CGRectGetWidth(self.bounds), 0) animated:NO];
    ///回复偏移量之后,刷新左右两边的cell
    [self reloadLeftCell];
    [self reloadRightCell];
}
以上就是该框架的和新代码,已验证该框架的健壮性良好,
扩展性较强,可以满足大多数轮播需求
如:可以在不同的索引下展示不同的视图
- (LBHorizontalLoopViewCell *)cellForIndex:(NSInteger)index inLoopView:(LBHorizontalLoopView *)loopView
{
    if (index % 2 == 0) {
        LBCell *cell = [loopView dequeueReusableCellWithIdentifier:NSStringFromClass([LBCell class])];
        NSString  *content = self.dataArray[index];
        [cell updateWithModel:content];
        return cell;
    }
    LBBannerCell *cell = [loopView dequeueReusableCellWithIdentifier:NSStringFromClass([LBBannerCell class])];
    return cell;
}
使用方法
pod ‘LBHorizontalLoopView’
自定义轮播视图继承于 LBHorizontalLoopViewCell

@interface LBBannerCell : LBHorizontalLoopViewCell

@end

创建 轮播视图,并设置代理对象和数据源对象,注册自定义cell

- (LBHorizontalLoopView *)loopView
{
    if (!_loopView) {
        _loopView = [[LBHorizontalLoopView alloc] initWithFrame:CGRectMake(0, 100, CGRectGetWidth(self.view.bounds), 150)];
        [_loopView registerClass:[LBCell class] forViewReuseIdentifier:NSStringFromClass([LBCell class])];
        [_loopView registerClass:[LBBannerCell class] forViewReuseIdentifier:NSStringFromClass([LBBannerCell class])];
        _loopView.dataSource = self;
        _loopView.delegate = self;
    }
    return _loopView;
}

实现协议方法

#pragma mark - LBHorizontalLoopViewDelegate, LBHorizontalLoopViewDataSource
- (NSInteger)viewNumberOfLoopView:(LBHorizontalLoopView *)loopView
{
    return self.dataArray.count;
}

- (LBHorizontalLoopViewCell *)cellForIndex:(NSInteger)index inLoopView:(LBHorizontalLoopView *)loopView
{
    if (index % 2 == 0) {
        LBCell *cell = [loopView dequeueReusableCellWithIdentifier:NSStringFromClass([LBCell class])];
        NSString  *content = self.dataArray[index];
        [cell updateWithModel:content];
        return cell;
    }
    LBBannerCell *cell = [loopView dequeueReusableCellWithIdentifier:NSStringFromClass([LBBannerCell class])];
    return cell;
}

- (void)loopView:(LBHorizontalLoopView *)loopView didClickCellAtIndex:(NSInteger)index
{
}

- (void)loopView:(LBHorizontalLoopView *)loopView didScroll:(UIScrollView *)scrollView
{

}

- (void)loopView:(LBHorizontalLoopView *)loopView didScrollToCellAtIndex:(NSInteger)index
{

}

开始轮播
[self.loopView reloadDataAndStartRoll];


 1528
1528


 被折叠的 条评论
为什么被折叠?


