


在六部法的基础上扩展下面绿色和红色部分内容:

① 自制数据集,解决本领域应用
② 数据增强,扩充数据集
③ 断点续传,存取模型
④ 参数提取,把参数存入文本
⑤ acc/loss可视化,查看训练效果
⑥ 应用程序,给图识物
下面主要讲解一下③④⑤⑥:
1.3 断点续训,存取模型
读取模型:load_weights(路径文件名)

保存模型:tf.keras.callbacks.ModelCheckpoint(
filepath=路径文件名,
save_weights_only=True/False,
save_best_only=True/False
)
history=model.fit(callbacks=[cp_callback])
完整示例代码:
import tensorflow as tf
import os
mnist = tf.keras.datasets.mnist
(x_train, y_train), (x_test, y_test) = mnist.load_data()
x_train, x_test = x_train / 255.0, x_test / 255.0
model = tf.keras.models.Sequential([
tf.keras.layers.Flatten(),
tf.keras.layers.Dense(128, activation='relu'),
tf.keras.layers.Dense(10, activation='softmax')
])
model.compile(optimizer='adam',loss=tf.keras.losses.SparseCategoricalCrossentropy(from_logits=False),metrics=['sparse_categorical_accuracy'])
checkpoint_save_path = "./checkpoint/mnist.ckpt" # 保存文件路径
if os.path.exists(checkpoint_save_path + '.index'): # 生成ckpt文件时,会同时生成index文件
print('-------------load the model-----------------')
model.load_weights(checkpoint_save_path) # 读取模型
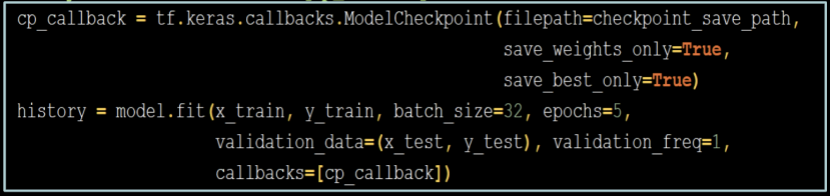
cp_callback = tf.keras.callbacks.ModelCheckpoint(filepath=checkpoint_save_path,
save_weights_only=True,
save_best_only=True)
history = model.fit(x_train, y_train, batch_size=32, epochs=5, validation_data=(x_test, y_test), validation_freq=1,callbacks=[cp_callback])
model.summary()
1.4 参数提取,把参数存入文本
提取可训练参数: model.trainable_variables 返回模型中可训练的参数
设置print输出格式: np.set_printoptions(threshold=超过多少省略显示)
np.set_printoptions(threshold=np.inf) # 展示所有参数
相比1.3代码,在代码末尾添加如下代码即可:
print(model.trainable_variables)  # 打印参数
file = open('./weights.txt', 'w')   # 输出参数到txt文件
for v in model.trainable_variables:
    file.write(str(v.name) + '\n')
    file.write(str(v.shape) + '\n')
    file.write(str(v.numpy()) + '\n')
file.close()
1.5 acc/loss可视化
在history=model.fit(训练集数据,训练集标签,batch_size=,epochs=,validation_split=用作测试数据的比例,validation_data=测试集,validation_freq=测试频率)
history中存在以下信息:
训练集loss:loss
测试集loss:val_loss
训练集准确率:sparse_categorical_accuracy
测试集准确率:val_sparse_categorical_accuracy
使用history.history[‘’]可获取上述4个数值信息。
在示例1.3末尾添加如下代码即可:
from matplotlib import pyplot as plt

# 显示训练集和验证集的acc和loss曲线
acc = history.history['sparse_categorical_accuracy']
val_acc = history.history['val_sparse_categorical_accuracy']
loss = history.history['loss']
val_loss = history.history['val_loss']

plt.subplot(1, 2, 1)
plt.plot(acc, label='Training Accuracy')
plt.plot(val_acc, label='Validation Accuracy')
plt.title('Training and Validation Accuracy')
plt.legend()

plt.subplot(1, 2, 2)
plt.plot(loss, label='Training Loss')
plt.plot(val_loss, label='Validation Loss')
plt.title('Training and Validation Loss')
plt.legend()
plt.show()
画图如下:

1.6 模型应用
前向传播执行应用: predict(输入特征,batch_size=整数) --返回前向传播计算结果
实现模型应用仅需要三步:复现模型 ---》 加载参数 --》 预测结果
① 复现模型(前向传播)
model = tf.keras.models.Sequential([
    tf.keras.layers.Flatten(),
    tf.keras.layers.Dense(128, activation='relu'),
    tf.keras.layers.Dense(10, activation='softmax')])
② 加载参数
model.load_weights(model_save_path)③ 预测结果
result = model.predict(x_predict)将示例1.4训练的模型进行应用:
from PIL import Image
import numpy as np
import tensorflow as tf

model_save_path = './checkpoint/mnist.ckpt'

model = tf.keras.models.Sequential([
    tf.keras.layers.Flatten(),
    tf.keras.layers.Dense(128, activation='relu'),
    tf.keras.layers.Dense(10, activation='softmax')])

model.load_weights(model_save_path)

preNum = int(input("input the number of test pictures:"))


for i in range(preNum):
    image_path = input("the path of test picture:")
    img = Image.open(image_path)
    img = img.resize((28, 28), Image.ANTIALIAS)
    img_arr = np.array(img.convert('L'))

    for i in range(28):
        for j in range(28):
            if img_arr[i][j] < 200:
                img_arr[i][j] = 255
            else:
                img_arr[i][j] = 0

    img_arr = img_arr / 255.0
    x_predict = img_arr[tf.newaxis, ...]
    result = model.predict(x_predict)

    pred = tf.argmax(result, axis=1)

    print('\n')
    tf.print(pred)


 133
133


 被折叠的 条评论
为什么被折叠?
被折叠的 条评论
为什么被折叠?
 到【灌水乐园】发言


