


Selenium 自动化测试(五
pytest 简介
Pytest是一个基于python的测试框架。用于编写简单到复杂的测试,即编写代码来测试API、数据库、UI等。
优点:
- Pytest可以并行运行多个测试,从而减少测试套件的执行时间。
- Pytest有自己的方式来自动检测测试文件和测试功能。
- Pytest允许在执行过程中跳过测试的一个子集 skip 和 xfail
- Pytest允许运行整个测试套件的一个子集。
- Pytest是免费和开源的。
- 由于其简单的语法,pytest非常容易上手。
- 做selenium/appnium 等自动化测试,接口自动化测试 (pytest + requests)
- 有很多第三方插件,可以自定义扩展:
- 集成selenium pyttest-selenium
- 生成 html 测试报告 pytest-html
- 失败case重复执行 pytest-rerunfailures
- 多cpu分发 pytest-xdist
- 可以很好和 CI 工具结合,例如 Jenkins
安装 pytest
pip install pytest
官网: https://docs.pytest.org/en/stable/getting-started.html#get-started
编写规范
- 测试文件命名以test开头,或以test结尾
- 测试类以Test开头,且不能有init方法
- 测试函数以test开头
- 断言使用基本的assert
执行测试
-
配置pycharm
File > Settings > Tools > Python Intergrated Tools > Default test runner > pytest

在case 左侧点击执行按钮即可:
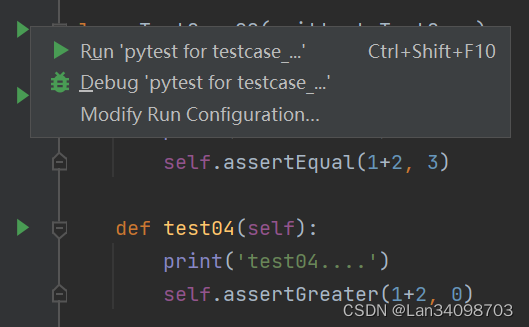
-
在main 方法中执行
if __name__ == '__main__': pytest.main(['-s', '-v', 'testcase_02.py']) -
使用命令行执行
PS C:\Users\yolan\PycharmProjects\pythonProject> cd testcases
PS C:\Users\yolan\PycharmProjects\pythonProject\testcases> pytest -s -v testcase_02.py
console 参数
- -v: 显示每个测试用例的结果
- -q: 只显示整体测试结果
- -s: 显示print()函数输出
- -x, --exitfirst: 在第一个错误或测试失败时立即退出
- -h: 帮助
pytest 标记
pytest 查找测试策略:
默认: 递归查找当前目录下所有以test开始或结果的python脚本 > 执行文件内所有以test 开始或结束的函数和方法
标记测试函数
- 显式指定函数名称: pytest -s -v testcase_02.py::test05
- 使用模糊匹配 -k: pytest -s -v testcase_02.py::test05
- 使用pytest,mark 在函数上进行标记
- 添加 pytest.ini 文件
[pytest] markers= do: do undo: undo - 在case上加上对应的mark
import pytest @pytest.mark.do def test05(): print('test05....') @pytest.mark.do def test06(): print('test06....') @pytest.mark.undo def test07(): print('test07....') @pytest.mark.undo def test08(): print('test08....') - 执行 pytest -m do testcase_02.py
PS C:\Users\yolan\PycharmProjects\pythonProject\testcases> pytest -m do testcase_02.py
========================== test session starts ====================================
platform win32 -- Python 3.7.6, pytest-7.2.2, pluggy-1.0.0
rootdir: C:\Users\yolan\PycharmProjects\pythonProject\testcases, configfile: pytest.ini
collected 4 items / 2 deselected / 2 selected

testcase_02.py ..  [100%]

==================== 2 passed, 2 deselected in 0.01s =====================
pytest 参数化
在pytest中可以使用参数化执行测试,每组参数都独立执行一次测试。
使用工具:pytest.mark.parametrize(argnames, argvalues)
import  pytest

data =['123','456']


@pytest.mark.parametrize('pwd', data)
def test01(pwd):
    print(f'test data is {pwd}')
运行结果:
C:\Python3.7.6\python.exe "C:/Program Files/JetBrains/PyCharm Community Edition 2022.3.3/plugins/python-ce/helpers/pycharm/_jb_pytest_runner.py" --target testcase_03.py::test01
Testing started at 9:42 ...
Launching pytest with arguments testcase_03.py::test01 --no-header --no-summary -q in C:\Users\yolan\PycharmProjects\pythonProject\testcases

============================= test session starts =============================
collecting ... collected 2 items

testcase_03.py::test01[123] PASSED                                       [ 50%]test data is 123

testcase_03.py::test01[456] PASSED                                       [100%]test data is 456


============================== 2 passed in 0.01s ==============================

Process finished with exit code 0
pytest fixture
- 定义与普通函数类似,要加个装饰器 @pytest.fixture()
- 命名不要以test开头,与用例区分开。fixture是有返回值的,没有时默认为none
- 用例调用fixture的返回值,当变量名称
import pytest


@pytest.fixture()
def init():
    print('init ............')
    return 1


def test01(init):
    print('test01........')
    print(init)


def test02(init):
    print('test02....')
    print(init)
pytest 的 setup 和 teardown
- 模块级 setup_module/teardown_module: 开始于模块始末,全局的
- 函数级 setup_function/teardown_function: 只对函数用例生效,不在类中
- 类级 setup_class/teardown_class: 只在类中前后运行一次
- 方法级 setup_method/teardown_method: 开始于方法始末
- 类内 setup/teardown: 运行在调用方法前后
pytest allure 生成测试报告
安装
pip install allure-pytest
安装 allure 命令执行行:
https://repo.maven.apache.org/maven2/io/qameta/allure/allure-commandline/2.21.0/
下载合适版本解压后,添加到环境变量
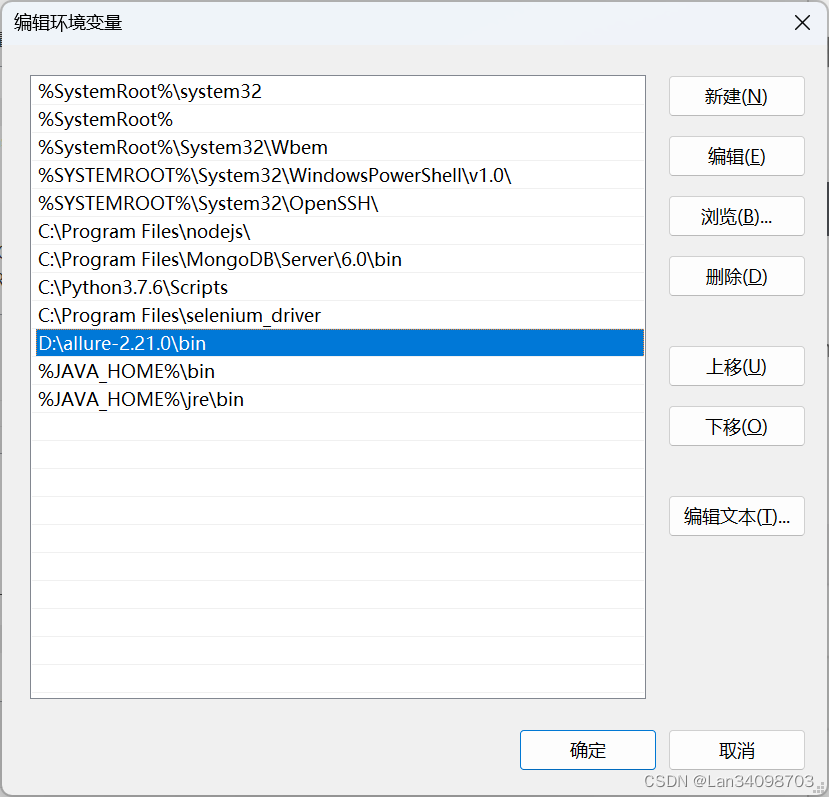
注意:需要安装 JAVA
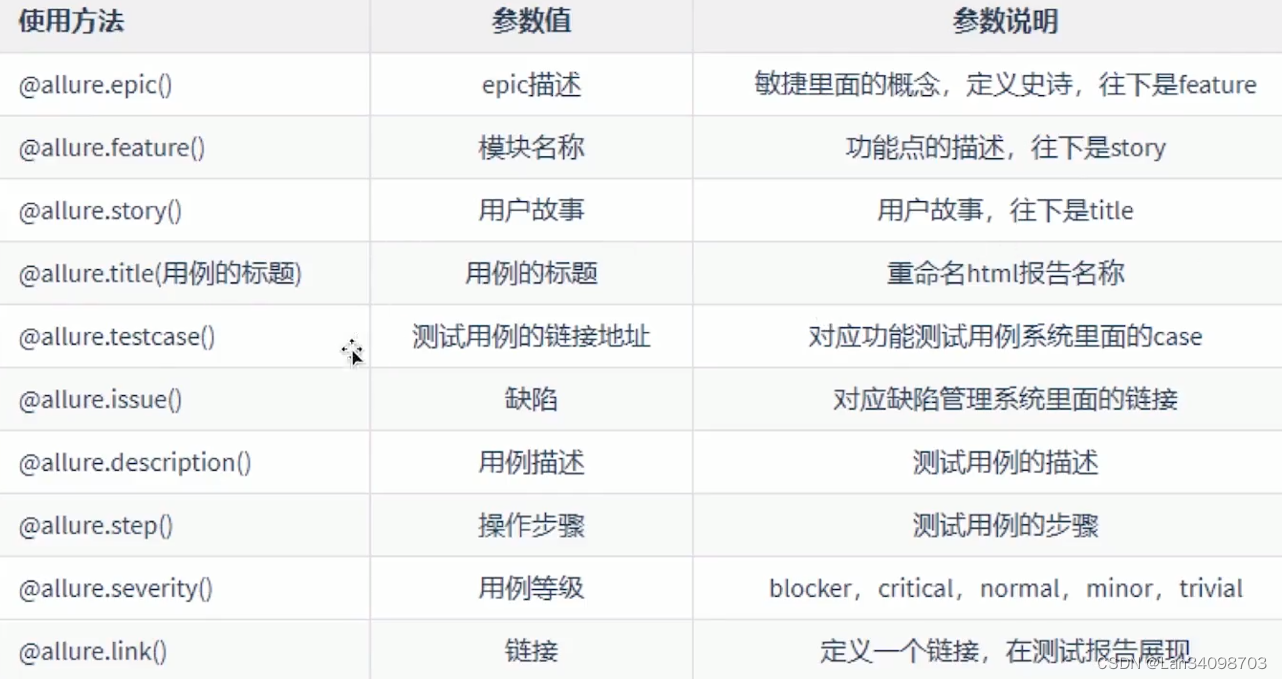
allure 用例描述
import pytest
import allure


@pytest.fixture(scope="session")
def login():
    print("login the system")


@allure.step("step 1: click button xxxxx")
def step_1():
    print("111111")


@allure.step("step 2: click button xxxxx")
def step_2():
    print("222222")


@allure.feature("Edit page")
class Testeditpage():

    @allure.story("this is first case")
    def test01(self, login):
        step_1
        step_2
        print("test 01 end")

    @allure.story("open test page")
    def test02(self, login):
        print("test 02 end")
执行:
pytest alluredir ./reports ./testcases/testcase_05.py - 生成 reports文件夹
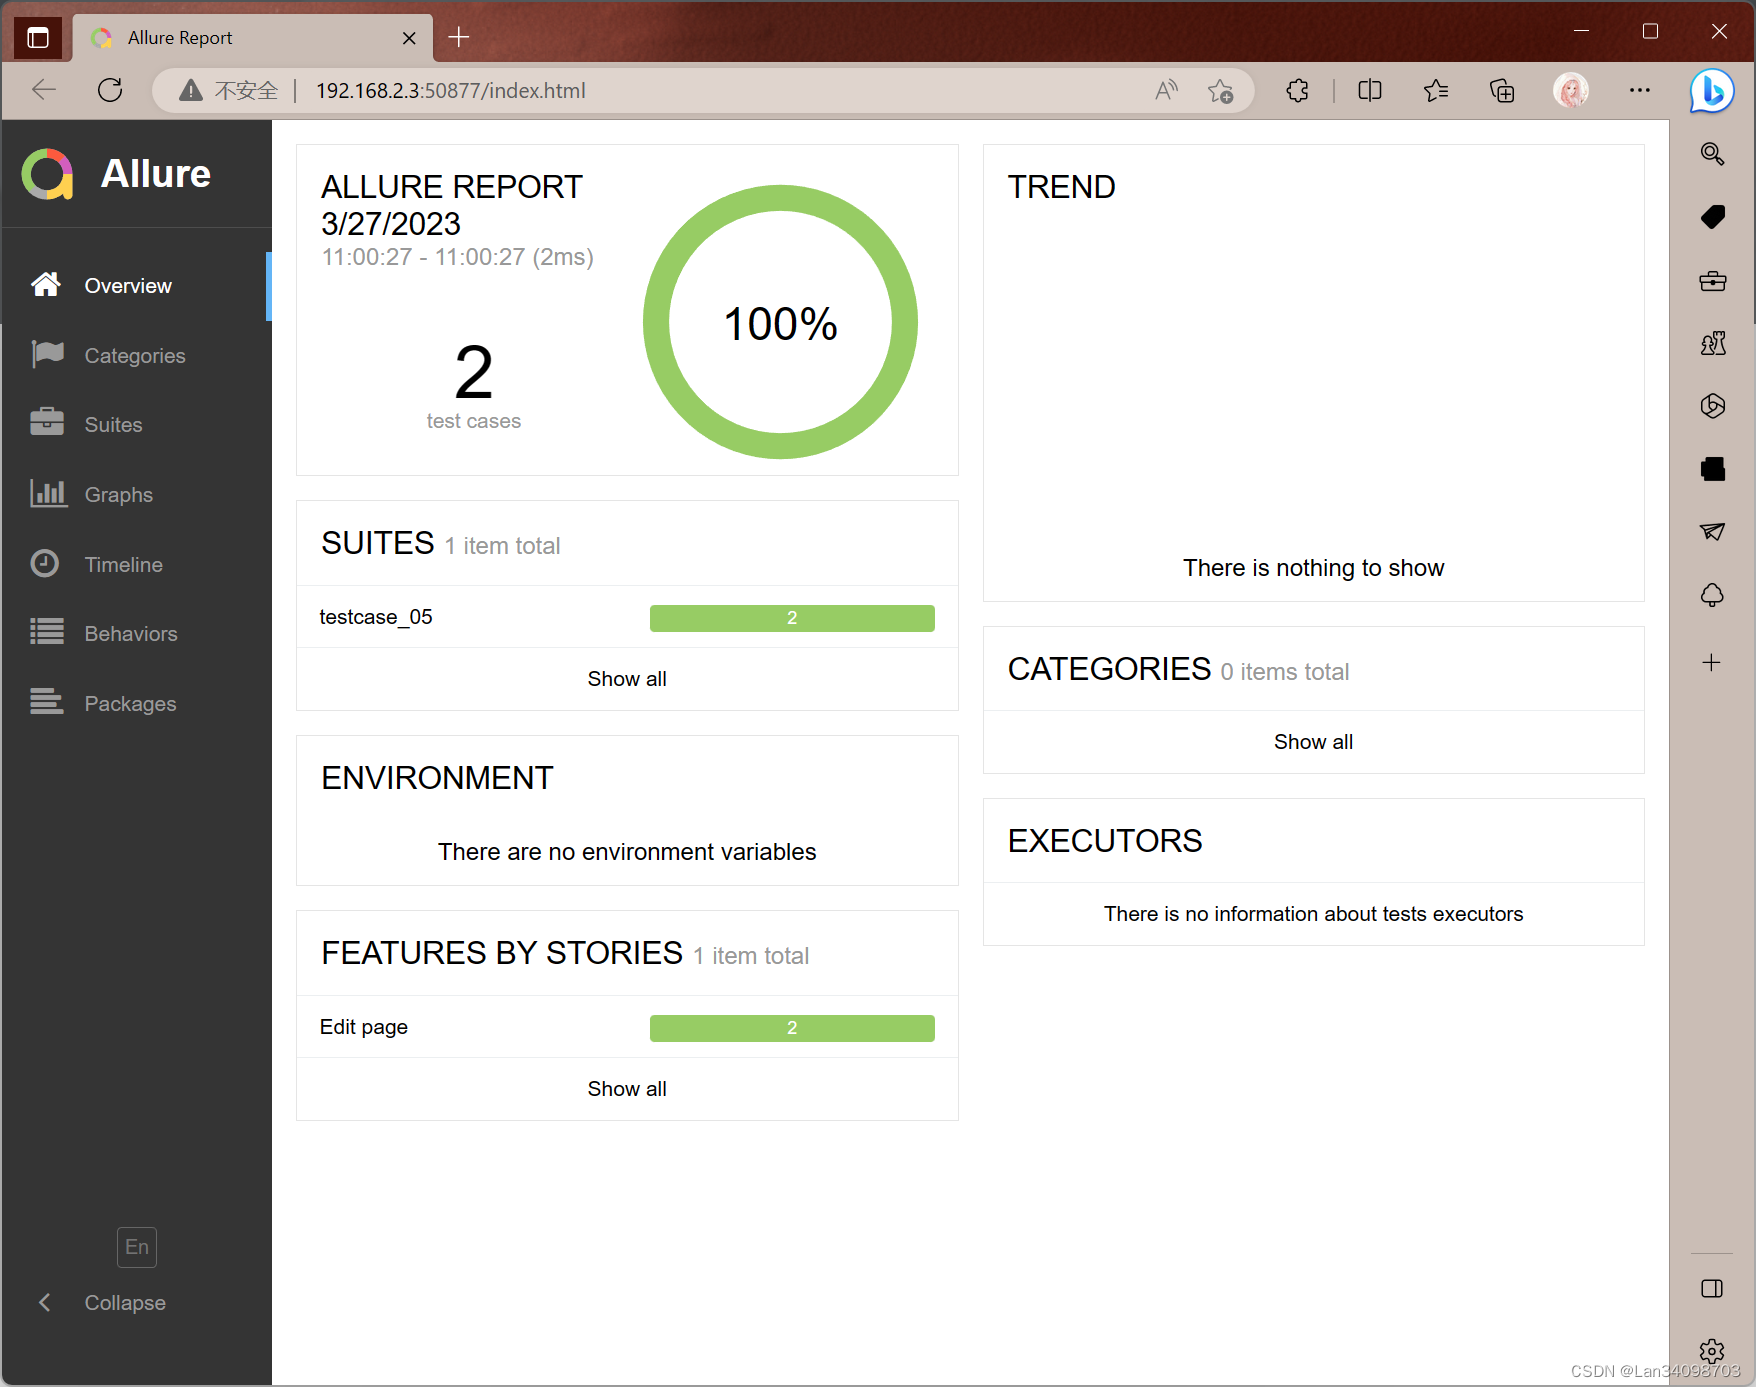
allure serve ./reports - 运行报告,自动打开网页报告
PS C:\Users\yolan\PycharmProjects\pythonProject> pytest alluredir ./reports ./testcases/testcase_05.py

========================== test session starts ==========================
platform win32 -- Python 3.7.6, pytest-7.2.2, pluggy-1.0.0
rootdir: C:\Users\yolan\PycharmProjects\pythonProject\testcases, configfile: pytest.ini
plugins: allure-pytest-2.13.1
collected 0 items

========================= no tests ran in 0.00s =========================
=====================platform win32 -- Python 3.7.6, pytest-7.2.2, pluggy-1.0.0
rootdir: C:\Users\yolan\PycharmProjects\pythonProject\testcases, configfile: pytest.ini
plugins: allure-pytest-2.13.1
collected 2 items

testcases\testcase_05.py ..                                                                                                                                                                                                                                                                                      [100%]

=========================== 2 passed in 0.01s ===========================
PS C:\Users\yolan\PycharmProjects\pythonProject> allure serve ./reports
Generating report to temp directory...
Report successfully generated to C:\Users\yolan\AppData\Local\Temp\6330792775400644813\allure-report
Starting web server...
2023-03-27 11:00:49.329:INFO::main: Logging initialized @1558ms to org.eclipse.jetty.util.log.StdErrLog
Server started at <http://192.168.2.3:50877/>. Press <Ctrl+C> to exit
使用 pytest 重构项目
- 继承 object
- setup方法改为 pytest setup
- 断言修改为python 断言assert
- 使用 pytest 依赖插件 >pip install pytest-dependency
日志
日志的作用
- 程序调试
- 了解程序运行是否正常
- 故障分析和问题定位
- 用户行为分析
日志等级
- DEBUG
- INFO
- WARNNING/
WARN - ERROR
- CRITICAL/FATAL
import logging

logging.basicConfig(level=logging.INFO)

logging.info("info")
logging.debug("debug")
logging.warning("warning")
logging.error("error")
logging.critical("critical")
logging 模块的四大组件
- loggers 提供应用程序大门直接使用的接口
- handlers 将日志记录发生到指定的目的位置
- filters 提供日志过滤功能,用于决定哪些日志将被输出
- formatters 用于控制日志信息输出格式
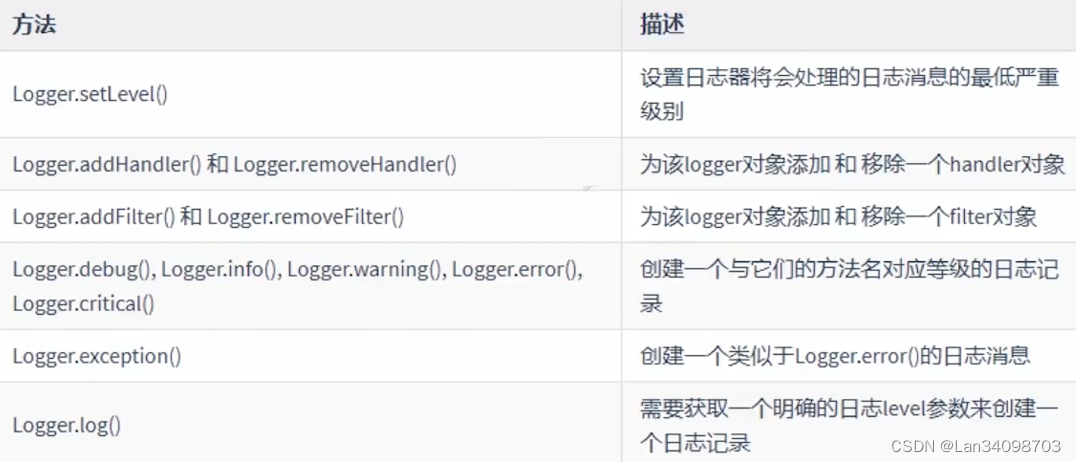
Logger
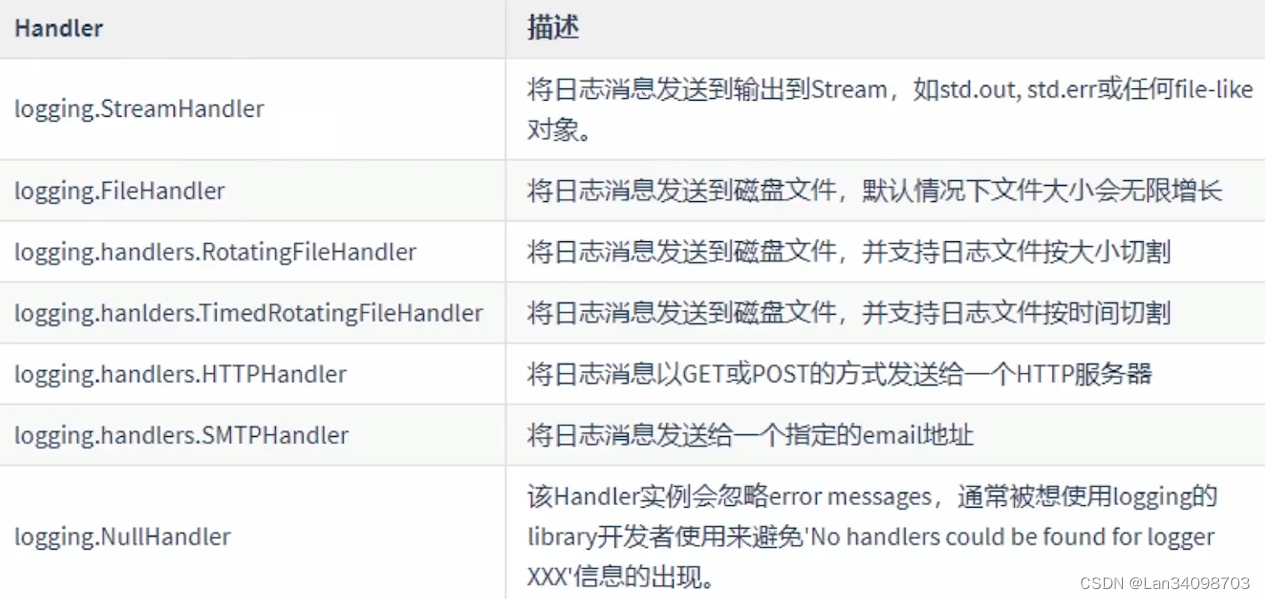
Handler

logging.basicConfig() 说明

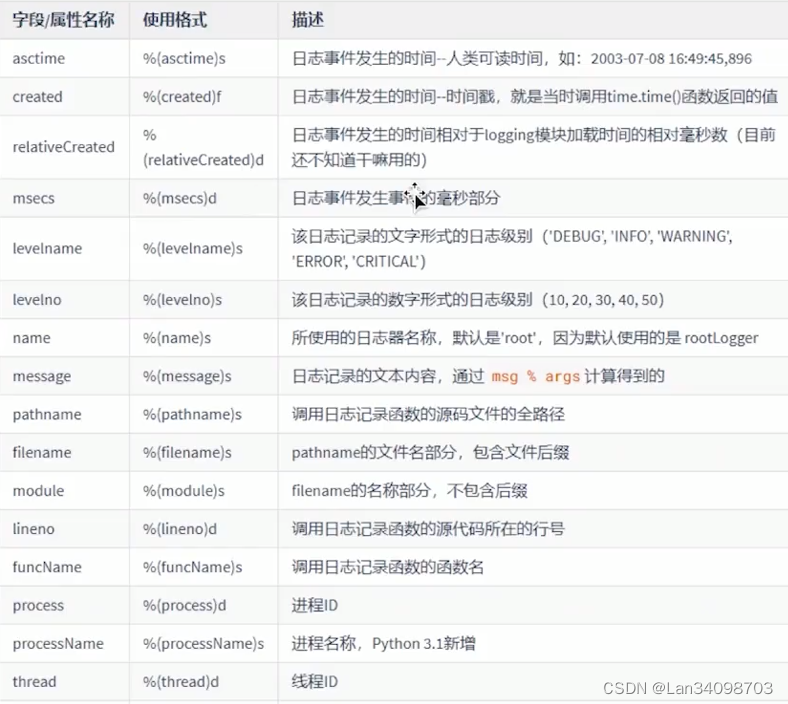
logging 的格式字符串


 1555
1555


 被折叠的 条评论
为什么被折叠?
被折叠的 条评论
为什么被折叠?
 到【灌水乐园】发言


