步骤1:基于上一个知识点改进
步骤2:先运行,看到效果,再学习
步骤3:模仿和排错
步骤4:Product类
步骤5:TestController
步骤6:test.html
步骤7:重启测试
步骤 1 : 基于上一个知识点改进
本知识点是基于上一个知识点进行改进
步骤 2 : 先运行,看到效果,再学习
老规矩,先下载下载区(点击进入)的可运行项目,配置运行起来,确认可用之后,再学习做了哪些步骤以达到这样的效果。
运行Application, 然后访问地址, 即可看到如图效果
| http://127.0.0.1:8080/thymeleaf/test
|

步骤 3 : 模仿和排错
在确保可运行项目能够正确无误地运行之后,再严格照着教程的步骤,对代码模仿一遍。
模仿过程难免代码有出入,导致无法得到期望的运行结果,此时此刻通过比较正确答案 ( 可运行项目 ) 和自己的代码,来定位问题所在。
采用这种方式,学习有效果,排错有效率,可以较为明显地提升学习速度,跨过学习路上的各个槛。
推荐使用diffmerge软件,进行文件夹比较。把你自己做的项目文件夹,和我的可运行项目文件夹进行比较。
这个软件很牛逼的,可以知道文件夹里哪两个文件不对,并且很明显地标记出来
这里提供了绿色安装和使用教程:diffmerge 下载和使用教程
步骤 4 : Product类
准备实体类,用于页面上显示数据
| package com.how2java.springboot.pojo;
public class Product {
private int id;
private String name;
private int price;
public int getId() {
return id;
}
public void setId(int id) {
this.id = id;
}
public String getName() {
return name;
}
public void setName(String name) {
this.name = name;
}
public int getPrice() {
return price;
}
public void setPrice(int price) {
this.price = price;
}
public Product(int id, String name, int price) {
super();
this.id = id;
this.name = name;
this.price = price;
}
}
|
步骤 5 : TestController
控制器里准备数据,然后映射 /test 路径,返回到test.html中
准备了 一个html片段和 一个 Product对象。
| package com.how2java.springboot.web;
import java.util.ArrayList;
import java.util.Date;
import java.util.List;
import org.springframework.stereotype.Controller;
import org.springframework.ui.Model;
import org.springframework.web.bind.annotation.RequestMapping;
import com.how2java.springboot.pojo.Product;
@Controller
public class TestController {
@RequestMapping("/test")
public String test(Model m) {
String htmlContent = "<p style='color:red'> 红色文字</p>";
Product currentProduct =new Product(5,"product e", 200);
m.addAttribute("htmlContent", htmlContent);
m.addAttribute("currentProduct", currentProduct);
return "test";
}
}
|
步骤 6 : test.html
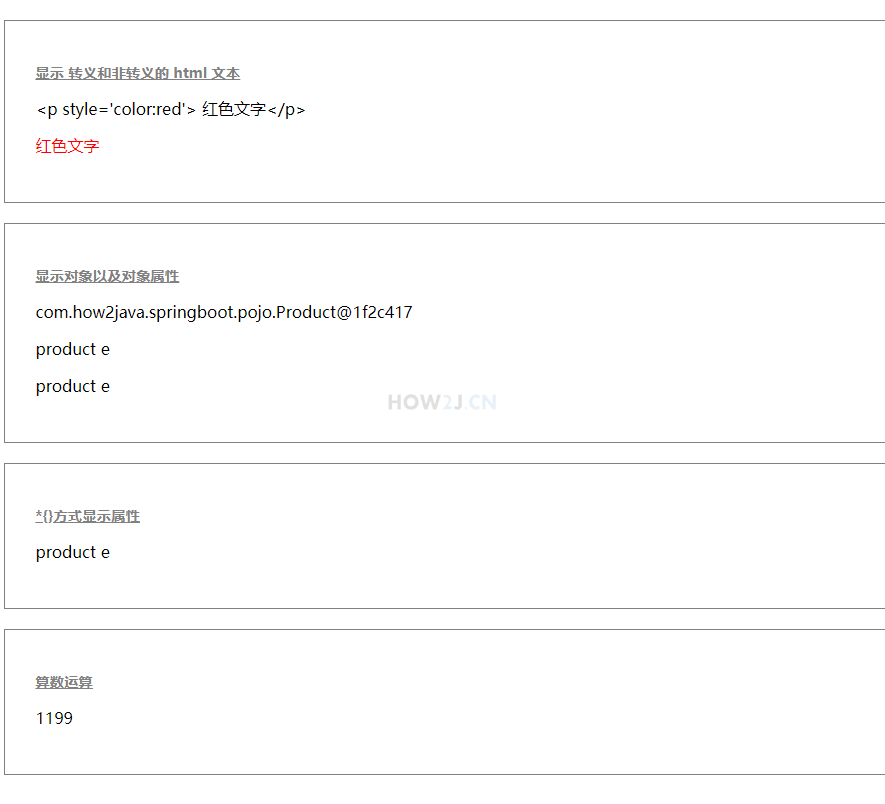
test.html 把控制器中准备的数据展示出来
1. 转义和非转义的html
| <p th:text="${htmlContent}" ></p>
<p th:utext="${htmlContent}" ></p>
|
2. 获取对象属性的两种方式,这里可以直接调用方法了
| <p th:text="${currentProduct.name}" ></p>
<p th:text="${currentProduct.getName()}" ></p>
|
3. 使用 *{} 方式显示当前对象的属性
<div class="showing" th:object="${currentProduct}">
<h2>*{}方式显示属性</h2>
<p th:text="*{name}" ></p>
</div>
4. 算数运算,这里之演示了加法,其他的减法,乘法什么的略过不表
| <p th:text="${currentProduct.price+999}" ></p>
|
| <!DOCTYPE HTML>
<html xmlns:th="http://www.thymeleaf.org">
<head>
<title>hello</title>
<meta http-equiv="Content-Type" content="text/html; charset=UTF-8" />
<link rel="stylesheet" type="text/css" media="all" href="../../webapp/static/css/style.css" th:href="@{/static/css/style.css}"/>
<script type="text/javascript" src="../../webapp/static/js/thymeleaf.js" th:src="@{/static/js/thymeleaf.js}"></script>
<style>
h2{
text-decoration: underline;
font-size:0.9em;
color:gray;
}
</style>
</head>
<body>
<div class="showing">
<h2>显示 转义和非转义的 html 文本</h2>
<p th:text="${htmlContent}" ></p>
<p th:utext="${htmlContent}" ></p>
</div>
<div class="showing">
<h2>显示对象以及对象属性</h2>
<p th:text="${currentProduct}" ></p>
<p th:text="${currentProduct.name}" ></p>
<p th:text="${currentProduct.getName()}" ></p>
</div>
<div class="showing" th:object="${currentProduct}">
<h2>*{}方式显示属性</h2>
<p th:text="*{name}" ></p>
</div>
<div class="showing">
<h2>算数运算</h2>
<p th:text="${currentProduct.price+999}" ></p>
</div>
</body>
</html>
|
步骤 7 : 重启测试
重新运行Application, 然后访问地址, 即可看到如图效果
| http://127.0.0.1:8080/thymeleaf/test
|
更多内容,点击了解: https://how2j.cn/k/springboot/springboot-expression/1737.html


 本文详细介绍了在SpringBoot环境中,从基础知识点改进开始,通过运行、模仿、排错,创建Product类和TestController,再到test.html中的HTML表达式,一步步进行实战学习的过程。


 21万+
21万+

 被折叠的 条评论
为什么被折叠?
被折叠的 条评论
为什么被折叠?
 到【灌水乐园】发言


