


步骤1:idea 热更新
步骤2:pom.xml
步骤3:idea 设置
步骤4:1. 项目自动编译
步骤5:2. automake 选项开启-A
步骤6:2. automake 选项开启-B
步骤 1 : idea 热更新
在 idea2017 里, springboot thymeleaf 修改 html 之后不能立即看到效果,要重新启动 Application 才可以看到效果。 这样做开发效率肯定是大受影响的。
本知识点讲解如何进行相关设置,以达到修改 html 之后,马上就可以看到效果。
步骤 2 : pom.xml
首先要确保 pom.xml 里有热部署的依赖和插件:
做法很简单,在pom.xml中新增加一个依赖和一个插件就行了。
依赖:
|
|
插件:
|
|
这一点在前面的 热部署 教程里已经有讲解了。
步骤 3 : idea 设置
然后是 idea 设置。
设置两个内容:
1. 项目自动编译
2. automake 选项开启
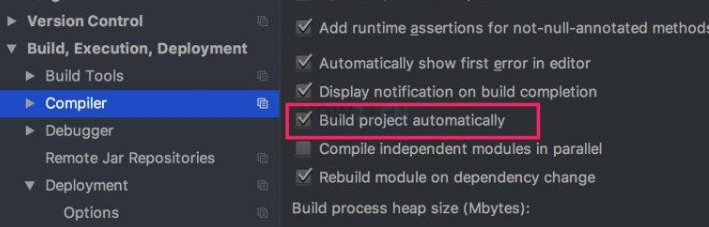
步骤 4 : 1. 项目自动编译
菜单 -> Other Settings -> Default Settings -> Builld, Execution, Deployment -> Compiler
勾选其中的 Build project automatically. 这个选项默认是没有被勾选的。
步骤 5 : 2. automake 选项开启-A
automake 选项开启比较麻烦,因为它的开启界面默认是不能够被打开的,需要通过快捷键才能打开。。。
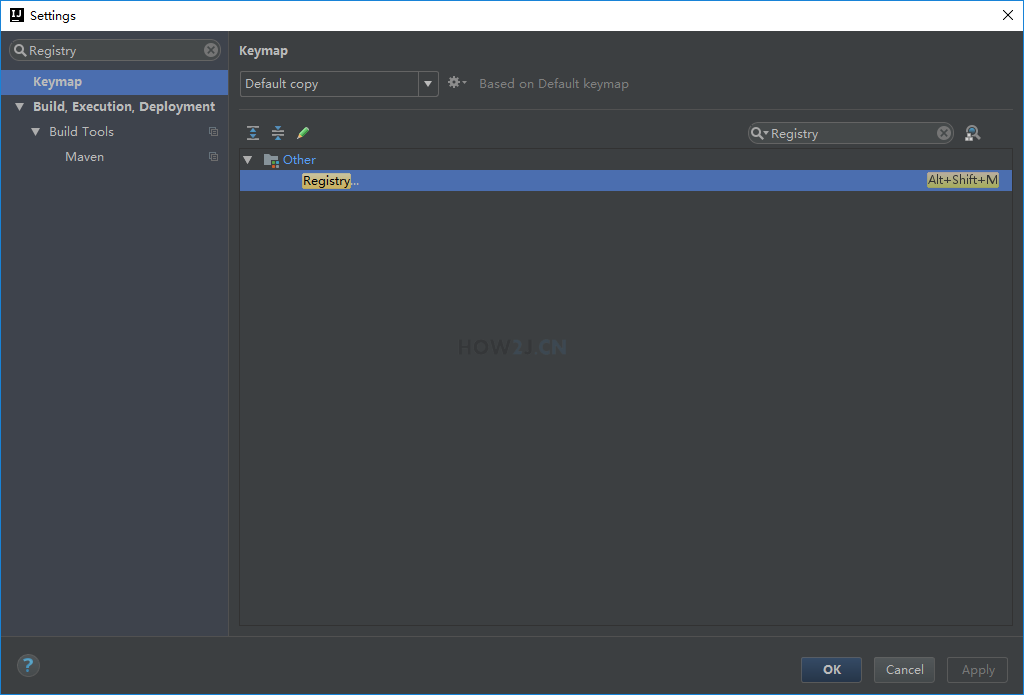
设置快捷键办法:
1. 菜单->File->Settings->左上角的搜索框里输入 Registry
2. 右边搜索结果出现 Registry... 这么一个功能,然后给这个功能增加一个快捷键 Alt+Shift+M。 用这个快捷键是因为它默认情况下是没有冲突的。
3. 点击 OK
继续下一步
步骤 6 : 2. automake 选项开启-B
然后通过 Alt+Shift +M 快捷键打开 Registry 窗口,找到 如图所示的 comipler.automake.allow.when.app.running 勾上。
然后点 Close.
接着重启 idea, 这样修改 html 就可以马上看到效果了
![]()
更多内容,点击了解: https://how2j.cn/k/springboot/springboot-idea-hot-deploy/1923.html


 被折叠的 条评论
为什么被折叠?
被折叠的 条评论
为什么被折叠?
 到【灌水乐园】发言


