


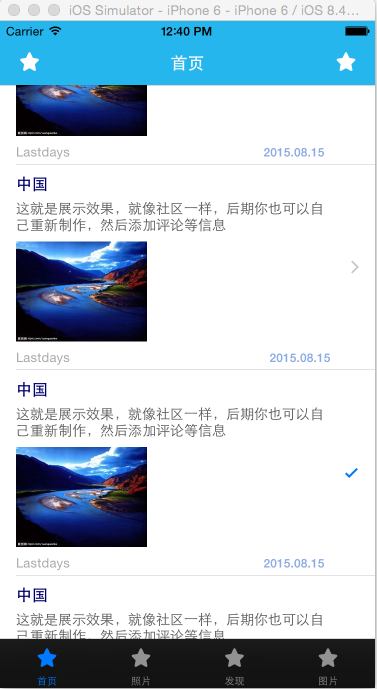
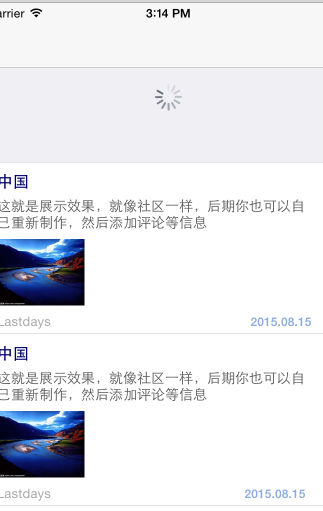
效果展示
·

进入构建结构
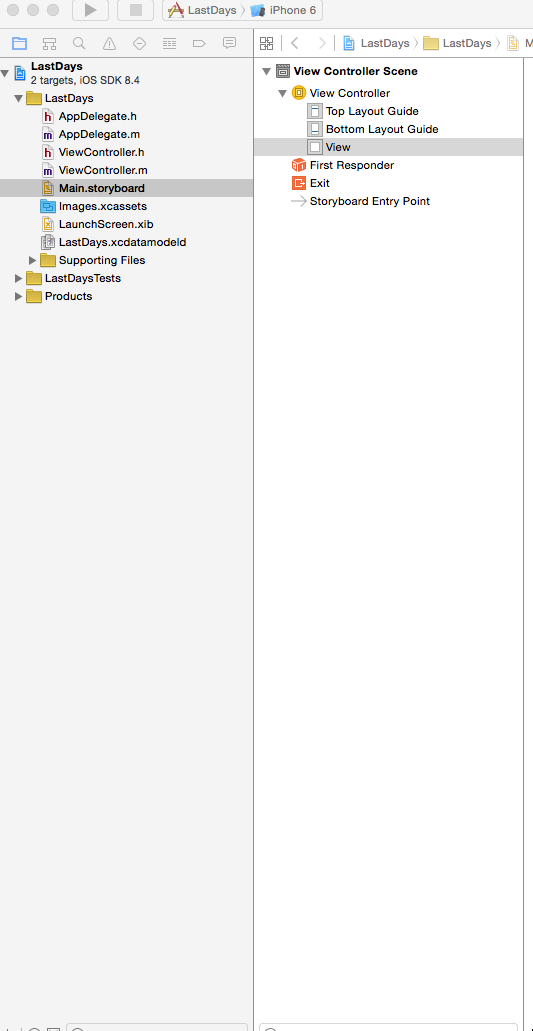
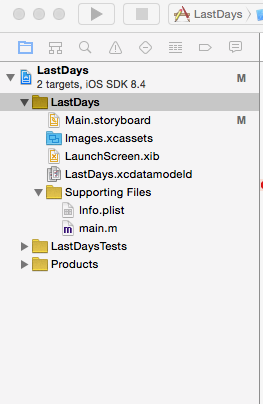
首先我们新建一个工程
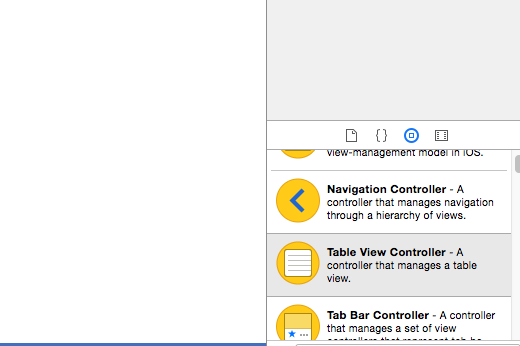
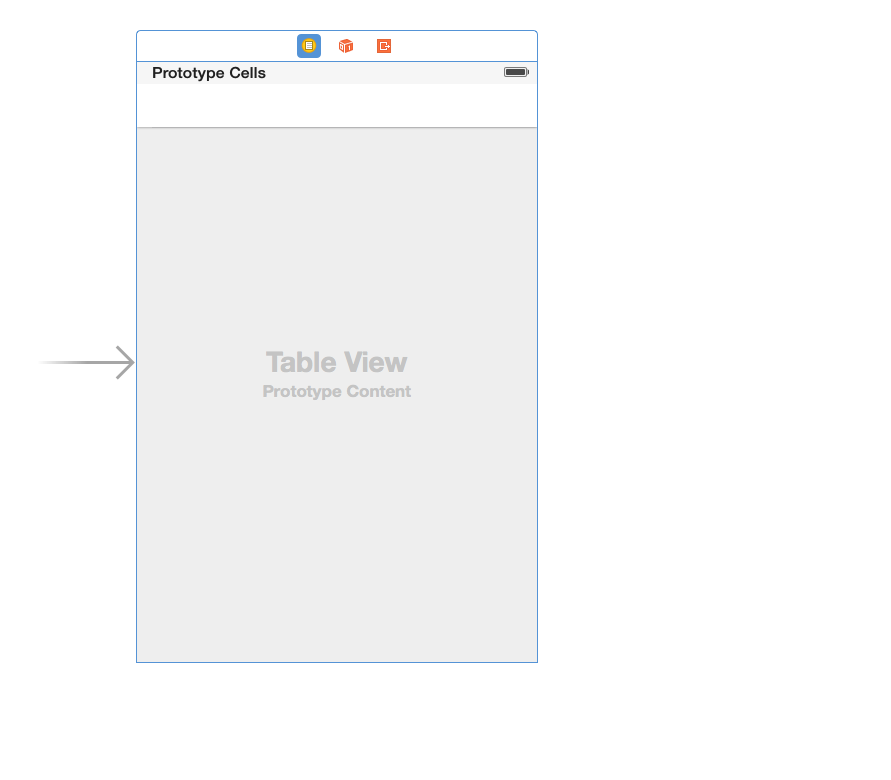
接下来我们拖进来一个Table View Controller,将Storyboard Entry Point指向我们的Table View Controller。原来的ViewController就可以删除了。效果如图所示
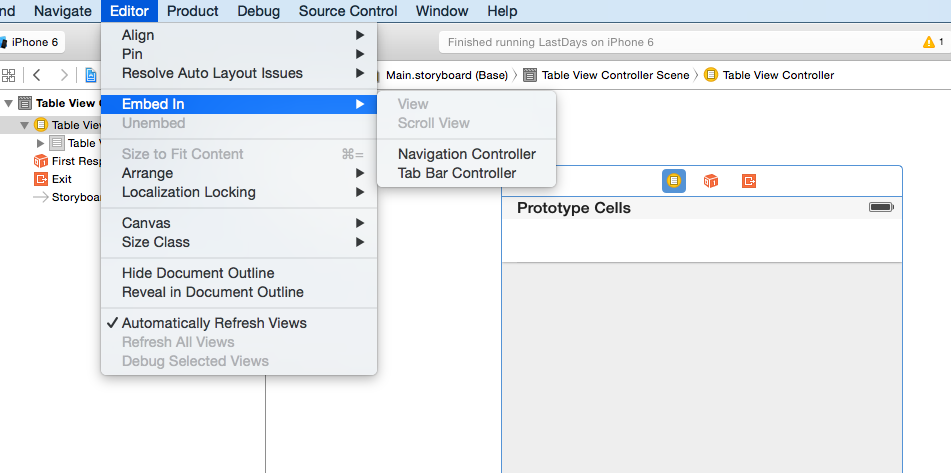
选中Table View Controller,点击上面菜单栏中Editor->Embed in->Navigation Controller
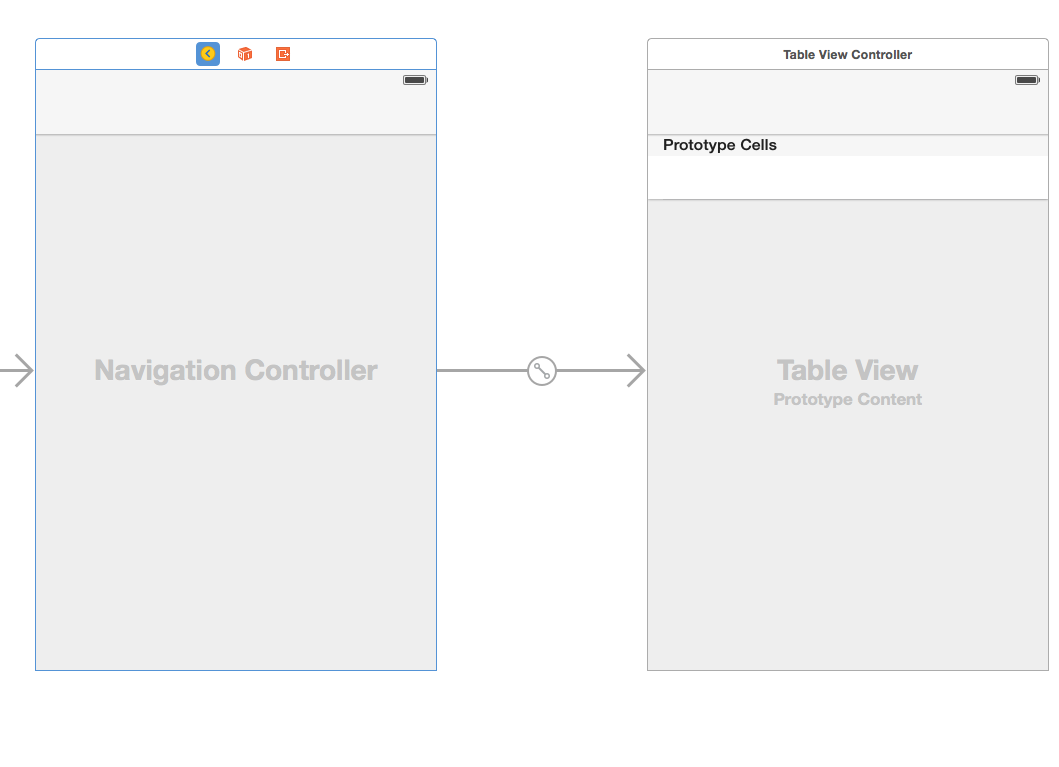
基本的工作我们都做完了,可以讲工程中没用的东西都可以删除了,方便我们进行编写东西
主题(代码编写)
在这里我进行代码的编写,讲述主要部分,后面会把完整的项目给出
构建LDEntity用来初始化字典,进行Json数据的解析
LDEntity.h
#import <Foundation/Foundation.h>

@interface FDFeedEntity : NSObject

- (instancetype)initWithDictionary:(NSDictionary *)dictionary;

@property (nonatomic, copy) NSString *title;
@property (nonatomic, copy) NSString *content;
@property (nonatomic, copy) NSString *username;
@property (nonatomic, copy) NSString *time;
@property (nonatomic, copy) NSString *imageName;

@end
-(instancetype)initWithDictionary:(NSDictionary *)dictionary方法的具体实现,返回本身类型
LDEntity.m
#import "FDFeedEntity.h"

@implementation FDFeedEntity

- (instancetype)initWithDictionary:(NSDictionary *)dictionary
{
    self = super.init;
    if (self) {
        self.title = dictionary[@"title"];
        self.content = dictionary[@"content"];
        self.username = dictionary[@"username"];
        self.time = dictionary[@"time"];
        self.imageName = dictionary[@"imageName"];
    }
    return self;
}

@end
以上代码的功能主要是为了解析JSON数据
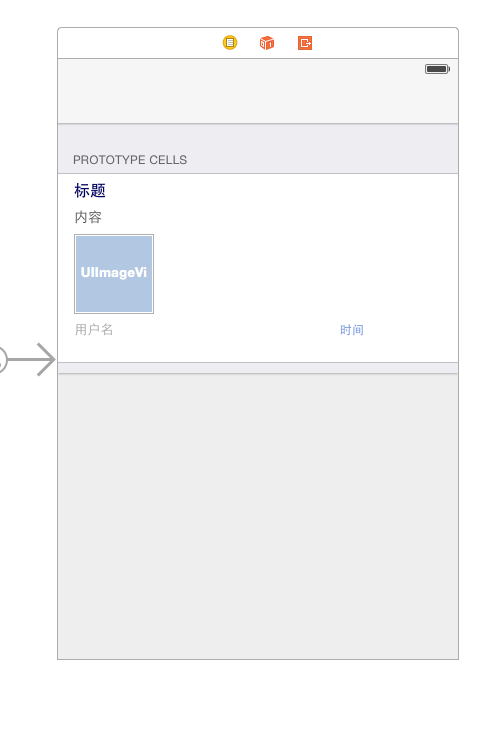
构建我们的Main.storyboard
选中Table View更改Style为Grouped

设计出以下样式,并且使用 auto layout进行约束
接下来编写cell
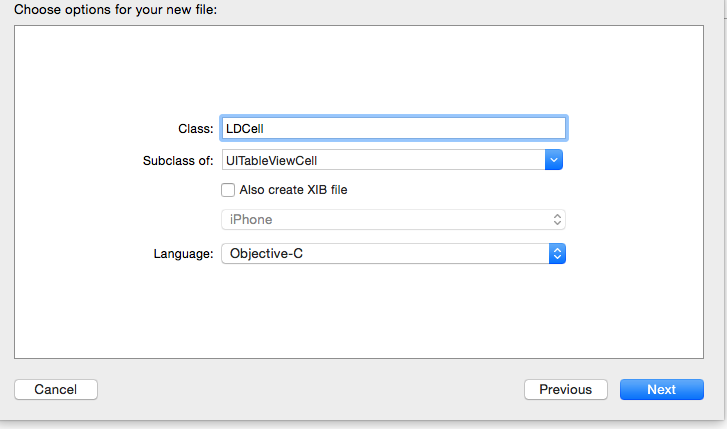
新建LDCell 继承 UITableViewCell
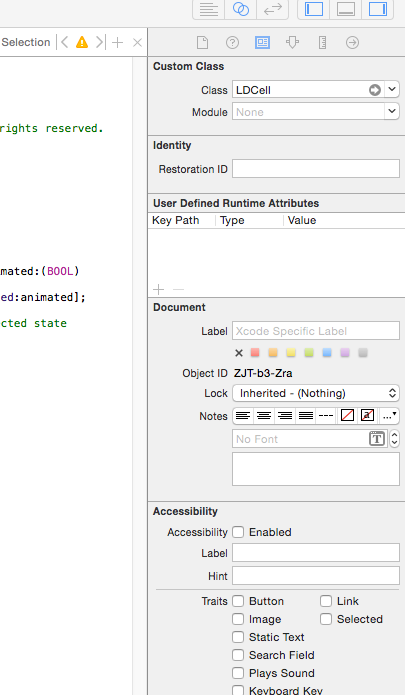
将Main.storyboard中TableView中的Cell的Identifier设置为LDCell,并且关联LDCell
LDCell.h
构建一个LDEntity对象解析数据
#import <UIKit/UIKit.h>
#import "LDEntity.h"

@interface LDCell : UITableViewCell

@property(nonatomic,strong)LDEntity *entity;

@end
将刚才的所有控件与LDCell.m关联
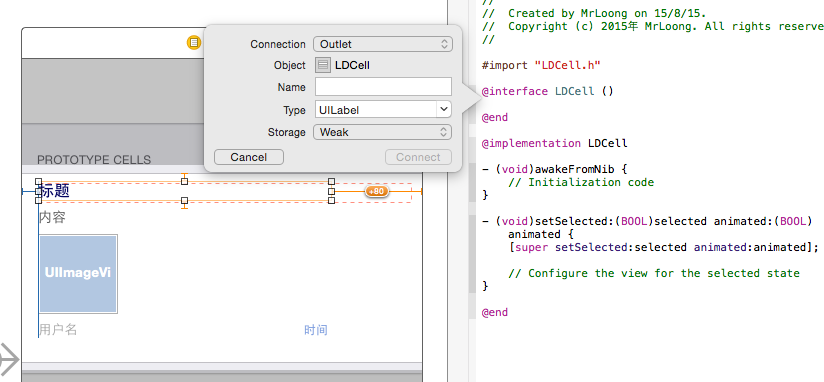
在LDCell.m中构建entity的set方法,还有需要注意的是如果你没有使用auto layout,你需要重写约束方法
LDCell.m
#import "LDCell.h"

@interface LDCell ()
@property (weak, nonatomic) IBOutlet UILabel *titleLabel;
@property (weak, nonatomic) IBOutlet UILabel *contentLabel;
@property (weak, nonatomic) IBOutlet UIImageView *contentImageView;
@property (weak, nonatomic) IBOutlet UILabel *usernameLabel;
@property (weak, nonatomic) IBOutlet UILabel *timeLabel;

@end

@implementation LDCell

- (void)awakeFromNib {
    // 修复IOS7中的BUG- 初始化 constraints warning

    self.contentView.bounds = [UIScreen mainScreen].bounds;
}

//关联控件进行数据显示
-(void)setEntity:(LDEntity *)entity{
    _entity = entity;

    self.titleLabel.text = entity.title;
    self.contentLabel.text = entity.content;
    self.contentImageView.image = entity.imageName.length > 0 ? [UIImage imageNamed:entity.imageName] : nil;
    self.usernameLabel.text = entity.username;
    self.timeLabel.text = entity.time;
}

#if 0

// 如果没有使用 auto layout, 请重写这个方法
- (CGSize)sizeThatFits:(CGSize)size
{
    CGFloat totalHeight = 0;
    totalHeight += [self.titleLabel sizeThatFits:size].height;
    totalHeight += [self.contentLabel sizeThatFits:size].height;
    totalHeight += [self.contentImageView sizeThatFits:size].height;
    totalHeight += [self.usernameLabel sizeThatFits:size].height;
    totalHeight += 40; // margins
    return CGSizeMake(size.width, totalHeight);
}

#endif

@end
开始编写我们最重要的类LDViewController.在编写这个类之前,我们需要使用FDTemplateLayout
,并且将TableViewController与LDViewController进行关联
LDViewController.h
#import <UIKit/UIKit.h>

@interface FDFeedViewController : UITableViewController

@end
TableView的使用有不明白的可以去学习下,这里不做解释了,注释中给出了重点的地方讲解,设置data source以及设置Delegate在程序中做出区分
LDViewController.m
#import "LDViewController.h"
#import "UITableView+FDTemplateLayoutCell.h"
#import "LDEntity.h"
#import "LDCell.h"

@interface LDViewController ()<UIActionSheetDelegate>

@property (nonatomic, copy) NSArray *prototypeEntitiesFromJSON;
@property (nonatomic, strong) NSMutableArray *feedEntitySections; // 2d array
@property (nonatomic, assign) BOOL cellHeightCacheEnabled;

@end

@implementation LDViewController

- (void)viewDidLoad {
    [super viewDidLoad];

    self.tableView.estimatedRowHeight = 200;
    self.tableView.fd_debugLogEnabled = YES;

    self.cellHeightCacheEnabled = YES;

    [self buildTestDataThen:^{
        self.feedEntitySections = @[].mutableCopy;
        [self.feedEntitySections addObject:self.prototypeEntitiesFromJSON.mutableCopy];
        [self.tableView reloadData];
    }];
}

- (void)buildTestDataThen:(void (^)(void))then
{
    // 模拟一个异步请求
    dispatch_async(dispatch_get_global_queue(DISPATCH_QUEUE_PRIORITY_DEFAULT, 0), ^{

        // 读取数据从 `data.json`
        NSString *dataFilePath = [[NSBundle mainBundle] pathForResource:@"data" ofType:@"json"];
        NSData *data = [NSData dataWithContentsOfFile:dataFilePath];
        NSDictionary *rootDict = [NSJSONSerialization JSONObjectWithData:data options:NSJSONReadingAllowFragments error:nil];
        NSArray *feedDicts = rootDict[@"feed"];

        // 讲数据转化为 `LDEntity`
        NSMutableArray *entities = @[].mutableCopy;
        [feedDicts enumerateObjectsUsingBlock:^(id obj, NSUInteger idx, BOOL *stop) {
            [entities addObject:[[LDEntity alloc] initWithDictionary:obj]];
        }];
        self.prototypeEntitiesFromJSON = entities;

        // 重返
        dispatch_async(dispatch_get_main_queue(), ^{
            !then ?: then();
        });
    });
}

//设置数据源
#pragma mark - Table view data source


- (NSInteger)numberOfSectionsInTableView:(UITableView *)tableView
{
    return self.feedEntitySections.count;
}

- (NSInteger)tableView:(UITableView *)tableView numberOfRowsInSection:(NSInteger)section
{
    return [self.feedEntitySections[section] count];
}

- (UITableViewCell *)tableView:(UITableView *)tableView cellForRowAtIndexPath:(NSIndexPath *)indexPath
{
    //LDCell为Main.storyboard中的cell控件
    LDCell *cell = [tableView dequeueReusableCellWithIdentifier:@"LDCell" forIndexPath:indexPath];
    [self configureCell:cell atIndexPath:indexPath];
    return cell;
}

- (void)configureCell:(LDCell *)cell atIndexPath:(NSIndexPath *)indexPath
{
    cell.fd_enforceFrameLayout = NO; // Enable to use "-sizeThatFits:"
    if (indexPath.row % 2 == 0) {
        cell.accessoryType = UITableViewCellAccessoryDisclosureIndicator;
    } else {
        cell.accessoryType = UITableViewCellAccessoryCheckmark;
    }
    cell.entity = self.feedEntitySections[indexPath.section][indexPath.row];
}


//设置委托
#pragma mark - UITableViewDelegate

- (CGFloat)tableView:(UITableView *)tableView heightForRowAtIndexPath:(NSIndexPath *)indexPath
{
    if (self.cellHeightCacheEnabled) {

        //LDCell为Main.storyboard中的cell控件

        return [tableView fd_heightForCellWithIdentifier:@"LDCell" cacheByIndexPath:indexPath configuration:^(LDCell *cell) {
            [self configureCell:cell atIndexPath:indexPath];
        }];
    } else {
        return [tableView fd_heightForCellWithIdentifier:@"LDCell" configuration:^(LDCell *cell) {
            [self configureCell:cell atIndexPath:indexPath];
        }];
    }
}

- (void)tableView:(UITableView *)tableView commitEditingStyle:(UITableViewCellEditingStyle)editingStyle forRowAtIndexPath:(NSIndexPath *)indexPath
{
    if (editingStyle == UITableViewCellEditingStyleDelete) {
        NSMutableArray *mutableEntities = self.feedEntitySections[indexPath.section];
        [mutableEntities removeObjectAtIndex:indexPath.row];
        [self.tableView deleteRowsAtIndexPaths:@[indexPath] withRowAnimation:UITableViewRowAnimationAutomatic];
    }
}


@end
如果你想有自己的cell,你可以这么做:
#import "UITableView+FDTemplateLayoutCell.h"

- (CGFloat)tableView:(UITableView *)tableView heightForRowAtIndexPath:(NSIndexPath *)indexPath
{
    return [tableView fd_heightForCellWithIdentifier:@"reuse identifer" configuration:^(id cell) {
        // 配置此Cell(单元格)的数据, 同你在"-tableView:cellForRowAtIndexPath:"做了什么一样
        // 像这样:
        //    cell.entity = self.feedEntities[indexPath.row];
    }];
}
下面制作我们的最后一个功能就是下拉刷新操作
我们使用UITableViewController自带的UIRefreshControl
在LDViewController.m中添加此方法,并且与UIRefreshControl关联
//重新加载数据

dispatch_after(dispatch_time(DISPATCH_TIME_NOW, (int64_t)(1.5 * NSEC_PER_SEC)), dispatch_get_main_queue(), ^{
        [self.feedEntitySections removeAllObjects];
        [self.feedEntitySections addObject:self.prototypeEntitiesFromJSON.mutableCopy];
        [self.tableView reloadData];
        [sender endRefreshing];
    });
效果如下:


 1541
1541


 被折叠的 条评论
为什么被折叠?
被折叠的 条评论
为什么被折叠?
 到【灌水乐园】发言


