


环境准备
10.0.0.8 nginx    安装nginx 做proxy
10.0.0.18 web1   安装apache
10.0.0.28  web2   安装apache
10.0.0.100  Ubuntu  做客户端
1.安装apache;
在10.0.0.18 web1
[root@centos8 ~]#yum install httpd -y
[root@centos8 ~]#echo "web1 10.0.0.18" > /var/www/html/index.html
[root@centos8 ~]#systemctl enable --now httpd
在10.0.0.28web2
[root@centos8 ~]#yum install httpd -y
[root@centos8 ~]#echo "web2 10.0.0.28" >> /var/www/html/index.html
[root@centos8 ~]#systemctl enable --now httpd
----在客户端测试;


2. 在nginx上搭建负载均衡的服务;
vim /apps/nginx/conf/nginx.conf #设置upstream webserver (这里webserver是可以任意取名的)

vim /apps/nginx/conf.d/pc.conf #打开pc的conf文件设置 将原来的ip改成webserver
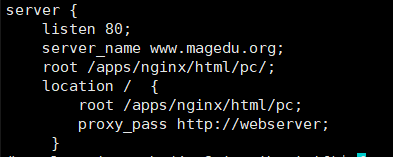
设置好了以后 重置nginx -s reload
3.在Ubuntu上测试
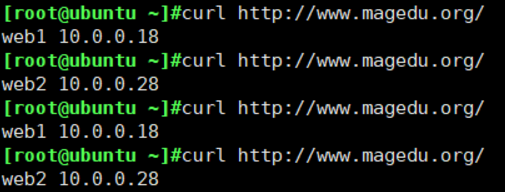
可以看到实现了负载均衡
4 添加分组m.magedu.org进行测试
测试另外一组 m.magedu.org
在nginx 10.0.0.8上设置
#vim /apps/nginx/conf.d/mobile.conf

在vim /apps/nginx/conf/nginx.conf中 添加一组;

在7和27上测试
yum -y install httpd;systemctl enable --now httpd;hostname -I > /var/www/html/index.html #先安装并启动httpd
在Ubuntu客户端上测试
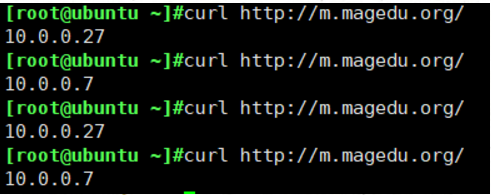
默认是有健康检查
就是当其中一台web服务器故障后,不会再转发数据
示例,如果10.0.0.27服务器故障
执行 systemctl stop httpd
如图,没有再转发;

设置完成


 1651
1651


 被折叠的 条评论
为什么被折叠?
被折叠的 条评论
为什么被折叠?
 到【灌水乐园】发言


