


文章目录
先啰嗦直接看代码
Q3 Image Captioning with Transformers
MultiHeadAttention.forward
题面

解析
让我们实现多头注意力的前向计算
如果你看了上面的这个视频,那么你应该能大概明白多头注意力是个什么东西
然后我们来看init部分的代码
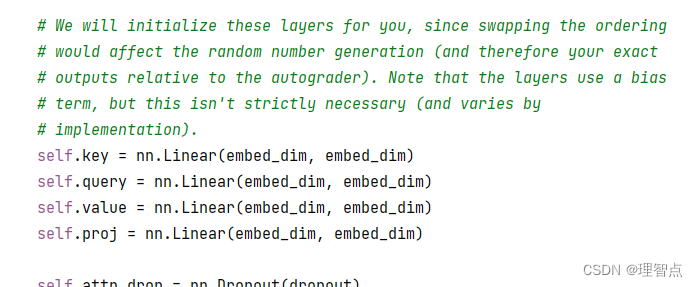
首先多头注意力让我们对单纯的注意力的Q,K,V,计算的时候进行了投影,那么具体的投影方法,就是上面定义的
- self.key 投影key
- self.query 投影query
- self.value 投影 value
我们可以看到,这几个线性层的输入输出维度是相同的,接下来只需要计算单纯的权重就好了,如果看不懂我的解析,可以看我的代码注释,同时建议看看上面那个链接的视频
代码
def forward(self, query, key, value, attn_mask=None):
"""
Calculate the masked attention output for the provided data, computing
all attention heads in parallel.
In the shape definitions below, N is the batch size, S is the source
sequence length, T is the target sequence length, and E is the embedding
dimension.
Inputs:
- query: Input data to be used as the query, of shape (N, S, E)
- key: Input data to be used as the key, of shape (N, T, E)
- value: Input data to be used as the value, of shape (N, T, E)
- attn_mask: Array of shape (S, T) where mask[i,j] == 0 indicates token
i in the source should not influence token j in the target.
Returns:
- output: Tensor of shape (N, S, E) giving the weighted combination of
data in value according to the attention weights calculated using key
and query.
"""
N, S, E = query.shape
N, T, E = value.shape
# Create a placeholder, to be overwritten by your code below.
output = torch.empty((N, S, E))
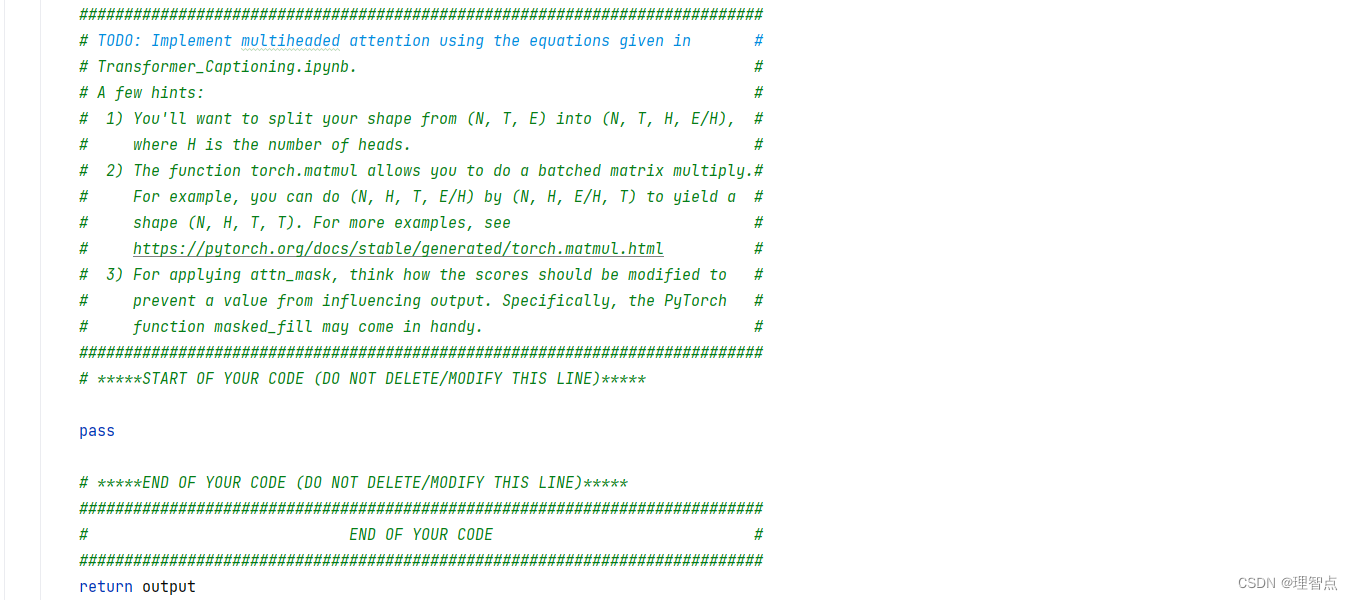
############################################################################
# TODO: Implement multiheaded attention using the equations given in #
# Transformer_Captioning.ipynb. #
# A few hints: #
# 1) You'll want to split your shape from (N, T, E) into (N, T, H, E/H), #
# where H is the number of heads. #
# 2) The function torch.matmul allows you to do a batched matrix multiply.#
# For example, you can do (N, H, T, E/H) by (N, H, E/H, T) to yield a #
# shape (N, H, T, T). For more examples, see #
# https://pytorch.org/docs/stable/generated/torch.matmul.html #
# 3) For applying attn_mask, think how the scores should be modified to #
# prevent a value from influencing output. Specifically, the PyTorch #
# function masked_fill may come in handy. #
############################################################################
# *****START OF YOUR CODE (DO NOT DELETE/MODIFY THIS LINE)*****
# 投影QKV
Q = self.query(query)
K = self.key(key)
V = self.value(value)
# 获取投影个数
H = self.n_head
# 获取投影维度
D = self.head_dim
# 矩阵分割 与 转置 这里需要结合QKV的形状来理解
Q = Q.reshape(N, S, H, D).transpose(1, 2) # (N H S D)
K = K.reshape(N, T, H, D).transpose(1, 2) # (N H T D)
V = V.reshape(N, T, H, D).transpose(1, 2) # (N H T D)
# 矩阵乘法算权重 (N, H, S, K) * (N, H, K, T) -> N, H, S, T
energy = torch.matmul(Q, K.transpose(-2, -1)) / math.sqrt(D) # (N H S T)
# 判断是否需要mask
if attn_mask is not None:
energy = energy.masked_fill(attn_mask == 0, float('-inf'))
# softmax计算
A = torch.softmax(energy, dim=3) # 对第四维度进行softmax
# 使用dropout
A = self.attn_drop(A)
# 计算加权和 (N, H, S, T) * (N, H, T, K) -> (N, H, S, K)
Y = A.matmul(V)
# 再投影回去
Y = Y.transpose(1, 2).reshape(N, S, E) # (N, S, E)
output = self.proj(Y) # (N, S, E)
# *****END OF YOUR CODE (DO NOT DELETE/MODIFY THIS LINE)*****
############################################################################
# END OF YOUR CODE #
############################################################################
return output
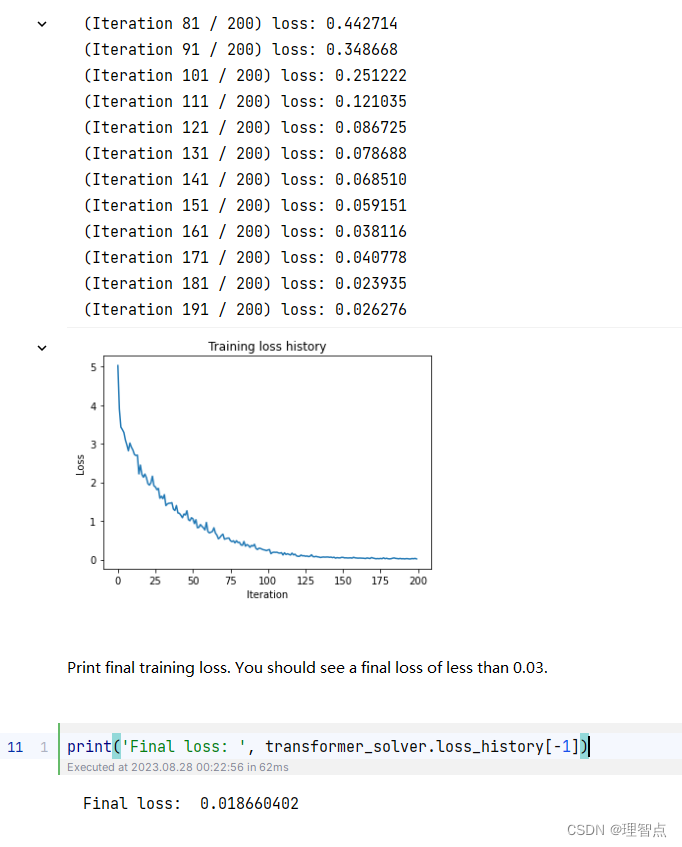
输出

Positional Encoding
题面
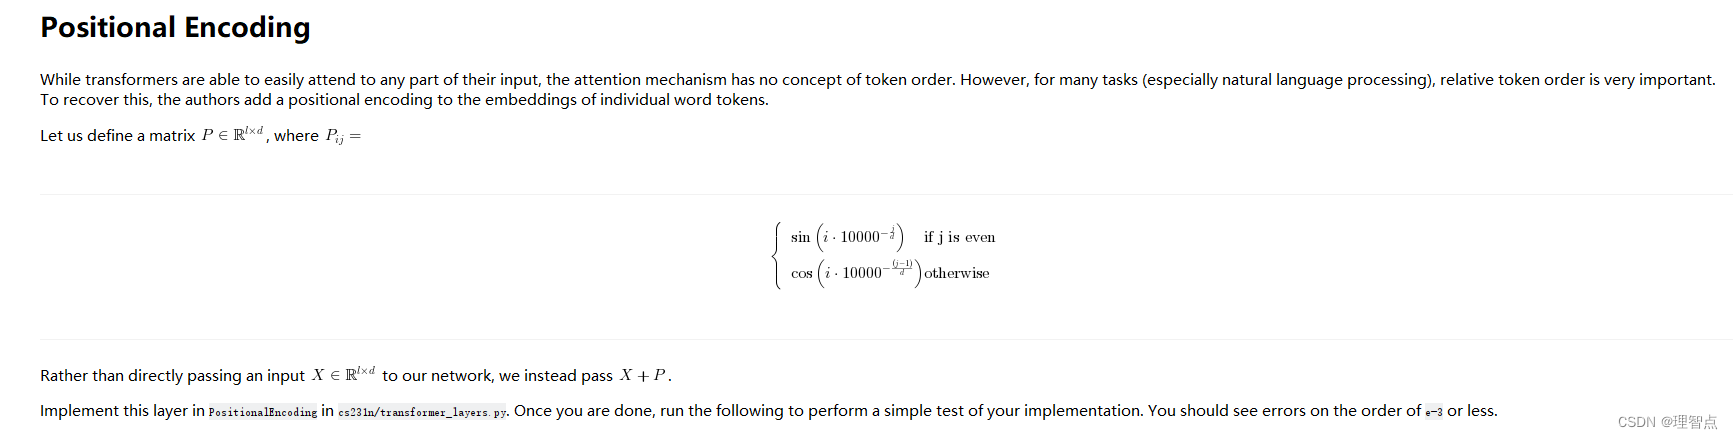
因为transformer能够很容易的主要的输入的任何部分,但是注意力机制没有顺序的概念,但是,对于许多人物,尤其是自然语言处理任务,顺序非常重要,因此作者添加了位置标记对每个单词的token
定于矩阵p为
我们并不直接把x输入进网络,而是将 x + p输入进来

解析
看懂上面的题面,就好了,还不懂就看代码
代码
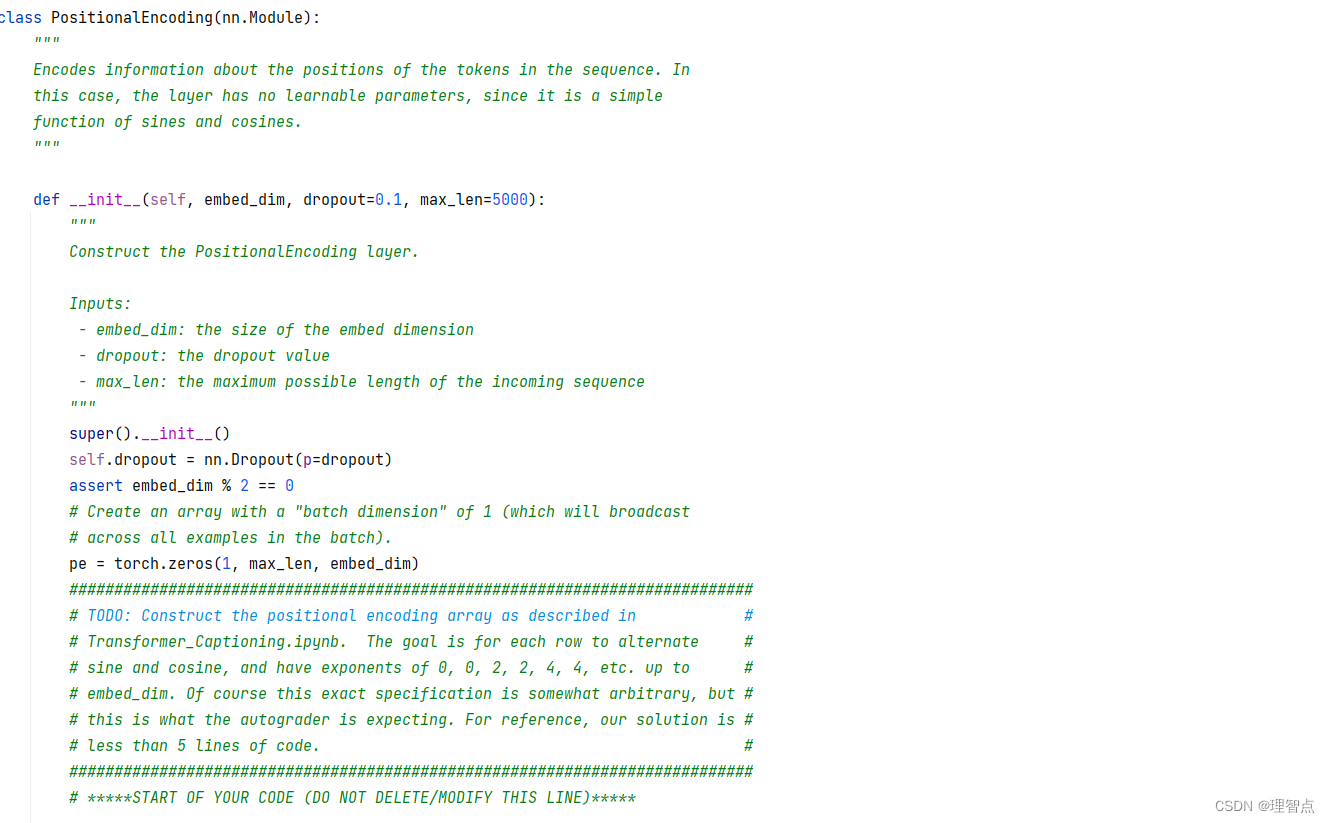
class PositionalEncoding(nn.Module):
"""
Encodes information about the positions of the tokens in the sequence. In
this case, the layer has no learnable parameters, since it is a simple
function of sines and cosines.
"""
def __init__(self, embed_dim, dropout=0.1, max_len=5000):
"""
Construct the PositionalEncoding layer.
Inputs:
- embed_dim: the size of the embed dimension
- dropout: the dropout value
- max_len: the maximum possible length of the incoming sequence
"""
super().__init__()
self.dropout = nn.Dropout(p=dropout)
assert embed_dim % 2 == 0
# Create an array with a "batch dimension" of 1 (which will broadcast
# across all examples in the batch).
pe = torch.zeros(1, max_len, embed_dim)
############################################################################
# TODO: Construct the positional encoding array as described in #
# Transformer_Captioning.ipynb. The goal is for each row to alternate #
# sine and cosine, and have exponents of 0, 0, 2, 2, 4, 4, etc. up to #
# embed_dim. Of course this exact specification is somewhat arbitrary, but #
# this is what the autograder is expecting. For reference, our solution is #
# less than 5 lines of code. #
############################################################################
# *****START OF YOUR CODE (DO NOT DELETE/MODIFY THIS LINE)*****
# 创建一个 0 到 maxlen 的行向量并转为列向量 就相当于公式里的i
col = torch.arange(max_len)[:, None]
# 获取公式中的矩阵的行向量
row = torch.pow(10000, -torch.arange(0, embed_dim, 2) / embed_dim)
# 计算p 矩阵
pe[0, :, 0::2] = torch.sin(col * row)
pe[0, :, 1::2] = torch.cos(col * row)
# *****END OF YOUR CODE (DO NOT DELETE/MODIFY THIS LINE)*****
############################################################################
# END OF YOUR CODE #
############################################################################
# Make sure the positional encodings will be saved with the model
# parameters (mostly for completeness).
self.register_buffer('pe', pe)
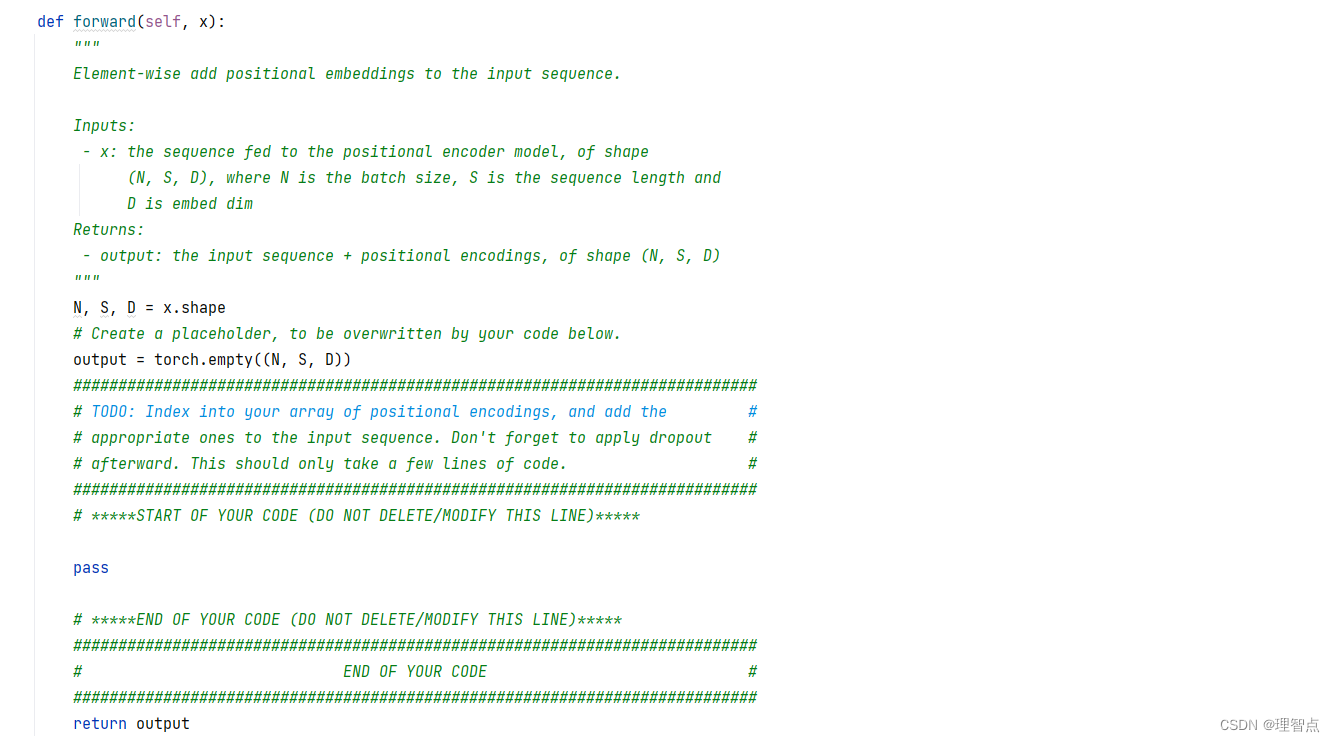
def forward(self, x):
"""
Element-wise add positional embeddings to the input sequence.
Inputs:
- x: the sequence fed to the positional encoder model, of shape
(N, S, D), where N is the batch size, S is the sequence length and
D is embed dim
Returns:
- output: the input sequence + positional encodings, of shape (N, S, D)
"""
N, S, D = x.shape
# Create a placeholder, to be overwritten by your code below.
output = torch.empty((N, S, D))
############################################################################
# TODO: Index into your array of positional encodings, and add the #
# appropriate ones to the input sequence. Don't forget to apply dropout #
# afterward. This should only take a few lines of code. #
############################################################################
# *****START OF YOUR CODE (DO NOT DELETE/MODIFY THIS LINE)*****
output = x + self.pe[:, :S]
output = self.dropout(output)
# *****END OF YOUR CODE (DO NOT DELETE/MODIFY THIS LINE)*****
############################################################################
# END OF YOUR CODE #
############################################################################
return output
输出
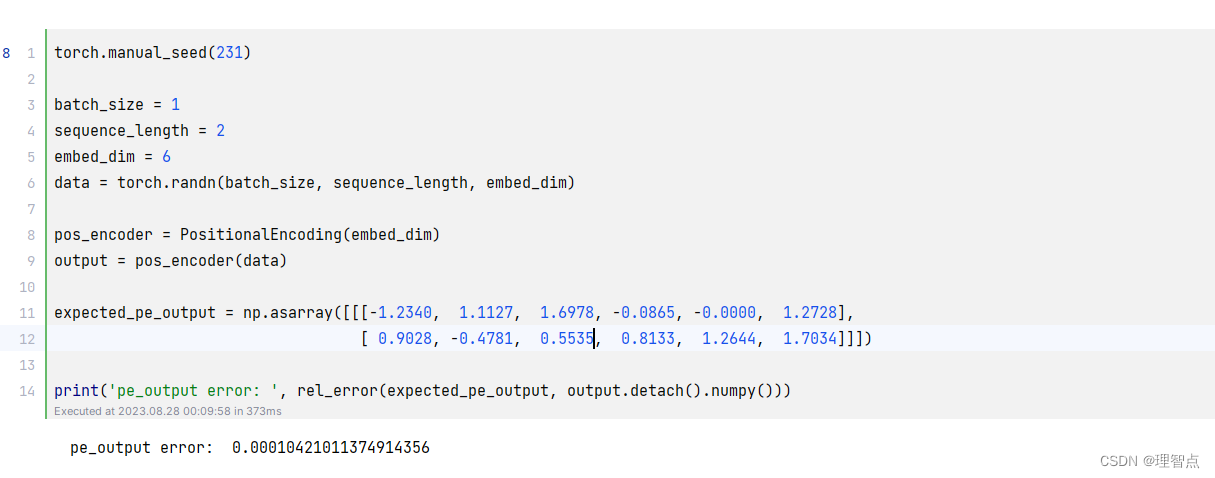
transformer.forward
题面


解析
如果是正确理解了transformer模型的话,应该不会在这里卡壳,建议多看看相应的课程和论文讲解,我在代码中也写上了详尽的注释
代码
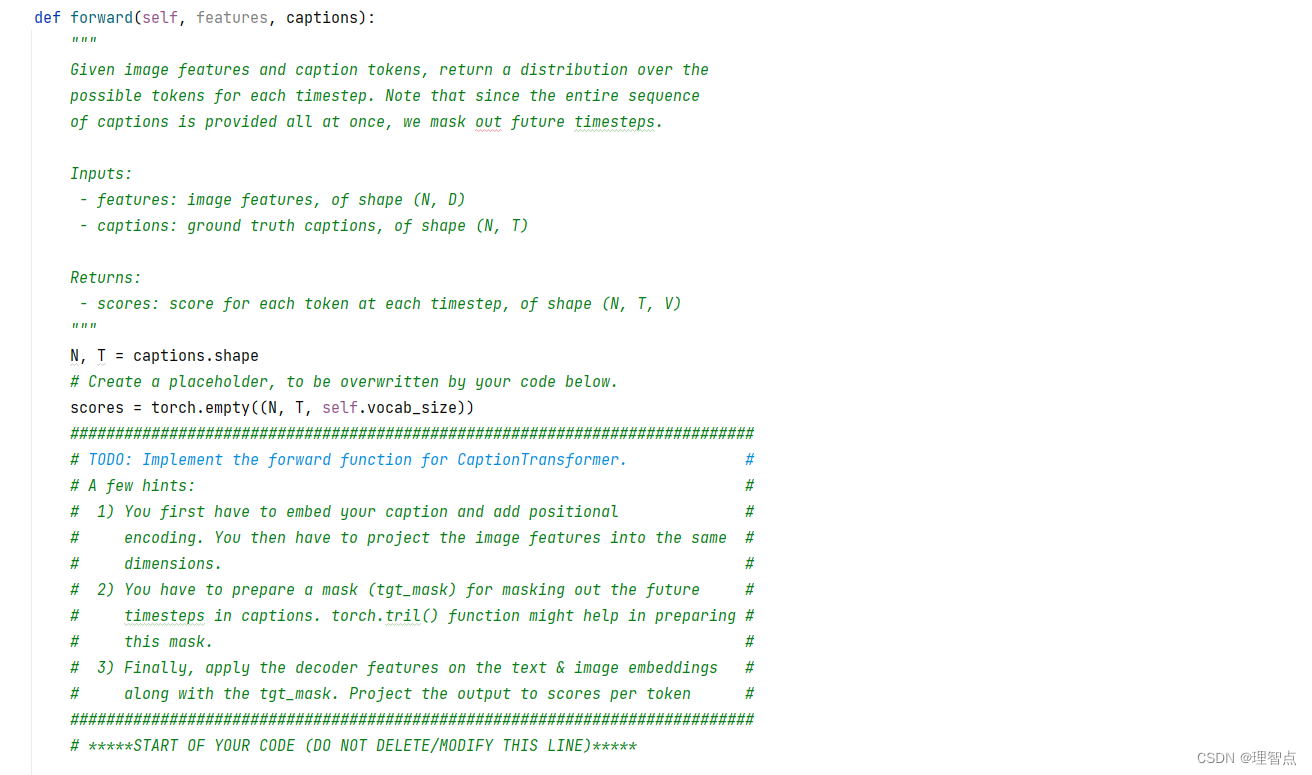
    def forward(self, features, captions):
        """
        Given image features and caption tokens, return a distribution over the
        possible tokens for each timestep. Note that since the entire sequence
        of captions is provided all at once, we mask out future timesteps.

        Inputs:
         - features: image features, of shape (N, D)
         - captions: ground truth captions, of shape (N, T)

        Returns:
         - scores: score for each token at each timestep, of shape (N, T, V)
        """
        N, T = captions.shape
        # Create a placeholder, to be overwritten by your code below.
        scores = torch.empty((N, T, self.vocab_size))
        ############################################################################
        # TODO: Implement the forward function for CaptionTransformer.             #
        # A few hints:                                                             #
        #  1) You first have to embed your caption and add positional              #
        #     encoding. You then have to project the image features into the same  #
        #     dimensions.                                                          #
        #  2) You have to prepare a mask (tgt_mask) for masking out the future     #
        #     timesteps in captions. torch.tril() function might help in preparing #
        #     this mask.                                                           #
        #  3) Finally, apply the decoder features on the text & image embeddings   #
        #     along with the tgt_mask. Project the output to scores per token      #
        ############################################################################
        # *****START OF YOUR CODE (DO NOT DELETE/MODIFY THIS LINE)*****

        # 第一步,嵌入说明和添加位置编码
        # captions: (N, T) -> (N, T, W)
        captions = self.embedding(captions)
        captions = self.positional_encoding(captions)

        # 第二步,将图像特征投影到相同的维度
        # features: (N, D) -> (N,W) -> (N, T, W)
        features_projected = self.visual_projection(features).unsqueeze(1)

        # 第三步,准备一个掩码(tgt_mask)来屏蔽说明中的未来时间步骤
        tgt_mask = torch.tril(torch.ones((T, T), dtype=torch.bool))

        # 第四部,将解码器特征应用于文本和图像嵌入以及tgt_mask
        # scores: (N, T, W) -> (N, T, V)
        scores = self.transformer(captions, features_projected, tgt_mask=tgt_mask)
        scores = self.output(scores)

        # *****END OF YOUR CODE (DO NOT DELETE/MODIFY THIS LINE)*****
        ############################################################################
        #                             END OF YOUR CODE                             #
        ############################################################################

        return scores
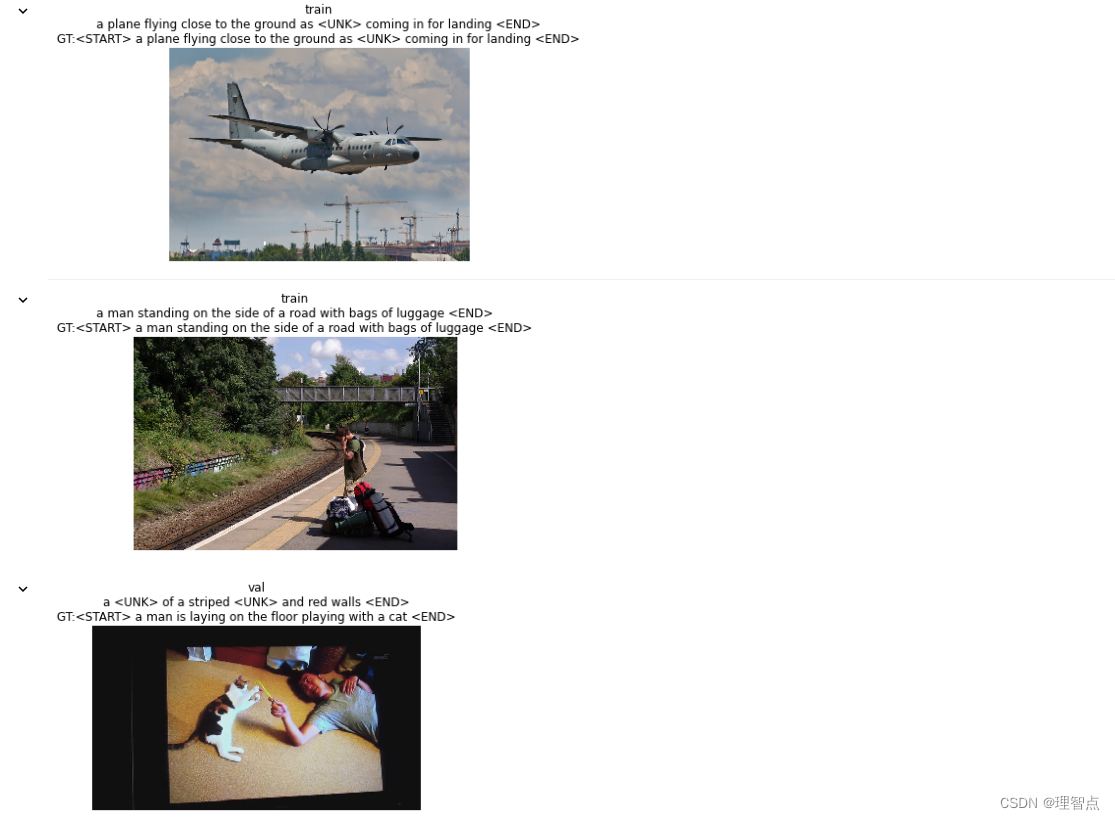
输出


 378
378


 被折叠的 条评论
为什么被折叠?
被折叠的 条评论
为什么被折叠?
 到【灌水乐园】发言


