


定时备份
crontab命令
作用
循环执行的例行性工作:每隔一定的周期就需要执行一次
使用方法
[root@localhost ~]# crontab --help
crontab: invalid option -- '-'
crontab: usage error: unrecognized option
Usage:
crontab [options] file
crontab [options]
crontab -n [hostname]
Options:
-u <user> define user
-e edit user's crontab
-l list user's crontab
-r delete user's crontab
-i prompt before deleting
-n <host> set host in cluster to run users' crontabs
-c get host in cluster to run users' crontabs
-s selinux context
-V print version and exit
-x <mask> enable debugging
-e选项用于编辑用户的crontab文件,-l选项用于列出用户的crontab文件,-r选项用于删除用户的crontab文件。
作业
指定在每天凌晨4:00将该时间点之前的系统日志信息(/var/log/messages )备份到目录下/backup,备份后日志文件名显示格式logfileYY-MM-DD-HH-MM
打开并编辑crontab文件
crontab -e设置每天凌晨四点更新
0 4 * * * /bin/cp /var/log/messages /backup/logfile$(date +%Y-%m-%d-%H-%M).log
分 时 日 月 周
0-59 0-23 1-31 1-12 0-7
免密登录
登录认证过程
SSH基于密钥认证过程如下:
1. 客户端向服务器发起SSH连接请求。
2. 服务器收到请求后,会返回一个公钥(包括公钥ID和公钥内容)。
3. 客户端将服务器的公钥保存到本地的authorized_keys文件中。
4. 当客户端再次发起SSH连接请求时,客户端会将本地的私钥和authorized_keys文件一起发送给服务器。
5. 服务器使用客户端发送过来的公钥进行解密,得到客户端的私钥。
6. 服务器使用客户端的私钥进行加密,生成一段随机字符串。
7. 客户端使用自己的私钥解密服务器发送过来的随机字符串,如果解密成功,说明客户端拥有正确的私钥,可以免密登录。
8. 如果解密成功,客户端会向服务器发送一个“yes”信号,表示同意建立SSH连接。
9. 服务器收到“yes”信号后,会建立一个加密通道,用于传输数据。
10. SSH连接建立成功,客户端和服务器之间可以进行加密通信。
基于口令认证过程:
基于口令的认证(password认证):客户端向服务器发出password认证请求,将用户名和密码加密后发送给服务器,服务器将该信息解密后得到用户名和密码的明文,与设备上保存的用户名和密码进行比较,并返回认证成功或失败消息。
ssh服务配置
#ssh服务安装包openssh-server
[root@server1 ~]# vim /etc/ssh/sshd_config
17.#Port 22 #监听端口,默认监听22端口 【默认可修改】
18.#AddressFamily any #IPV4和IPV6协议家族用哪个,any表示二者均有
19.#ListenAddress 0.0.0.0 #指明监控的地址,0.0.0.0表示本机的所有地址 【默认可修改】
20.#ListenAddress :: #指明监听的IPV6的所有地址格式
28.HostKey /etc/ssh/ssh_host_rsa_key # rsa私钥认证 【默认】
29.#HostKey /etc/ssh/ssh_host_dsa_key # dsa私钥认证
30.HostKey /etc/ssh/ssh_host_ecdsa_key # ecdsa私钥认证
31.HostKey /etc/ssh/ssh_host_ed25519_key # ed25519私钥认证
43.SyslogFacility AUTHPRIV #当有人使用ssh登录系统的时候,SSH会记录信息,信息保存在/var/log/secure里面
48.#LoginGraceTime 2m #登录的宽限时间,默认2分钟没有输入密码,则自动断开连接
49.#PermitRootLogin yes #是否允许管理员远程登录,'yes'表示允许
51.#MaxAuthTries 6 #最大认证尝试次数,最多可以尝试6次输入密码。之后需要等待某段时间后才能再次输入密码
52.#MaxSessions 10 #允许的最大会话数
59.AuthorizedKeysFile .ssh/authorized_keys #选择基于密钥验证时,客户端生成一对公私钥之后,会将公钥放到.ssh/authorizd_keys里面
79.PasswordAuthentication yes #是否允许支持基于口令的认证
83.ChallengeResponseAuthentication no #是否允许使用键盘输入身份验证,也就是xshell的第三个登录方式
129.#UseDNS yes #是否反解DNS,如果想让客户端连接服务器端快一些,这个可以改为no
146.Subsystem sftp /usr/libexec/openssh/sftp-server #支持 SFTP ,如果注释掉,则不支持sftp连接
154.AllowUsers user1 user2 #登录白名单(默认没有这个配置,需要自己手动添加),允许远程登录的用户。如果名单中没有的用户,则提示拒绝登录
作业
服务器生成登录密钥
 ssh-keygen -t rsa
ssh-keygen 生成、管理和转换认证密钥 -t制定类型 RSA
/root/.ssh/id_rsa私钥文件
/root/.ssh/id_rsa.pub公钥文件
服务器将登录密钥发给客户端
ssh-copy-id root@192.168.59.129登录
ssh root@192.168.59.132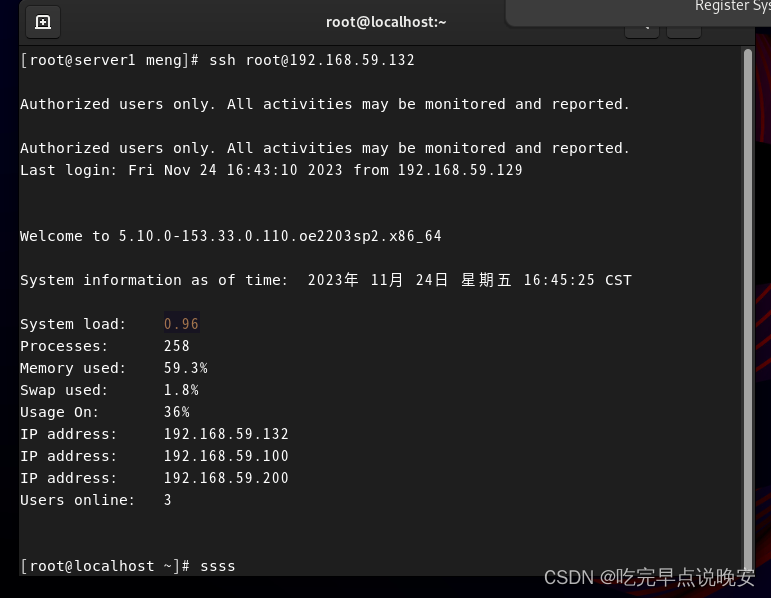
构建web网站
nginx基本配置
[root@localhost ~]# dnf install nginx -y
[root@localhost ~]# nginx -v
[root@localhost ~]# nginx -V
[root@localhost ~]# rpm -ql nginx
[root@localhost httpd]# tree /etc/nginx
[root@localhost ~]# tree /etc/nginx/
/etc/nginx/
├── conf.d #子配置文件目录
├── default.d
├── fastcgi.conf
├── fastcgi.conf.default
├── fastcgi_params #用以翻译nginx的变量供php识别
├── fastcgi_params.default
├── koi-utf
├── koi-win
├── mime.types #用以配置支持的媒体文件类型
├── mime.types.default
├── nginx.conf #主配置文件
├── nginx.conf.default
├── scgi_params
├── scgi_params.default
├── uwsgi_params #用以配置nginx的变量供python识别
├── uwsgi_params.default
└── win-utf
[root@localhost ~]# tree /usr/share/nginx/html/ #默认的nginx网站根目录
[root@localhost ~]# tree /var/log/nginx/ #nginx的日志文件所在目录
#nginx服务主配置文件nginx.conf的结构
[root@localhost nginx]# grep ^[^#] nginx.conf
=========全局配置(无{}标志)=======================
user nginx; #进程所属用户
worker_processes auto; #worker数量
error_log /var/log/nginx/error.log; #错误日志存放路径
pid /run/nginx.pid; #pid文件路径
include /usr/share/nginx/modules/*.conf; #include导入的功能模块配置文件
=========全局配置(无{}标志)=======================
==========性能配置(有{}标志)=================
events {
worker_connections 1024; #TCP连接数
}
==========性能配置(有{}标志)=================
=========http模块配置(有{}标志)==================
http { #http区块开始
log_format main '$remote_addr - $remote_user [$time_local] "$request" '
'$status $body_bytes_sent "$http_referer" '
'"$http_user_agent" "$http_x_forwarded_for"'; #错误日志格式
access_log /var/log/nginx/access.log main; #访问日志路径
sendfile on; #开启高效文件传输模式
tcp_nopush on; #性能优化参数
tcp_nodelay on; #性能优化参数
keepalive_timeout 65; #持久连接时间或超时时间
types_hash_max_size 4096; #性能优化参数
include /etc/nginx/mime.types; #可解析的静态资源类型
default_type application/octet-stream;
# Load modular configuration files from the /etc/nginx/conf.d directory.
# See http://nginx.org/en/docs/ngx_core_module.html#include
# for more information.
include /etc/nginx/conf.d/*.conf; #子配置文件存放路径
server { #server区块开始
listen 80; #监听端口
listen [::]:80;
server_name _; #服务器的名字
root /usr/share/nginx/html; #主页存放路径
# Load configuration files for the default server block.
include /etc/nginx/default.d/*.conf; #子配置文件存放路径
error_page 404 /404.html; #404错误返回的页面
location = /40x.html { #使用location定义用户请求的uri
}
error_page 500 502 503 504 /50x.html; #500、502、503、504返回的页面
location = /50x.html {
}
} #server区块结束
} #http区块结束
=========http模块配置(有{}标志)==================
[root@localhost ~]#systemctl disable firewalld --now
[root@localhost ~]# systemctl restart nginx
#测试可以使用curl命令访问web服务器或者使用浏览器访问
[root@localhost ~]# curl -I localhost
HTTP/1.1 200 OK
Server: nginx/1.21.5
Date: Fri, 17 Nov 2023 08:40:28 GMT
Content-Type: text/html
Content-Length: 3510
Last-Modified: Mon, 23 Oct 2023 15:48:29 GMT
Connection: keep-alive
ETag: "653695cd-db6"
Accept-Ranges: bytes
作业
构建静态网站
echo "hello world" > /usr/share/nginx/html/index.html访问
curl 192.168.59.132设置基于地址的网页访问
创建根目录
mkdir -pv /www/ip/100
mkdir -pv /www/ip/200
构建网站
echo this is 100 > /www/ip/100/index.html
echo this is 200 > /www/ip/200/index.html
设置selinux
 setenforce 0
#设置SELinux为permissive模式,这样可以避免无法看到网页页面内容的问题
创建并编写配置文件
[root@localhost ~]# vim /etc/nginx/conf.d/test_ip.conf
server {
        listen 192.168.59.100:80;
        root /www/ip/100;
        location / {
        }
}
server {
        listen 192.168.59.200:80;
        root /www/ip/200;
        location / {
        }
}
效果
[root@localhost ~]# systemctl restart nginx
[root@localhost ~]# curl 192.168.59.100
this is 100
[root@localhost ~]# curl 192.168.59.200
this is 200
设置基于端口的网站访问
创建根目录
mkdir -pv /www/port/80
mkdir -pv /www/port/8000
创建并编写配置文件
[root@localhost ~]# cat  /etc/nginx/conf.d/test_port.conf
server {
        listen 192.168.59.132:80;
        root /www/port/80;
        location / {
        }
}
server {
        listen 192.168.59.132:10000;
        root /www/port/10000;
        location / {
        }
}
效果
[root@localhost ~]# curl 192.168.59.132:10000
the port is 10000
[root@localhost ~]# curl 192.168.59.132
the port is 80


 1万+
1万+


 被折叠的 条评论
为什么被折叠?
被折叠的 条评论
为什么被折叠?
 到【灌水乐园】发言


