


 本文介绍如何配置 SpringBoot Admin 的客户端以实现微服务的监控管理。内容包括配置 pom 文件引入依赖、设置 yml 配置文件,以及如何通过配置注册中心、服务端口等来完成客户端配置。
SpringBoot Admin(Client)
上一章讲了admin-server端的配置和创建,现在我们需要配置Client,这里需要被监控和管理到微服务。
一、配置pom
这里同样再次强调的是,springboot的版本和admin-client的版本需要对应,我这里是2.1.0版本
    <parent>
        <groupId>org.springframework.boot</groupId>
        <artifactId>spring-boot-starter-parent</artifactId>
        <version>2.1.0.RELEASE</version>
        <relativePath /> <!-- lookup parent from repository -->
    </parent>

        <dependency>
            <groupId>de.codecentric</groupId>
            <artifactId>spring-boot-admin-starter-client</artifactId>
            <version>2.1.0</version>
        </dependency>

        <dependency>
            <groupId>org.springframework.boot</groupId>
            <artifactId>spring-boot-starter-web</artifactId>
        </dependency>
二、配置yml配置
#### 注册中心
eureka:
  instance:
    prefer-ip-address: true
    ip-address: 192.168.x.xx
  client:
    serviceUrl:
      defaultZone: http://user:123@192.168.x.xx:8888/eureka/
#####服务端口
server:
  port: 9002
spring:
  jackson:
    date-format: yyyy-MM-dd HH:mm:ss
    time-zone: GMT+8
  http:
    encoding:
      charset: UTF-8
      force: true
      enabled: true
  datasource:
    type: com.alibaba.druid.pool.DruidDataSource
    druid:
      url: jdbc:mysql://192.168.x.xx:3306/forest?useUnicode=true&characterEncoding=UTF-8&serverTimezone=Asia/Shanghai
      username: root
      password: xxx
      driver-class-name: com.mysql.jdbc.Driver
      initial-size: 10
      max-active: 100
      min-idle: 10
      max-wait: 60000
      pool-prepared-statements: true
      max-pool-prepared-statement-per-connection-size: 20
      time-between-eviction-runs-millis: 60000
      min-evictable-idle-time-millis: 300000
  application:
    name: patrol-mountains2
  boot:
    admin:
      client:
        url: http://192.168.4.49:8769
management:
  endpoints:
    web:
      exposure:
        include: '*'
  endpoint:
    health:
      show-details: ALWAYS

mybatis-plus:
  mapper-locations: classpath:/mapper/**/*.xml
  global-config:
    db-config:
      id-type: auto
      logic-delete-value: 1
      logic-not-delete-value: 0
到这里客户端配置就完成了
启动我们的这个微服务然后进行访问
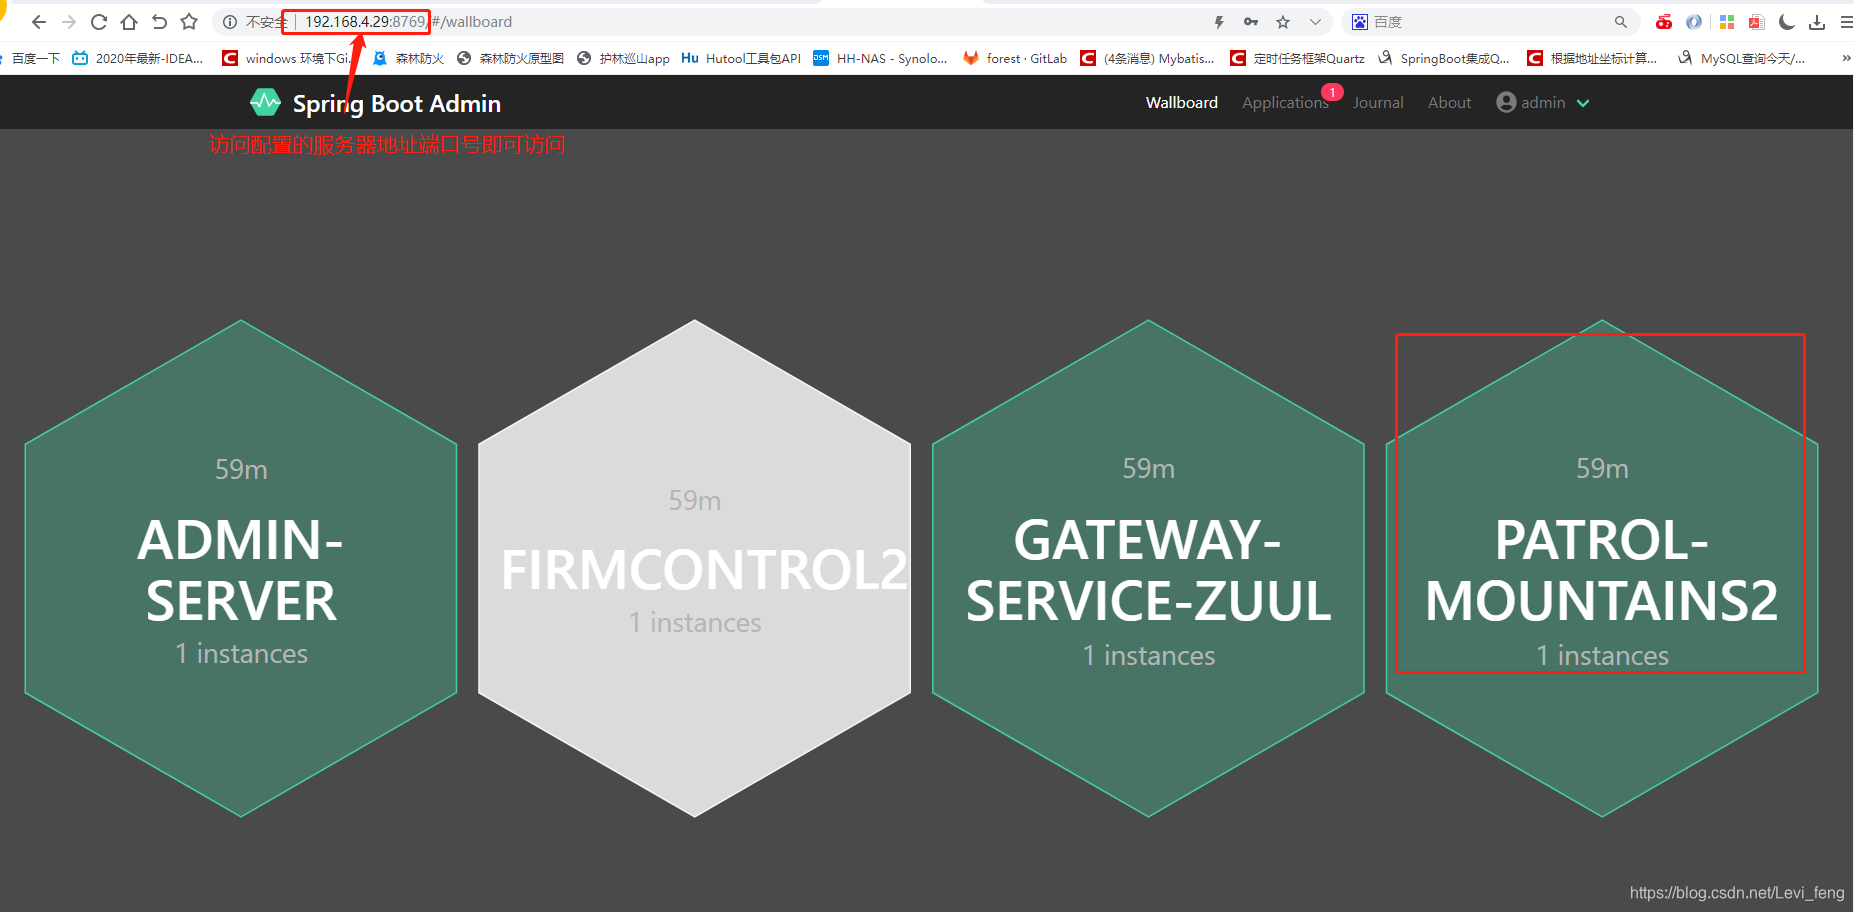
查看监控详情
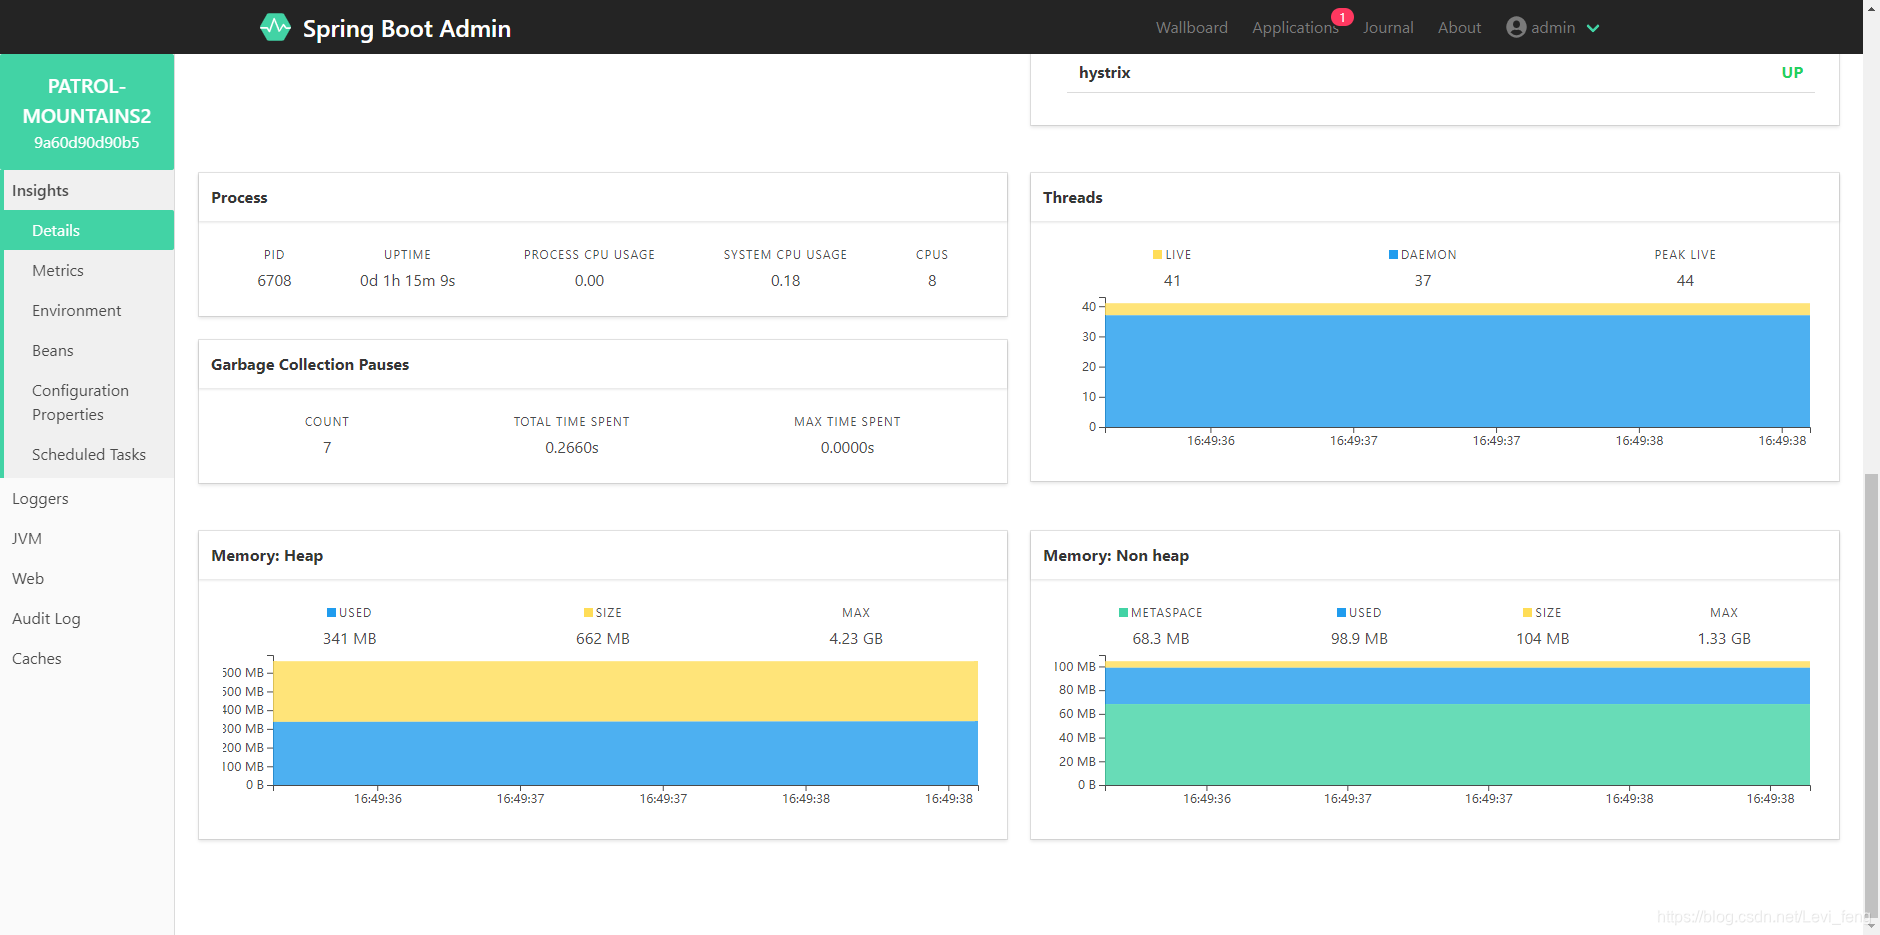
到这里简单的springboot admin 监控管理就完成了


 2087
2087

 被折叠的 条评论
为什么被折叠?
被折叠的 条评论
为什么被折叠?
 到【灌水乐园】发言


