


windows10编译与调试webrtc
代理设置
以下流程使用国内网络一般是行不通的,需要设置代理才有可能成功
Lin@DESKTOP-05I624T MINGW64 /e/webrtc
$ export http_proxy=http://127.0.0.1:7890

Lin@DESKTOP-05I624T MINGW64 /e/webrtc
$ export https_proxy=http://127.0.0.1:7890
一、depot_tools下载
- 进入depot_tools网页,使用git clone下载depot_tools
- 将depot_tools目录添加到PATH环境变量中
- 添加环境变量
DEPOT_TOOLS_WIN_TOOLCHAIN=0 - gclient更新depot_tools
二、webrtc下载
众所周知,由于墙的存在,在国内是无法下载到webrtc完整源码的,只能借助一些特殊的手段。本人试过两种方法,这里简单介绍一下。
1、租海外服务器下载
方法就是租一台海外服务器,将源码下载好后上传至云盘,然后再使用国内的网络下载下来,这种方法比较麻烦,不太推荐。具体方法可参考如下链接。
webrtc windows for vs 2019 编译工程下载
2、挂代理下载
方法二就是使用代理进行下载,这种方法比较方便快捷
mkdir webrtc-checkoutcd webrtc-checkoutfetch --nohooks webrtcgclient sync
使用该方法遇到了如下问题
NOTICE: You have PROXY values set in your environment, but gsutil in depot_tools does not (yet) obey them.
Also, --no_auth prevents the normal BOTO_CONFIG environment variable from being used.
To use a proxy in this situation, please supply those settings in a .boto file pointed to by the NO_AUTH_BOTO_CONFIG environment var.
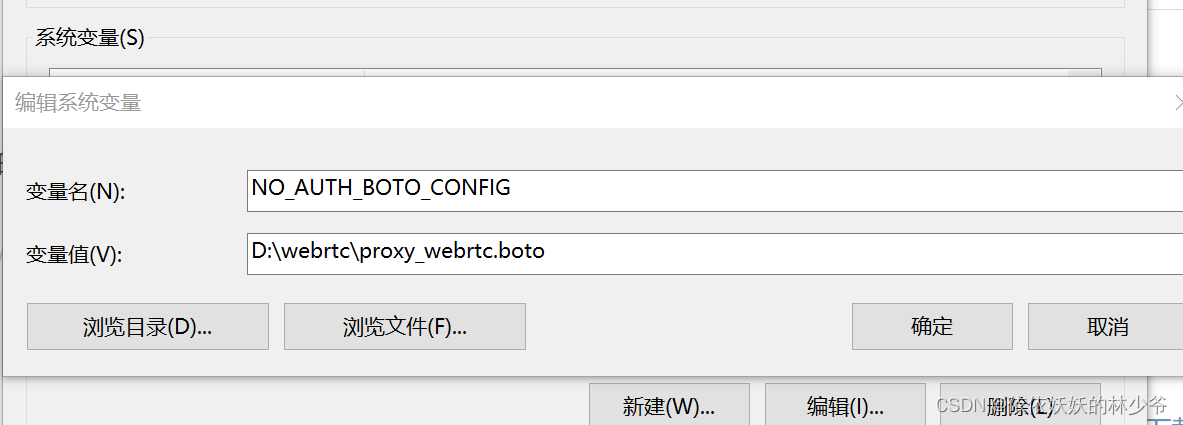
解决办法是创建一个叫xxx.boto的文件,文件内容如下
[Boto]
proxy = 127.0.0.1
proxy_port = 7890
proxy_type = http
然后添加环境变量NO_AUTH_BOTO_CONFIG
三、vs工程文件生成与编译
webrtc下载完成后没有切版本,应该就是当前最新的版本
1、生成Visual Studio工程
在cmd中 cd进src目录分别执行以下目录
set DEPOT_TOOLS_WIN_TOOLCHAIN=0
//--vs2022安装目录
set GYP_MSVS_VERSION=2022
set GYP_MSVS_OVERRIDE_PATH=F:\Program Files\Microsoft Visual Studio\2022\Community
set GYP_GENERATORS=msvs-ninja,ninja
//--Win10SDK目录
set WINDOWSSDKDIR=D:\Windows Kits\10

//--生成vs2022工程,在out/Default目录下
gn gen --ide=vs2022 out/Default
1.1、生成vs工程中遇到的问题
Traceback (most recent call last):
  File "E:/webrtc/webrtc-chechout/src/build/vs_toolchain.py", line 589, in <module>
    sys.exit(main())
  File "E:/webrtc/webrtc-chechout/src/build/vs_toolchain.py", line 585, in main
    return commands[sys.argv[1]](*sys.argv[2:])
  File "E:/webrtc/webrtc-chechout/src/build/vs_toolchain.py", line 571, in GetToolchainDir
    ToGNString(win_sdk_dir), ToGNString(GetVisualStudioVersion()),
  File "E:/webrtc/webrtc-chechout/src/build/vs_toolchain.py", line 202, in GetVisualStudioVersion
    raise Exception('No supported Visual Studio can be found.'
Exception: No supported Visual Studio can be found. Supported versions are: 17.0 (2022), 16.0 (2019), 15.0 (2017).
ERROR at //build/config/win/visual_studio_version.gni:29:7: Script returned non-zero exit code.
      exec_script("../../vs_toolchain.py", [ "get_toolchain_dir" ], "scope")
      ^----------
Current dir: E:/webrtc/webrtc-chechout/src/out/Default/
Command: E:/webrtc/depot_tools/bootstrap-2@3_8_10_chromium_26_bin/python3/bin/python3.exe E:/webrtc/webrtc-chechout/src/build/vs_toolchain.py get_toolchain_dir
Returned 1.
See //build/toolchain/win/BUILD.gn:5:1: whence it was imported.
import("//build/config/win/visual_studio_version.gni")
^----------------------------------------------------
See //BUILD.gn:39:3: which caused the file to be included.
  group("default") {
  ^------------------
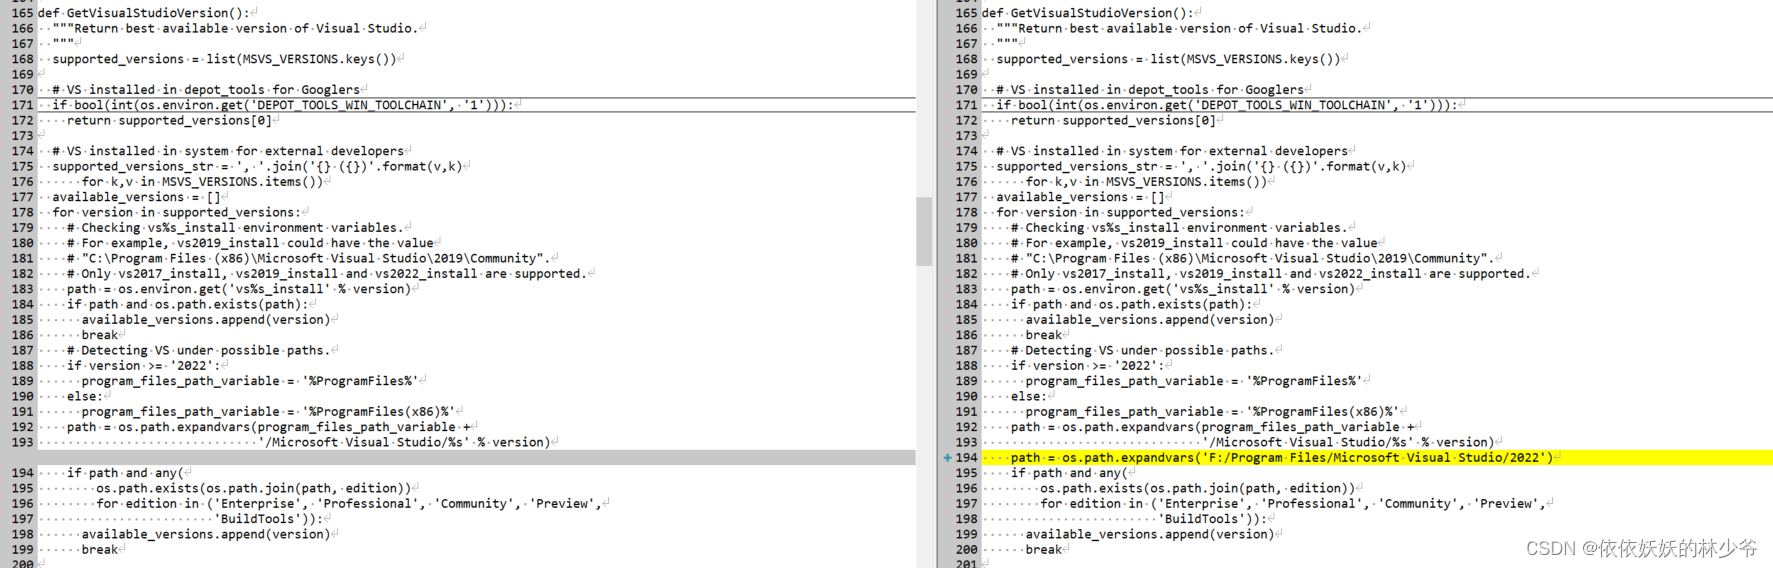
解决办法是修改vs_toolchain.py脚本(src/build/路径下),将vs路径写死
接下来又出现了另一个错误
Traceback (most recent call last):
  File "E:/webrtc/webrtc-chechout/src/build/toolchain/win/setup_toolchain.py", line 328, in <module>
    main()
  File "E:/webrtc/webrtc-chechout/src/build/toolchain/win/setup_toolchain.py", line 274, in main
    env = _LoadToolchainEnv(cpu, toolchain_root, win_sdk_path, target_store)
  File "E:/webrtc/webrtc-chechout/src/build/toolchain/win/setup_toolchain.py", line 190, in _LoadToolchainEnv
    return _ExtractImportantEnvironment(variables)
  File "E:/webrtc/webrtc-chechout/src/build/toolchain/win/setup_toolchain.py", line 68, in _ExtractImportantEnvironment
    raise Exception(
Exception: Path "C:\Program Files (x86)\Windows Kits\10\\include\10.0.22621.0\\um" from environment variable "include" does not exist. Make sure the necessary SDK is installed.
ERROR at //build/toolchain/win/win_toolchain_data.gni:9:7: Script returned non-zero exit code.
      exec_script("//build/toolchain/win/setup_toolchain.py",
      ^----------
Current dir: E:/webrtc/webrtc-chechout/src/out/Default/
Command: E:/webrtc/depot_tools/bootstrap-2@3_8_10_chromium_26_bin/python3/bin/python3.exe E:/webrtc/webrtc-chechout/src/build/toolchain/win/setup_toolchain.py "F:\Program Files\Microsoft Visual Studio\2022\Community" "C:\Program Files (x86)\Windows Kits\10" "C:\WINDOWS\System32;C:\WINDOWS\SysWOW64;Arm64Unused" win x86 environment.x86
Returned 1.
See //build/toolchain/win/toolchain.gni:14:1: whence it was imported.
import("//build/toolchain/win/win_toolchain_data.gni")
^----------------------------------------------------
See //build/toolchain/win/BUILD.gn:6:1: whence it was imported.
import("//build/toolchain/win/toolchain.gni")
^-------------------------------------------
See //BUILD.gn:39:3: which caused the file to be included.
  group("default") {
  ^------------------
上面的意思大致是说需要10.0.22621.0版本的SDK,而我当时的版本是10.0.20348.0,解决方法就是在Visual Studio Installer中安装10.0.22621.0版本的SDK
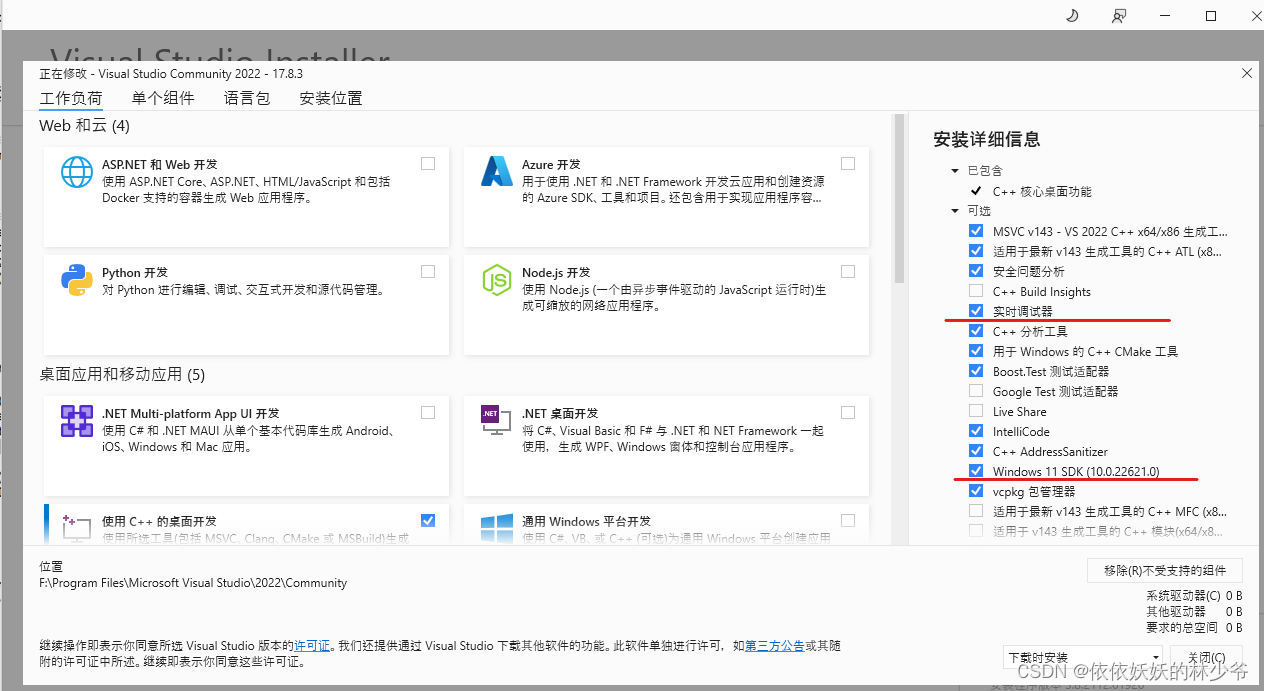
虽然上面写的是 Windows 11 SDK(10.0.22621.0) 但Win10系统也能用。另外顺便检查一下实时调试器有没有安装,没有的话也顺便安装一下。
工程生成成功
E:\webrtc\webrtc-chechout\src>gn gen --ide=vs2022 out/Default
Generating Visual Studio projects took 1914ms
Done. Made 1782 targets from 295 files in 6194ms
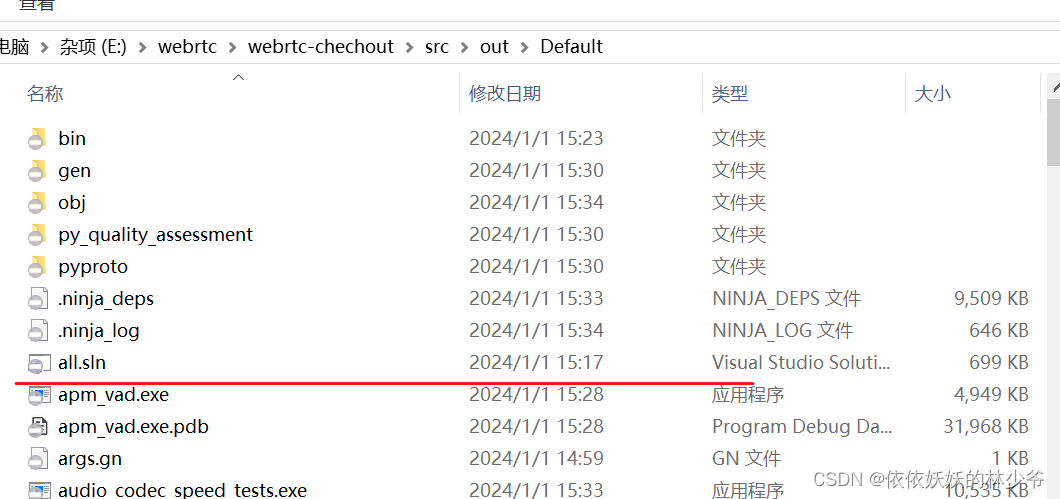
打开out/Default目录就能看见vs工程文件了!
2、webrtc编译
E:\webrtc\webrtc-chechout\src>ninja -C out/Default
ninja: Entering directory `out/Default'
[6313/6313] STAMP obj/default.stamp
在此之后,就可在Visual Studio中对webrtc进行调试了

如果想清理工程
gn clean out/Default
四、demo运行问题
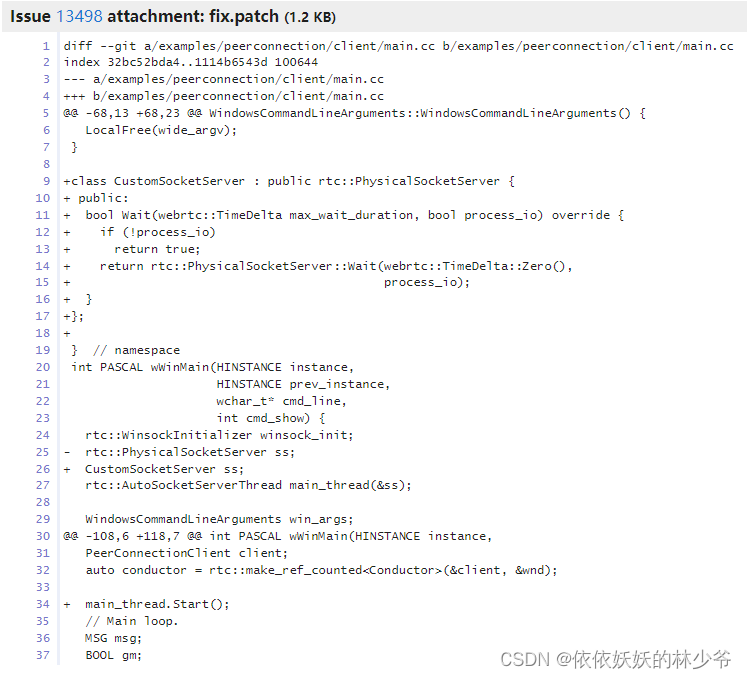
【Bug修复记录】WebRTC源码demo无法运行
Issue 13498 attachment: fix.patch
五、参考链接
webrtc windows for vs 2019 编译工程下载
WEBRTC–windows下载及编译
Windows平台WebRTC编译-VS2017
Webrtc中如何确定通常意义上说的M108,M90是指什么


 4351
4351


 被折叠的 条评论
为什么被折叠?
被折叠的 条评论
为什么被折叠?
 到【灌水乐园】发言


