


目录
视图的构建过程(三)
之前介绍过视图的构造方法以及视图的测量方法,接下来介绍视图的绘制方法。
视图的绘制方法
测量完视图的宽高,接下来就要来绘制控件的图案了。此时可以重写onDraw方法以及dispatchDraw方法,这两个方法主要区别如下:
1.onDraw方法即可以用于普通控件也可以用于布局类视图,而dispatchDraw方法专门用于布局类视图。
2.onDraw方法先执行,dispatchDraw方法后执行,这两个方法中间再执行下级视图的绘制方法。例如线性布局A中有一个相对布局B,B中有一个文本视图C,那么两个方法的执行顺序为A的onDraw>B的onDraw>C的onDraw>B的dispatchDraw>A的dispatchDraw。
这个两个方法的参数都为Canvas画布对象。Canvas有三类方法用于绘图,说明如下:
1.划定可绘制的区域,相关方法说明如下:
(1)clipPath:裁剪不规则曲线区域。
(2)clipRect:裁剪矩形区域。
(3)clipRegion:裁剪一块组合区域。
2.在区域内部绘制图形,相关方法说明如下:
(1)drawBitmap:绘制位图。
(2)drawCircle:绘制圆形。
(3)drawLine:绘制直线。
(4)drawOval:绘制椭圆。
(5)drawPath:绘制路径,即不规则曲线。
(6)drawPoint:绘制点。
(7)drawRect:绘制矩形。
(8)drawRoundRect:绘制圆角矩形。
(9)drawText:绘制文本。
3.画布的控制操作,相关方法说明如下:
(1)rotate:旋转画布。
(2)scale:缩放画布。
(3)translate:平移画布。
(4)save:保存画布状态。
(5)restore:恢复画布状态。
上面的第二点即在区域内绘制图形所提到的方法只是准备要画什么图形,真正细节绘制还需要借助画笔工具Paint实现。Paint类定义了回画常用的画笔颜色、样式、粗细、阴影等,常用方法说明如下:
1.setAntiAlias:设置是否使用抗锯齿功能,主要用于画圆圈等曲线。
2.setDither:设置是否使用防抖动功能。
3.setColor:设置画笔颜色。
4.setShadowLayer:设置画笔的阴影区域与颜色。
5.setStyle:设置画笔的样式。Style.STROKE表示线条,Style.FILL表示填充。
6.setStrokeWidth:设置画笔线条宽度。
示例代码如下,首先新建一个继承于RelativeLayout的组件DrawRelativeLayout,然后在里面编写代码,如下为示例代码。
public class DrawRelativeLayout extends RelativeLayout {
    private int mDrawType = 0; // 绘制类型
    private Paint mPaint = new Paint(); // 创建一个画笔对象
    private int mStrokeWidth = 3; // 线宽

    public DrawRelativeLayout(Context context) {
        this(context, null);
    }

    public DrawRelativeLayout(Context context, AttributeSet attrs) {
        super(context, attrs);
        mPaint.setAntiAlias(true); // 设置画笔为无锯齿
        mPaint.setDither(true); // 设置画笔为防抖动
        mPaint.setColor(Color.BLACK); // 设置画笔的颜色
        mPaint.setStrokeWidth(mStrokeWidth); // 设置画笔的线宽
        mPaint.setStyle(Style.STROKE); // 设置画笔的类型。STROKE表示空心,FILL表示实心
    }

    // onDraw方法在绘制下级视图之前调用
    @Override
    protected void onDraw(Canvas canvas) {
        super.onDraw(canvas);
        int width = getMeasuredWidth(); // 获得布局的实际宽度
        int height = getMeasuredHeight(); // 获得布局的实际高度
        if (width > 0 && height > 0) {
            if (mDrawType == 1) { // 绘制矩形
                Rect rect = new Rect(0, 0, width, height);
                canvas.drawRect(rect, mPaint); // 在画布上绘制矩形
            } else if (mDrawType == 2) { // 绘制圆角矩形
                RectF rectF = new RectF(0, 0, width, height);
                canvas.drawRoundRect(rectF, 30, 30, mPaint); // 在画布上绘制圆角矩形
            } else if (mDrawType == 3) { // 绘制圆圈
                int radius = Math.min(width, height) / 2 - mStrokeWidth;
                canvas.drawCircle(width / 2, height / 2, radius, mPaint); // 在画布上绘制圆圈
            } else if (mDrawType == 4) { // 绘制椭圆
                RectF oval = new RectF(0, 0, width, height);
                canvas.drawOval(oval, mPaint); // 在画布上绘制椭圆
            } else if (mDrawType == 5) { // 绘制矩形及其对角线
                Rect rect = new Rect(0, 0, width, height);
                canvas.drawRect(rect, mPaint); // 绘制矩形
                canvas.drawLine(0, 0, width, height, mPaint); // 绘制左上角到右下角的线段
                canvas.drawLine(0, height, width, 0, mPaint); // 绘制左下角到右上角的线段
            }
        }
    }

    // dispatchDraw方法在绘制下级视图之前调用
    @Override
    protected void dispatchDraw(Canvas canvas) {
        super.dispatchDraw(canvas);
        int width = getMeasuredWidth(); // 获得布局的实际宽度
        int height = getMeasuredHeight(); // 获得布局的实际高度
        if (width > 0 && height > 0) {
            if (mDrawType == 6) { // 绘制矩形及其对角线
                Rect rect = new Rect(0, 0, width, height);
                canvas.drawRect(rect, mPaint); // 绘制矩形
                canvas.drawLine(0, 0, width, height, mPaint); // 绘制左上角到右下角的线段
                canvas.drawLine(0, height, width, 0, mPaint); // 绘制左下角到右上角的线段
            }
        }
    }

    // 设置绘制类型
    public void setDrawType(int type) {
        setBackgroundColor(Color.WHITE); // 背景置为白色,目的是把画布擦干净
        mDrawType = type;
        invalidate(); // 立即重新绘图,此时会触发onDraw方法和dispatchDraw方法
    }
}
接着新建一个页面,页面的布局文件代码如下,在根节点下添加了一个相对布局,在相对布局下添加一个文本视图以及一个下拉框,在根节点下添加一个自定义的相对布局,在其中添加一个不可见的按钮。
<?xml version="1.0" encoding="utf-8"?>
<LinearLayout xmlns:android="http://schemas.android.com/apk/res/android"
    android:layout_width="match_parent"
    android:layout_height="match_parent"
    android:orientation="vertical"
    android:padding="5dp" >

    <RelativeLayout
        android:layout_width="match_parent"
        android:layout_height="40dp" >

        <TextView
            android:id="@+id/tv_draw"
            android:layout_width="wrap_content"
            android:layout_height="match_parent"
            android:layout_alignParentLeft="true"
            android:gravity="center"
            android:text="绘图方式:"
            android:textColor="@color/black"
            android:textSize="17sp" />

        <Spinner
            android:id="@+id/sp_draw"
            android:layout_width="match_parent"
            android:layout_height="match_parent"
            android:layout_toRightOf="@+id/tv_draw"
            android:gravity="left|center"
            android:spinnerMode="dialog" />
    </RelativeLayout>

    <!-- 自定义的绘画视图,需要使用全路径 -->
    <com.example.myapplicationforstudy.Widget.DrawRelativeLayout
        android:id="@+id/drl_content"
        android:layout_width="match_parent"
        android:layout_height="150dp" >

        <Button
            android:id="@+id/btn_center"
            android:layout_width="wrap_content"
            android:layout_height="wrap_content"
            android:padding="10dp"
            android:layout_centerInParent="true"
            android:text="我在中间"
            android:textColor="@color/black"
            android:textSize="20sp"
            android:visibility="gone" />
    </com.example.myapplicationforstudy.Widget.DrawRelativeLayout>

</LinearLayout>
页面的Java部分代码如下。
public class PaintActivity extends AppCompatActivity {
private DrawRelativeLayout drl_content; // 声明一个绘画布局对象
private Button btn_center; // 声明一个按钮对象
@Override
protected void onCreate(Bundle savedInstanceState) {
super.onCreate(savedInstanceState);
setContentView(R.layout.activity_paint);
// 从布局文件中获取名叫drl_content的绘画布局
drl_content = findViewById(R.id.drl_content);
btn_center = findViewById(R.id.btn_center);
initTypeSpinner(); // 初始化绘图方式的下拉框
}
// 初始化绘图方式的下拉框
private void initTypeSpinner() {
ArrayAdapter<String> drawAdapter = new ArrayAdapter<String>(this,
R.layout.item_layout, descArray);
Spinner sp_draw = findViewById(R.id.sp_draw);
sp_draw.setPrompt("请选择绘图方式");
sp_draw.setAdapter(drawAdapter);
sp_draw.setOnItemSelectedListener(new DrawSelectedListener());
sp_draw.setSelection(0);
}
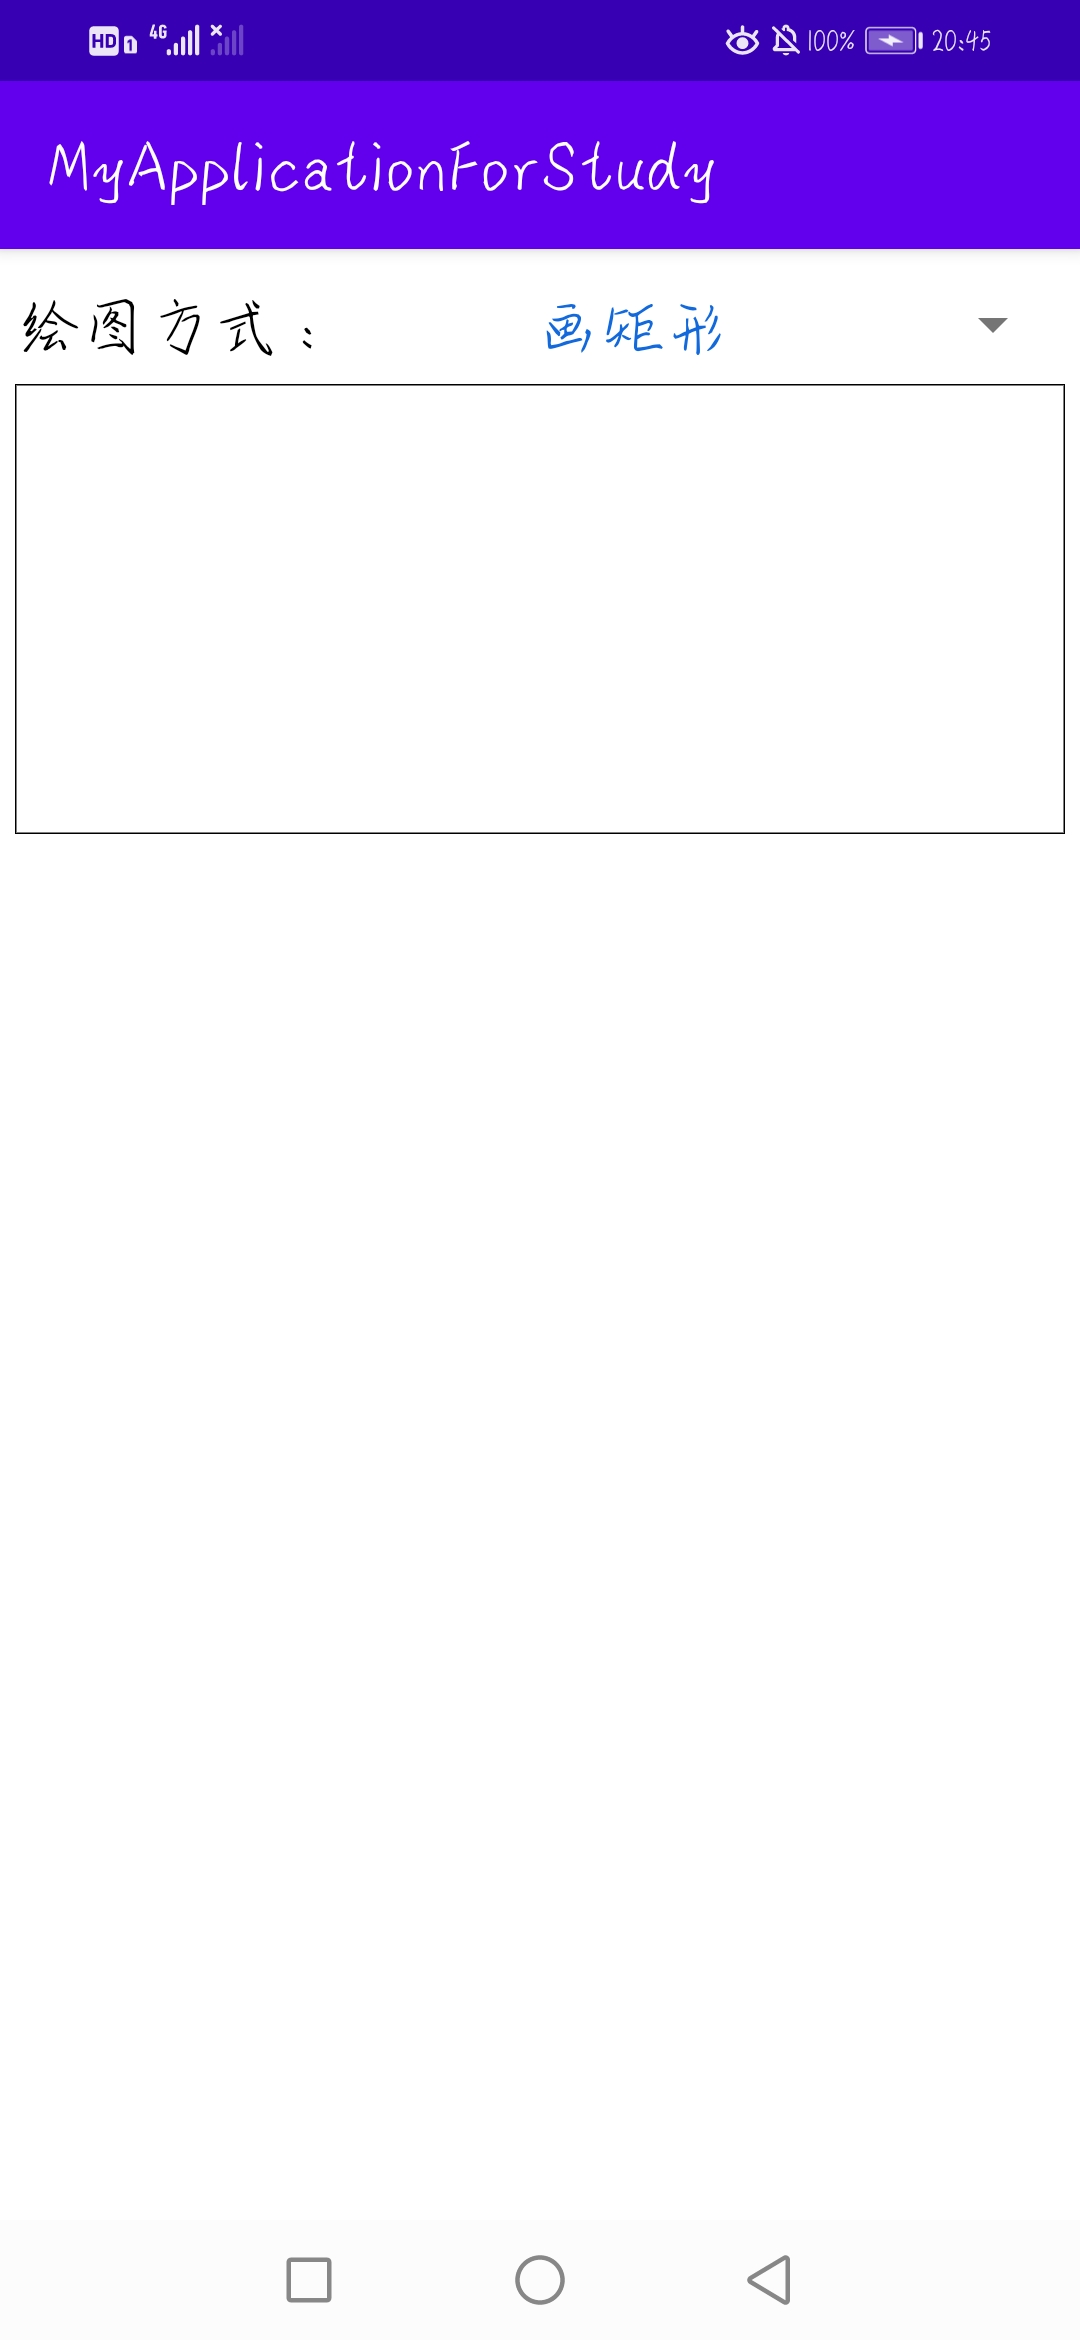
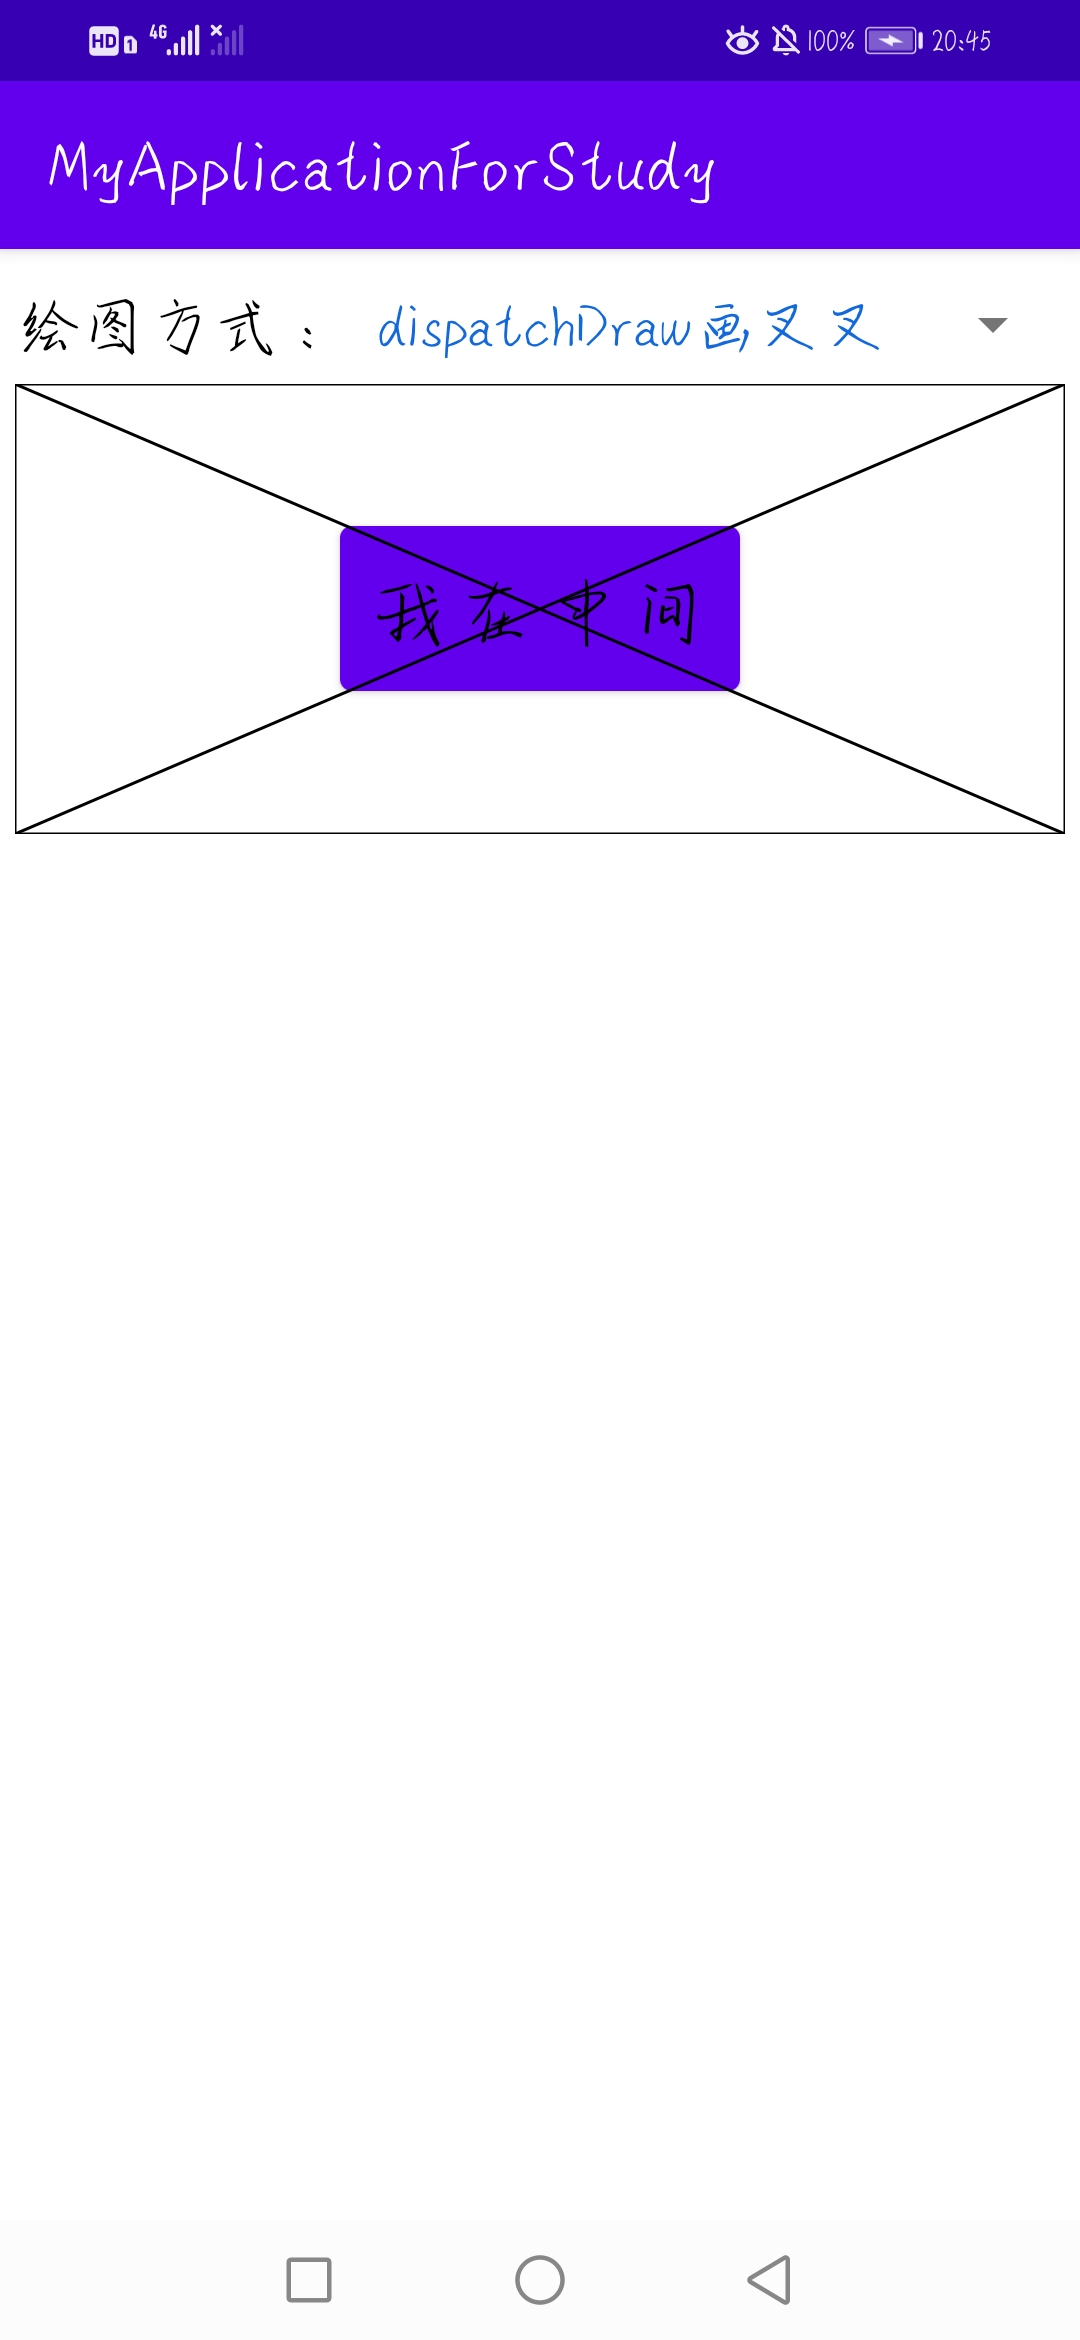
private String[] descArray = {"不画图", "画矩形", "画圆角矩形", "画圆圈", "画椭圆",
"onDraw画叉叉", "dispatchDraw画叉叉"};
private int[] typeArray = {0, 1, 2, 3, 4, 5, 6};
class DrawSelectedListener implements AdapterView.OnItemSelectedListener {
public void onItemSelected(AdapterView<?> arg0, View arg1, int arg2, long arg3) {
int type = typeArray[arg2];
if (type == 5 || type == 6) {
btn_center.setVisibility(View.VISIBLE);
} else {
btn_center.setVisibility(View.GONE);
}
drl_content.setDrawType(type); // 设置绘图布局的绘制类型
}
public void onNothingSelected(AdapterView<?> arg0) {}
}
}效果图如下,主要看后面两张,若先在onDraw绘画叉则会被按钮覆盖,若在dispatchDraw绘画叉则不会,若不想图形被下级视图覆盖就在dispatchDraw中绘画图形。


 4万+
4万+

 被折叠的 条评论
为什么被折叠?
被折叠的 条评论
为什么被折叠?
 到【灌水乐园】发言


