


源码下载地址
NGINX 源码
NGINX 下载地址
NGINX 依赖库
pcre 源码
pcre 下载地址
openssl 源码
openssl 下载地址
zlib 源码
zlib 下载地址
nginx-rtmp-module
得去git下载
libx264 源码
libx264 下载地址
ffmpeg 源码下载
ffmpeg 下载地址
交叉编译编译nginx
因为nginx和openssl版本不匹配可能会冲突
我使用的是
pcre-8.39
openssl-1.0.2u
nginx-1.6.3
zlib-1.2.11
nginx交叉编译真的太痛苦了
主要会各种报错
首先写一个脚本文件, 保存为nginx_build.sh
#!/bin/sh
./configure \
#nginx 交叉编译生成路径
--prefix=/home/lee/linux/ffmpeg/arm-nginx \
#gcc 交叉编译器
--with-cc=arm-linux-gnueabihf-gcc \
#g++ 交叉编译器
--with-cpp=arm-linux-gnueabihf-g++ \
#pcre 源码路径
--with-pcre=/home/lee/linux/ffmpeg/pcre-8.39 \
#openssl 源码路径
--with-openssl=/home/lee/linux/ffmpeg/openssl-1.0.2u \
#zlib 源码路径
--with-zlib=/home/lee/linux/zlib/zlib-1.2.11 \
--without-http_gzip_module \
#nginx-rtmp-module 源码路径
--add-module=/home/lee/linux/ffmpeg/nginx-rtmp-module-master
pcre openssl zlib nginx-rtmp-module不需要自己去交叉编译
nginx交叉编译的时候会把这些依赖库编译一遍并静态链接
- 打开aoto/cc/name
ngx_feature_run=yes
修改为:
ngx_feature_run=no
- 打开auto/types/sizeof
ngx_test="$CC $CC_TEST_FLAGS $CC_AUX_FLAGS \
          -o $NGX_AUTOTEST $NGX_AUTOTEST.c $NGX_LD_OPT $ngx_feature_libs"
修改为:
ngx_test="gcc $CC_TEST_FLAGS $CC_AUX_FLAGS \
          -o $NGX_AUTOTEST $NGX_AUTOTEST.c $NGX_LD_OPT $ngx_feature_libs"

//

if [ -x $NGX_AUTOTEST ]; then
    ngx_size=`$NGX_AUTOTEST`
    echo " $ngx_size bytes"
fi
修改为:
if [ -x $NGX_AUTOTEST ]; then
    ngx_size=4
    echo " $ngx_size bytes"
fi
- 打开auto/lib/pcre/make
$PCRE/Makefile:	$NGX_MAKEFILE
	cd $PCRE \\
	&& if [ -f Makefile ]; then \$(MAKE) distclean; fi \\
	&& CC="\$(CC)" CFLAGS="$PCRE_OPT" \\
	./configure --disable-shared $PCRE_CONF_OPT
修改为:
$PCRE/Makefile:	$NGX_MAKEFILE
	cd $PCRE \\
	&& if [ -f Makefile ]; then \$(MAKE) distclean; fi \\
	&& CC="\$(CC)" CFLAGS="$PCRE_OPT" \\
	./configure --host=arm-linux-gnueabihf --disable-shared $PCRE_CONF_OPT
- 打开auto/lib/openssl/make
$OPENSSL/.openssl/include/openssl/ssl.h:	$NGX_MAKEFILE
	cd $OPENSSL \\
	&& if [ -f Makefile ]; then \$(MAKE) clean; fi \\
	&& ./config --prefix=$ngx_prefix no-shared $OPENSSL_OPT \\
	&& \$(MAKE) \\
	&& \$(MAKE) install LIBDIR=lib

END
修改为:
$OPENSSL/.openssl/include/openssl/ssl.h:	$NGX_MAKEFILE
	cd $OPENSSL \\
	&& if [ -f Makefile ]; then \$(MAKE) clean; fi \\
	&& ./Configure linux-armv4 --cross-compile-prefix=arm-linux-gnueabihf- --prefix=$ngx_prefix no-shared $OPENSSL_OPT \\
	&& \$(MAKE) \\
	&& \$(MAKE) install LIBDIR=lib

END
第三和第四步主要是在nginx执行make编译pcre openssl时 指定交叉编译器
运行nginx_build.sh后在/objs/ 目录下会生成Makefile
在1416行你会看到以下代码
/home/lee/linux/ffmpeg/pcre-8.39/Makefile:	objs/Makefile
	cd /home/lee/linux/ffmpeg/pcre-8.39 \
	&& if [ -f Makefile ]; then $(MAKE) distclean; fi \
	&& CC="$(CC)" CFLAGS="-O2 -fomit-frame-pointer -pipe " \
	./configure --host=arm-linux-gnueabihf --disable-shared

/home/lee/linux/ffmpeg/pcre-8.39/.libs/libpcre.a:	/home/lee/linux/ffmpeg/pcre-8.39/Makefile
	cd /home/lee/linux/ffmpeg/pcre-8.39 \
	&& $(MAKE) libpcre.la


/home/lee/linux/ffmpeg/openssl-1.0.2u/.openssl/include/openssl/ssl.h:	objs/Makefile
	cd /home/lee/linux/ffmpeg/openssl-1.0.2u \
	&& if [ -f Makefile ]; then $(MAKE) clean; fi \
	&& ./Configure linux-armv4 --cross-compile-prefix=arm-linux-gnueabihf- --prefix=/home/lee/linux/ffmpeg/openssl-1.0.2u/.openssl no-shared  no-threads \
	&& $(MAKE) \
	&& $(MAKE) install LIBDIR=lib
- 修改/objs/ngx_auto_config
在最下面添加这几行代码
#ifndef NGX_SYS_NERR
#define NGX_SYS_NERR  132
#endif

#ifndef NGX_HAVE_SYSVSHM
#define NGX_HAVE_SYSVSHM 1
#endif
- 执行make & make install
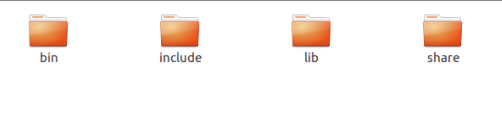
编译完成有四个文件夹,全部拷贝到arm板

需要注意的是,在编译nginx的时候,nginx在运行时会按照–prefix填路径去查找logs/error.log和conf/nginx.conf
即在ubuntu下编译到/usr/local路径,拷贝的时候也要放在/usr/local路径下
修改nginx.conf
打开conf/nginx.conf, 添加rtmp代码
完整代码
user              nobody nobody;
worker_processes  auto;
pid               /usr/local/function/arm-nginx/logs/nginx.pid;


#error_log  logs/error.log;
#error_log  logs/error.log  notice;
#error_log  logs/error.log  info;

#pid        logs/nginx.pid;


events {
    worker_connections  1024;
}

rtmp_auto_push on;
rtmp_auto_push_reconnect 1s;

rtmp {
        server {
                listen 1935;
                application live {
                        live on;
                        pull rtmp://localhost/live;
                }
        }
}
将/sbin/nginx ln到/usr/bin里面
执行nginx就启动nginx了
执行nginx -s stop 停止nginx
交叉编译ffmpeg
- 先编译libx264
进入libx264文件夹, 创建脚本文件
#!/bin/bash

./configure \
--enable-static \
--enable-shared \
--prefix=/home/lee/linux/ffmpeg/arm-x264 \
--host=arm-linux \
--cross-prefix=arm-linux-gnueabihf- \
--disable-asm
-
打开终端运行脚本文件

提示"You can run ‘make’ or ‘make fprofiled’ now.", 执行make & make install -
libx264生成文件
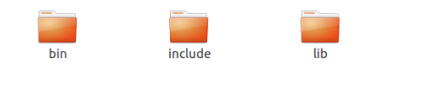
-
进入ffmpeg源码文件夹,打开终端运行
注意连接libx264的路径,要改为你编译的libx264的路径
./configure --prefix=/home/lee/linux/ffmpeg/arm-ffmpeg --cross-prefix=arm-linux-gnueabihf- --enable-cross-compile --target-os=linux --cc=arm-linux-gnueabihf-gcc --arch=arm --enable-static --enable-gpl --enable-libx264 --extra-cflags=-I/home/lee/linux/ffmpeg/arm-x264/include --extra-ldflags=-L/home/lee/linux/ffmpeg/arm-x264/lib
提示

警告可以无视,执行 make & make install
- ffmpeg生成文件
因为我这里选择了静态编译, 所以我使用的时候拷贝lib下的.a文件到工程里面link就行了
动态编译就需要把.so库拷贝到arm板子里
遇到的问题
-
nginx启动报错

原因: 没有配置用户
解决:打开nginx.conf 添加user -
ffmpeg推流失败

首先输入 netstat -lnt 看看 1935这个端口有无在监听
查看/etc/hosts文件(无则自己创建 ),看看有没配置localhost

输入ifconfig 看看有没打开lo端口, 没有则手动ifconfig lo up, 尝试ping localhost看能不能ping通
如果都没问题再试一试能否推流
ffmpeg成功推流打印输出

参考
https://blog.csdn.net/wangjingkaibear/article/details/108282915


 919
919


 被折叠的 条评论
为什么被折叠?
被折叠的 条评论
为什么被折叠?
 到【灌水乐园】发言


