


说明
在UITextField和UITextField中能查到这两个属性
@property (readwrite, retain) UIView *inputView;
@property (readwrite, retain) UIView *inputAccessoryView;
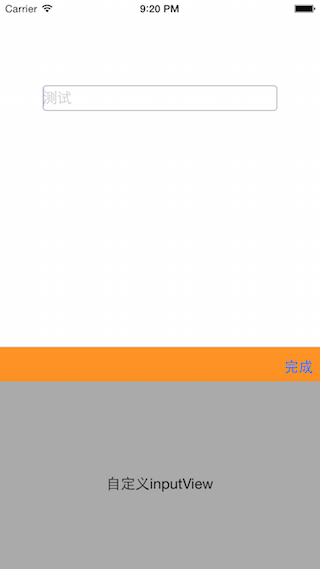
在UITextField或者UITextField成为默认响应的时候,会弹出系统键盘。如果对这两个控件的inputView属性设置了自定义的view,在其成为第一响应的时候系统键盘将不再弹出,取而代之的是赋值给inputView的那个view。inputAccessoryView是键盘的辅助视图,即键盘上面那部分。同样当对inputAccessoryView设置了自定义view时,键盘弹出的同时,该view会作为辅助视图出现在键盘的上面,和键盘一起弹出。通常会使用pickerView作为自定义的弹出视图,这里为了简单起见,用一个普通的view演示:
基础代码演示
#import "ViewController.h"
#define SCREEN_BOUNDS [UIScreen mainScreen].bounds

@interface ViewController ()

@property (nonatomic, strong) UITextField *textField;
@property (nonatomic, strong) UIView *customInputView;
@property (nonatomic, strong) UIToolbar *customAccessoryView;

@end

@implementation ViewController

- (void)viewDidLoad {
    [super viewDidLoad];
    [self loadBaseUI];
}

- (void)loadBaseUI{
    [self.view addSubview:self.textField];
}

- (UITextField *)textField{
    if (!_textField) {
        _textField = [[UITextField alloc]initWithFrame:CGRectMake(50, 100, SCREEN_BOUNDS.size.width - 100, 30)];
        _textField.layer.borderWidth = 1.0;
        _textField.layer.borderColor = [UIColor lightGrayColor].CGColor;
        _textField.layer.cornerRadius = 4.0;
        _textField.placeholder = @"测试";
        _textField.inputView = self.customInputView;
        _textField.inputAccessoryView = self.customAccessoryView;
    }
    return _textField;
}

- (UIView *)customInputView{
    if (!_customInputView) {
        _customInputView = [[UIView alloc]initWithFrame:CGRectMake(0, 0, SCREEN_BOUNDS.size.width, 220)];
        _customInputView.backgroundColor = [UIColor lightGrayColor];
        UILabel *label = [[UILabel alloc]initWithFrame:CGRectMake(0, 100, SCREEN_BOUNDS.size.width, 40)];
        label.textAlignment = NSTextAlignmentCenter;
        label.text = @"自定义inputView";
        [_customInputView addSubview:label];
    }
    return _customInputView;
}

- (UIToolbar *)customAccessoryView{
    if (!_customAccessoryView) {
        _customAccessoryView = [[UIToolbar alloc]initWithFrame:(CGRect){0,0,SCREEN_BOUNDS.size.width,40}];
        _customAccessoryView.barTintColor = [UIColor orangeColor];
        UIBarButtonItem *space = [[UIBarButtonItem alloc]initWithBarButtonSystemItem:UIBarButtonSystemItemFlexibleSpace target:nil action:nil];
        UIBarButtonItem *finish = [[UIBarButtonItem alloc]initWithTitle:@"完成" style:UIBarButtonItemStyleDone target:self action:@selector(done)];
        [_customAccessoryView setItems:@[space,space,finish]];
    }
    return _customAccessoryView;
}

- (void)done{
    [self.textField resignFirstResponder];
}

@end
点击textField后的显示效果
对其他控件设置inputView和inputAccessoryView
除了UITextField和UITextField,有事我们可能想让别的控件实现类似效果,比如点击一个按钮、选中某个cell的时候弹出键盘,但是对于UITextField和UITextField以外的控件,inputView和inputAccessoryView是只读的
@property (nonatomic, readonly, retain) UIView *inputView
@property (nonatomic, readonly, retain) UIView *inputAccessoryView
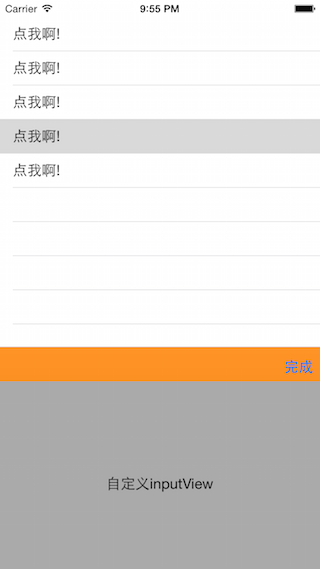
因此如果要使用控件这两个属性,就要创建该控件的子视图,然后重新申明inputView和inputAccessoryView为readwrite的,并重写它们的get方法,这样在UITableViewCell成为第一响应的时候会自动弹出inputView和inputAccessoryView。以UITableView演示:
代码示例
//MyTableViewCell.h

#import <UIKit/UIKit.h>
#define SCREEN_BOUNDS [UIScreen mainScreen].bounds

@interface MyTableViewCell : UITableViewCell

//属性申明为可读写
@property (nonatomic, strong, readwrite) UIView *inputView;

@property (nonatomic, strong, readwrite) UIToolbar *inputAccessoryView;

@end
// MyTableViewCell.m
#import "MyTableViewCell.h"
@implementation MyTableViewCell
//重写get方法
- (UIView *)inputView{
if (!_inputView) {
_inputView = [[UIView alloc]initWithFrame:CGRectMake(0, 0, SCREEN_BOUNDS.size.width, 220)];
_inputView.backgroundColor = [UIColor lightGrayColor];
UILabel *label = [[UILabel alloc]initWithFrame:CGRectMake(0, 100, SCREEN_BOUNDS.size.width, 40)];
label.textAlignment = NSTextAlignmentCenter;
label.text = @"自定义inputView";
[_inputView addSubview:label];
}
return _inputView;
}
- (UIToolbar *)inputAccessoryView{
if (!_inputAccessoryView) {
_inputAccessoryView = [[UIToolbar alloc]initWithFrame:(CGRect){0,0,SCREEN_BOUNDS.size.width,40}];
_inputAccessoryView.barTintColor = [UIColor orangeColor];
UIBarButtonItem *space = [[UIBarButtonItem alloc]initWithBarButtonSystemItem:UIBarButtonSystemItemFlexibleSpace target:nil action:nil];
UIBarButtonItem *finish = [[UIBarButtonItem alloc]initWithTitle:@"完成" style:UIBarButtonItemStyleDone target:self action:@selector(done)];
[_inputAccessoryView setItems:@[space,space,finish]];
}
return _inputAccessoryView;
}
- (void)done{
[self resignFirstResponder];
}
@end
在主视图控制器中创建一个tableView发现这样之后点击cell发现不会弹出inputView,最后查阅官方文档发现需要在子类中重写canBecomeFirstResponder方法:
在子类.m文件中添加
- (BOOL)canBecomeFirstResponder{
    return YES;
}
发现还是不行,最后手动becomeFirstResponder,终于实现了。PS原来选中都还不算是成为第一响应,坑爹啊!
- (void)tableView:(UITableView *)tableView didSelectRowAtIndexPath:(NSIndexPath *)indexPath{
    MyTableViewCell *cell = (MyTableViewCell *)[tableView cellForRowAtIndexPath:indexPath];
    [cell becomeFirstResponder];
}


 604
604

 被折叠的 条评论
为什么被折叠?
被折叠的 条评论
为什么被折叠?
 到【灌水乐园】发言


