


.Net Core WebApi集成Swagger中间件
简介
Swagger 是一个规范和完整的框架,用于生成、描述、调用和可视化 RESTful 风格的 Web 服务。
总体目标是使客户端和文件系统作为服务器以同样的速度来更新。文件的方法、参数和模型紧密集成到服务器端的代码,允许 API 来始终保持同步。Swagger 让部署管理和使用功能强大的 API 从未如此简单。
前提
.Net Core的环境我相信大家都有
这里主要说一下Nuget包
Swashbuckle.AspNetCore #核心库
Swashbuckle.AspNetCore.Annotations #用于生成文档注释的属性拓展包
Install-Package Swashbuckle.AspNetCore
Install-Package Swashbuckle.AspNetCore.Annotations
初始化
Swagger的初始化的代码写在Startup.cs脚本里
public class Startup
    {
        public Startup(IConfiguration configuration)
        {
            Configuration = configuration;
        }

        public IConfiguration Configuration { get; }

        // This method gets called by the runtime. Use this method to add services to the container.
        public void ConfigureServices(IServiceCollection services)
        {
            services.AddControllers();

            //注册Swagger服务
            services.AddSwaggerGen(c =>
            {
                //添加文档信息
                c.SwaggerDoc("v1", new OpenApiInfo
                {
                    Version = "v1",
                    Title = "Demo API",
                    Description = "这是一个Demo Api 文档",
                    Contact = new OpenApiContact
                    {
                        Name = "Lyon Nee",
                        Email = "lyon.nee@outlook.com"
                    }
                });
                c.EnableAnnotations();
            });
        }

        // This method gets called by the runtime. Use this method to configure the HTTP request pipeline.
        public void Configure(IApplicationBuilder app, IWebHostEnvironment env)
        {
            if (env.IsDevelopment())
            {
                app.UseDeveloperExceptionPage();
            }

            //启动Swagger中间件
            app.UseSwagger();
            //配置SwaggerUI
            app.UseSwaggerUI(c =>
            {
                c.SwaggerEndpoint("/swagger/v1/swagger.json", "Demo API");
                c.RoutePrefix = string.Empty;
            });


            app.UseHttpsRedirection();

            app.UseRouting();

            app.UseAuthorization();

            app.UseEndpoints(endpoints =>
            {
                endpoints.MapControllers();
            });
        }
    }
检查
启动项目
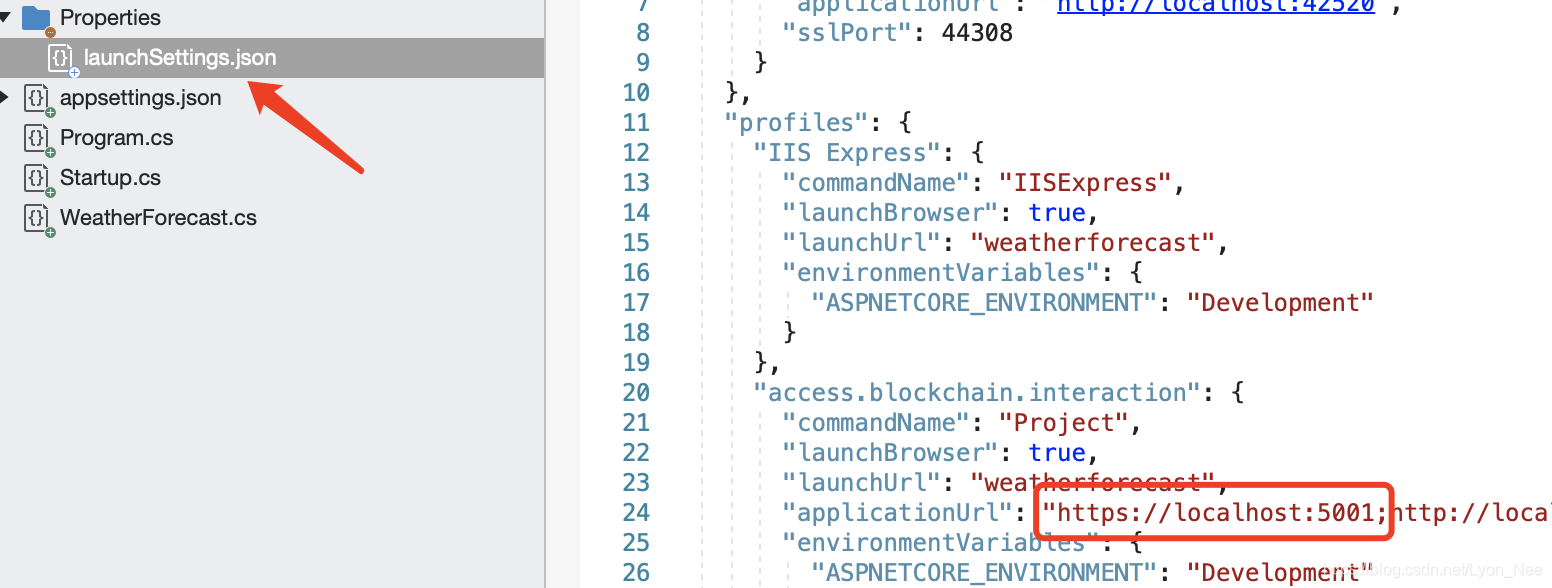
我的程序端口监听是5001, 所以我打开 https://localhost:5001/index.html 就可以看到api文档页面了
像这样
添加注释
我使用默认的模版WeatherForecastController.cs进行了代码修改,如下
这里我们看到我没有使用以往或其他博主的 /// 三斜杠注释,而是使用了 Swashbuckle.AspNetCore.Annotations库的属性注释,这样的好处是不用生成多余的.xml文档
[ApiController]
    [Route("[controller]")]
    [SwaggerTag(".NetCore创建项目的Controller模版")]
    public class WeatherForecastController : ControllerBase
    {
        private readonly ILogger<WeatherForecastController> _logger;

        public WeatherForecastController(ILogger<WeatherForecastController> logger)
        {
            _logger = logger;
        }

        [SwaggerOperation(
            Summary = "测试Get接口",
            Description = "这是一个测试Get调用的方法"
            )]
        [SwaggerResponse(200, "调用成功", typeof(BaseResponse))]
        [HttpGet, Route("TestGet")]
        public IActionResult TestGet([FromQuery, SwaggerParameter("Get方法入参")] string input)
        {
            var result = "调用TestGet成功,输入的参数是:" + input;

            return Ok(new BaseResponse(200, "", result));
        }


        [SwaggerOperation(
            Summary = "测试Post接口",
            Description = "这是一个测试Post调用的方法"
            )]
        [SwaggerResponse(200, "调用成功", typeof(BaseResponse))]
        [HttpPost, Route("TestPost")]
        public IActionResult TestPost([FromBody, SwaggerRequestBody("Post方法入参")] PostDTO input)
        {
            var result = input.Data1.ToString() + input.Data2;

            return Ok(new BaseResponse(200, "", result));
        }
    }

    [SwaggerSchema("Post方法入参")]
    public class PostDTO
    {
        [SwaggerSchema("int参数")]
        public int Data1 { get; set; }

        [SwaggerSchema("string参数")]
        public string Data2 { get; set; }
    }

    public class BaseResponse
    {
        public int Code { get; set; }
        public string Message { get; set; }
        public object Data { get; set; }

        public BaseResponse(int code, string message = null, object data = null)
        {
            Code = code;
            Message = message;
            Data = data;
        }
    }
检查
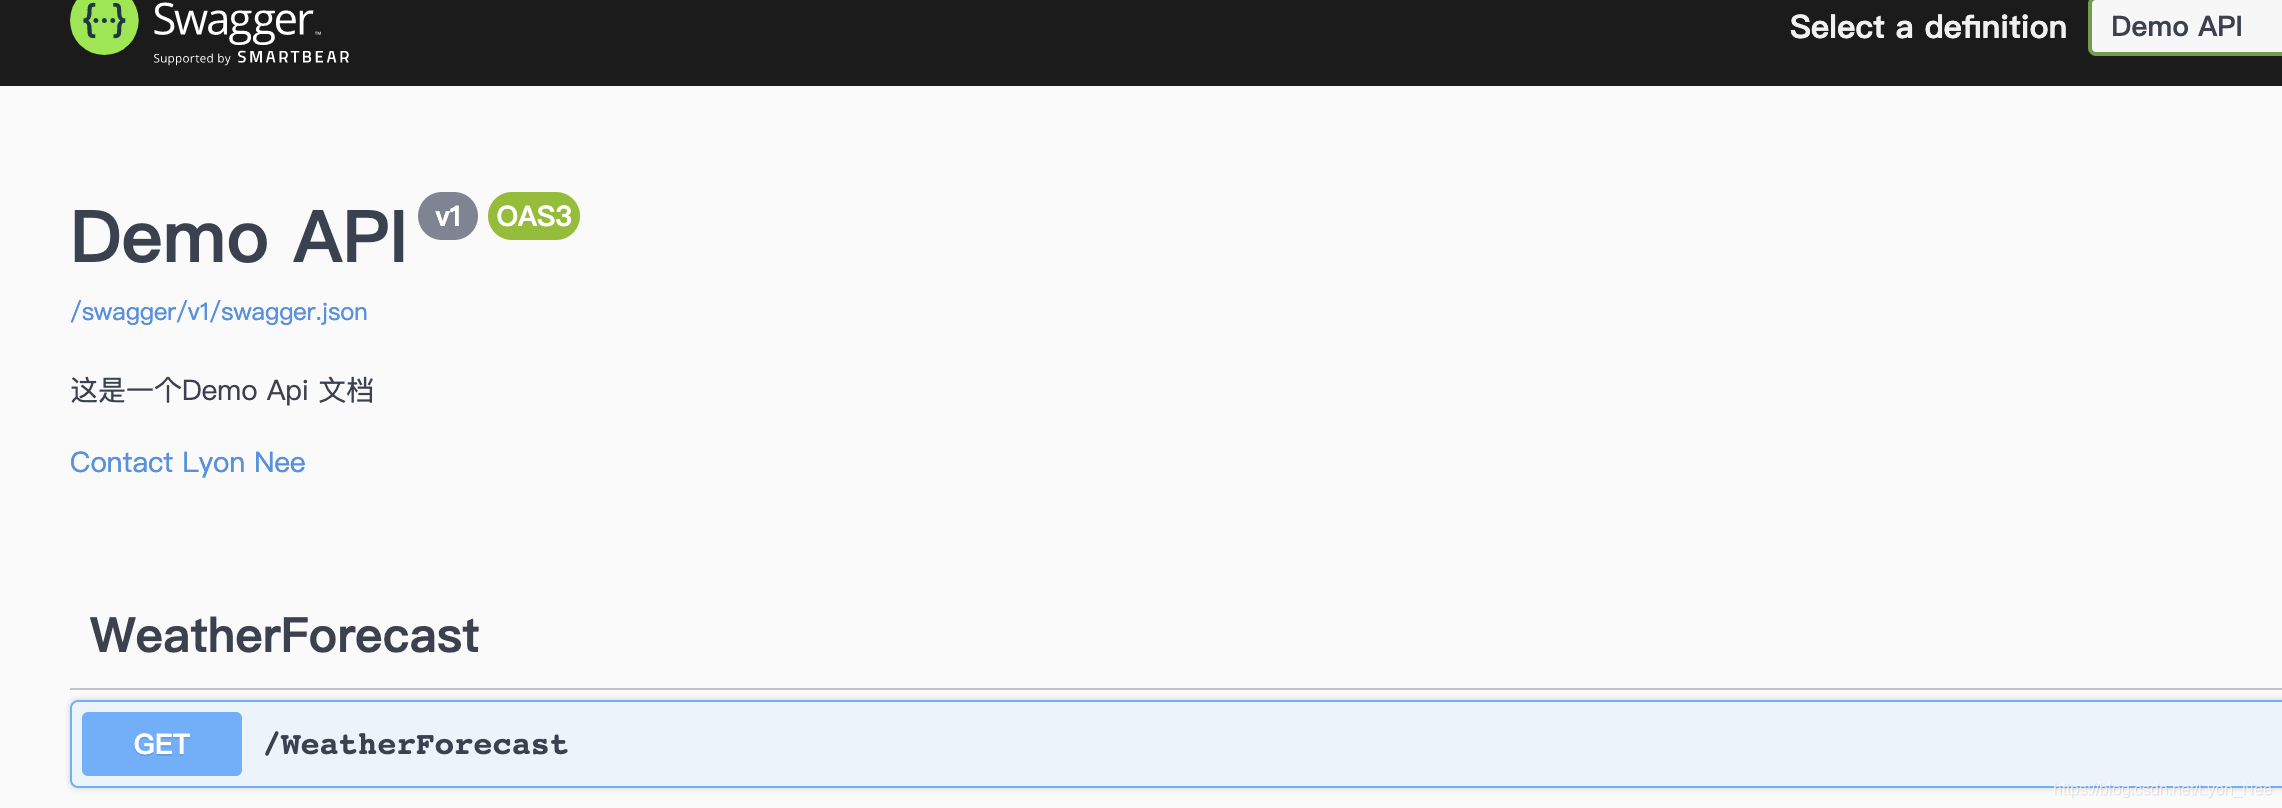
再次启动项目,打开 https://localhost:5001/index.html
像这样

测试方法调用
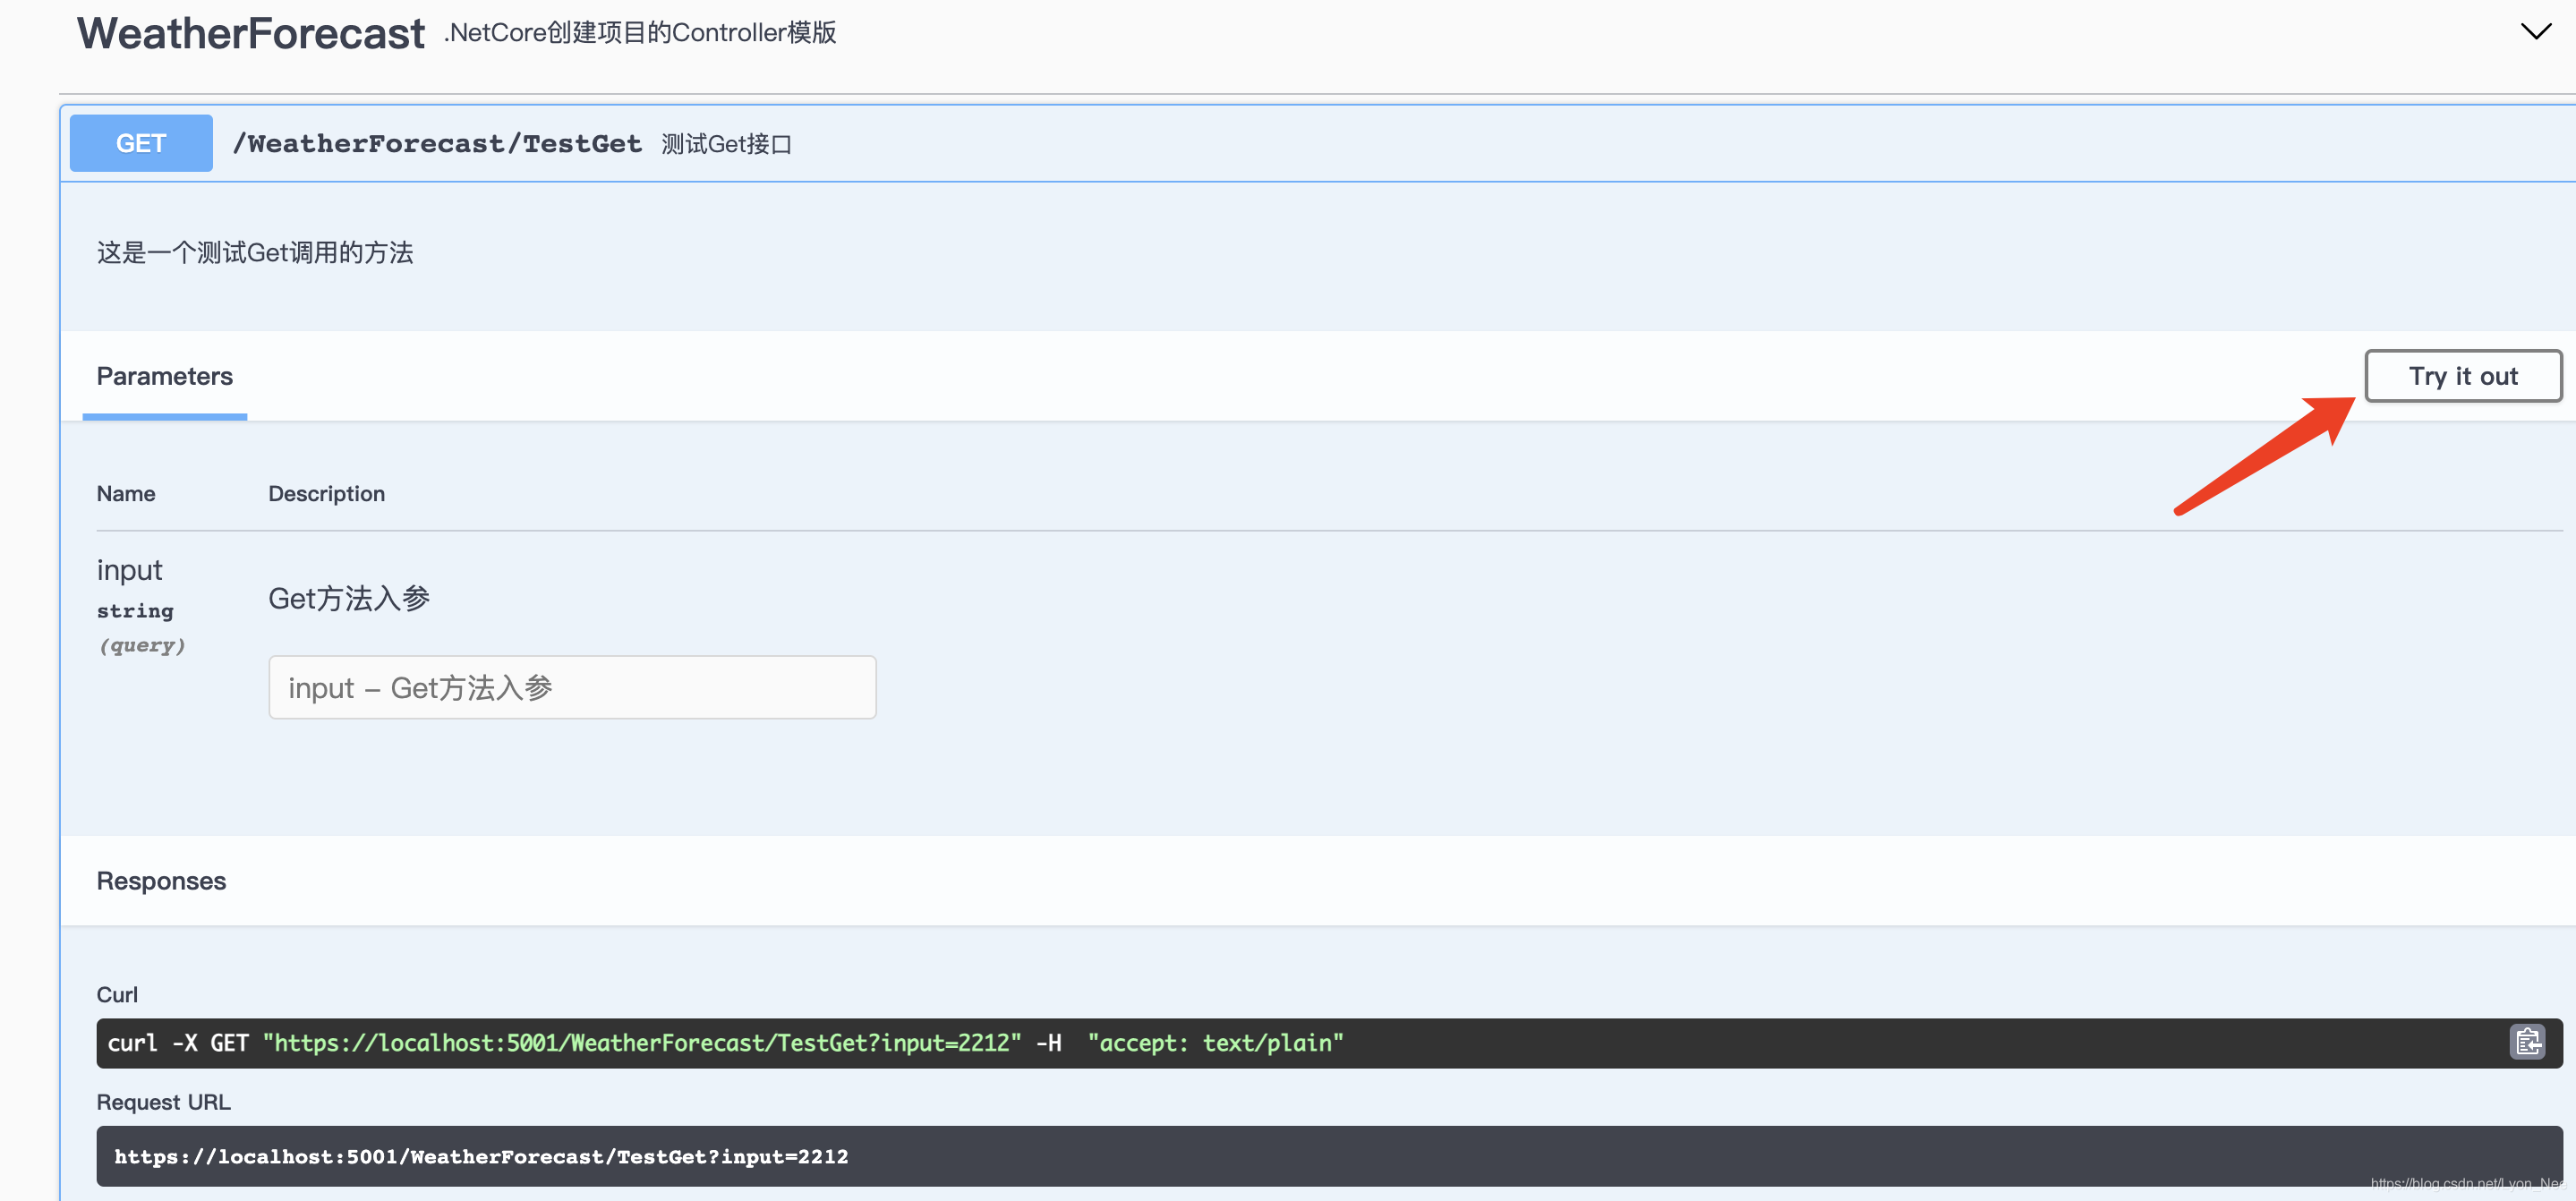
点击Try it out, 输入参数,点击Execute
像这样
测试Get方法

测试Post方法
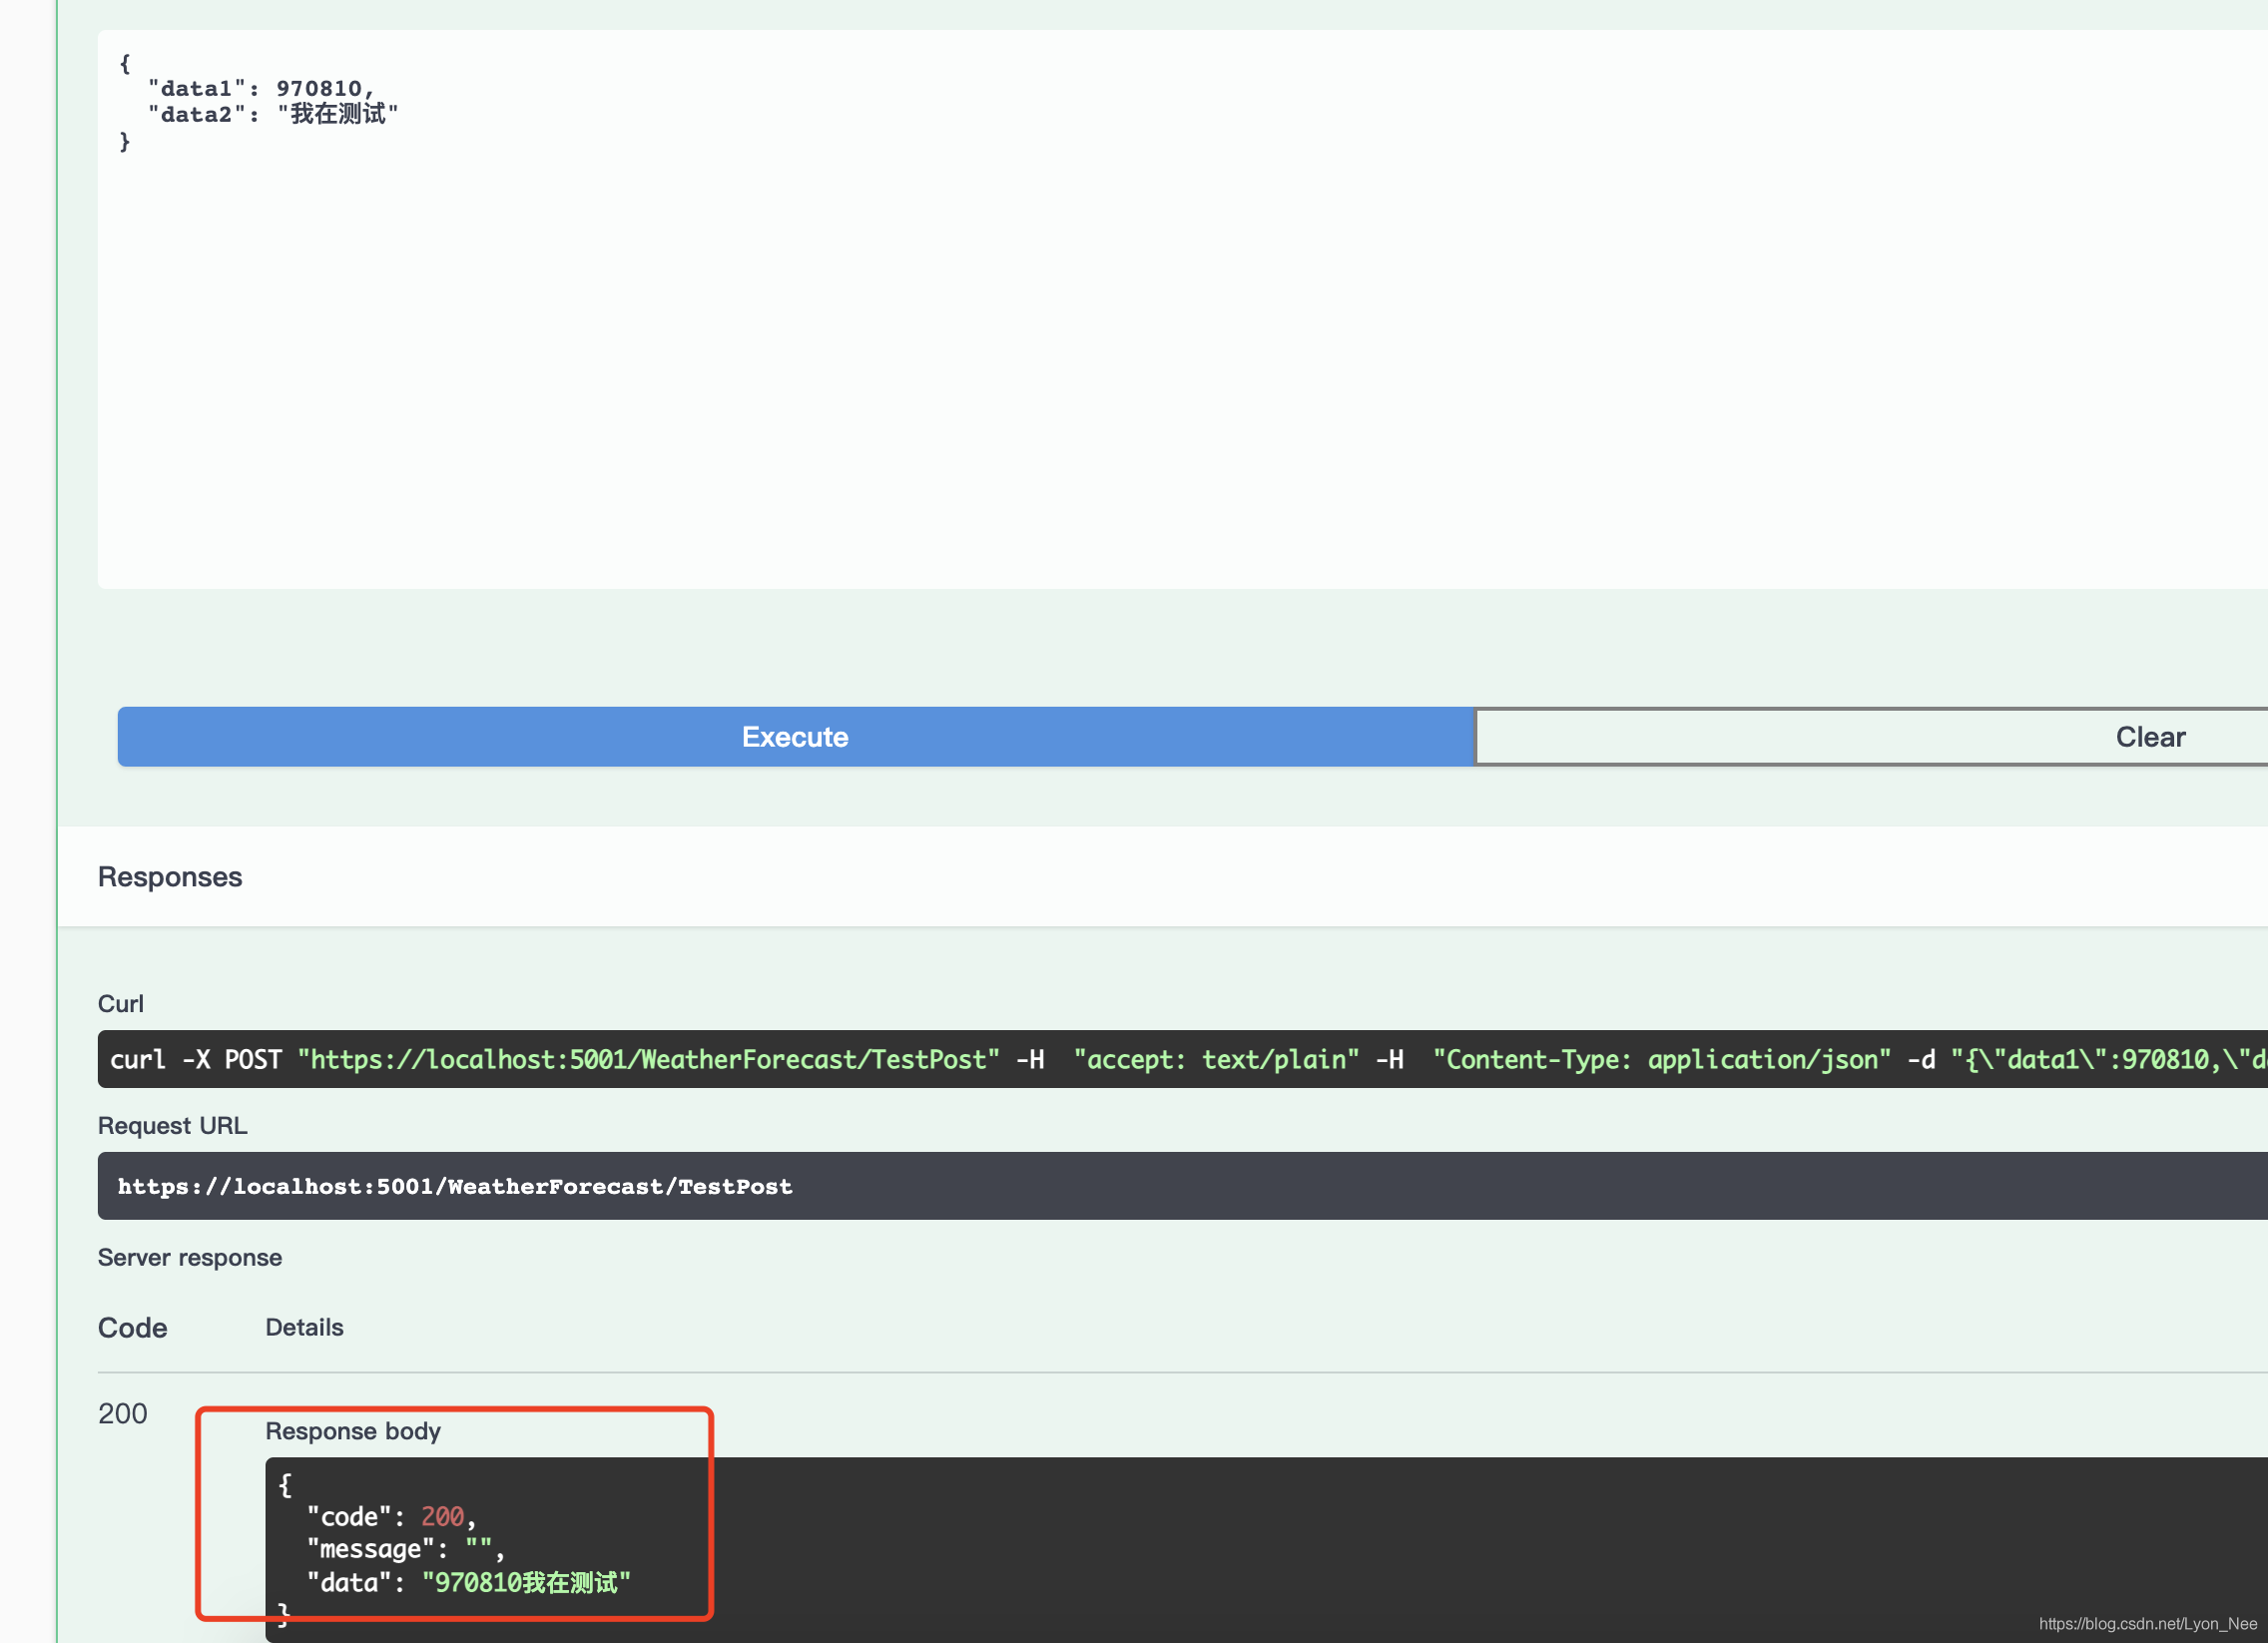
这里可以看到,预期都是我们预期的结果
总结
到这里,我们的 .Net Core WebApi集成Swagger中间件 操作完成.
我们可以看到,集成Swagger之后,我们可以很方便的编写API文档,和测试API,这给我们的开发带来了极大的方便.
有问题或意见欢迎留言!


 1万+
1万+


 被折叠的 条评论
为什么被折叠?
被折叠的 条评论
为什么被折叠?
 到【灌水乐园】发言


