


目录
2.0 添加需要的数据结构类型接口(types/canvas.ts)
2.1 添加 对齐线组件 的 全局数据(store/modules/design/canvas.ts)
2.2 添加 对齐线组件 的 全局方法(store/modules/design/canvas.ts)
2.3 添加对齐线组件(components\design\canvas\alignment-line.vue)
2.4 在设计中心(画布)组件中使用对齐线组件(views\design\canvas.vue)
2.5 在组件移动监听的页面中,书写对齐线的显隐逻辑,并调用(components\design\canvas\component-wrapper.vue)
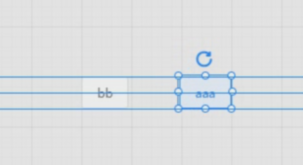
1. 功能描述(对齐 + 自动吸附)
- 对齐功能:移动组件时,如果 当前被移动的组件 和 画布中的其他组件 边框在同一条直线上,则显示对齐线
- 自动吸附功能:组件靠近时,比如两个组件仅仅相差 3px,那么组件会自动贴(吸附)到一起
- 效果:
2. 功能实现
2.0 添加需要的数据结构类型接口(types/canvas.ts)
- store 中的对齐线:
- export interface alignStoreData {
name: string,
isShow: boolean,
left: number,
top: number,
}- 组件中的对齐线:
- export interface alignData {
lineName: string, // 名字
isNearly: boolean, // 是否显示(对应组件是否粘合)
left: number, // 左边距
top: number, // 上边距
}- 上面两部分其实可以合并的,但是我当时没合并,目前差宽高属性的补充
当前被移动元素的样式信息:- export interface curEleInfoInterface {
width: number, // 宽
halfWidth: number, // 半宽
height: number, // 高
halfHeight: number, // 半高
left: number, // 左边距
top: number, // 上边距
}- 画布中,其他元素的样式信息:
- export interface otherEleInfointerface {
owidth: number, // 宽
ohalfWidth: number, // 半宽
oheight: number, // 高
ohalfHeight: number, // 半高
oleft: number, // 左边距
otop: number, // 上边距
}- 原理:比较 当前被移动的元素 和 画布中其他元素的 的各个样式距离
2.1 添加 对齐线组件 的 全局数据(store/modules/design/canvas.ts)
- 对齐线的数据,包括了:名字、展示状态、边距、宽高
  lines: [
    { name: 'xt', isShow: true, left: 0, top: 0 },
    { name: 'xc', isShow: true, left: 0, top: 0 },
    { name: 'xb', isShow: true, left: 0, top: 0 },
    { name: 'yl', isShow: true, left: 0, top: 0 },
    { name: 'yc', isShow: true, left: 0, top: 0 },
    { name: 'yr', isShow: true, left: 0, top: 0 },
  ] as alignStoreData[],
diff: 3 // 相距 diff 像素将自动吸附
2.2 添加 对齐线组件 的 全局方法(store/modules/design/canvas.ts)
- 修改对齐线数据的全局方法
- 该方法接受了两个参数:① vuex.state ② 需要被修改的 对齐线的 相关信息(名字、是否距离对比组件3px之内,边距、宽高)
- 遍历 state.lines 时,要注意的问题:
- 不能写成 line.name ,而应使用 state.lines[index]
- 也就是说,不能使用当前遍历项 line;而应使用 当前遍历项的编号 index,去 state.lines 中进行取值
- 原因未知(...)
// 修改对齐线数据的全局方法
const SET_ALIGNMENT_ISSHOW = 'SET_ALIGNMENT_ISSHOW';

  /**
   * 修改对齐线数据
   * @param state
   * @param lineData
   */
  [SET_ALIGNMENT_ISSHOW](state: CanvasState, lineData: alignData): void {
    const { lineName, isNearly, left, top } = lineData;
    state.lines.forEach((line: any, index: number) => {
      if (state.lines[index].name === lineName) {
        state.lines[index].isShow = isNearly;
        state.lines[index].left = left;
        state.lines[index].top = top;
      }
    });
  },
- 隐藏全部对齐线的全局方法
- 该方法接受了一个参数:① vuex.state
// 隐藏全部对齐线
const SET_ALIGNMENT_HIDDEN = 'SET_ALIGNMENT_HIDDEN';

  /**
   * 隐藏全部对齐线
   * @param state
   */
  [SET_ALIGNMENT_HIDDEN](state: CanvasState):void {
    state.lines.forEach((line: any, index: number) => {
      state.lines[index].isShow = false;
    });
  },
2.3 添加对齐线组件(components\design\canvas\alignment-line.vue)
- 从 store 中获取对齐线数据(使用 computed(() => {}); 获取 vuex 数据):
<script lang="ts">
import { computed, defineComponent, reactive, toRefs } from 'vue';
import { useStore } from 'vuex';
export default defineComponent({
  name: 'AlignmentLine',
  setup() {
    // 使用 vuex
    const store = useStore();
    const state = reactive({
      // 相距 diff 像素将自动吸附
      diff: computed(() => store.state.design.canvas.diff),
      // 对齐线数据
      lines: computed(() => store.state.design.canvas.lines),
    });
    return {
      ...toRefs(state),
    };
  },
});
</script>
使用对齐线数据进行渲染:
- 通过 v-show 控制 对齐线的展示与否,因为对齐边数不一定一致
- 通过 style 动态改变对齐线的 位置 及 宽高 信息
- 通过 class 判断 line.name,进而判断使用的对齐线样式(横 / 竖)
<template>
  <div
    v-for="(line, index) in lines"
    :key="index"
    class="alignment-line"
    :class="line.name.includes('x') ? 'xline' : 'yline'"
    v-show="line.isShow || false"
    :style="{
      left: line.left + 'px',
      top: line.top + 'px',
    }"
  />
</template>
对齐线的默认样式:- 横着的对齐线,高度为0,宽度可控,只展示 上/下(二选一)的 border
- 竖着的对齐线,宽度为零,高度可控,只展示 左/右(二选一)的 border
- 此处由于我还未写宽高,所以先在 class 写死了,日后要把 宽高在 style 中动态设置
<style lang="scss" scoped>
.alignment-line {
  position: absolute;
  z-index: 1000;
}
.xline {
  width: 100%;
  height: 0;
  border-top: 1px solid rgb(22 132 252);
}
.yline {
  width: 0;
  height: 100%;
  border-left: 1px solid rgb(22 132 252);
}
</style>
2.4 在设计中心(画布)组件中使用对齐线组件(views\design\canvas.vue)
<!-- 对齐线 -->
<alignment-line />

import AlignmentLine from '@/components/design/canvas/alignment-line.vue';

components: {
  AlignmentLine, ...
},
2.5 在组件移动监听的页面中,书写对齐线的显隐逻辑,并调用(components\design\canvas\component-wrapper.vue)
- 判断是否吸附的方法:
- 如果 当前被移动元素的某边距 距离 画布中其他元素的某边距 的间距 <= 3,就自动吸附
    /**
     * 判断是否吸附(当边距在3之内,则吸附)
     * @param dragValue 当前元素的边距
     * @param targetValue 对比元素的边距
     */
const isNearly = (dragValue: number, targetValue: number): boolean =>
Math.abs(dragValue - targetValue) <= 3;
隐藏画布中全部的对齐线:- 使用 store.commit 更改 vuex 中的数据
- 因为 store 中被分成了好多模块,要改变其中的数据,必须使用 { root: true }
    /*
     * 隐藏全部的对齐线
     */
    function hideLine() {
      store.commit('design/canvas/SET_ALIGNMENT_HIDDEN', { root: true });
    }
★★★★★★ 展示对齐线的方法 ★★★★★★:- 首先,隐藏全部对齐线 hideLine();
获取当前选中的元素:currentElement.value = document.getElementById(props.comId);- 初始化 当前选中的元素样式信息:
- let curEleInfo: curEleInfoInterface = {
width: 0, // 宽
halfWidth: 0, // 半宽
height: 0, // 高
halfHeight: 0, // 半高
left: 0, // 左边距
top: 0, // 上边距
};- 填充当前选中元素的样式信息:
- if (currentElement.value) {
// 获取 当前选中的元素样式信息
const curEleRect = currentElement.value.getBoundingClientRect();
curEleInfo = {
width: curEleRect.width,
halfWidth: curEleRect.width / 2,
height: curEleRect.height,
halfHeight: curEleRect.height / 2,
left: curEleRect.left,
top: curEleRect.top,
};
}
初始化 画布中其他元素的样式信息:- let otherEleInfo: otherEleInfointerface = {
owidth: 0, // 宽
ohalfWidth: 0, // 半宽
oheight: 0, // 高
ohalfHeight: 0, // 半高
oleft: 0, // 左边距
otop: 0, // 上边距
};- 从 store 中读取画布中其他元素的列表:const { componentList } = store.state.design;
初始化 需要展示的对齐线列表:const needToShow: alignData[] = [];
遍历页面中全部组件列表,获取当前遍历的每一项组件样式信息,填充 conditions 对象(里面包含了各个位置是否吸附,展示的对齐线名字,对齐线位置,对齐线宽高等信息);- 遍历 conditions 对象,若吸附,更改被移动组件的位置;
- 同时,向需要展示的对齐线列表 needToShow 中,添加 需要展示的对齐线;
- 遍历需要展示的对齐线列表 needToShow,将其中的数组项传给全局方法 修改对齐线信息,实现对齐线的更改;
    /**
     * 展示对齐线
     */
    function showAlignLine() {
      // 隐藏全部对齐线
      hideLine();
      // 当前选中的元素
      currentElement.value = document.getElementById(props.comId);

      // 当前选中元素的信息
      let curEleInfo: curEleInfoInterface = {
        width: 0, // 宽
        halfWidth: 0, // 半宽
        height: 0, // 高
        halfHeight: 0, // 半高
        left: 0, // 左边距
        top: 0, // 上边距
      };

      // 获取当前点击组件的信息
      if (currentElement.value) {
        // 当前选中的元素央视信息
        const curEleRect = currentElement.value.getBoundingClientRect();
        curEleInfo = {
          width: curEleRect.width,
          halfWidth: curEleRect.width / 2,
          height: curEleRect.height,
          halfHeight: curEleRect.height / 2,
          left: curEleRect.left,
          top: curEleRect.top,
        };
      }

      // 画布中其他元素样式信息
      let otherEleInfo: otherEleInfointerface = {
        owidth: 0, // 宽
        ohalfWidth: 0, // 半宽
        oheight: 0, // 高
        ohalfHeight: 0, // 半高
        oleft: 0, // 左边距
        otop: 0, // 上边距
      };

      // 画布中其他元素组件
      const { componentList } = store.state.design;

      // 需要展示的对齐线列表
      const needToShow: alignData[] = [];

      // 遍历当前画布的全部组件
      if (componentList) {
        componentList.forEach((comp: HTMLElement) => {
          // 遍历到正在点击的组件,就返回
          if (comp.id === props.comId) return;
          const compEleRect = document
            .getElementById(comp.id)
            ?.getBoundingClientRect();
          if (compEleRect) {
            otherEleInfo = {
              owidth: Number(compEleRect.width), // 宽
              ohalfWidth: Number(compEleRect.width) / 2, // 半宽
              oheight: Number(compEleRect.height), // 高
              ohalfHeight: Number(compEleRect.height) / 2, // 半高
              oleft: Number(compEleRect.left), // 左边距
              otop: Number(compEleRect.top), // 上边距
            };
          }

          // 判断吸附条件
          const conditions: any = {
            top: [
              {
                // 当前组件的顶部 和 画布中其他组件的顶部
                isNearly: isNearly(curEleInfo.top, otherEleInfo.otop),
                lineName: 'xt',
                top: otherEleInfo.otop - 35,
                left: 0,
              },
              {
                // 当前组件的底部 和 画布中其他组件的顶部
                isNearly: isNearly(
                  curEleInfo.top + curEleInfo.height,
                  otherEleInfo.otop,
                ),
                lineName: 'xt',
                top: otherEleInfo.otop - 35,
                left: 0,
              },
              {
                // 当前组件的水平中间 和 画布中其他组件的水平中间
                isNearly: isNearly(
                  curEleInfo.top + curEleInfo.halfHeight,
                  otherEleInfo.otop + otherEleInfo.ohalfHeight,
                ),
                lineName: 'xc',
                top: otherEleInfo.otop + otherEleInfo.ohalfHeight - 35,
                left: 0,
              },
              {
                // 当前组件的顶部 和 画布中其他组件的底部
                isNearly: isNearly(
                  curEleInfo.top,
                  otherEleInfo.otop + otherEleInfo.oheight,
                ),
                lineName: 'xb',
                top: otherEleInfo.otop + otherEleInfo.oheight - 35,
                left: 0,
              },
              {
                // 当前组件的底部 和 画布中其他组件的底部
                isNearly: isNearly(
                  curEleInfo.top + curEleInfo.height,
                  otherEleInfo.otop + otherEleInfo.oheight,
                ),
                lineName: 'xb',
                top: otherEleInfo.otop + otherEleInfo.oheight - 35,
                left: 0,
              },
            ],
            left: [
              {
                // 当前组件的左侧 和 画布中其他组件的左侧
                isNearly: isNearly(curEleInfo.left, otherEleInfo.oleft),
                lineName: 'yl',
                left: otherEleInfo.oleft - 35,
                top: 0,
              },
              {
                // 当前组件的右侧 和 画布中其他组件的左侧
                isNearly: isNearly(
                  curEleInfo.left + curEleInfo.width,
                  otherEleInfo.oleft,
                ),
                lineName: 'yl',
                left: otherEleInfo.oleft - 35,
                top: 0,
              },
              {
                // 当前组件的垂直中间 和 画布中其他组件的垂直中间
                isNearly: isNearly(
                  curEleInfo.left + curEleInfo.halfWidth,
                  otherEleInfo.oleft + otherEleInfo.owidth,
                ),
                lineName: 'yc',
                left: otherEleInfo.oleft + otherEleInfo.owidth - 35,
                top: 0,
              },
              {
                // 当前组件的左侧 和 画布中其他组件的右侧
                isNearly: isNearly(
                  curEleInfo.left,
                  otherEleInfo.oleft + otherEleInfo.owidth,
                ),
                lineName: 'yr',
                left: otherEleInfo.oleft + otherEleInfo.owidth - 35,
                top: 0,
              },
              {
                // 当前组件的右侧 和 画布中其他组件的右侧
                isNearly: isNearly(
                  curEleInfo.left + curEleInfo.width,
                  otherEleInfo.oleft + otherEleInfo.owidth,
                ),
                lineName: 'yr',
                left: otherEleInfo.oleft + otherEleInfo.owidth - 35,
                top: 0,
              },
            ],
          };

          // 遍历对齐条件
          Object.keys(conditions).forEach((key) => {
            // 遍历水平垂直的判断条件
            conditions[key].forEach((condition: any) => {
              // 如果无需吸附,就返回
              if (!condition.isNearly) return;
              // 如果可以吸附,修改当前组件的位置
              const comStyle: any = {
                ...props.com.style,
                ...{
                  top: condition.top,
                  left: condition.left,
                },
              };
              // 修改当前组件样式
              store.dispatch('design/setComponentPosition', {
                id: props.comId,
                style: comStyle,
              });
              // 添加需要展示的对齐线
              needToShow.push(condition);
            });
          });
        });
      }
      console.log('要展示的线:', needToShow);
      // return needToShow;
      needToShow.forEach((item: alignData) => {
        const lineData = {
          ...item,
        };
        store.commit('design/canvas/SET_ALIGNMENT_ISSHOW', lineData, {
          root: true,
        });
      });
    }
- 当鼠标移动时,调用 展示对齐线的方法 showAlignLine()
- 当鼠标松开(弹起)时,调用 隐藏对齐线的方法 hideLine()
后记:需要考虑的可能性太多了,对齐线这个功能,目前没写宽高的动态设置,现在展示的是默认100% 的宽高


09-27
 660
660
660
10-26
4510
4510
08-24
“相关推荐”对你有帮助么?
-

 非常没帮助
非常没帮助 -

 没帮助
没帮助 -

 一般
一般 -

 有帮助
有帮助 -

 非常有帮助
非常有帮助
提交

 被折叠的 条评论
为什么被折叠?
被折叠的 条评论
为什么被折叠?
 到【灌水乐园】发言


