


目录
4.2 PostCss 处理 Tailwind Css 基本流程
4.3.4 修改配置文件 tailwind.config.js
4.3.5 创建 index.css,并在 main.ts 中引入
1. 常见的 Vue UI 库
1.1 ElementPlus
使用 setup 语法糖 + ts
独特优势:支持 Volar 插件,配置 tsconfig.json 后可以实现代码提示
1.2 Ant Design Vue
https://www.antdv.com/docs/vue/getting-started-cn![]() https://www.antdv.com/docs/vue/getting-started-cn使用 setup() 函数
https://www.antdv.com/docs/vue/getting-started-cn使用 setup() 函数
独特优势:表格组件更符合业务,和分页结合起来啦
1.3 iView
https://www.iviewui.com/view-ui-plus/guide/start![]() https://www.iviewui.com/view-ui-plus/guide/start
https://www.iviewui.com/view-ui-plus/guide/start
使用 options API
独特优势:每个 demo 都非常的详细
1.4 Vant
使用 setup() 函数,是移动端组件库
独特优势:适用于电商类项目,把常见的优惠券等业务抽成了组件
2. scoped 、样式穿透
用于修改 Vue 相关的组件库(ElementPlus、AntDesign、Vant)
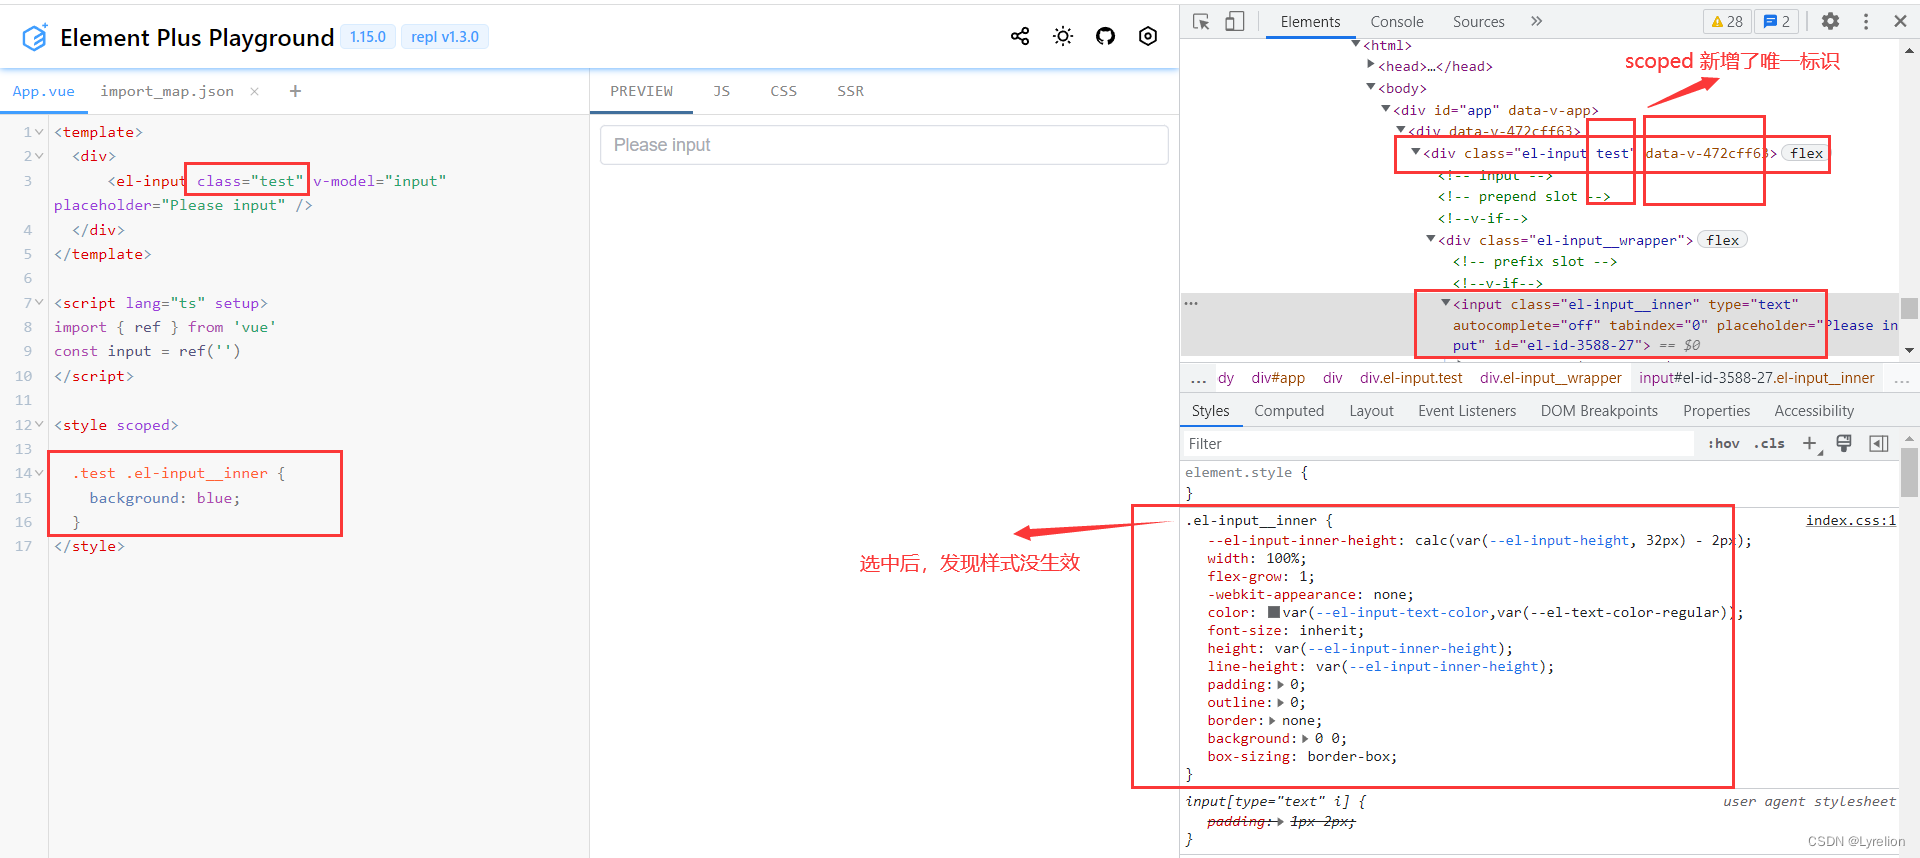
2.1 scoped 渲染规则
scoped 在 DOM 结构、CSS 样式上,增加唯一标识(形如 data-v-hash),达到样式私有化、样式模块化(PostCSS 转译实现)
scoped 三条渲染规则:
- PostCSS 给 HTML 的 DOM 节点,加不重复的 data 属性(形如 data-v-xxx)确保类名唯一
- PostCSS 在每句 CSS 选择器的末尾(编译后生成的 css)加当前组件的 data 属性选择器
- 如果组件内部包含有其他组件,只会给其他组件的最外层标签,加上当前组件的 data 属性
2.2 样式穿透
不使用样式穿透,属性选择器就永远在最后;使用样式穿透,就能改变属性选择器的位置;
不用任何样式穿透,无法直接在 scoped 中修改 ElementPlus 类名
Vue2 中使用 /deep/ 进行样式穿透
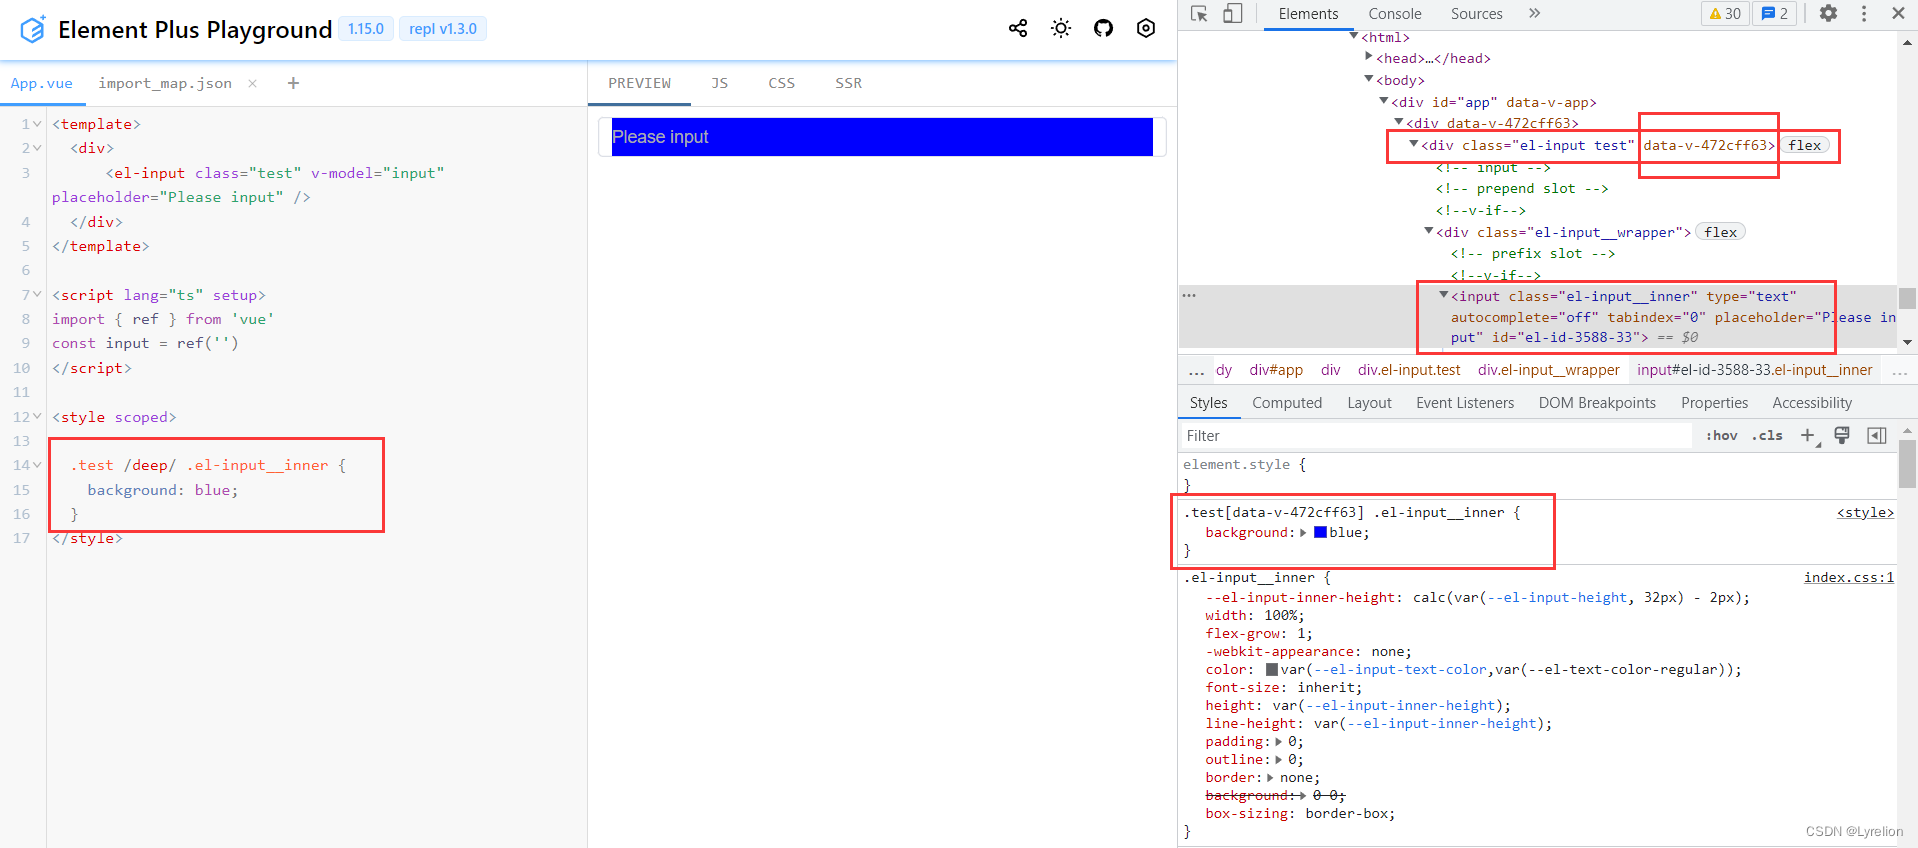
Vue3 中使用 :deep() 进行样式穿透

3. Vue3 样式新特性
3.1 插槽选择器 :slotted()
带插槽的子组件:
- 默认情况下,子组件内,无法修改 未来 slot 中出现的类名
- 可以使用 插槽选择器 :slotted() 修改未来 slot 中出现的类名
<template>
  <div>
      插槽组件
      <slot></slot>
  </div>
</template>

<script lang="ts" setup>

</script>

<style scoped>
  // 没效果
  .parent-custom {
    color: red;
  }

  // 有效果
  :slotted(.parent-custom) {
    color: red;
  }
</style>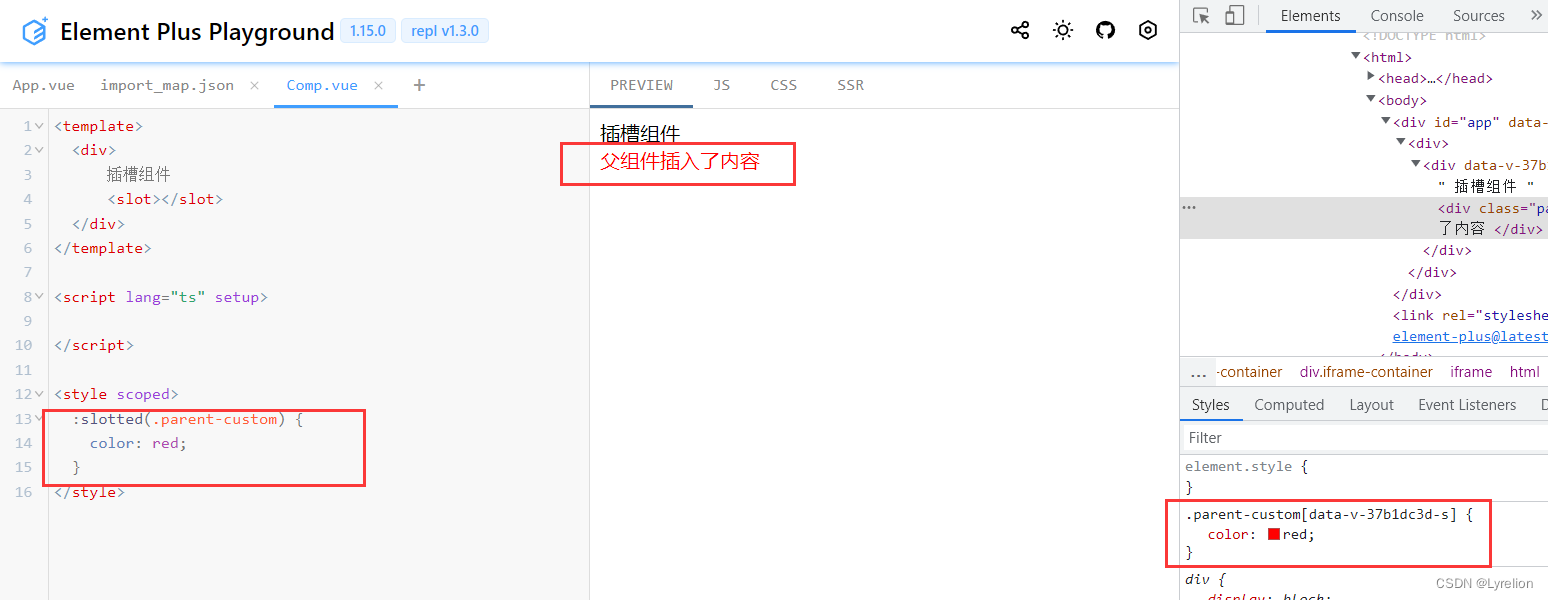
父组件中的类名,会覆盖子组件中的插槽选择器:
<template>
  <div>
    <test-comp>
    <div class="parent-custom"> 父组件插入了内容 </div>
    </test-comp>
  </div>
</template>

<script lang="ts" setup>
import { ref } from 'vue'
import TestComp from './Comp.vue';
</script>

<style scoped>
  .parent-custom {
    color: green;
  }
</style>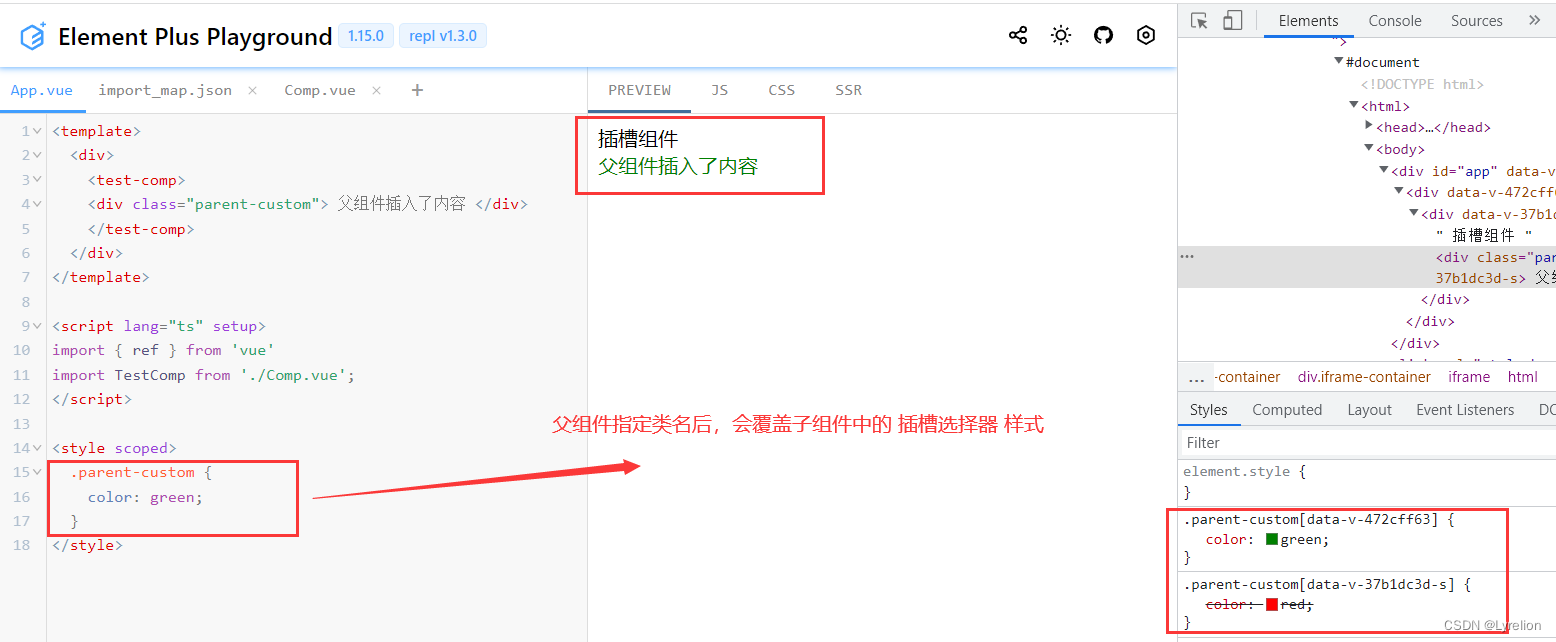
3.2 全局选择器 :global()
如果想在单个 .vue 文件里增加全局样式,可以通过删除 scoped 实现,这样不够优雅
<template>
  <div>
    <!-- test-comp 里面包含了 section -->
    <test-comp></test-comp>
  </div>
</template>

<script lang="ts" setup>
import TestComp from './Comp.vue';
</script>

<style>
  /* 通过删除 scoped 实现增加全局样式 */
  section {
    width: 100px;
    height: 100px;
    background: red;
  }
</style>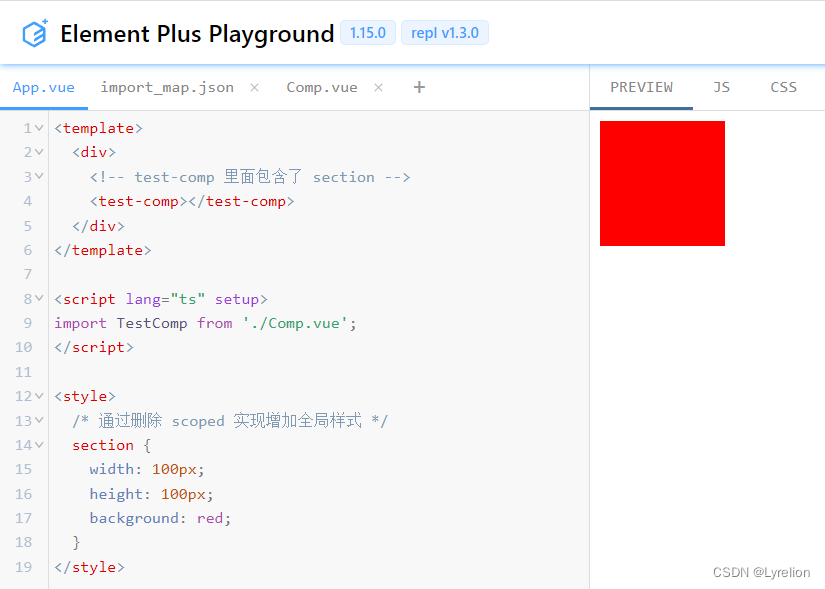
可以通过 :global() 全局选择器,在不删除 scoped 的情况下,增加全局样式
<template>
  <div>
    <!-- test-comp 里面包含了 section -->
    <test-comp></test-comp>
  </div>
</template>

<script lang="ts" setup>
import TestComp from './Comp.vue';
</script>

<style scoped>
  /*
     通过 :global() 全局选择器
     在不删除 scoped 的情况下
     增加全局样式
  */
  :global(section) {
    width: 100px;
    height: 100px;
    background: red;
  }
</style>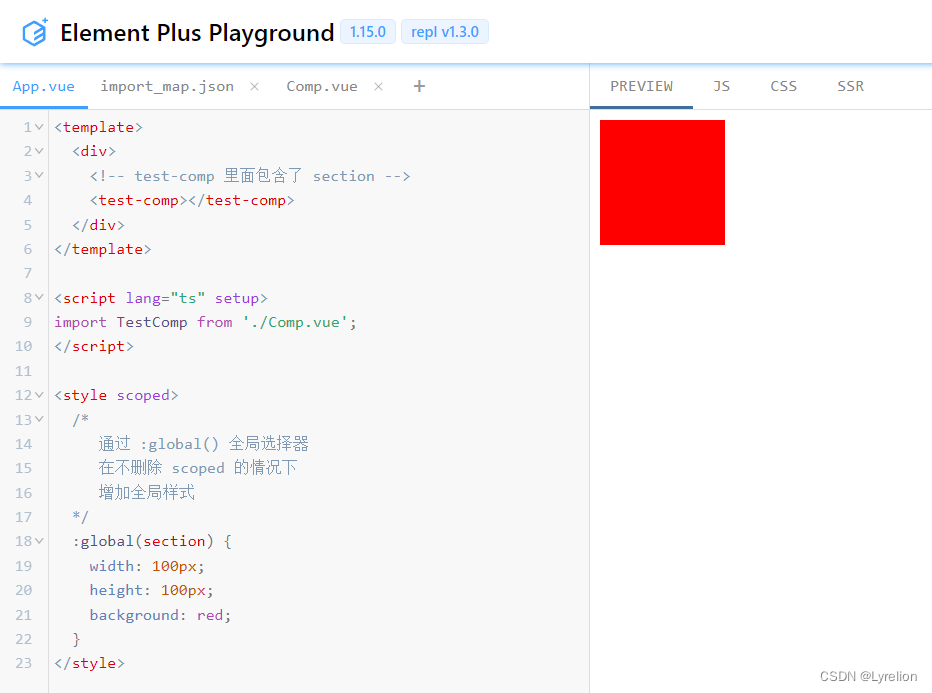
3.3 动态样式绑定
通过 v-bind 可以绑定变量,实现动态 css
如下所示:
- 新增响应式变量 color,新增按钮
- 点击按钮后,改变 color 的值,.test 类名的 div 随之改变背景色
<template>
  <div class="test"></div>
  <el-button @click="changeColor">颜色切换</el-button>
</template>

<script lang="ts" setup>
import { ref } from 'vue'
const color = ref('red');
const changeColor = () => {
 color.value = color.value === 'red' ? 'green' : 'red'
};
</script>

<style scoped>
  .test {
    width: 88px;
    height: 88px;
    /* 通过 v-bind 可以绑定变量,实现动态 css */
    background: v-bind(color)
  }
</style>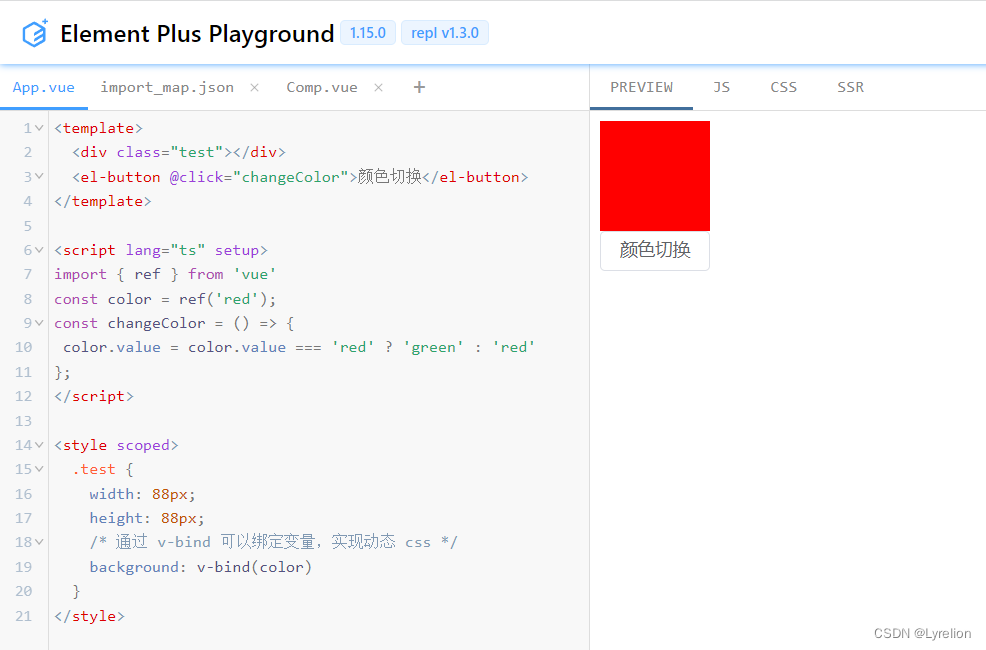
如果响应式变量是对象形式,则需要在 v-bind 中加单引号
<template>
  <div class="test"></div>
</template>

<script lang="ts" setup>
import { ref } from 'vue'
const color = ref({
  one: 'red',
  two: 'yellow',
});
</script>

<style scoped>
  .test {
    width: 88px;
    height: 88px;
    /* 通过 v-bind 可以绑定变量,实现动态 css */
    /* 如果是对象,则要加单引号 */
    background: v-bind('color.two')
  }
</style>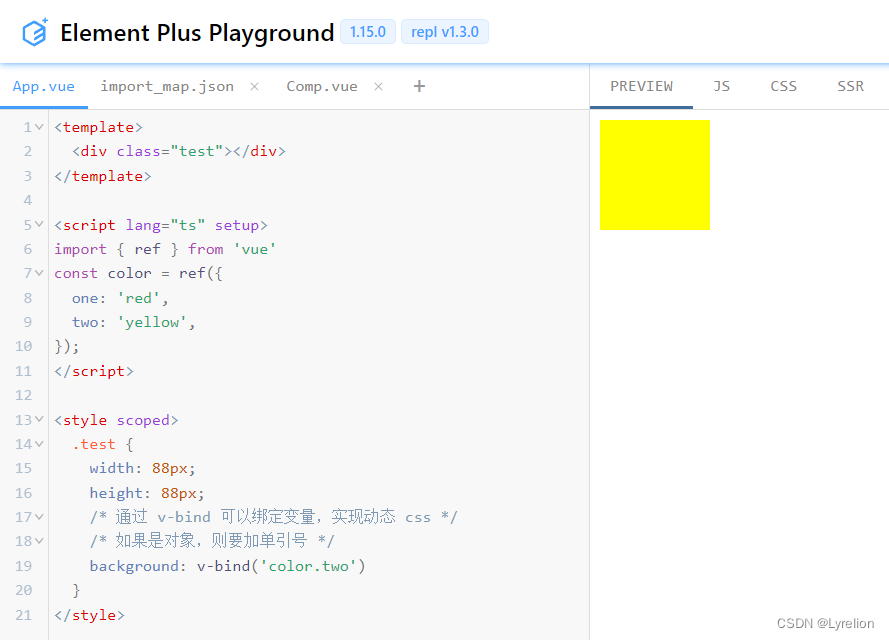
3.4 css module
使用场景 —— 此功能一般用于 tsx、render 函数
在 style 标签上,新增 module;
在样式处,新增默认名字 $style,在他的后面加真正的类名;
<template>
  <div class="$style.test"></div>
</template>

<style module>
  .test {
    background: red;
  }
</style>
如果有多个类名,则用数组
<template>
  <!-- 多个使用数组分割 -->
  <div class="[$style.test, $style.uat]"></div>
</template>

<style module>
  .test {
    background: red;
  }
  .uat {
    border: 1px solid red;
  }
</style>
可以给模块指定名字,并通过 Vue3 内置 hoos useCssModule() 获取类名列表
<template>
  <div class="$mmm.test"></div>
</template>

<script lang="ts" setup>
import { useCssModule } from 'vue'
const classList = useCssModule('mmm')
</script>

<style module="mmm">
  .test {
    background: red;
  }
</style>
4. Tailwind Css
4.1 基本介绍及优点分析
Tailwind Css 是由 JavaScript 编写的 Css 框架,基于PostCss 解析
优点分析:
- 类名驱动文档
- 生产环境体积很小,编译后只有 8.7KB
- 支持 栅格、hover/focus、深色模式等
- 可以通过 apply 指令实现自定义类名
- 支持前沿样式属性,比如很多浏览器不支持 grid 属性,但此框架帮我们做了转换
- 写代码时在 VSCode 里有提示
4.2 PostCss 处理 Tailwind Css 基本流程
PostCss 功能介绍:
- 增强代码的可读性 (利用从 Can I Use 网站获取的数据为 CSS 规则添加特定厂商的前缀。 Autoprefixer 自动获取浏览器的流行度和能够支持的属性,并根据这些数据帮你自动为 CSS 规则添加前缀。)
- 将未来的 CSS 特性带到今天!(PostCSS Preset Env 帮你将最新的 CSS 语法转换成大多数浏览器都能理解的语法,并根据你的目标浏览器或运行时环境来确定你需要的 polyfills,此功能基于 cssdb 实现。)
- 终结全局 CSS(CSS 模块 能让你你永远不用担心命名太大众化而造成冲突,只要用最有意义的名字就行了。)
- 避免 CSS 代码中的错误【类似 eslint】(通过使用 stylelint 强化一致性约束并避免样式表中的错误。stylelint 是一个现代化 CSS 代码检查工具。它支持最新的 CSS 语法,也包括类似 CSS 的语法,例如 SCSS 。)
PostCss 处理 Tailwind Css 基本流程,原理类似于 —— 虚拟 DOM 解析
- 将CSS解析成抽象语法树(AST树)
- 读取插件配置,根据配置文件,生成新的抽象语法树
- 将 AST 树 ”传递” 给一系列数据转换操作处理(变量数据循环生成,切套类名循环等)
- 清除一系列操作留下的数据痕迹
- 将处理完毕的 AST 树重新转换成字符串
4.3 使用 Tailwind Css 栗子
在 vscode 中,安装 Tailwind Css 插件,增加代码提示
4.3.1 初始化项目
npm init vue@latest
4.3.2 安装 Tailwind Css
npm install -D tailwindcss@latest postcss@latest autoprefixer@latest
4.3.3 执行命令,生成两个配置文件
- postcss.config.js
- tailwind.config.js
npx tailwindcss init -p
配置文档参考:配置 - Tailwind CSS 中文文档
4.3.4 修改配置文件 tailwind.config.js
2.6版本
module.exports = {
  purge: ['./index.html', './src/**/*.{vue,js,ts,jsx,tsx}'],
  theme: {
    extend: {},
  },
  plugins: [],
}
3.0版本
module.exports = {
  content: ['./index.html', './src/**/*.{vue,js,ts,jsx,tsx}'],
  theme: {
    extend: {},
  },
  plugins: [],
}
4.3.5 创建 index.css,并在 main.ts 中引入
创建 index.css
@tailwind base;
@tailwind components;
@tailwind utilities;
5. unocss 原子化
5.1 什么是 unocss 原子化
减少了 css 体积,提高了 css 复用(重复的样式不用写了,直接用现有类名)
减少起名的复杂度(比如 margin-top,就简写成 mt)
增加了记忆成本,将 css 拆分为原子之后,就必须要记住一些 class 才能书写(比如 background,开头是 bg)
5.2 unocss 原子化参考资料
由于个人感觉此模块在实际项目中应用很少,所以不做记录,但是为了以防万一,先记下来之前看过的文章及视频,讲的非常清晰,给大佬点赞~~
 https://www.bilibili.com/video/BV1dS4y1y7vd?p=49&vd_source=8bc01635b95dbe8ecd349b2c23b03a10


 1万+
1万+


 被折叠的 条评论
为什么被折叠?
被折叠的 条评论
为什么被折叠?
 到【灌水乐园】发言


