


SpringCloud
服务注册与发现
Eureka
服务提供者注册进eureka
引入依赖
<!--eureka-server-->
<dependency>
	<groupId>org.springframework.cloud</groupId>
	<artifactId>spring-cloud-starter-netflix-eureka-server</artifactId>
</dependency>
yml配置
server:
  port: 7001

eureka:
  instance:
    # eureka服务端的实例名称
    hostname: localhost
  client:
    # false表示不向注册中心注册自己。
    register-with-eureka: false
    # false表示自己端就是注册中心,我的职责就是维护服务实例,并不需要去检索服务
    fetch-registry: false
    service-url:
      # 设置与eureka server交互的地址查询服务和注册服务都需要依赖这个地址
      defaultZone: http://${eureka.instance.hostname}:${server.port}/eureka/
主启动类
@SpringBootApplication
@EnableEurekaServer
public class EurekaMain7001 {
    public static void main(String[] args) {
        SpringApplication.run(EurekaMain7001.class, args);
    }
}
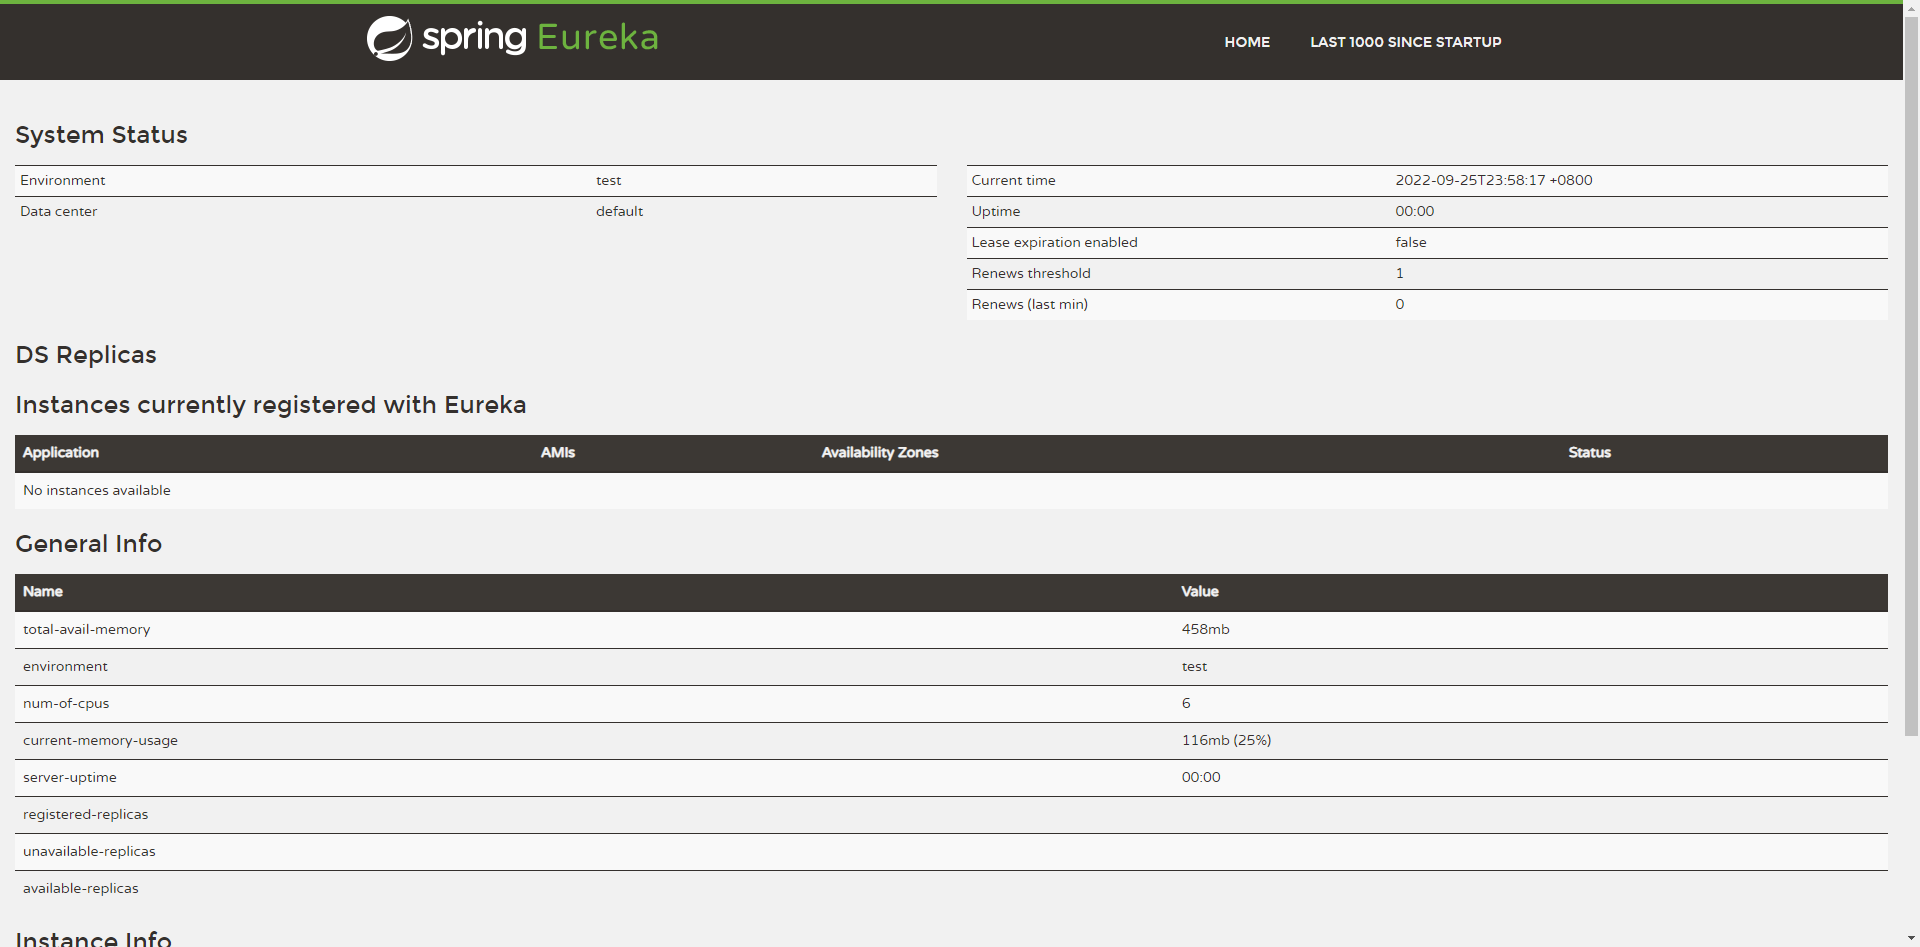
测试:
打开浏览器,访问:http://localhost:7001
服务消费者注册进eureka
引入依赖
<!--eureka-client-->
<dependency>
    <groupId>org.springframework.cloud</groupId>
    <artifactId>spring-cloud-starter-netflix-eureka-client</artifactId>
</dependency>
yml配置
eureka:
  client:
    # 表示是否将自己注册进EurekaServer,默认为true
    register-with-eureka: true
    # 是否从EurekaServer抓取已有的注册信息,默认为true。单节点无所谓,集群必须设置为true才能配置ribbon使用负载均衡
    fetch-registry: true
    service-url:
      defaultZone: http://localhost:7001/eureka
主启动类开启Eureka客户端注解
@MapperScan("com.lzp.springcloud.dao")
@SpringBootApplication
@EnableEurekaClient
public class PaymentMain8001 {
    public static void main(String[] args) {
        SpringApplication.run(PaymentMain8001.class, args);
    }
}
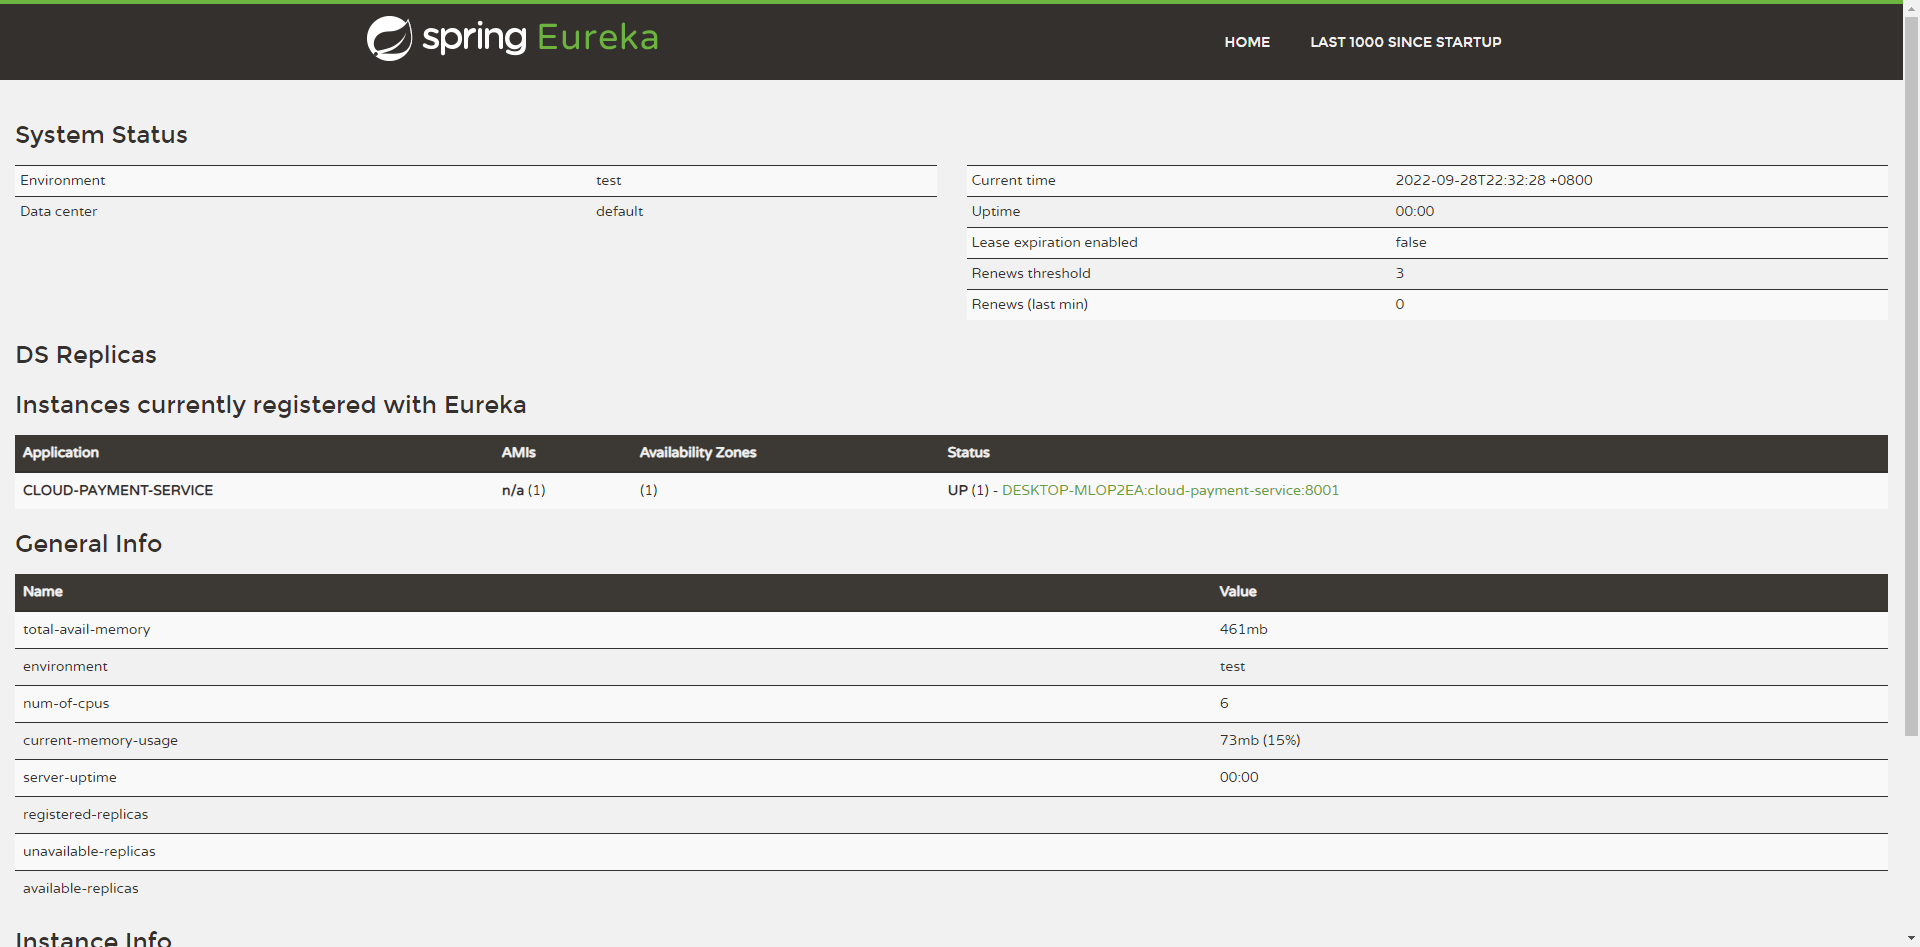
测试
先启动eureka服务端,再启动客户端,启动成功后访问:http://localhost:7001
Eureka集群
两个EurekaServer互相注册,相互守望
配置hosts
配置hosts,方便区分两个注册中心
127.0.0.1	eureka7001.com
127.0.0.1	eureka7002.com
EurekaServer1配置yml
server:
  port: 7001

eureka:
  instance:
    # eureka服务端的实例名称
    hostname: eureka7001.com
  client:
    # false表示不向注册中心注册自己。
    register-with-eureka: false
    # false表示自己端就是注册中心,我的职责就是维护服务实例,并不需要去检索服务
    fetch-registry: false
    service-url:
      # 设置与eureka server交互的地址查询服务和注册服务都需要依赖这个地址
      defaultZone: http://eureka7002.com:7002/eureka/
EurekaServer2配置yml
server:
  port: 7001

eureka:
  instance:
    # eureka服务端的实例名称
    hostname: eureka7001.com
  client:
    # false表示不向注册中心注册自己。
    register-with-eureka: false
    # false表示自己端就是注册中心,我的职责就是维护服务实例,并不需要去检索服务
    fetch-registry: false
    service-url:
      # 设置与eureka server交互的地址查询服务和注册服务都需要依赖这个地址
      defaultZone: http://eureka7002.com:7002/eureka/
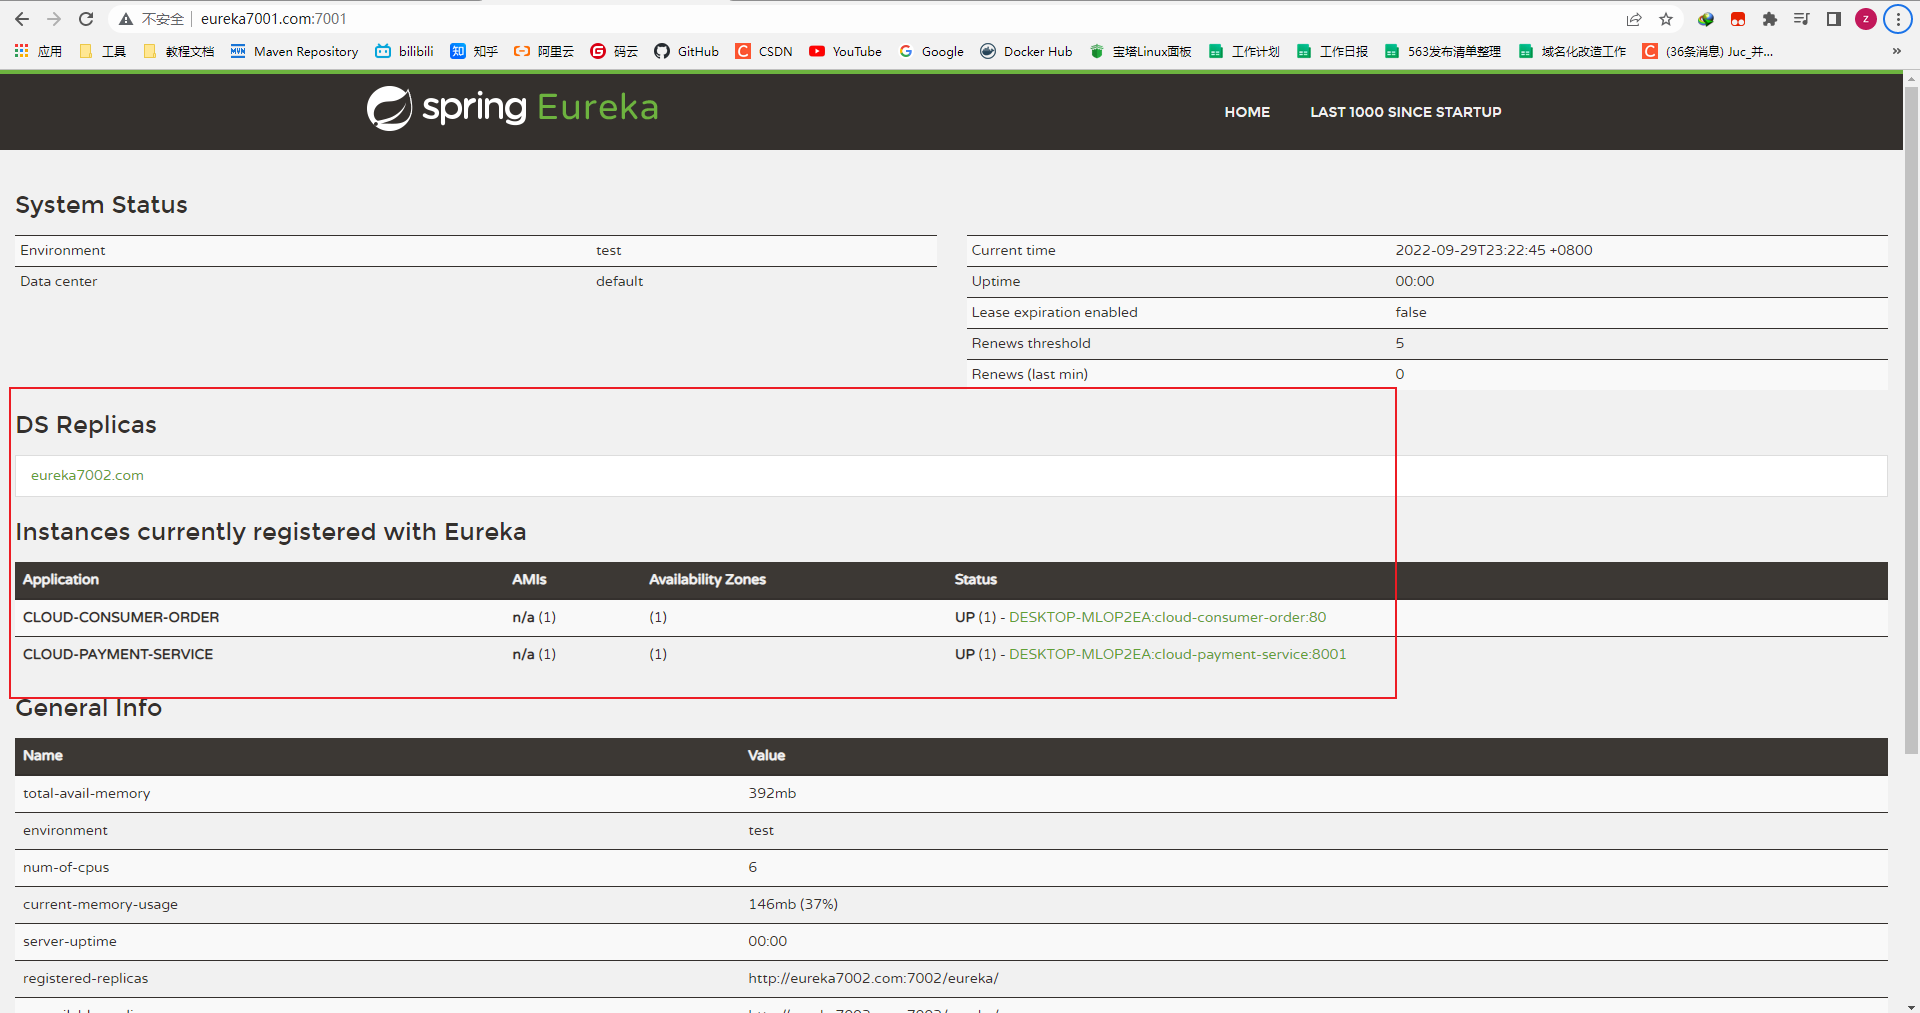
测试
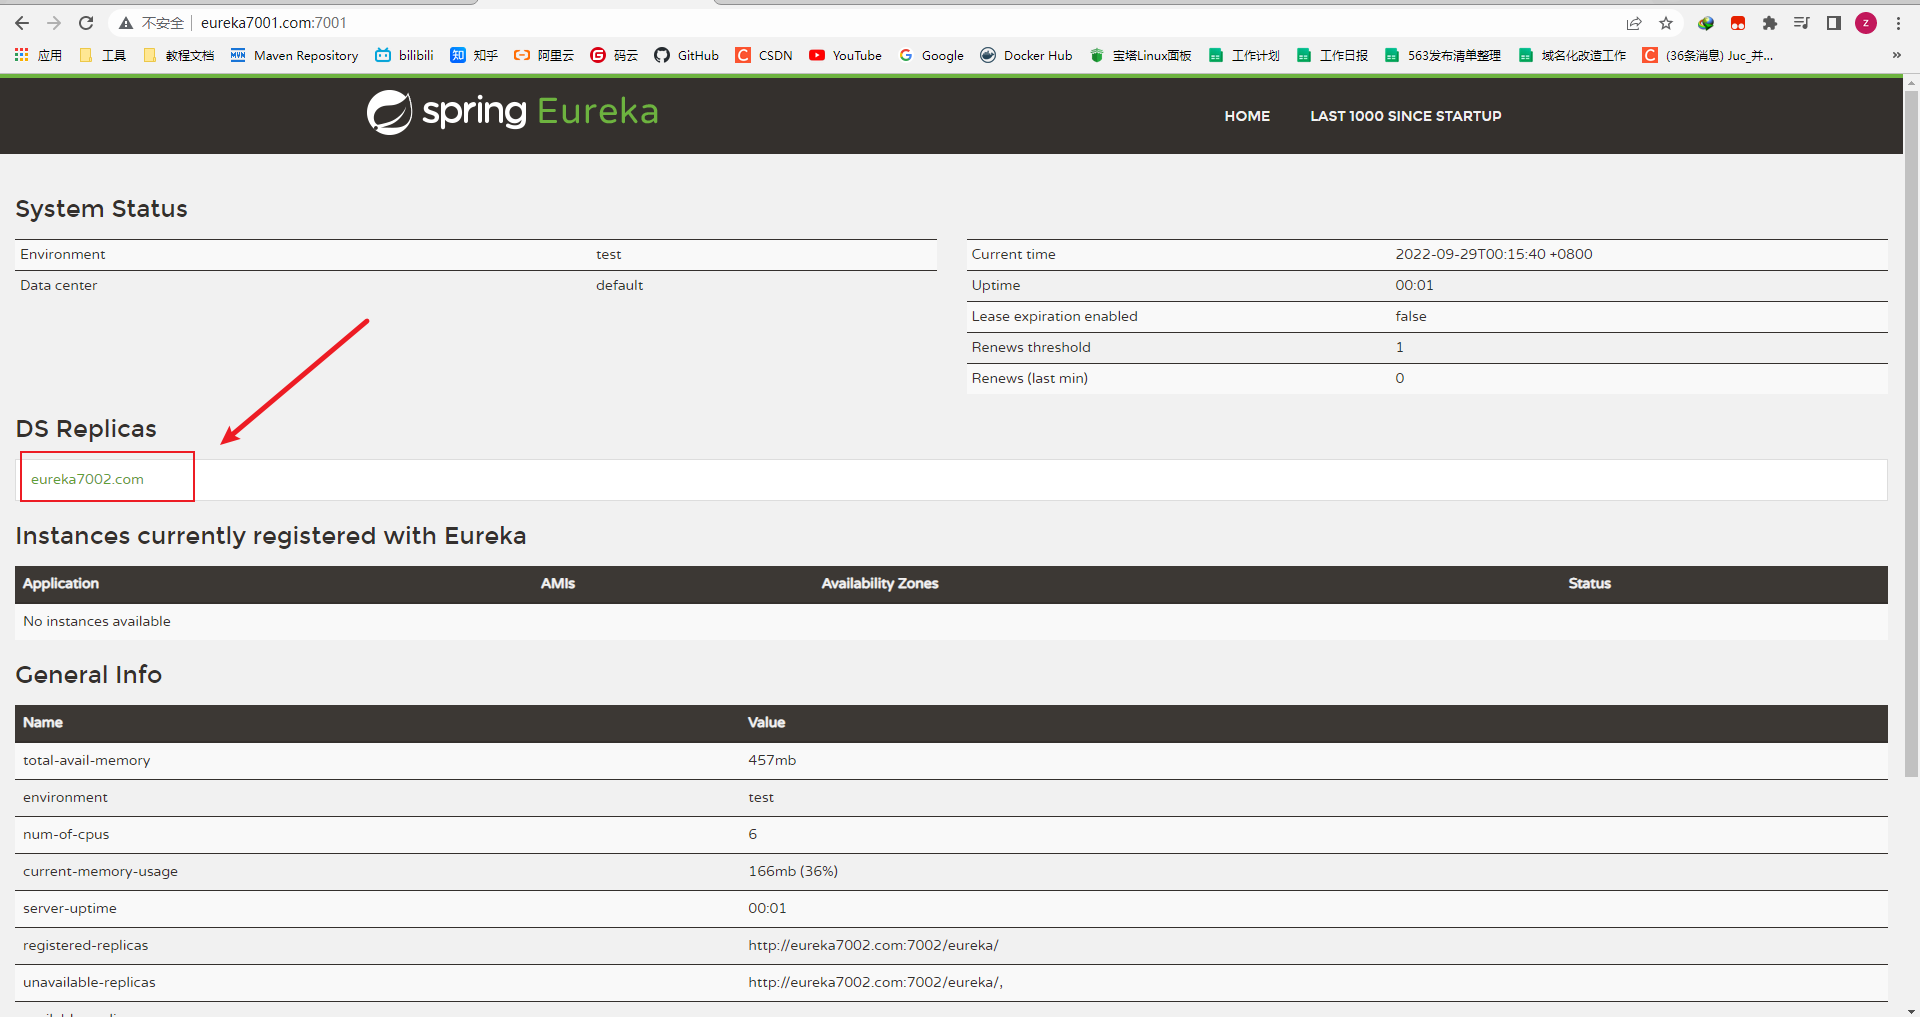
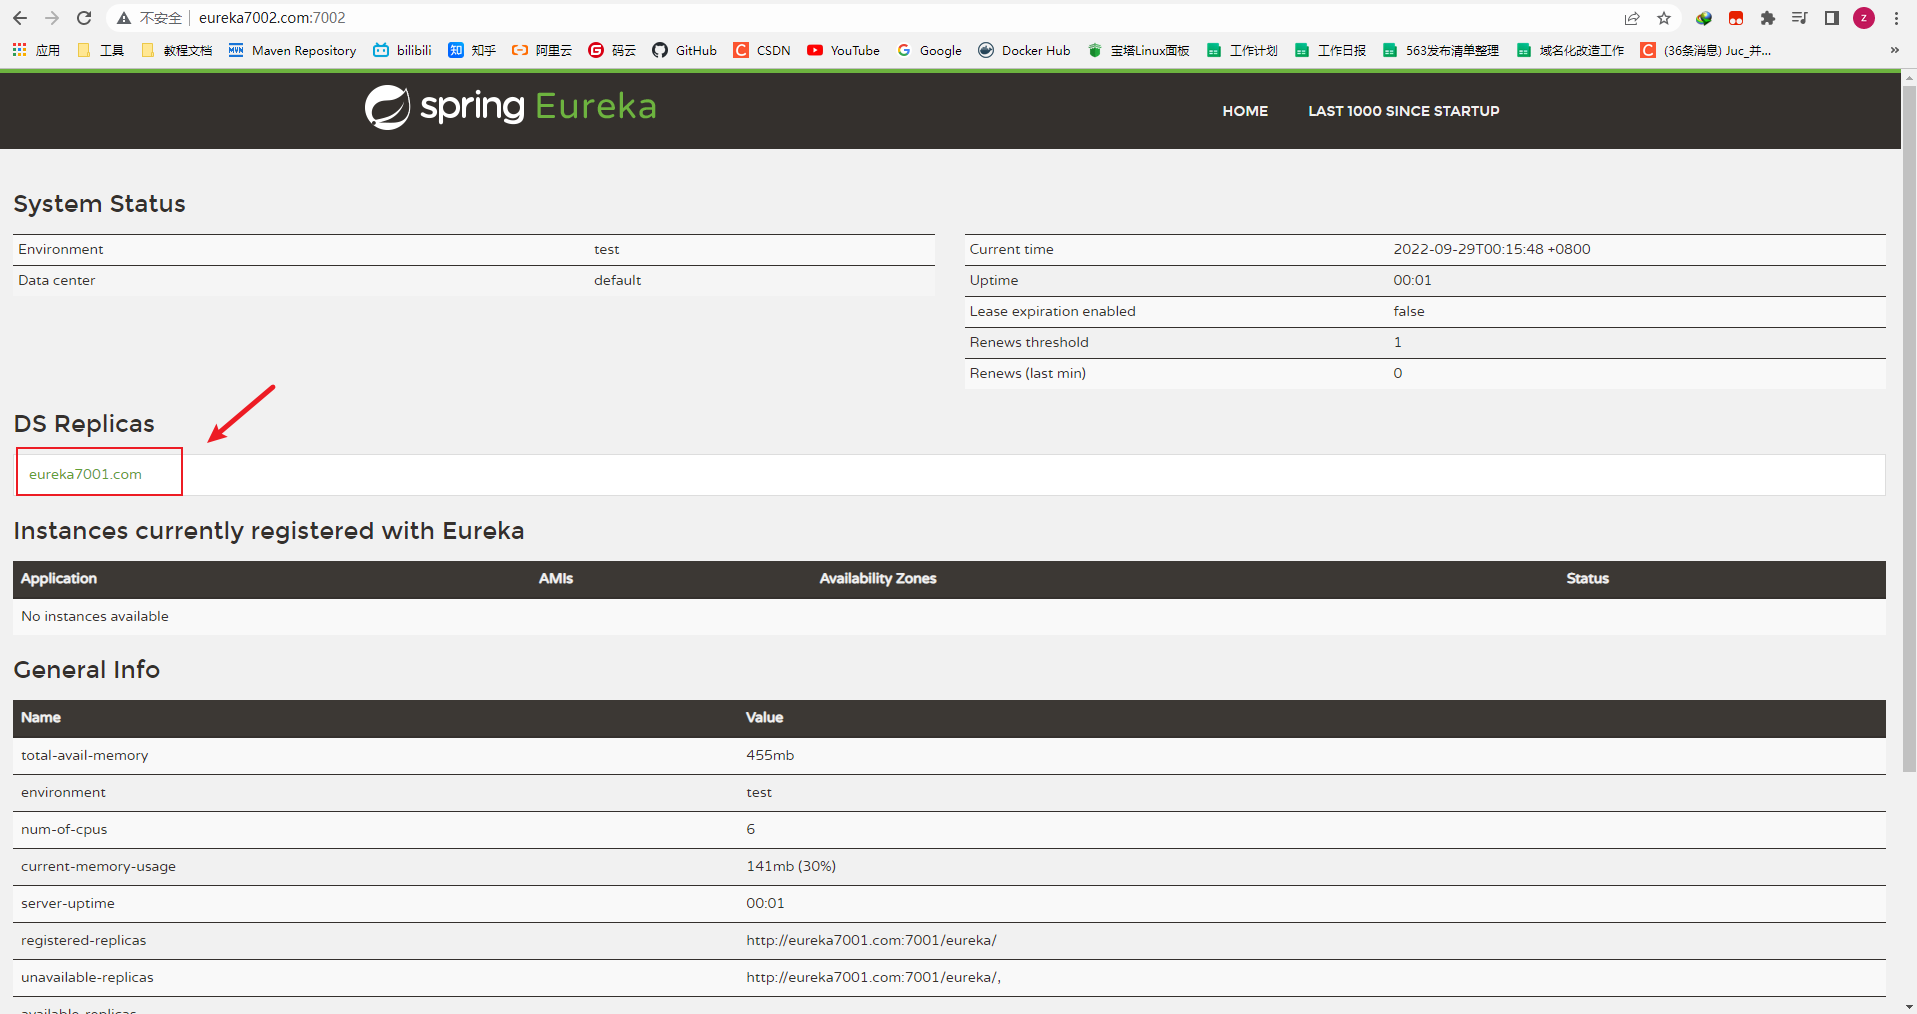
测试结果发现EurekaServer1在EurekaServer2中注册成功,EurekaServer2反之亦然,Eureka集群就搭建完毕。
将两个客户端注册进Eureka集群
server:
  port: 80

spring:
  application:
    name: cloud-consumer-order

eureka:
  client:
    # 表示是否将自己注册进EurekaServer,默认为true
    register-with-eureka: true
    # 是否从EurekaServer抓取已有的注册信息,默认为true。单节点无所谓,集群必须设置为true才能配置ribbon使用负载均衡
    fetch-registry: true
    service-url:
      # defaultZone: http://localhost:7001/eureka
      defaultZone: http://eureka7001.com:7001/eureka,http://eureka7002.com:7002/eureka
server:
  port: 8001

spring:
  application:
    name: cloud-payment-service
  datasource:
    type: com.alibaba.druid.pool.DruidDataSource            # 当前数据源操作类型
    driver-class-name: org.gjt.mm.mysql.Driver              # mysql驱动包
    url: jdbc:mysql://localhost:3306/db2019?useUnicode=true&characterEncoding=utf-8&useSSL=false
    username: root
    password: 123456

eureka:
  client:
    # 表示是否将自己注册进EurekaServer,默认为true
    register-with-eureka: true
    # 是否从EurekaServer抓取已有的注册信息,默认为true。单节点无所谓,集群必须设置为true才能配置ribbon使用负载均衡
    fetch-registry: true
    service-url:
      # defaultZone: http://localhost:7001/eureka
      defaultZone: http://eureka7001.com:7001/eureka,http://eureka7002.com:7002/eureka

mybatis:
  mapperLocations: classpath:mapper/*.xml
  # 所有Entity别名类所在包
  type-aliases-package: com.lzp.springcloud.entities
测试结果:

服务发现 Discovery
controller代码
@Autowired
private DiscoveryClient discoveryClient;

@GetMapping(value = "/payment/discovery")
public Object discovery() {
    // 获取服务列表
    List<String> services = discoveryClient.getServices();
    for (String service : services) {
        log.info("**********service:" + service + "************");
    }

    // 获取对应服务的实例列表
    List<ServiceInstance> instances = discoveryClient.getInstances("cloud-payment-service");
    for (ServiceInstance instance : instances) {
        log.info("serviceId:" + instance.getServiceId() + ", host:" + instance.getHost() + ", port:" + instance.getPort() + ", uri:" + instance.getUri());
    }
    return this.discoveryClient;
}
主启动类开启服务发现
@MapperScan("com.lzp.springcloud.dao")
@SpringBootApplication
@EnableEurekaClient
@EnableDiscoveryClient
public class PaymentMain8001 {
    public static void main(String[] args) {
        SpringApplication.run(PaymentMain8001.class, args);
    }
}
ZooKeeper
Consul
启动consul
consul官网:https://www.consul.io/
下载地址:https://developer.hashicorp.com/consul/downloads?host=www.consul.io
双击consul.exe运行
在consul.exe所在目录打开命令行窗口,执行consul --version查看consul版本
使用开发模式启动consul:consul agent -dev
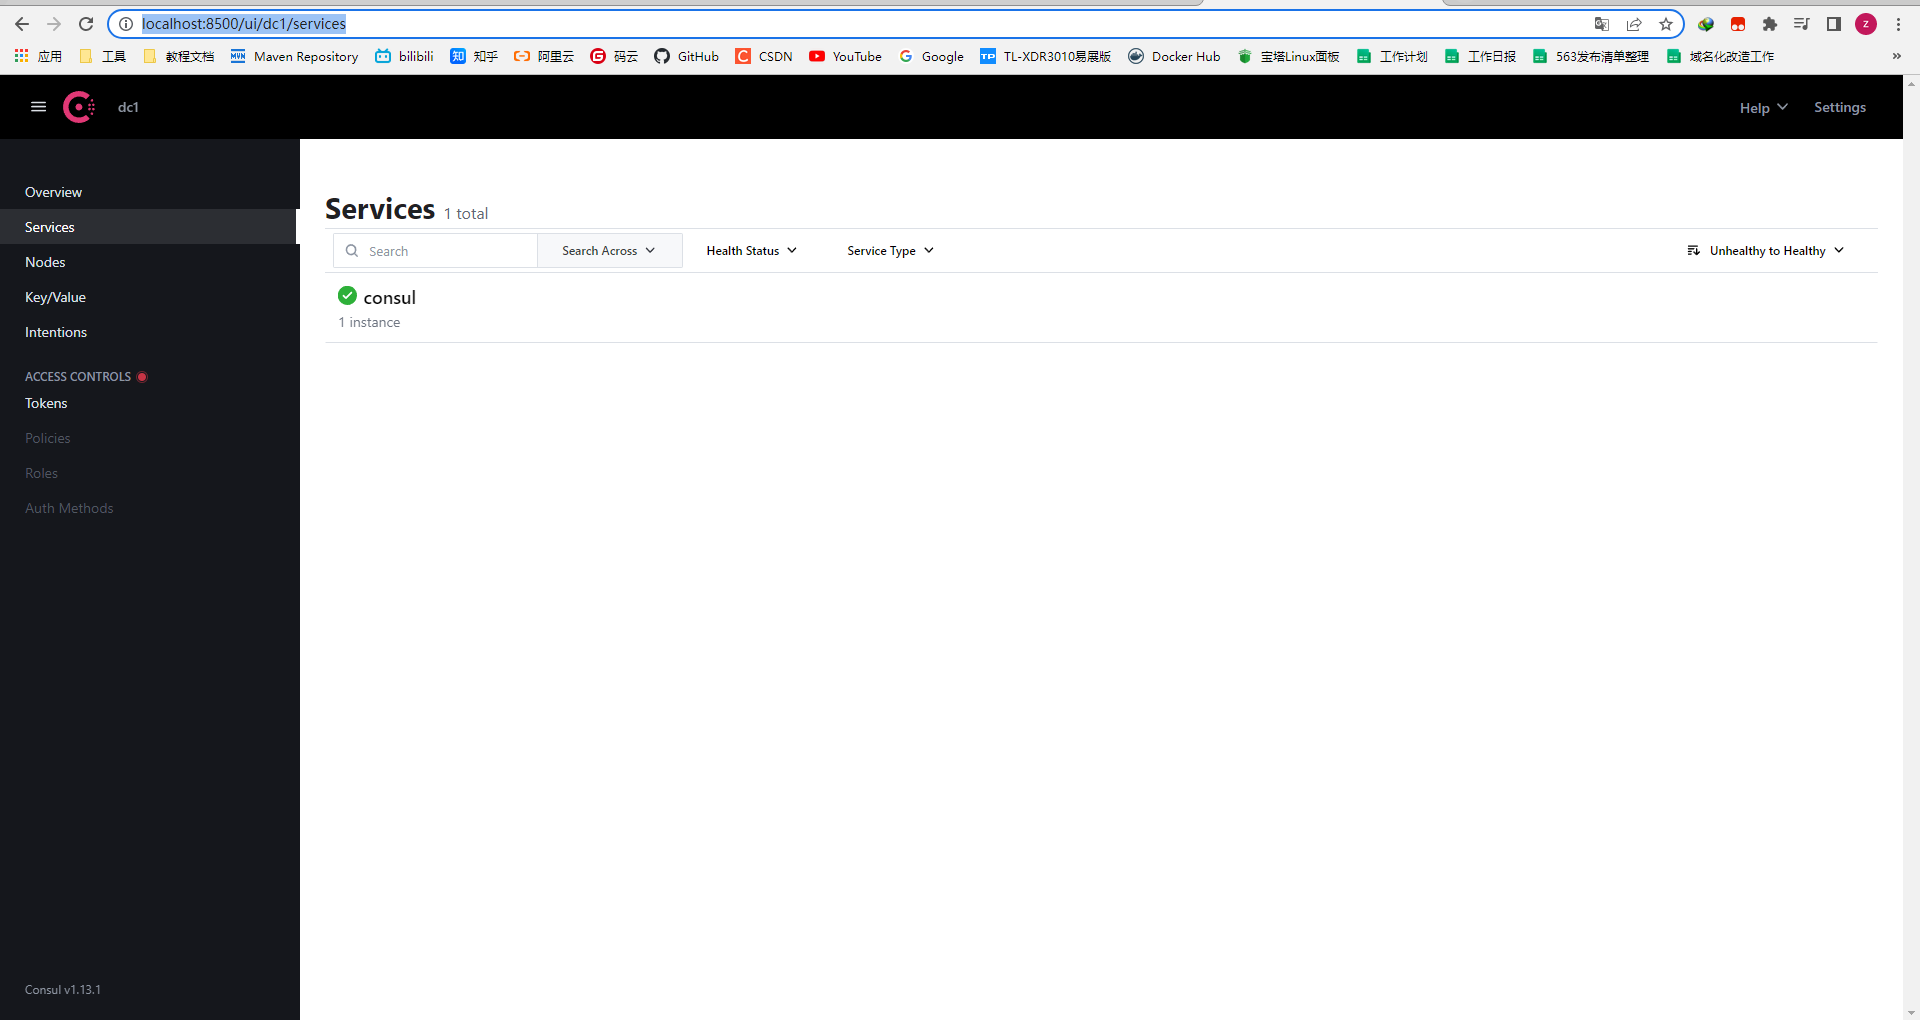
启动成功后,通过以下地址访问consul首页:http://localhost:8500
服务提供者注册进consul
引入依赖
<!--SpringCloud consul-server -->
<dependency>
    <groupId>org.springframework.cloud</groupId>
    <artifactId>spring-cloud-starter-consul-discovery</artifactId>
</dependency>
yml配置
###consul服务端口号
server:
  port: 8006

spring:
  application:
    name: consul-provider-payment
  ####consul注册中心地址
  cloud:
    consul:
      host: localhost
      port: 8500
      discovery:
        #hostname: 127.0.0.1
        service-name: ${spring.application.name}
主启动类
/**
 * @author lzp
 * @date 2022/10/14 23:34:11
 */
@SpringBootApplication
public class PaymentMain8006 {
    public static void main(String[] args) {
        SpringApplication.run(PaymentMain8006.class, args);
    }
}
controller
@RestController
@Slf4j
public class PaymentController {

    @Value("${server.port}")
    private String serverPort;

    @RequestMapping(value = "/payment/consul")
    public String paymentConsul() {
        return "springcloud with consul: " + serverPort + "\t   " + UUID.randomUUID().toString();
    }

}
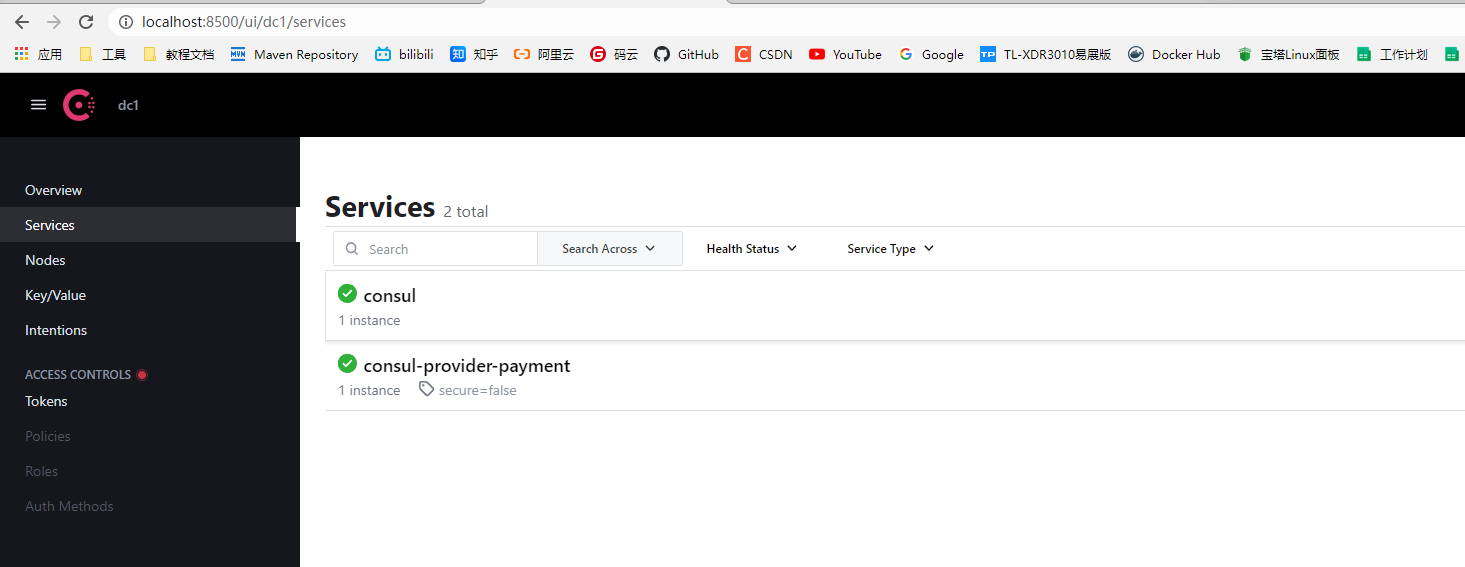
测试
访问consul首页:http://localhost:8500,发现服务端已经注册进入consul
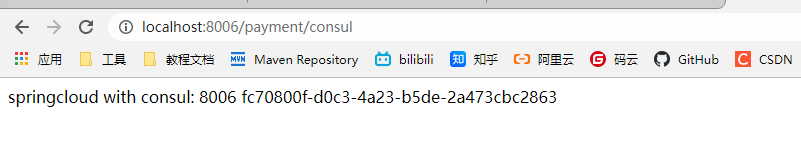
访问服务端接口:http://localhost:8006/payment/consul,测试正常
服务消费者注册进consul
引入依赖
<!--SpringCloud consul-server -->
<dependency>
    <groupId>org.springframework.cloud</groupId>
    <artifactId>spring-cloud-starter-consul-discovery</artifactId>
</dependency>
yml配置
###consul服务端口号
server:
  port: 80

spring:
  application:
    name: cloud-consumer-order
  ####consul注册中心地址
  cloud:
    consul:
      host: localhost
      port: 8500
      discovery:
        #hostname: 127.0.0.1
        service-name: ${spring.application.name}
主启动类
@SpringBootApplication
@EnableDiscoveryClient
public class OrderConsulMain80 {
    public static void main(String[] args) {
        SpringApplication.run(OrderConsulMain80.class, args);
    }
}
controller及配置类
@RestController
@Slf4j
public class OrderConsulController {

    public static final String INVOKE_URL = "http://consul-provider-payment";

    @Resource
    private RestTemplate restTemplate;

    @GetMapping(value = "/consumer/payment/consul")
    public String paymentInfo()
    {
        String result = restTemplate.getForObject(INVOKE_URL+"/payment/consul",String.class);
        return result;
    }

}
@Configuration
public class ApplicationContextConfig {

    @Bean
    @LoadBalanced
    public RestTemplate restTemplate() {
        return new RestTemplate();
    }

}
服务调用
Ribbon
引入依赖
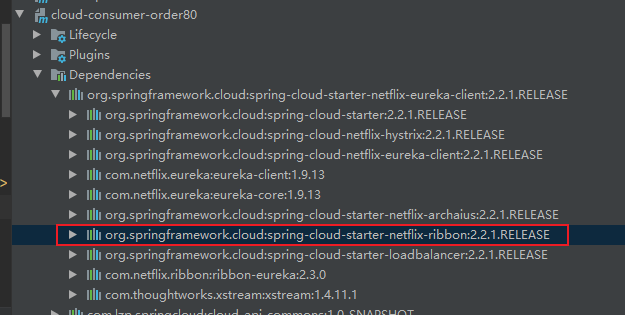
无须引入依赖,spring-cloud-starter-netflix-eureka-client依赖中已经包含ribbon的依赖
开启RestTemplate负载均衡能力
@Bean
@LoadBalanced
public RestTemplate restTemplate() {
    return new RestTemplate();
}
开启微服务集群,两台服务提供者,一台服务消费者,调用测试


测试可以发现,调用时,默认负载规则是:轮询调用。
Ribbon的七种负载策略
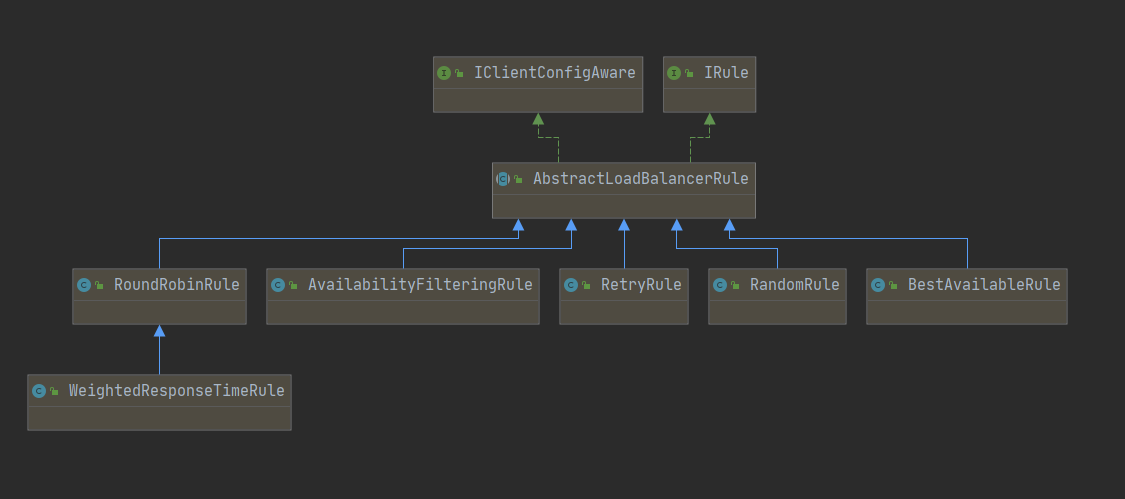
- RoundRobinRule:轮询(默认)
- RandomRule:随机 按照轮询策略来获取服务,如果获取的服务实例为null或已经失效,则在指定的时间之内不断地进行重试来获取服务
- RetryRule:重试 先按按照轮询的策略获取服务,如果获取服务失败,则会在指定时间内进行重试,获取可用服务
- WeightedResponseTimeRule:权重策略 根据每个服务提供者的响应时间分配一个权重,响应时间越长,权重越小,被选中的可能性也就越低大
- BestAvailableRule:最小连接数策略 也叫最小并发数策略 遍历服务提供者列表,选取连接数最小的一个服务实例,如果有相同的最小连接数,那么会调用轮询策略进行选取
- AvailabilityFilteringRule:可用敏感性策略 先过滤掉非健康的服务实例,然后在选择连接数较小的服务实例
- ZoneAvoidanceRule:区域敏感策略 根据服务所在区域(zone)的性能和服务的可用性来选择服务实例,在没有区域的环境下,该策略和轮询策略类似
Ribbon策略替换
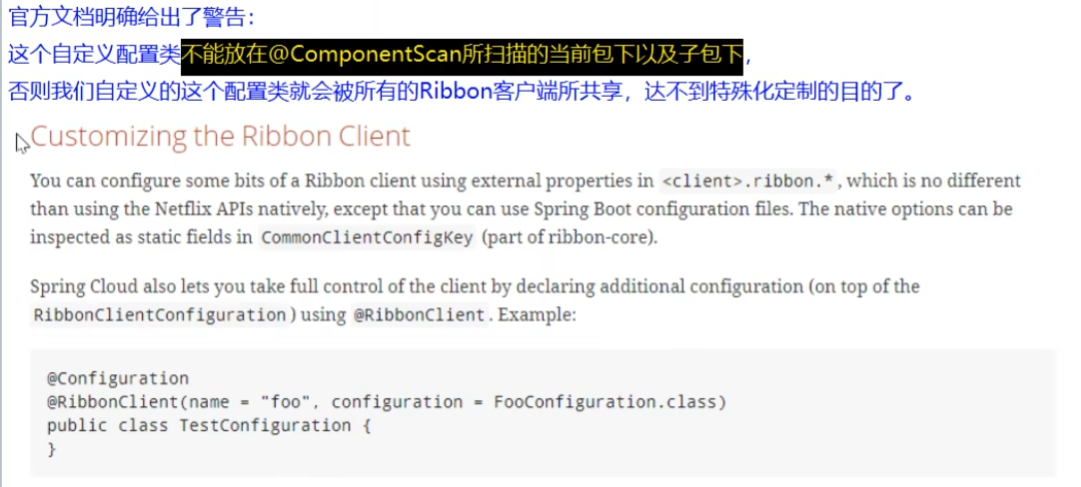
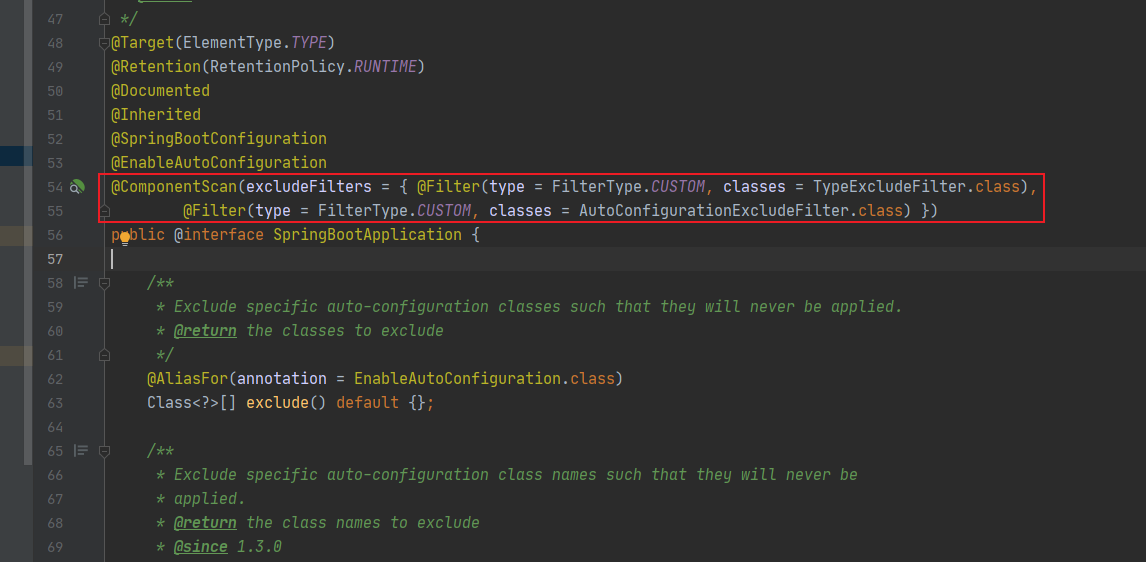
根据Ribbon官网提示,Ribbon的规则配置类不要放在@ComponentScan包扫描的当前包及子包目录下,而主启动类的@SpringBootApplication中包含了@ComponentScan,所以不能再该目录下存放Ribbon的规则配置类
新增Ribbon配置类
@Configuration
public class MySelfRule {

    @Bean
    public IRule myRule() {
        return new RandomRule();
    }

}
修改主启动类配置
@SpringBootApplication
@EnableEurekaClient
@RibbonClient(name = "CLOUD-PAYMENT-SERVICE", configuration = MySelfRule.class) // 使用自定义的ribbon负载均衡策略
public class OrderMain80 {
    public static void main(String[] args) {
        SpringApplication.run(OrderMain80.class, args);
    }
}
重启服务测试就可以发现,负载均衡策略从轮询变为了随机。
轮询算法的原理
Rest接口第几次请求数 % 服务器集群总数量 = 实际调用服务器下标
每次服务重启后,Rest接口第几次请求数从1开始。
OpenFeign
引入依赖
<!--openfeign-->
<dependency>
    <groupId>org.springframework.cloud</groupId>
    <artifactId>spring-cloud-starter-openfeign</artifactId>
</dependency>
<!--eureka client-->
<dependency>
    <groupId>org.springframework.cloud</groupId>
    <artifactId>spring-cloud-starter-netflix-eureka-client</artifactId>
</dependency>
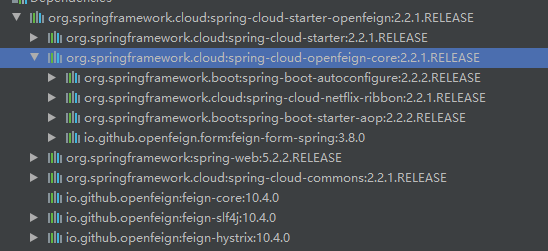
观察jar包依赖发现openFeign底层集成了ribbon
配置yml
server:
  port: 80
spring:
  application:
    name: cloud-consumer-order
eureka:
  client:
    register-with-eureka: true
    service-url:
      defaultZone: http://eureka7001.com:7001/eureka/,http://eureka7002.com:7002/eureka/
主启动类
@SpringBootApplication
@EnableFeignClients
public class OrderFeignMain80 {
    public static void main(String[] args) {
        SpringApplication.run(OrderFeignMain80.class, args);
    }
}
feign客户端
@FeignClient(value = "CLOUD-PAYMENT-SERVICE")
public interface PaymentFeignClient {

    @GetMapping(value = "/payment/get/{id}")
    CommonResult<Payment> getPaymentById(@PathVariable("id") Long id);

}
controller
@RestController
@Slf4j
public class OrderFeignController {

    @Resource
    private PaymentFeignClient paymentFeignClient;

    @GetMapping("/consumer/payment/get/{id}")
    public CommonResult<Payment> getPayment(@PathVariable("id") Long id) {
        return paymentFeignClient.getPaymentById(id);
    }

}
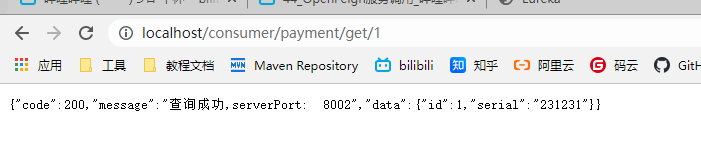
测试结果
启动eureka,8001、8002服务端,再启动80feign客户端,调用http://localhost/consumer/payment/get/1,发现openFeign默认也是轮询调用

OpenFeign超时设置
#设置feign客户端超时时间(OpenFeign默认支持ribbon)
ribbon:
  #指的是建立连接后从服务器读取到可用资源所用的时间
  ReadTimeout: 5000
  #指的是建立连接所用的时间,适用于网络状况正常的情况下,两端连接所用的时间
  ConnectTimeout: 5000
OpenFeign日志增强
@Configuration
public class FeignConfig {

    /**
     * OpenFeign日志增强
     * NONE: 默认的,不显示任何日志
     * BASIC: 仅记录请求方法、URL、响应状态、执行时间
     * HEADERS: 除了BASIC中定义的信息之外,还有请求和响应的头信息
     * FULL:除了HEADERS中定义的信息之外,还有请求和响应的正文及元信息
     *
     * @return
     */
    @Bean
    Logger.Level feignLoggerLevel() {
        return Logger.Level.FULL;
    }

}
日志打印效果(FULL):
[PaymentFeignClient#paymentFeignTimeout] <--- HTTP/1.1 200 (3182ms)
2022-10-31 22:37:05.227 DEBUG 22412 --- [p-nio-80-exec-1] c.l.s.client.PaymentFeignClient          : [PaymentFeignClient#paymentFeignTimeout] connection: keep-alive
2022-10-31 22:37:05.227 DEBUG 22412 --- [p-nio-80-exec-1] c.l.s.client.PaymentFeignClient          : [PaymentFeignClient#paymentFeignTimeout] content-length: 4
2022-10-31 22:37:05.227 DEBUG 22412 --- [p-nio-80-exec-1] c.l.s.client.PaymentFeignClient          : [PaymentFeignClient#paymentFeignTimeout] content-type: text/plain;charset=UTF-8
2022-10-31 22:37:05.227 DEBUG 22412 --- [p-nio-80-exec-1] c.l.s.client.PaymentFeignClient          : [PaymentFeignClient#paymentFeignTimeout] date: Mon, 31 Oct 2022 14:37:05 GMT
2022-10-31 22:37:05.227 DEBUG 22412 --- [p-nio-80-exec-1] c.l.s.client.PaymentFeignClient          : [PaymentFeignClient#paymentFeignTimeout] keep-alive: timeout=60
2022-10-31 22:37:05.227 DEBUG 22412 --- [p-nio-80-exec-1] c.l.s.client.PaymentFeignClient          : [PaymentFeignClient#paymentFeignTimeout]
2022-10-31 22:37:05.228 DEBUG 22412 --- [p-nio-80-exec-1] c.l.s.client.PaymentFeignClient          : [PaymentFeignClient#paymentFeignTimeout] 8001
2022-10-31 22:37:05.228 DEBUG 22412 --- [p-nio-80-exec-1] c.l.s.client.PaymentFeignClient          : [PaymentFeignClient#paymentFeignTimeout] <--- END HTTP (4-byte body)
服务降级Hystrix
Hystrix断路器
引入依赖
<dependency>
    <groupId>org.springframework.cloud</groupId>
    <artifactId>spring-cloud-starter-netflix-hystrix</artifactId>
</dependency>
服务降级
服务端配置
主启动类
@EnableCircuitBreaker // 开启熔断器
public class PaymentHystrixMain8001 {

    public static void main(String[] args) {
        SpringApplication.run(PaymentHystrixMain8001.class, args);
    }

}
配置服务降级
@HystrixCommand(fallbackMethod = "paymentInfo_TimeOutHandler", commandProperties = {
    @HystrixProperty(name = "execution.isolation.thread.timeoutInMilliseconds", value = "3000")
})
public String paymentInfo_TimeOut(Integer id) {
    try {
        TimeUnit.MILLISECONDS.sleep(5000);
    } catch (InterruptedException e) {
        e.printStackTrace();
    }
    return "线程池:  " + Thread.currentThread().getName() + " id:  " + id + "\t" + "O(∩_∩)O哈哈~" + "  耗时(秒): ";
}

public String paymentInfo_TimeOutHandler(Integer id) {
    return "线程池:  "+Thread.currentThread().getName()+"  8001系统繁忙或者运行报错,请稍后再试,id:  "+id+"\t"+"o(╥﹏╥)o";
}
客户端配置
yml配置
feign:
  hystrix:
    enabled: true
主启动类
@SpringBootApplication
@EnableFeignClients
@EnableHystrix
public class OrderHystrixMain80 {

    public static void main(String[] args) {
        SpringApplication.run(OrderHystrixMain80.class, args);
    }

}
controller
@GetMapping("/consumer/payment/hystrix/timeout/{id}")
@HystrixCommand(fallbackMethod = "paymentTimeOutFallbackMethod",commandProperties = {
        @HystrixProperty(name="execution.isolation.thread.timeoutInMilliseconds",value="1500")
})
public String paymentInfo_TimeOut(@PathVariable("id") Integer id)
{
    String result = paymentHystrixClient.paymentInfo_TimeOut(id);
    return result;
}
public String paymentTimeOutFallbackMethod(@PathVariable("id") Integer id)
{
    return "我是消费者80,对方支付系统繁忙请10秒钟后再试或者自己运行出错请检查自己,o(╥﹏╥)o";
}
全局配置@DefaultProperties
@RestController
@DefaultProperties(defaultFallback = "payment_Global_FallbackMethod")
public class OrderHystrixController {

    @Autowired
    private PaymentHystrixClient paymentHystrixClient;

    @GetMapping("/consumer/payment/hystrix/ok/{id}")
    public String paymentInfo_OK(@PathVariable("id") Integer id) {
        return paymentHystrixClient.paymentInfo_OK(id);
    }

    @GetMapping("/consumer/payment/hystrix/timeout/{id}")
   	@HystrixCommand
    public String paymentInfo_TimeOut(@PathVariable("id") Integer id) {
        String result = paymentHystrixClient.paymentInfo_TimeOut(id);
        return result;
    }

    /**
     * 下面是全局fallback方法
     *
     * @return
     */
    public String payment_Global_FallbackMethod() {
        return "Global异常处理信息,请稍后再试,/(ㄒoㄒ)/~~";
    }

}
通配服务降级
@Component
@FeignClient(value = "CLOUD-PROVIDER-HYSTRIX-PAYMENT", fallback = PaymentFallbackService.class)
public interface PaymentHystrixClient {

    @GetMapping("/payment/hystrix/ok/{id}")
    public String paymentInfo_OK(@PathVariable("id") Integer id);

    @GetMapping("/payment/hystrix/timeout/{id}")
    public String paymentInfo_TimeOut(@PathVariable("id") Integer id);

}
@Component
public class PaymentFallbackService implements PaymentHystrixClient {

    @Override
    public String paymentInfo_OK(Integer id) {
        return "-----PaymentFallbackService fall back-paymentInfo_OK ,o(╥﹏╥)o";
    }

    @Override
    public String paymentInfo_TimeOut(Integer id) {
        return "-----PaymentFallbackService fall back-paymentInfo_TimeOut ,o(╥﹏╥)o";
    }
}
服务熔断
@HystrixCommand(fallbackMethod = "paymentCircuitBreaker_fallback", commandProperties = {
        @HystrixProperty(name = "circuitBreaker.enabled", value = "true"),// 是否开启断路器
        @HystrixProperty(name = "circuitBreaker.requestVolumeThreshold", value = "10"),// 请求次数
        @HystrixProperty(name = "circuitBreaker.sleepWindowInMilliseconds", value = "10000"), // 时间窗口期
        @HystrixProperty(name = "circuitBreaker.errorThresholdPercentage", value = "60"),// 失败率达到多少后跳闸
})
public String paymentCircuitBreaker(@PathVariable("id") Integer id) {
    if (id < 0) {
        throw new RuntimeException("******id 不能负数");
    }
    String serialNumber = IdUtil.simpleUUID();

    return Thread.currentThread().getName() + "\t" + "调用成功,流水号: " + serialNumber;
}

public String paymentCircuitBreaker_fallback(@PathVariable("id") Integer id) {
    return "id 不能负数,请稍后再试,/(ㄒoㄒ)/~~   id: " + id;
}
流程:服务降级-》进而熔断-》恢复链路调用
Hystrix图形化监控
主启动类开启Hystrix图形化监控
@SpringBootApplication
@EnableHystrixDashboard
public class HystrixDashboardMain9001 {
    public static void main(String[] args) {
        SpringApplication.run(HystrixDashboardMain9001.class, args);
    }
}
需要监控的服务新增配置
/**
 * 此配置是为了服务监控而配置,与服务容错本身无关,springcloud升级后的坑
 * ServletRegistrationBean因为springboot的默认路径不是"/hystrix.stream",
 * 只要在自己的项目里配置上下面的servlet就可以了
 */
@Bean
public ServletRegistrationBean getServlet() {
    HystrixMetricsStreamServlet streamServlet = new HystrixMetricsStreamServlet();
    ServletRegistrationBean registrationBean = new ServletRegistrationBean(streamServlet);
    registrationBean.setLoadOnStartup(1);
    registrationBean.addUrlMappings("/hystrix.stream");
    registrationBean.setName("HystrixMetricsStreamServlet");
    return registrationBean;
}
测试
访问:http://localhost:9001/hystrix

成功状态: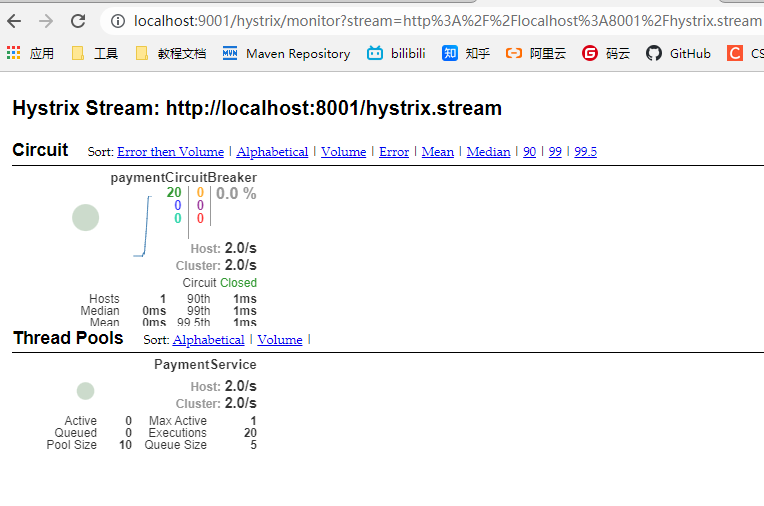
失败状态: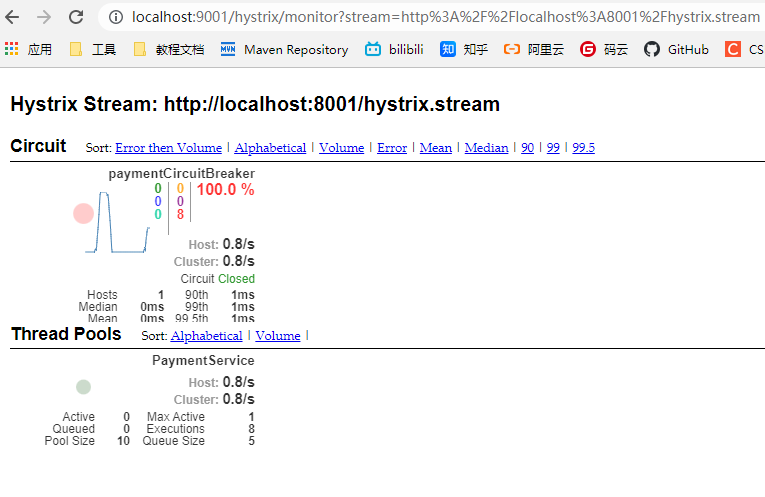
服务网关Gateway
引入依赖
<dependency>
    <groupId>org.springframework.cloud</groupId>
    <artifactId>spring-cloud-starter-gateway</artifactId>
</dependency>
注意点:网关项目不需要引入spring-boot-starter-web
yml配置(方式一)
server:
  port: 9527

spring:
  application:
    name: cloud-gateway
  cloud:
    gateway:
      discovery:
        locator:
          enabled: true #开启从注册中心动态创建路由的功能,利用微服务名进行路由
      routes:
        - id: payment_routh #payment_route    #路由的ID,没有固定规则但要求唯一,建议配合服务名
          uri: http://localhost:8001          #匹配后提供服务的路由地址
          #uri: lb://cloud-payment-service #匹配后提供服务的路由地址
          predicates:
            - Path=/payment/get/**         # 断言,路径相匹配的进行路由

        - id: payment_routh2 #payment_route    #路由的ID,没有固定规则但要求唯一,建议配合服务名
          uri: http://localhost:8001          #匹配后提供服务的路由地址
          #uri: lb://cloud-payment-service #匹配后提供服务的路由地址
          predicates:
            - Path=/payment/lb/**         # 断言,路径相匹配的进行路由
            #- After=2020-02-21T15:51:37.485+08:00[Asia/Shanghai]
            #- Cookie=username,zzyy
            #- Header=X-Request-Id, \d+  # 请求头要有X-Request-Id属性并且值为整数的正则表达式

eureka:
  instance:
    hostname: cloud-gateway-service
  client: #服务提供者provider注册进eureka服务列表内
    service-url:
      register-with-eureka: true
      fetch-registry: true
      defaultZone: http://eureka7001.com:7001/eureka
主启动类
@SpringBootApplication
@EnableEurekaClient
public class GateWayMain9527 {

    public static void main(String[] args) {
        SpringApplication.run(GateWayMain9527.class, args);
    }

}
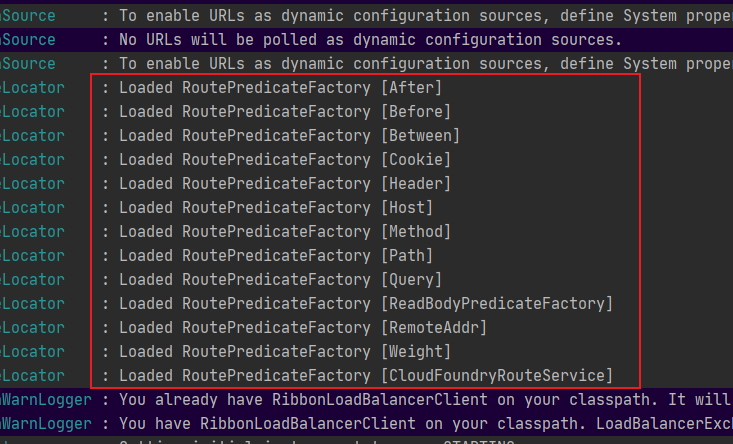
测试

配置类配置路由(方式二)
@Configuration
public class GateWayConfig {
@Bean
public RouteLocator customerRouteLocator(RouteLocatorBuilder routeLocatorBuilder) {
RouteLocatorBuilder.Builder routes = routeLocatorBuilder.routes();
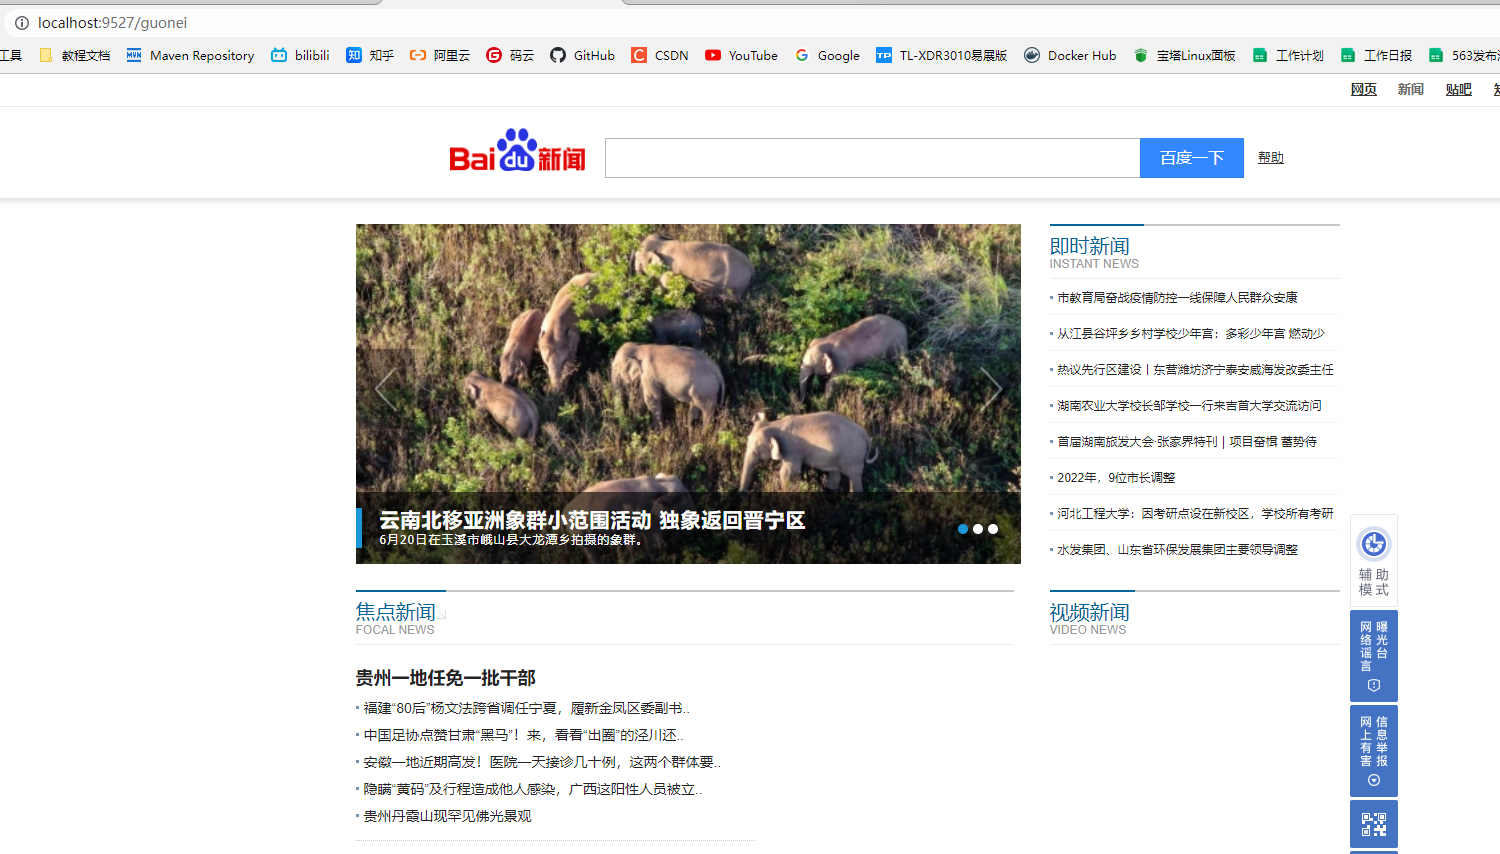
// 将http://localhost:9527/guonei 转发到 https://news.baidu.com/guonei
routes.route("path_route_atguigu", r -> r.path("/guonei").uri("https://news.baidu.com/guonei")).build();
// 将http://localhost:9527/guoji 转发到 https://news.baidu.com/guoji
routes.route("path_route_guoji", r -> r.path("/guoji").uri("https://news.baidu.com/guoji")).build();
return routes.build();
}
}
测试
常用的断言(predicates)
- Path=/payment/get/** # 断言,路径相匹配的进行路由
- After=2022-11-20T22:50:20.170+08:00[Asia/Shanghai] # 在什么时间之后进行路由
- Before=2022-11-20T23:50:20.170+08:00[Asia/Shanghai] # 在什么时间之前进行路由
- Between=2022-11-20T22:50:20.170+08:00[Asia/Shanghai],2022-11-20T23:10:20.170+08:00[Asia/Shanghai] # 在什么时间之间进行路由
- Cookie=username,zzyy # cookie相匹配的进行路由
- Header=x-access-token,\d+ # header相匹配的进行路由
- Host=**.com # host相匹配的进行路由
- Method=GET # Method相匹配的进行路由
- Query=username,\d+ # 查询条件相匹配的进行路由
自定义过滤器
@Component
@Slf4j
public class MyLogGateWayFilter implements GlobalFilter, Ordered {

    @Override
    public Mono<Void> filter(ServerWebExchange exchange, GatewayFilterChain chain) {
        log.info("***********come in MyLogGateWayFilter:  " + new Date());

        String uname = exchange.getRequest().getQueryParams().getFirst("uname");

        if (uname == null) {
            log.info("*******用户名为null,非法用户,o(╥﹏╥)o");
            exchange.getResponse().setStatusCode(HttpStatus.NOT_ACCEPTABLE);
            return exchange.getResponse().setComplete();
        }

        return chain.filter(exchange);
    }

    @Override
    public int getOrder() {
        return 0;
    }
}
配置中心Config
服务端配置
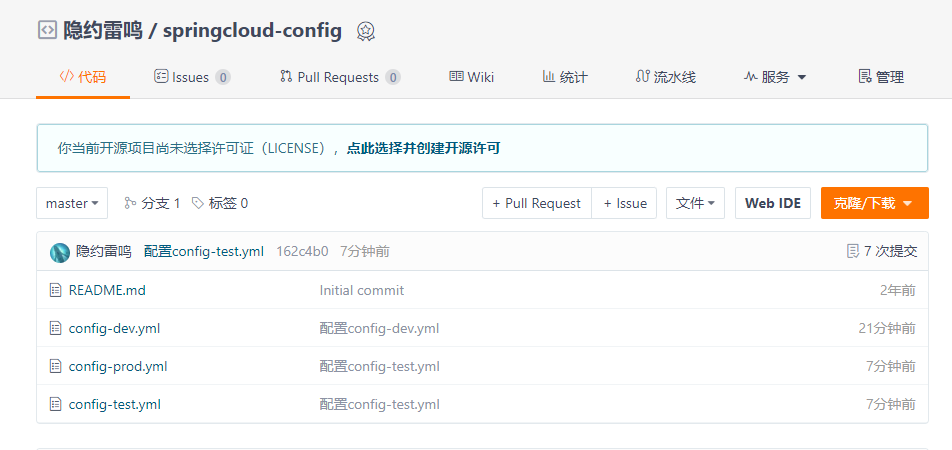
新建个公开的仓库,用于保存配置
引入依赖
<dependency>
    <groupId>org.springframework.cloud</groupId>
    <artifactId>spring-cloud-config-server</artifactId>
</dependency>
配置yml
server:
  port: 3344

spring:
  application:
    name:  cloud-config-center #注册进Eureka服务器的微服务名
  cloud:
    config:
      server:
        git:
          # uri: git@github.com:zzyybs/springcloud-config.git #GitHub上面的git仓库名字
          uri: https://gitee.com/lzp123456789/springcloud-config.git
          ####搜索目录
          search-paths:
            - springcloud-config
      ####读取分支
      label: master

#服务注册到eureka地址
eureka:
  client:
    service-url:
      defaultZone: http://localhost:7001/eureka
主启动类
@SpringBootApplication
@EnableConfigServer
public class ConfigCenterMain3344 {

    public static void main(String[] args) {
        SpringApplication.run(ConfigCenterMain3344.class, args);
    }

}
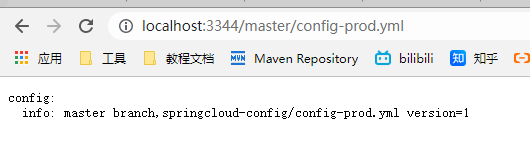
启动访问测试
客户端配置
引入依赖
<dependency>
    <groupId>org.springframework.cloud</groupId>
    <artifactId>spring-cloud-starter-config</artifactId>
</dependency>
bootstrap.yml配置
bootstrap.yml是系统级的,优先级更高
server:
  port: 3355

spring:
  application:
    name: config-client
  cloud:
    #Config客户端配置
    config:
      label: master #分支名称
      name: config #配置文件名称
      profile: dev #读取后缀名称   上述3个综合:master分支上config-dev.yml的配置文件被读取http://localhost:3344/master/config-dev.yml
      uri: http://localhost:3344 #配置中心地址

#服务注册到eureka地址
eureka:
  client:
    service-url:
      defaultZone: http://localhost:7001/eureka
主启动类
package com.lzp.springcloud;

import org.springframework.boot.SpringApplication;
import org.springframework.boot.autoconfigure.SpringBootApplication;
import org.springframework.cloud.netflix.eureka.EnableEurekaClient;

/**
 * @author lzp
 * @date 2022/11/25 23:45:24
 */
@SpringBootApplication
@EnableEurekaClient
public class ConfigClientMain3355 {

    public static void main(String[] args) {
        SpringApplication.run(ConfigClientMain3355.class, args);
    }

}
controller
@RestController
public class ConfigClientController {
@Value("${config.info}")
private String configInfo;
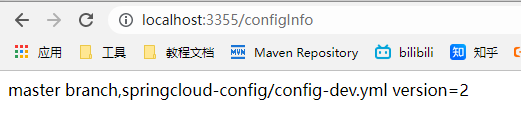
@GetMapping("/configInfo")
public String getConfigInfo() {
return configInfo;
}
}
测试结果
动态刷新配置(手动)
修改controller
@RestController
@RefreshScope
public class ConfigClientController {

    @Value("${config.info}")
    private String configInfo;

    @GetMapping("/configInfo")
    public String getConfigInfo() {
        return configInfo;
    }

}
yml暴露监控端点
server:
  port: 3355

spring:
  application:
    name: config-client
  cloud:
    #Config客户端配置
    config:
      label: master #分支名称
      name: config #配置文件名称
      profile: dev #读取后缀名称   上述3个综合:master分支上config-dev.yml的配置文件被读取http://localhost:3344/master/config-dev.yml
      uri: http://localhost:3344 #配置中心地址

#服务注册到eureka地址
eureka:
  client:
    service-url:
      defaultZone: http://localhost:7001/eureka

# 暴露监控端点
management:
  endpoints:
    web:
      exposure:
        include: "*"
修改配置后,post调用接口,手动刷新接口,服务不需要重启
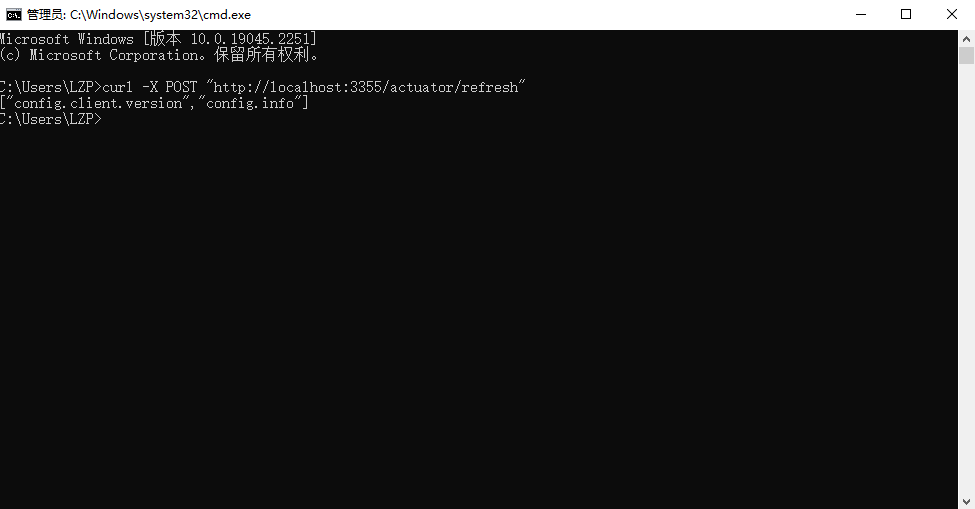
测试结果
服务未重启,就可以手动刷新配置了。

消息总线BUS
动态刷新全局广播通知
修改服务端配置
引入依赖
<dependency>
    <groupId>org.springframework.cloud</groupId>
    <artifactId>spring-cloud-starter-bus-amqp</artifactId>
</dependency>
修改服务端yml,连接rabbitmq
server:
  port: 3344

spring:
  application:
    name:  cloud-config-center #注册进Eureka服务器的微服务名
  cloud:
    config:
      server:
        git:
          # uri: git@github.com:zzyybs/springcloud-config.git #GitHub上面的git仓库名字
          uri: https://gitee.com/lzp123456789/springcloud-config.git
          ####搜索目录
          search-paths:
            - springcloud-config
      ####读取分支
      label: master
  # rabbitmq相关配置
  rabbitmq:
    host: localhost
    port: 5673
    username: guest
    password: guest

#服务注册到eureka地址
eureka:
  client:
    service-url:
      defaultZone: http://localhost:7001/eureka

##rabbitmq相关配置,暴露bus刷新配置的端点
management:
  endpoints: #暴露bus刷新配置的端点
    web:
      exposure:
        include: 'bus-refresh'
修改客户端配置
引入依赖
<dependency>
    <groupId>org.springframework.cloud</groupId>
    <artifactId>spring-cloud-starter-bus-amqp</artifactId>
</dependency>
修改客户端yml,连接rabbitmq
server:
  port: 3355

spring:
  application:
    name: config-client
  cloud:
    #Config客户端配置
    config:
      label: master #分支名称
      name: config #配置文件名称
      profile: dev #读取后缀名称   上述3个综合:master分支上config-dev.yml的配置文件被读取http://localhost:3344/master/config-dev.yml
      uri: http://localhost:3344 #配置中心地址

  #rabbitmq相关配置 15672是Web管理界面的端口;5672是MQ访问的端口
  rabbitmq:
    host: localhost
    port: 5673
    username: guest
    password: guest

#服务注册到eureka地址
eureka:
  client:
    service-url:
      defaultZone: http://localhost:7001/eureka

# 暴露监控端点
management:
  endpoints:
    web:
      exposure:
        include: "*"
测试广播更新config配置
接口公式:
http://config服务端ip:config端口号/actuator/bus-refresh
启动config服务端,再启动一个或多个config客户端,修改远端的yml配置,服务端配置自动更新,客户端配置不会自动更新,需要调用客户端接口发布广播。

接口调用成功后,多个config客户端配置自动更新。
动态刷新定点广播通知
接口公式:
http://config服务端ip:config端口号/actuator/bus-refresh/config客户端服务名:config客户端端口号

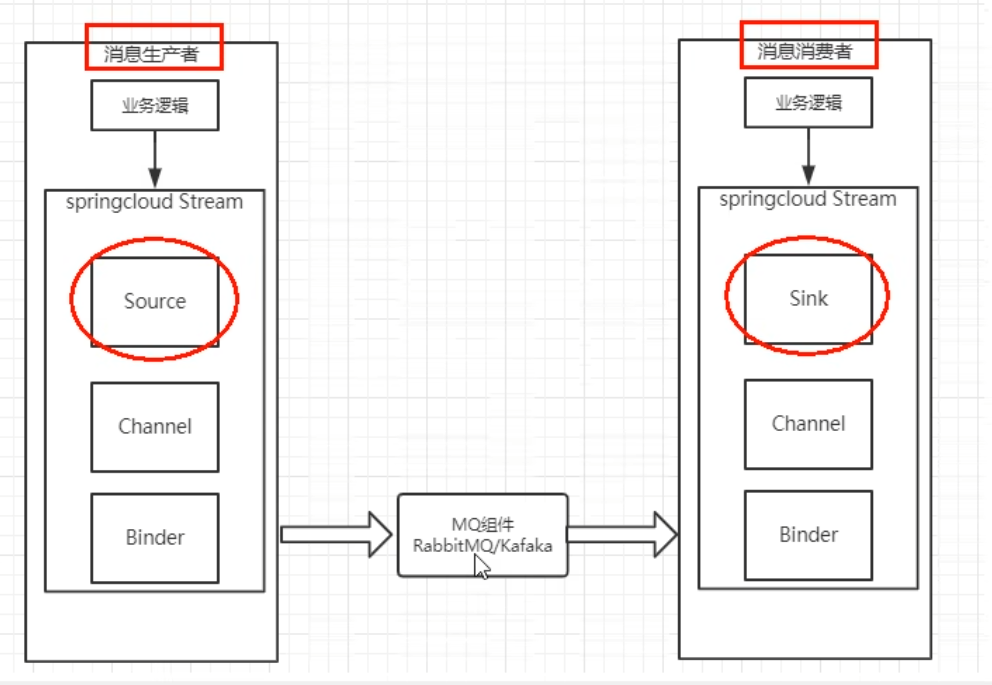
消息驱动Stream
标准流程
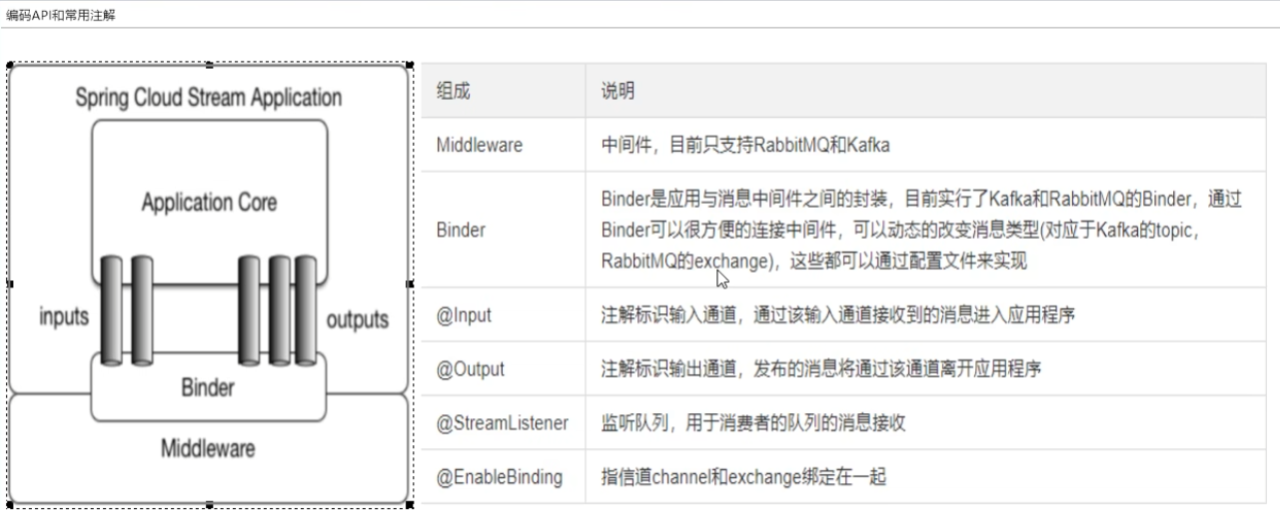
常用注解
生产者配置
引入依赖
<dependency>
    <groupId>org.springframework.cloud</groupId>
    <artifactId>spring-cloud-starter-stream-rabbit</artifactId>
</dependency>
配置yml
server:
  port: 8801

spring:
  application:
    name: cloud-stream-provider
    # rabbitmq相关配置
  rabbitmq:
    host: localhost
    port: 5673
    username: guest
    password: guest
  cloud:
    stream:
      binders: # 在此处配置要绑定的rabbitmq的服务信息;
        defaultRabbit: # 表示定义的名称,用于于binding整合
          type: rabbit # 消息组件类型
      bindings: # 服务的整合处理
        output: # 这个名字是一个通道的名称
          destination: studyExchange # 表示要使用的Exchange名称定义
          content-type: application/json # 设置消息类型,本次为json,文本则设置“text/plain”
          binder: defaultRabbit # 设置要绑定的消息服务的具体设置

eureka:
  client: # 客户端进行Eureka注册的配置
    service-url:
      defaultZone: http://localhost:7001/eureka
  instance:
    lease-renewal-interval-in-seconds: 2 # 设置心跳的时间间隔(默认是30秒)
    lease-expiration-duration-in-seconds: 5 # 如果现在超过了5秒的间隔(默认是90秒)
    instance-id: send-8801.com  # 在信息列表时显示主机名称
    prefer-ip-address: true     # 访问的路径变为IP地址
主启动类
@SpringBootApplication
public class StreamMQMain8801 {
    public static void main(String[] args) {
        SpringApplication.run(StreamMQMain8801.class, args);
    }
}
controller
@RestController
public class SendMessageController {

    @Autowired
    private IMessageProvider messageProvider;

    @GetMapping("/sendMessage")
    public String sendMessage() {
        return messageProvider.send();
    }

}
消息推送实现类
@EnableBinding(value = Source.class)
@Slf4j
public class IMessageProviderImpl implements IMessageProvider {

    @Resource
    private MessageChannel output;

    @Override
    public String send() {
        String serial = UUID.randomUUID().toString();
        log.info("流水号:{}", serial);
        // 构建消息
        Message<String> message = MessageBuilder.withPayload(serial).build();
        boolean send = output.send(message);
        return send + "";
    }

}
测试
调用controller中的/sendMessage,会往rabbitmq推送消息
消费者配置
引入依赖
<dependency>
    <groupId>org.springframework.cloud</groupId>
    <artifactId>spring-cloud-starter-stream-rabbit</artifactId>
</dependency>
yml配置
server:
  port: 8802

spring:
  application:
    name: cloud-stream-consumer
  cloud:
    stream:
      binders: # 在此处配置要绑定的rabbitmq的服务信息;
        defaultRabbit: # 表示定义的名称,用于于binding整合
          type: rabbit # 消息组件类型
          environment: # 设置rabbitmq的相关的环境配置
            spring:
              rabbitmq:
                host: localhost
                port: 5672
                username: guest
                password: guest
      bindings: # 服务的整合处理
        input: # 这个名字是一个通道的名称
          destination: studyExchange # 表示要使用的Exchange名称定义
          content-type: application/json # 设置消息类型,本次为对象json,如果是文本则设置“text/plain”
          binder: defaultRabbit # 设置要绑定的消息服务的具体设置


eureka:
  client: # 客户端进行Eureka注册的配置
    service-url:
      defaultZone: http://localhost:7001/eureka
  instance:
    lease-renewal-interval-in-seconds: 2 # 设置心跳的时间间隔(默认是30秒)
    lease-expiration-duration-in-seconds: 5 # 如果现在超过了5秒的间隔(默认是90秒)
    instance-id: receive-8802.com  # 在信息列表时显示主机名称
    prefer-ip-address: true     # 访问的路径变为IP地址
主启动类
@SpringBootApplication
public class StreamMQMain8802 {
    public static void main(String[] args) {
        SpringApplication.run(StreamMQMain8802.class, args);
    }
}
配置监听
@Component
@EnableBinding(Sink.class)
public class ReceiveMessageListenerController {
@Value("${server.port}")
private String serverPort;
/**
* 监听消息
* @param message
*/
@StreamListener(Sink.INPUT)
public void input(Message<String> message) {
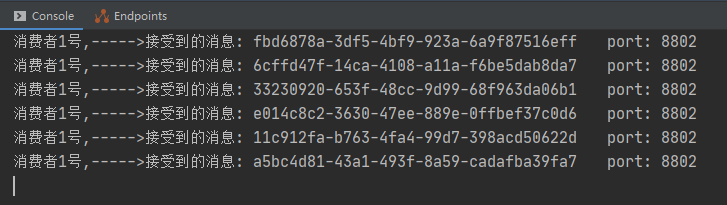
System.out.println("消费者1号,----->接受到的消息: " + message.getPayload() + "\t port: " + serverPort);
}
}
测试,生产者推送消息至kafka,消费者监听kafka消息
调用生产者controller中的/sendMessage,会往rabbitmq推送消息,消费者controller的@StreamListener(Sink.INPUT)会监听到消息
重复消费问题&消息持久化
当消费者有多个时,同时连接的一个交换机,当生产者推送一条消息,每个消费者都可以收到生产者推送的消息。
给每个生产者设置分组,可以避免重复消费问题。
设置分组也可以让消息持久化,设置了分组的消费者如果服务重启,可以继续从消息队列获取消息。
未设置分组的消费者无法继续从消息队列获取消息。
server:
  port: 8802

spring:
  application:
    name: cloud-stream-consumer
  cloud:
    stream:
      binders: # 在此处配置要绑定的rabbitmq的服务信息;
        defaultRabbit: # 表示定义的名称,用于于binding整合
          type: rabbit # 消息组件类型
          environment: # 设置rabbitmq的相关的环境配置
            spring:
              rabbitmq:
                host: localhost
                port: 5672
                username: guest
                password: guest
      bindings: # 服务的整合处理
        input: # 这个名字是一个通道的名称
          destination: studyExchange # 表示要使用的Exchange名称定义
          content-type: application/json # 设置消息类型,本次为对象json,如果是文本则设置“text/plain”
          binder: defaultRabbit # 设置要绑定的消息服务的具体设置
          group: lzpA # 设置分组,防止重复消费问题

eureka:
  client: # 客户端进行Eureka注册的配置
    service-url:
      defaultZone: http://localhost:7001/eureka
  instance:
    lease-renewal-interval-in-seconds: 2 # 设置心跳的时间间隔(默认是30秒)
    lease-expiration-duration-in-seconds: 5 # 如果现在超过了5秒的间隔(默认是90秒)
    instance-id: receive-8802.com  # 在信息列表时显示主机名称
    prefer-ip-address: true     # 访问的路径变为IP地址
分布式请求链路追踪Sleuth
下载zipkin
下载地址:https://repo1.maven.org/maven2/io/zipkin/zipkin-server/
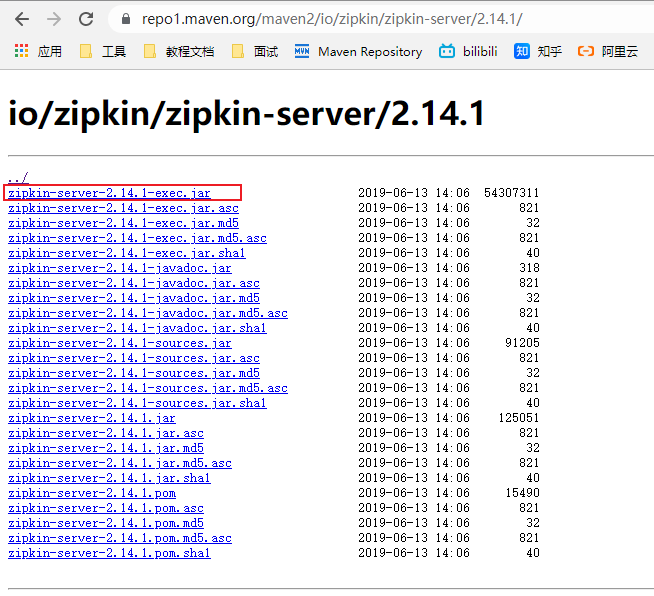
启动zipkin
进入zipkin-server-2.14.1-exec.jar所在目录,使用java -jar命令启动jar包
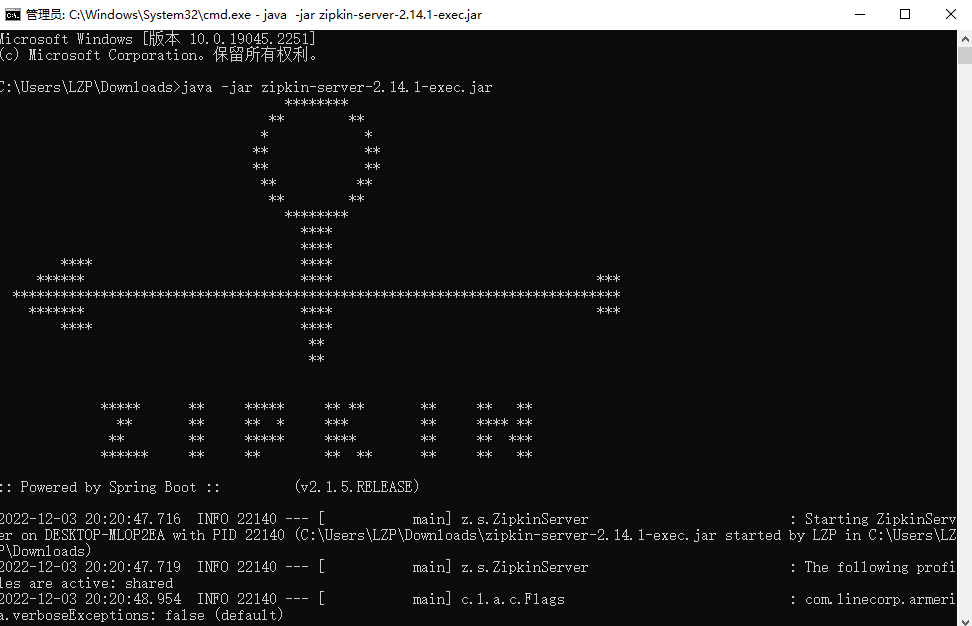
访问zipkin监控页面 localhost:9411

生产者和消费者整合zipkin
引入依赖
<dependency>
    <groupId>org.springframework.cloud</groupId>
    <artifactId>spring-cloud-starter-zipkin</artifactId>
</dependency>
yml配置
spring:
  application:
    name: cloud-consumer-order
  zipkin:
    base-url: http://localhost:9411
  sleuth:
    sampler:
      # 采样率:值介于0~1之间,1则表示全部采集
      probability: 1
spring:
  application:
    name: cloud-payment-service
  zipkin:
    base-url: http://localhost:9411
  sleuth:
    sampler:
      # 采样率:值介于0~1之间,1则表示全部采集
      probability: 1
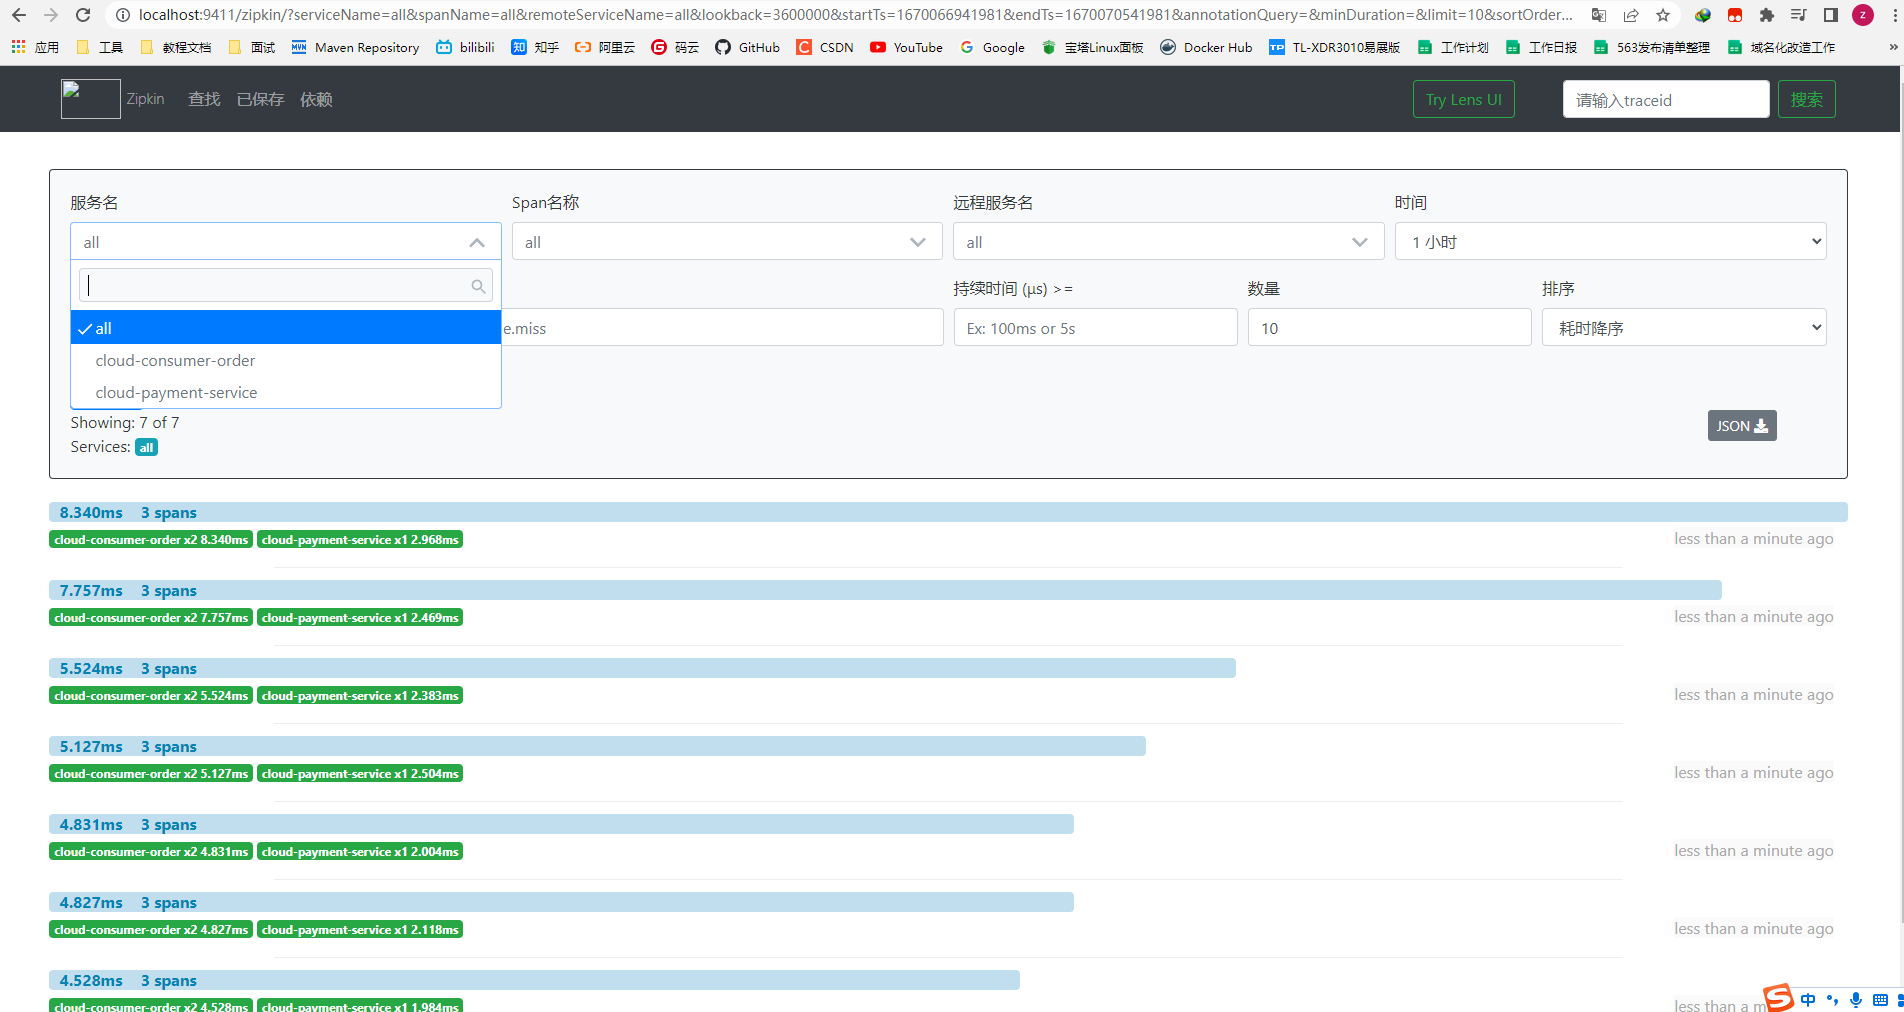
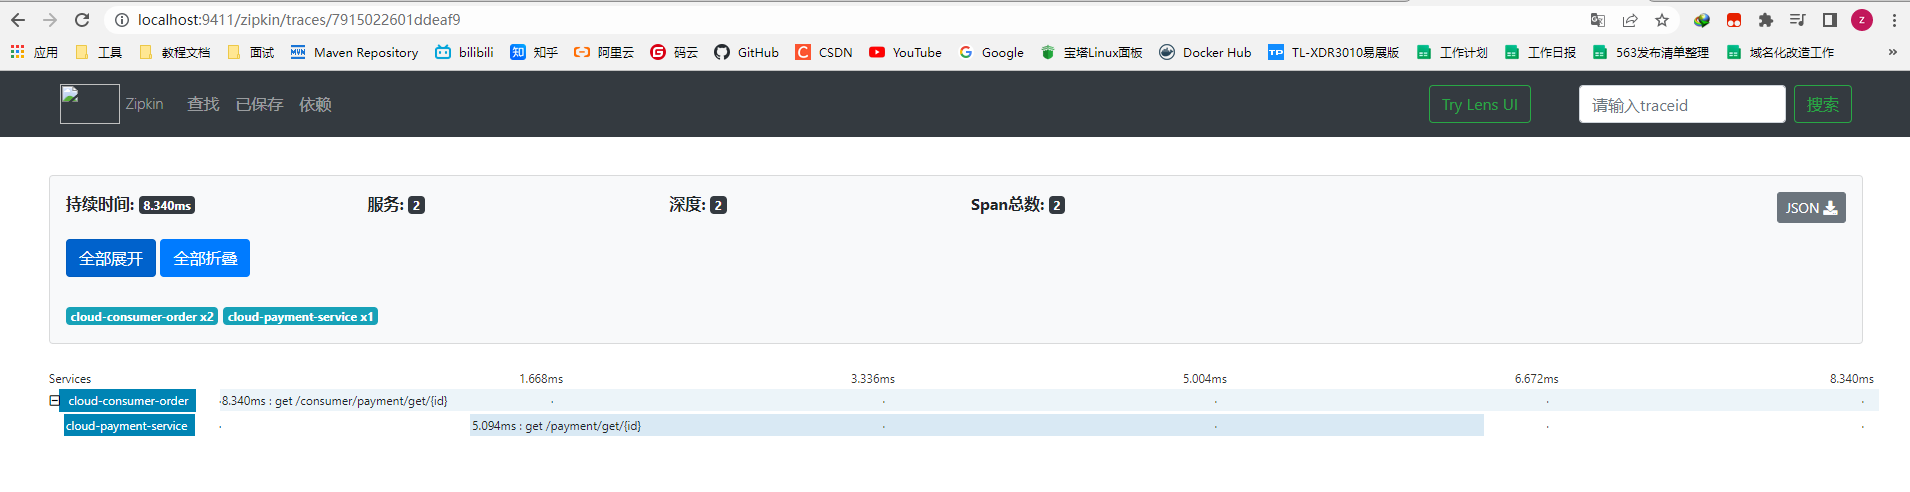
测试调用链路
调用http://localhost/consumer/payment/get/1
查看zipkin监控页面,查看调用链路
Spring Cloud Alibaba
服务注册与配置中心Nacos
下载安装Nacos
nacos官网地址:https://nacos.io/zh-cn/
github地址:https://github.com/alibaba/nacos
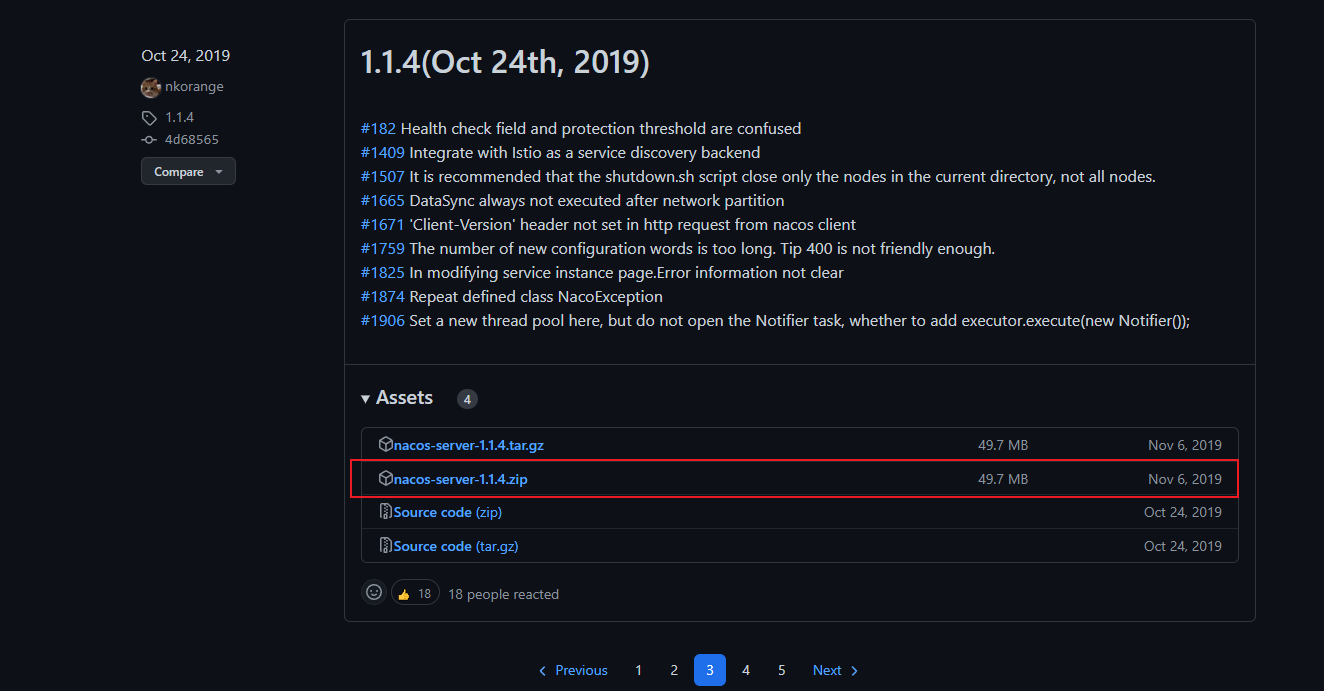
下载地址:https://github.com/alibaba/nacos/releases
本次下载的windows使用的包
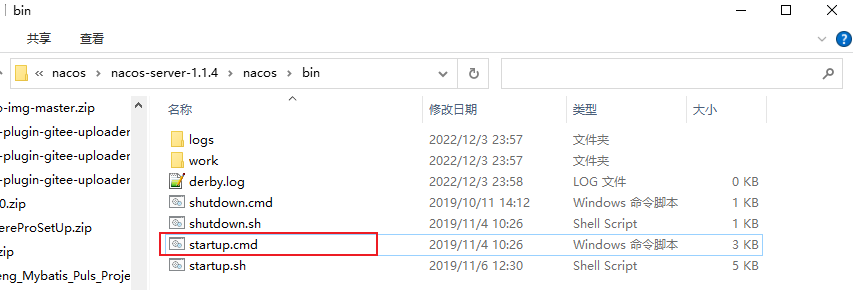
启动Nacos
windows系统下双击该脚本启动Nacos
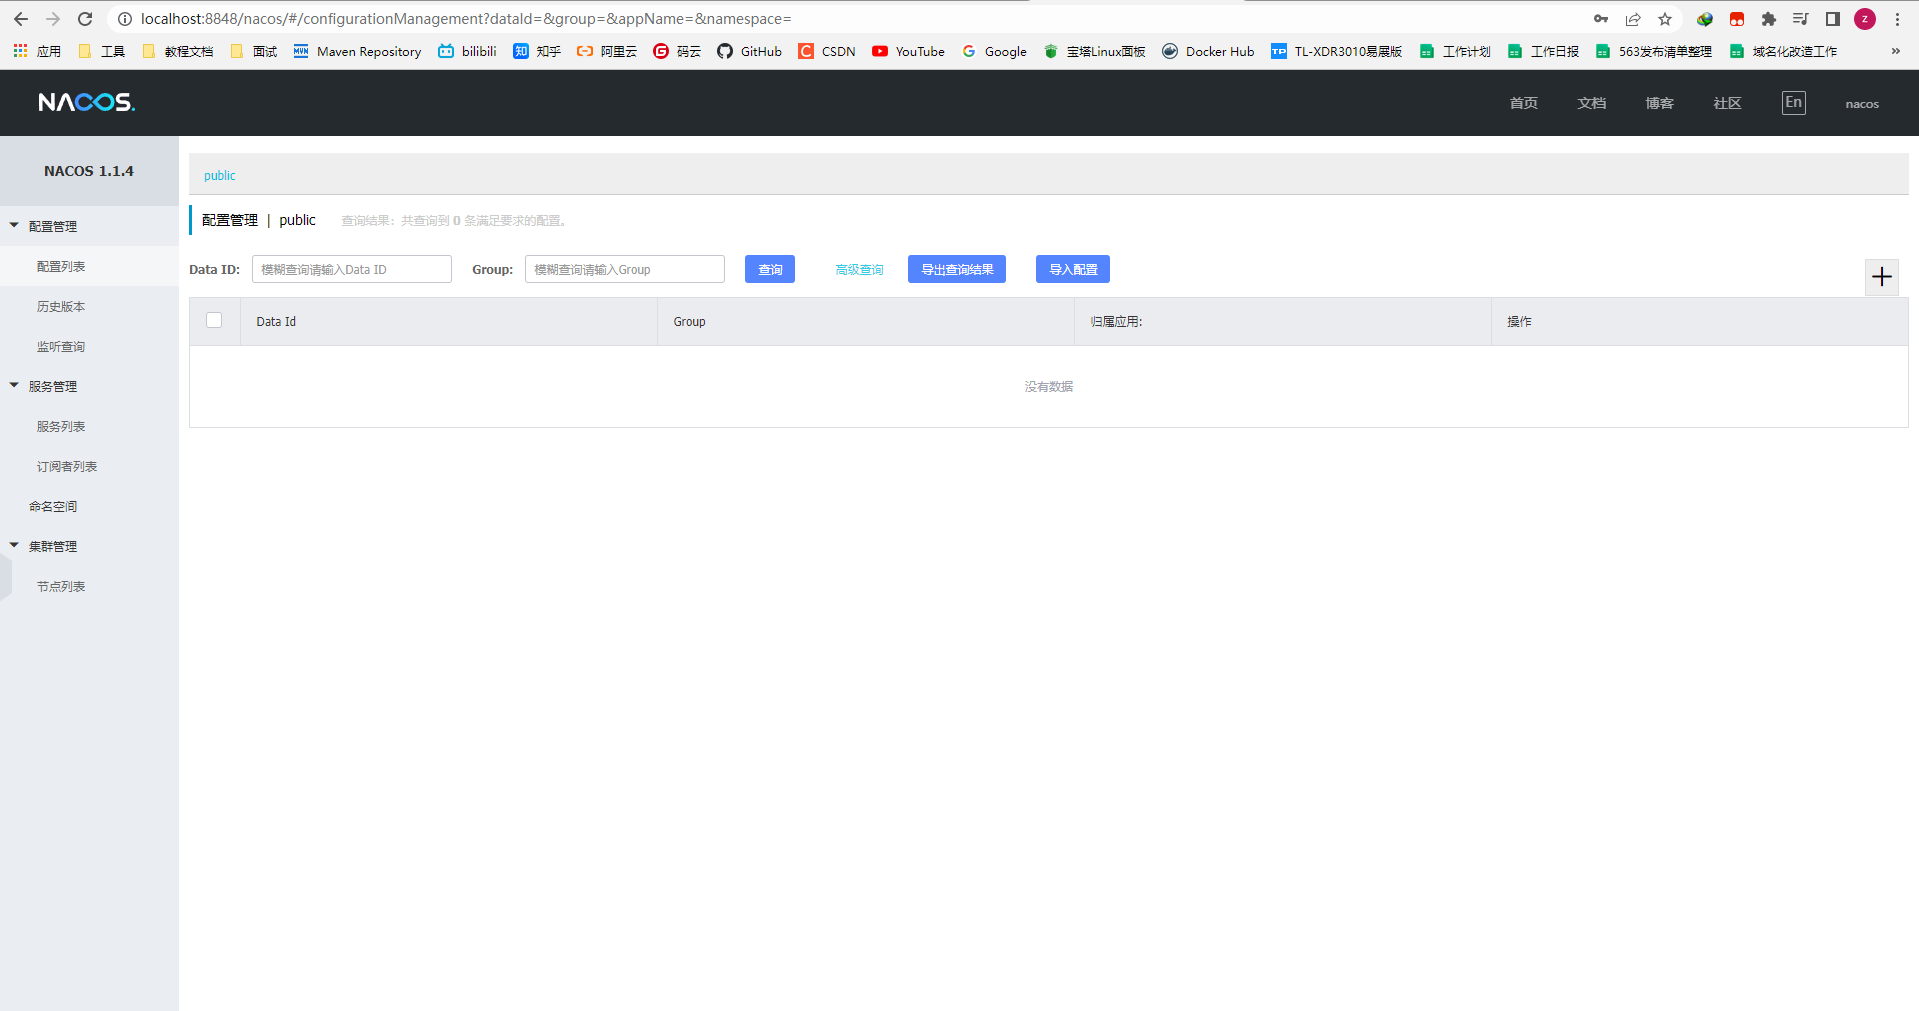
进入该页面标识启动成功:

默认账号/密码 nacos/nacos
Nacos注册服务提供者
父工程引入依赖
<dependency>
    <groupId>com.alibaba.cloud</groupId>
    <artifactId>spring-cloud-alibaba-dependencies</artifactId>
    <version>2.1.0.RELEASE</version>
    <type>pom</type>
    <scope>import</scope>
</dependency>
当前工程引入依赖
<dependency>
    <groupId>com.alibaba.cloud</groupId>
    <artifactId>spring-cloud-starter-alibaba-nacos-discovery</artifactId>
</dependency>
配置yml
server:
  port: 9002

spring:
  application:
    name: nacos-payment-provider
  cloud:
    nacos:
      discovery:
        server-addr: localhost:8848 #配置Nacos地址

management:
  endpoints:
    web:
      exposure:
        include: '*'
主启动类
@SpringBootApplication
@EnableDiscoveryClient
public class PaymentMain9002 {
    public static void main(String[] args) {
        SpringApplication.run(PaymentMain9002.class, args);
    }
}
controller
@RestController
public class PaymentController {
    @Value("${server.port}")
    private String serverPort;

    @GetMapping(value = "/payment/nacos/{id}")
    public String getPayment(@PathVariable("id") Integer id) {
        return "nacos registry, serverPort: " + serverPort + "\t id" + id;
    }
}
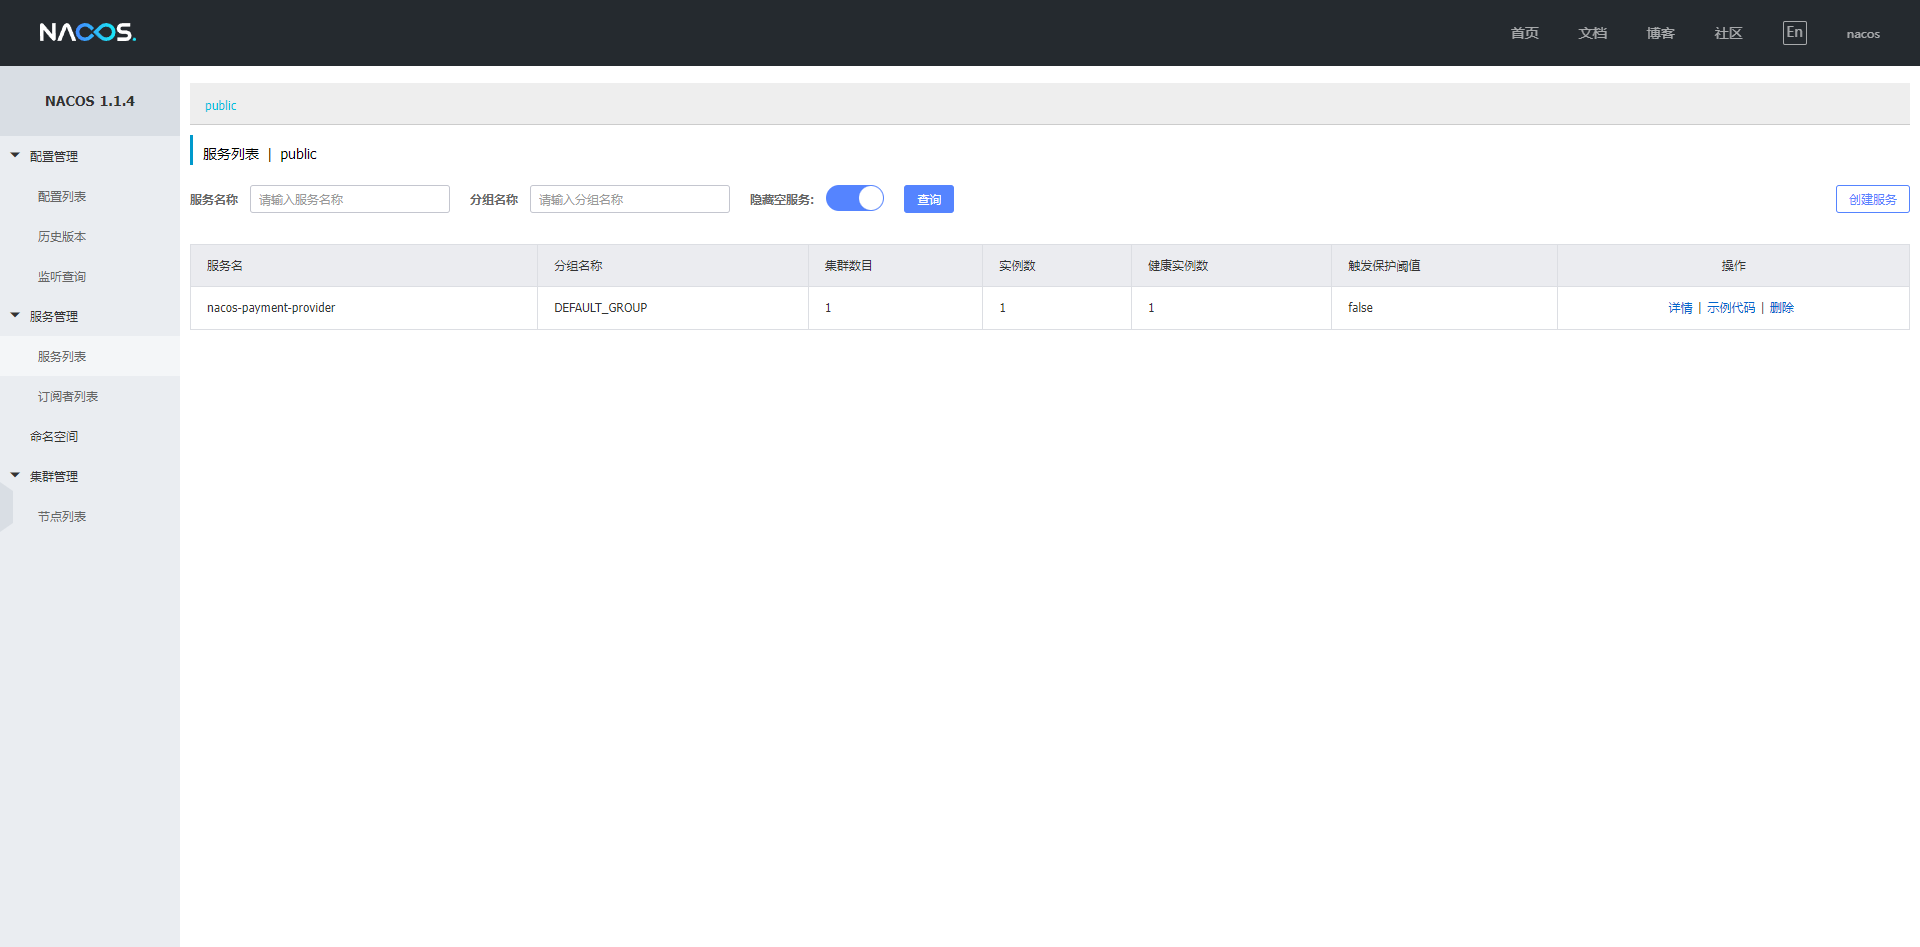
查看nacos服务列表
Nacos注册服务消费者及负载
引入依赖
<dependency>
    <groupId>com.alibaba.cloud</groupId>
    <artifactId>spring-cloud-starter-alibaba-nacos-discovery</artifactId>
</dependency>
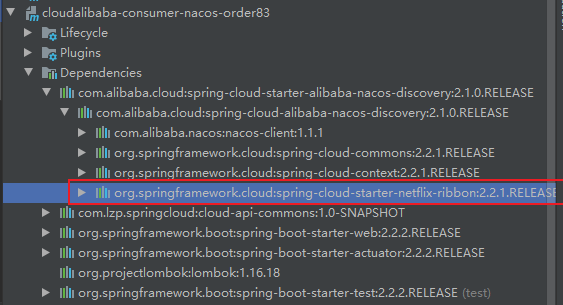
Nacos集成了Ribbon所以也支持负载
配置yml
server:
  port: 83

spring:
  application:
    name: nacos-order-consumer
  cloud:
    nacos:
      discovery:
        server-addr: localhost:8848

#消费者将要去访问的微服务名称(注册成功进nacos的微服务提供者)
service-url:
  nacos-user-service: http://nacos-payment-provider
主启动类
@SpringBootApplication
@EnableDiscoveryClient
public class OrderNacosMain83 {
    public static void main(String[] args) {
        SpringApplication.run(OrderNacosMain83.class, args);
    }

    @Bean
    @LoadBalanced
    public RestTemplate restTemplate() {
        return new RestTemplate();
    }
}
controller
@RestController
@Slf4j
public class OrderNacosController {

    @Autowired
    private RestTemplate restTemplate;

    @Value("${service-url.nacos-user-service}")
    private String serverURL;

    @GetMapping(value = "/consumer/payment/nacos/{id}")
    public String paymentInfo(@PathVariable("id") Long id) {
        return restTemplate.getForObject(serverURL + "/payment/nacos/" + id, String.class);
    }

}
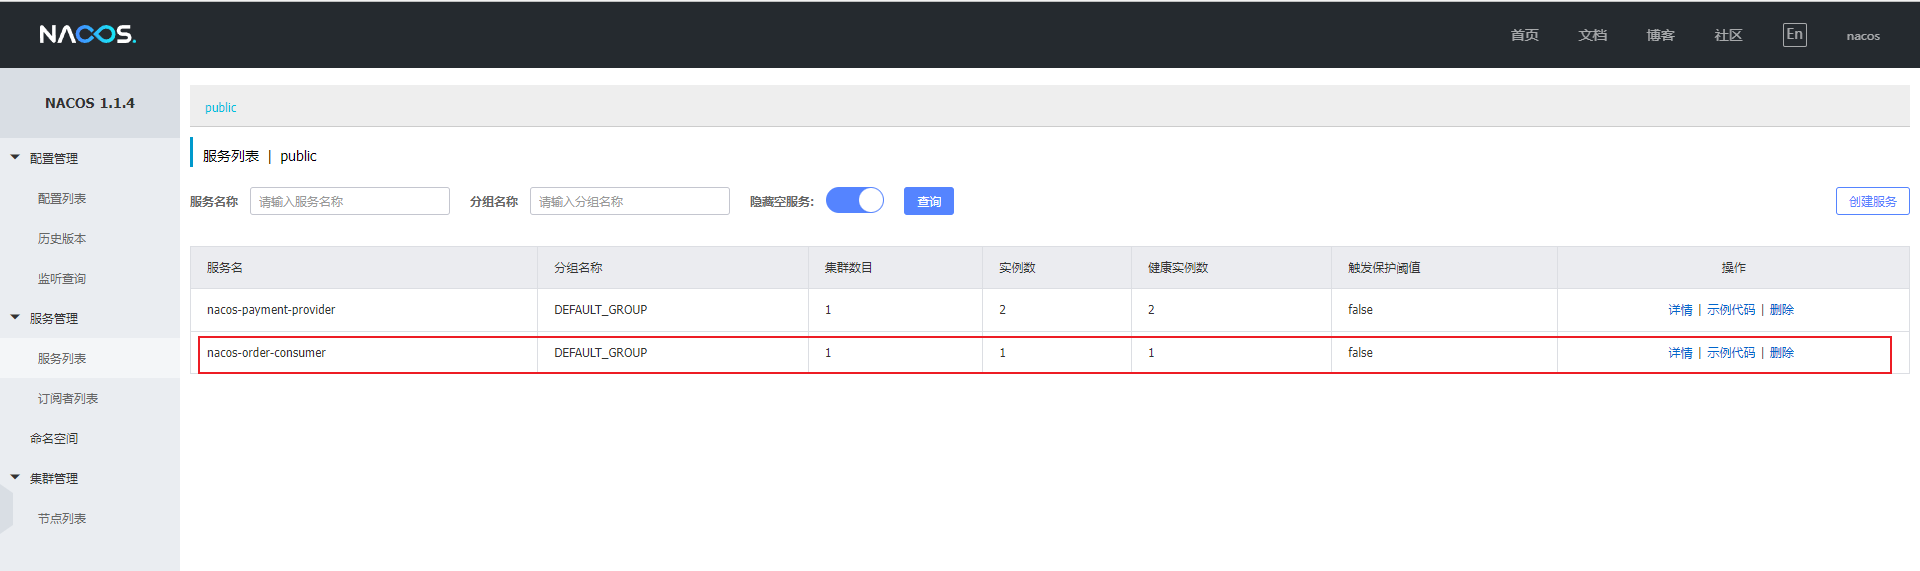
查看nacos服务列表发现注册成功
测试,负载功能正常


Nacos作为配置中心
引入依赖
<!--nacos-config-->
<dependency>
    <groupId>com.alibaba.cloud</groupId>
    <artifactId>spring-cloud-starter-alibaba-nacos-config</artifactId>
</dependency>
<!--nacos-discovery-->
<dependency>
    <groupId>com.alibaba.cloud</groupId>
    <artifactId>spring-cloud-starter-alibaba-nacos-discovery</artifactId>
</dependency>
配置bootstrap.yml
# nacos配置
server:
  port: 3377

spring:
  application:
    name: nacos-config-client
  cloud:
    nacos:
      discovery:
        server-addr: localhost:8848 #Nacos服务注册中心地址
      config:
        server-addr: localhost:8848 #Nacos作为配置中心地址
        file-extension: yaml #指定yaml格式的配置
配置applicaiton.yml
spring:
  profiles:
    active: dev
主启动类
@SpringBootApplication
@EnableDiscoveryClient
public class NacosConfigClientMain3377 {
    public static void main(String[] args) {
        SpringApplication.run(NacosConfigClientMain3377.class, args);
    }
}
controller
@RestController
@RefreshScope //支持Nacos的动态刷新功能。
public class ConfigClientController {
@Value("${config.info}")
private String configInfo;
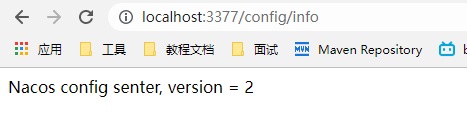
@GetMapping("/config/info")
public String getConfigInfo() {
return configInfo;
}
}
Nacos界面新增配置文件

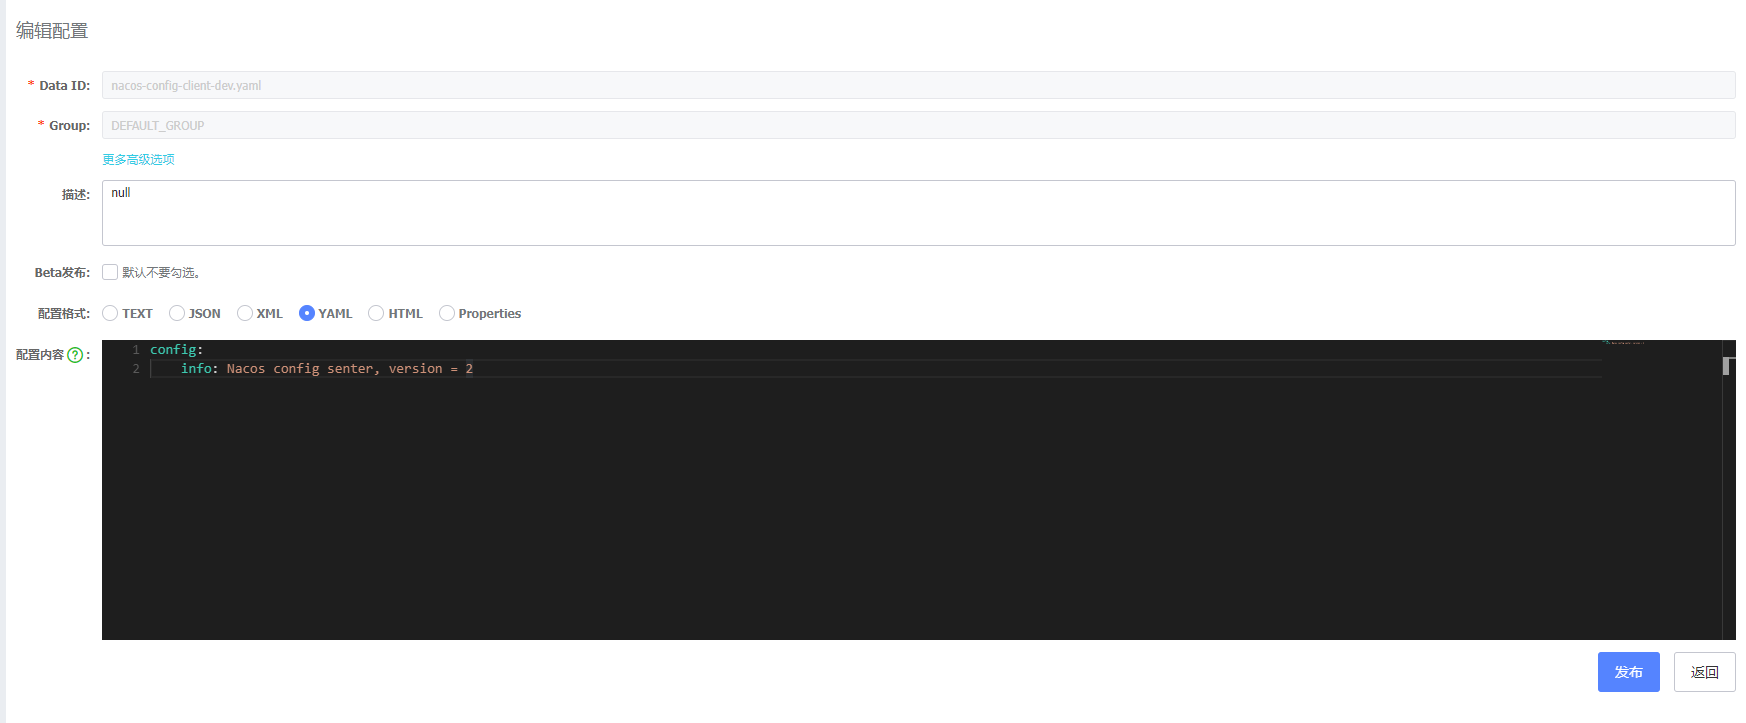
测试获取nacos配置的文件内容
流控Sentinel
下载与启动
下载地址:https://github.com/alibaba/Sentinel/releases

进入sentinel-dashboard-1.7.0.jar的安装目录,使用java -jav sentinel-dashboard-1.7.0.jar 即可启动sentinel,默认端口号为8080,注意端口占用。
初始化监控
引入依赖
<!--SpringCloud ailibaba nacos -->
<dependency>
    <groupId>com.alibaba.cloud</groupId>
    <artifactId>spring-cloud-starter-alibaba-nacos-discovery</artifactId>
</dependency>
<!--SpringCloud ailibaba sentinel-datasource-nacos 后续做持久化用到-->
<dependency>
    <groupId>com.alibaba.csp</groupId>
    <artifactId>sentinel-datasource-nacos</artifactId>
</dependency>
<!--SpringCloud ailibaba sentinel -->
<dependency>
    <groupId>com.alibaba.cloud</groupId>
    <artifactId>spring-cloud-starter-alibaba-sentinel</artifactId>
</dependency>
配置yml
server:
  port: 8401

spring:
  application:
    name: cloudalibaba-sentinel-service
  cloud:
    nacos:
      discovery:
        server-addr: localhost:8848 #Nacos服务注册中心地址
    sentinel:
      transport:
        dashboard: localhost:8080 #配置Sentinel dashboard地址
        port: 8719
      datasource:
        ds1:
          nacos:
            server-addr: localhost:8848
            dataId: cloudalibaba-sentinel-service
            groupId: DEFAULT_GROUP
            data-type: json
            rule-type: flow

management:
  endpoints:
    web:
      exposure:
        include: '*'

feign:
  sentinel:
    enabled: true # 激活Sentinel对Feign的支持
主启动类
@EnableDiscoveryClient
@SpringBootApplication
public class MainApp8401 {
    public static void main(String[] args) {
        SpringApplication.run(MainApp8401.class, args);
    }
}
controller
@RestController
@Slf4j
public class FlowLimitController {

    @GetMapping("/testA")
    public String testA() {
        return "------testA";
    }

    @GetMapping("/testB")
    public String testB() {
        log.info(Thread.currentThread().getName() + "\t" + "...testB");
        return "------testB";
    }

}
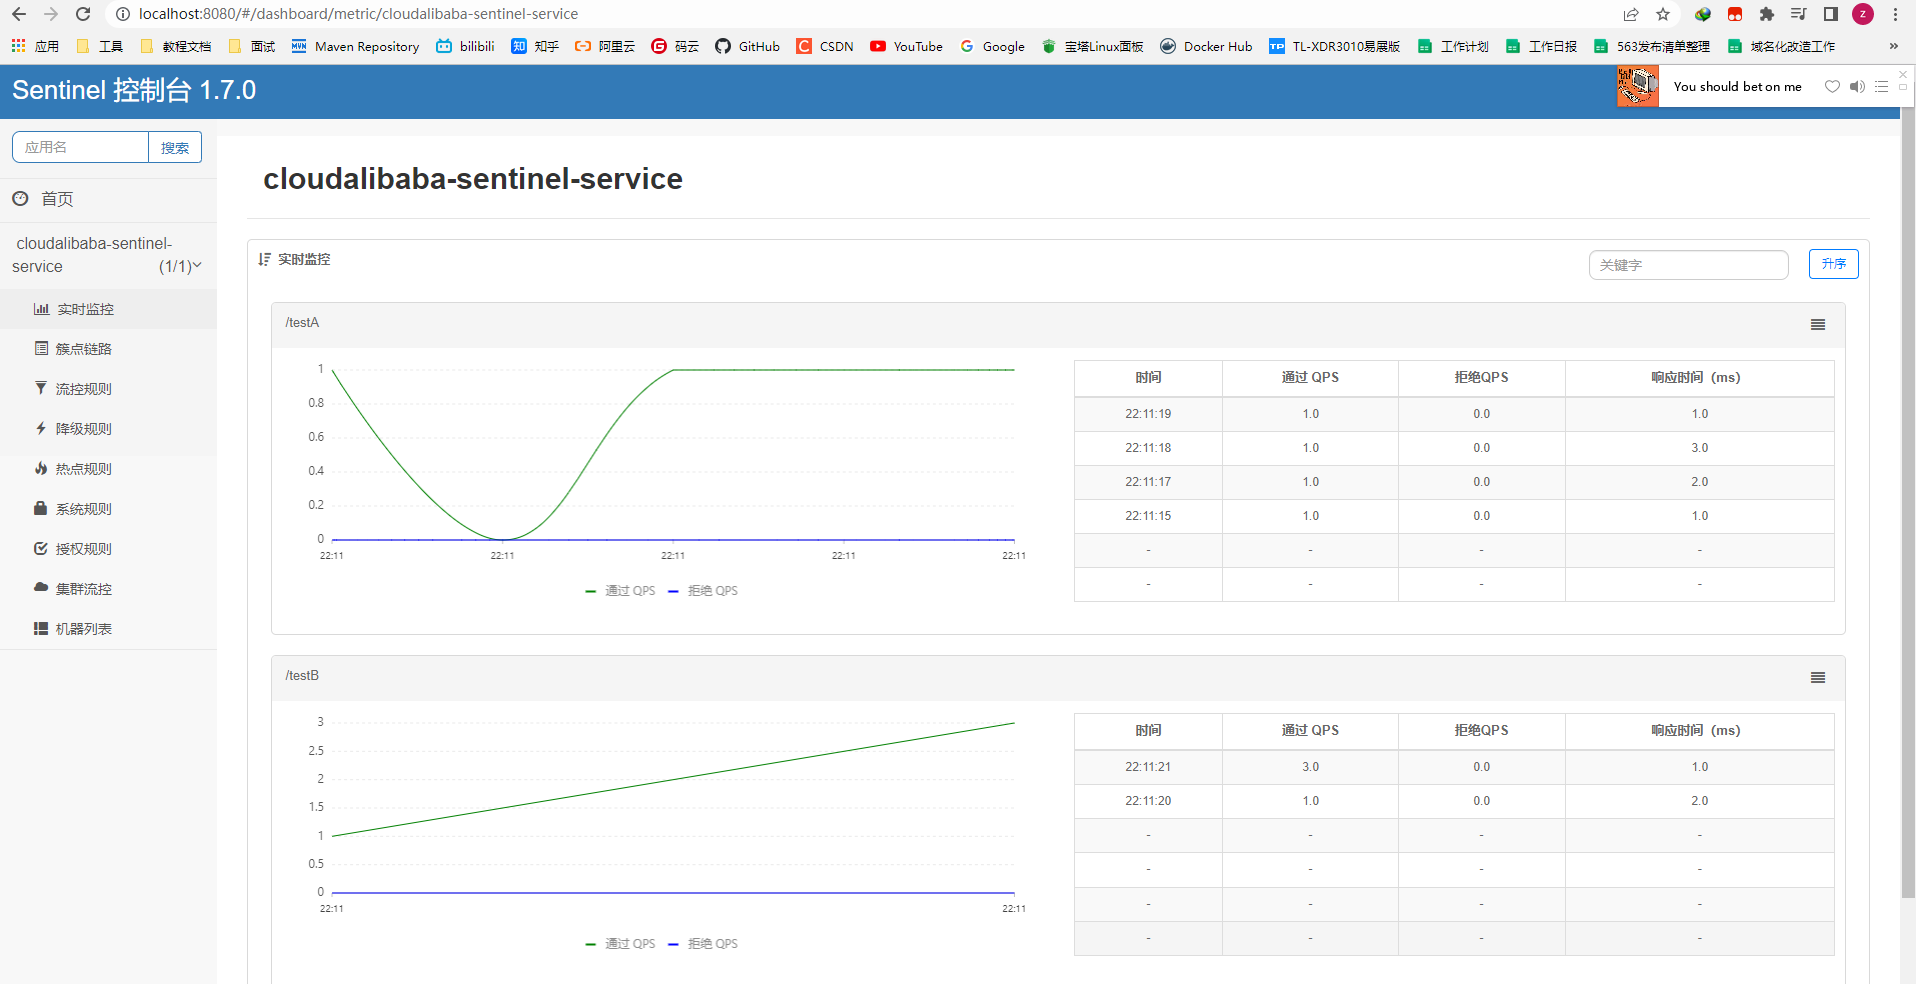
测试监控
启动Nacos,启动被监控的服务,再启动sentinel,三者启动完成后访问http://localhost:8080/#/dashboard 并未发现被监控的服务,访问被监控服务后,才能再sentinel中监控到。
流控规则

闽值类型/单机闻值:
-
**QPS(每秒钟的请求数量):**当调用该api的QPS达到闻值的时候,进行限流
-
**线程数:**当调用该api的线程数达到闻值的时候,进行限流
**是否集群:**不需要集群
流控模式:
-
**直接:**api达到限流条件时,直接限流
-
**关联:**当关联的资源达到闻值时,就限流自己
-
**链路:**只记录指定链路上的流量(指定资源从入口资源进来的流量,如果达到闻值,就进行限流)[api级别的针对来源]
流控效果:
-
**快速失败:**直接失败,抛异常
-
**Warm Up:**根据codeFactor (冷加载因子,默认3)的值,从阈值/codeFactor,经过预热时长,才达到设置的QPS闻值
-
**排队等待:**匀速排队,让请求以匀速的速度通过,闽值类型必须设置为QPS,否则无效
降级规则
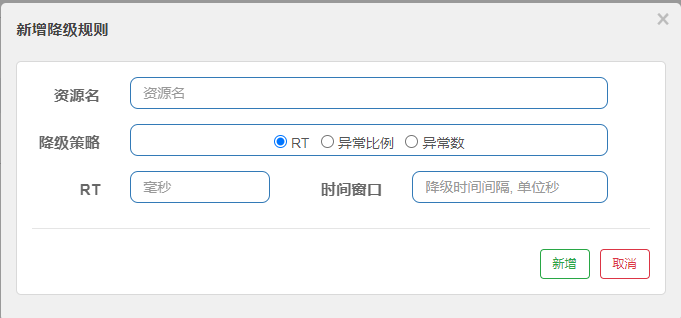
RT(平均响应时间,秒级)
平均响应时间 超出闻值 且 在时间窗口内通过的请求>=5,两个条件同时满足后触发降级窗口期过后关闭断路器
RT最大4900(更大的需要通过-Dcsp.sentinel.statisticmaxrt=XXXX才能生效)
异常比列 (秒级)
QPS>= 5 异常比例(秒级统计)超过值时,触发降级:时间窗口结束后,关闭降级
异常数 (分钟级)
异常数(分钟统计)超过闻值时,触发降级;时间窗口结束后,关闭降级
热点规则
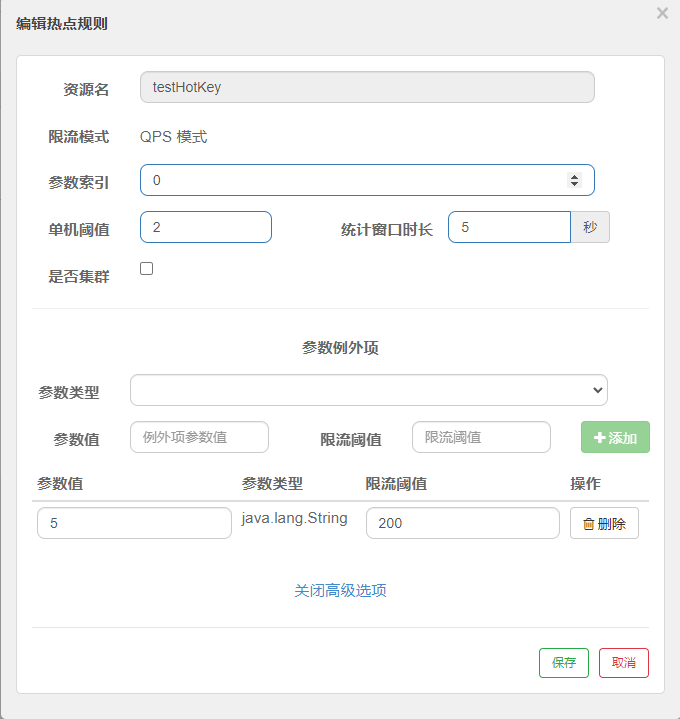
热点参数规则(ParamFlowRule)类似于流量控制规则(FlowRule):
| 属性 | 说明 | 默认值 |
|---|---|---|
| resource | 资源名,必填 | |
| count | 限流阈值,必填 | |
| grade | 限流模式 | QPS 模式 |
| durationInSec | 统计窗口时间长度(单位为秒),1.6.0 版本开始支持 | 1s |
| paramIdx | 热点参数的索引,必填,对应 SphU.entry(xxx, args) 中的参数索引位置 | |
| paramFlowItemList | 参数例外项,可以针对指定的参数值单独设置限流阈值,不受前面 count 阈值的限制。仅支持基本类型和字符串类型 |
@GetMapping("/testHotKey")
@SentinelResource(value = "testHotKey", blockHandler = "deal_testHotKey")
public String testHotKey(@RequestParam(value = "p1", required = false) String p1, @RequestParam(value = "p2", required = false) String p2) {
    return "--------testHotKey";
}

public String deal_testHotKey(String p1, String p2, BlockException exception) {
    return "系统繁忙,请稍后重试~";
}
系统规则
系统保护规则是从应用级别的入口流量进行控制,从单台机器的 load、CPU 使用率、平均 RT、入口 QPS 和并发线程数等几个维度监控应用指标,让系统尽可能跑在最大吞吐量的同时保证系统整体的稳定性。
系统保护规则是应用整体维度的,而不是资源维度的,并且仅对入口流量生效。入口流量指的是进入应用的流量(EntryType.IN),比如 Web 服务或 Dubbo 服务端接收的请求,都属于入口流量。
系统规则支持以下的模式:
- Load 自适应(仅对 Linux/Unix-like 机器生效):系统的 load1 作为启发指标,进行自适应系统保护。当系统 load1 超过设定的启发值,且系统当前的并发线程数超过估算的系统容量时才会触发系统保护(BBR 阶段)。系统容量由系统的
maxQps * minRt估算得出。设定参考值一般是CPU cores * 2.5。 - CPU usage(1.5.0+ 版本):当系统 CPU 使用率超过阈值即触发系统保护(取值范围 0.0-1.0),比较灵敏。
- 平均 RT:当单台机器上所有入口流量的平均 RT 达到阈值即触发系统保护,单位是毫秒。
- 并发线程数:当单台机器上所有入口流量的并发线程数达到阈值即触发系统保护。
- 入口 QPS:当单台机器上所有入口流量的 QPS 达到阈值即触发系统保护。
自定义限流处理
自定义限流处理类
@Component
public class CustomerBlockHandler {

    public static CommonResult handException(BlockException exception) {
        return new CommonResult(444, "服务不可用!!!");
    }

    public static CommonResult handException2(BlockException exception) {
        return new CommonResult(445, "系统繁忙,请稍后重试!!!");
    }

}
controller
@RestController
public class RateLimitController {

    @GetMapping(value = "/byResource")
    @SentinelResource(value = "byResource", blockHandler = "handleException")
    public CommonResult byResource() {
        return new CommonResult(200, "按照资源名限流测试", new Payment(2020L, "serial001"));
    }

    public CommonResult handleException(BlockException exception) {
        return new CommonResult(444, exception.getClass().getCanonicalName() + "  服务不可用");
    }

    @GetMapping(value = "/rateLimit/byUrl")
    @SentinelResource(value = "byUrl")
    public CommonResult byUrl() {
        return new CommonResult(200, "按照URL限流测试", new Payment(2020L, "serial001"));
    }

    @GetMapping(value = "/rateLimit/customerBlockHandler")
    @SentinelResource(value = "customerBlockHandler", blockHandlerClass = CustomerBlockHandler.class, blockHandler = "handException2")
    public CommonResult customerBlockHandler() {
        return new CommonResult(200, "按照自定义限流测试", new Payment(2020L, "serial001"));
    }

}
规则持久化
新增yml配置
sentinel:
  transport:
    dashboard: localhost:8080 #配置Sentinel dashboard地址
    port: 8719
  datasource:
    ds1:
      nacos:
        server-addr: localhost:8848
        dataId: cloudalibaba-sentinel-service
        groupId: DEFAULT_GROUP
        data-type: json
        rule-type: flow

在Sentinel配置页面新增流控规则后,F12拉取配置的json,在Nacos中新增配置,用来持久化规则配置。新增配置完成后,重启服务,该服务的相关Sentinel规则配置不会丢失。

分布式事务Seata
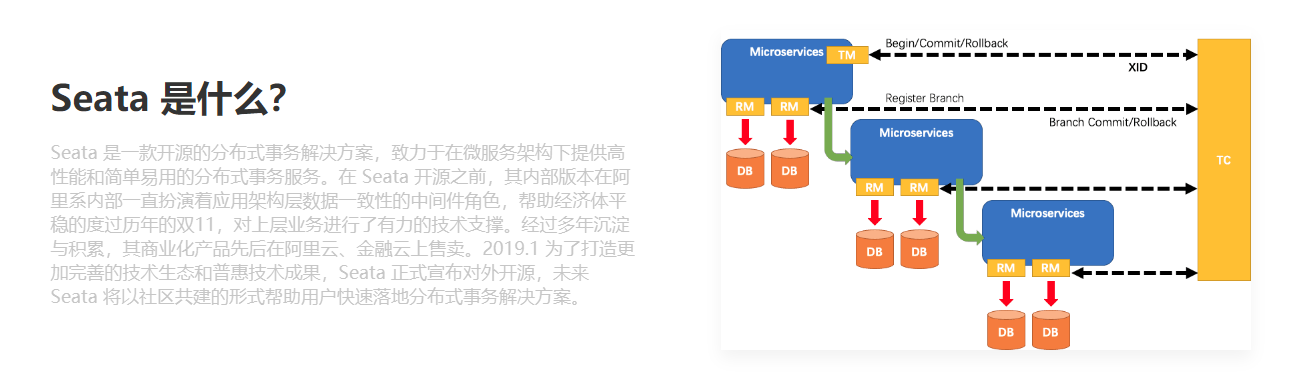
Seata术语
TC (Transaction Coordinator) - 事务协调者
维护全局和分支事务的状态,驱动全局事务提交或回滚。
TM (Transaction Manager) - 事务管理器
定义全局事务的范围:开始全局事务、提交或回滚全局事务。
RM (Resource Manager) - 资源管理器
管理分支事务处理的资源,与TC交谈以注册分支事务和报告分支事务的状态,并驱动分支事务提交或回滚。
Seata-Server下载配置启动
下载地址:https://github.com/seata/seata/releases
配置
-
修改/conf/file.conf 文件,连接数据库
transport { # tcp udt unix-domain-socket type = "TCP" #NIO NATIVE server = "NIO" #enable heartbeat heartbeat = true #thread factory for netty thread-factory { boss-thread-prefix = "NettyBoss" worker-thread-prefix = "NettyServerNIOWorker" server-executor-thread-prefix = "NettyServerBizHandler" share-boss-worker = false client-selector-thread-prefix = "NettyClientSelector" client-selector-thread-size = 1 client-worker-thread-prefix = "NettyClientWorkerThread" # netty boss thread size,will not be used for UDT boss-thread-size = 1 #auto default pin or 8 worker-thread-size = 8 } shutdown { # when destroy server, wait seconds wait = 3 } serialization = "seata" compressor = "none" } service { #vgroup->rgroup vgroup_mapping.my_test_tx_group = "fsp_tx_group" #only support single node default.grouplist = "127.0.0.1:8091" #degrade current not support enableDegrade = false #disable disable = false #unit ms,s,m,h,d represents milliseconds, seconds, minutes, hours, days, default permanent max.commit.retry.timeout = "-1" max.rollback.retry.timeout = "-1" } client { async.commit.buffer.limit = 10000 lock { retry.internal = 10 retry.times = 30 } report.retry.count = 5 tm.commit.retry.count = 1 tm.rollback.retry.count = 1 } ## transaction log store store { ## store mode: file、db mode = "db" ## file store file { dir = "sessionStore" # branch session size , if exceeded first try compress lockkey, still exceeded throws exceptions max-branch-session-size = 16384 # globe session size , if exceeded throws exceptions max-global-session-size = 512 # file buffer size , if exceeded allocate new buffer file-write-buffer-cache-size = 16384 # when recover batch read size session.reload.read_size = 100 # async, sync flush-disk-mode = async } ## database store db { ## the implement of javax.sql.DataSource, such as DruidDataSource(druid)/BasicDataSource(dbcp) etc. datasource = "dbcp" ## mysql/oracle/h2/oceanbase etc. db-type = "mysql" driver-class-name = "com.mysql.jdbc.Driver" url = "jdbc:mysql://106.14.175.14:3306/seata" user = "seata" password = "123456" min-conn = 1 max-conn = 3 global.table = "global_table" branch.table = "branch_table" lock-table = "lock_table" query-limit = 100 } } lock { ## the lock store mode: local、remote mode = "remote" local { ## store locks in user's database } remote { ## store locks in the seata's server } } recovery { #schedule committing retry period in milliseconds committing-retry-period = 1000 #schedule asyn committing retry period in milliseconds asyn-committing-retry-period = 1000 #schedule rollbacking retry period in milliseconds rollbacking-retry-period = 1000 #schedule timeout retry period in milliseconds timeout-retry-period = 1000 } transaction { undo.data.validation = true undo.log.serialization = "jackson" undo.log.save.days = 7 #schedule delete expired undo_log in milliseconds undo.log.delete.period = 86400000 undo.log.table = "undo_log" } ## metrics settings metrics { enabled = false registry-type = "compact" # multi exporters use comma divided exporter-list = "prometheus" exporter-prometheus-port = 9898 } support { ## spring spring { # auto proxy the DataSource bean datasource.autoproxy = false } } -
修改/conf/registry.conf文件,注册到nacos
registry { # file 、nacos 、eureka、redis、zk、consul、etcd3、sofa type = "nacos" nacos { serverAddr = "localhost:8848" namespace = "" cluster = "default" } eureka { serviceUrl = "http://localhost:8761/eureka" application = "default" weight = "1" } redis { serverAddr = "localhost:6379" db = "0" } zk { cluster = "default" serverAddr = "127.0.0.1:2181" session.timeout = 6000 connect.timeout = 2000 } consul { cluster = "default" serverAddr = "127.0.0.1:8500" } etcd3 { cluster = "default" serverAddr = "http://localhost:2379" } sofa { serverAddr = "127.0.0.1:9603" application = "default" region = "DEFAULT_ZONE" datacenter = "DefaultDataCenter" cluster = "default" group = "SEATA_GROUP" addressWaitTime = "3000" } file { name = "file.conf" } } config { # file、nacos 、apollo、zk、consul、etcd3 type = "file" nacos { serverAddr = "localhost" namespace = "" } consul { serverAddr = "127.0.0.1:8500" } apollo { app.id = "seata-server" apollo.meta = "http://192.168.1.204:8801" } zk { serverAddr = "127.0.0.1:2181" session.timeout = 6000 connect.timeout = 2000 } etcd3 { serverAddr = "http://localhost:2379" } file { name = "file.conf" } } -
执行/conf/db_store.sql
-- the table to store GlobalSession data drop table if exists `global_table`; create table `global_table` ( `xid` varchar(128) not null, `transaction_id` bigint, `status` tinyint not null, `application_id` varchar(32), `transaction_service_group` varchar(32), `transaction_name` varchar(128), `timeout` int, `begin_time` bigint, `application_data` varchar(2000), `gmt_create` datetime, `gmt_modified` datetime, primary key (`xid`), key `idx_gmt_modified_status` (`gmt_modified`, `status`), key `idx_transaction_id` (`transaction_id`) ); -- the table to store BranchSession data drop table if exists `branch_table`; create table `branch_table` ( `branch_id` bigint not null, `xid` varchar(128) not null, `transaction_id` bigint , `resource_group_id` varchar(32), `resource_id` varchar(256) , `lock_key` varchar(128) , `branch_type` varchar(8) , `status` tinyint, `client_id` varchar(64), `application_data` varchar(2000), `gmt_create` datetime, `gmt_modified` datetime, primary key (`branch_id`), key `idx_xid` (`xid`) ); -- the table to store lock data drop table if exists `lock_table`; create table `lock_table` ( `row_key` varchar(128) not null, `xid` varchar(96), `transaction_id` long , `branch_id` long, `resource_id` varchar(256) , `table_name` varchar(32) , `pk` varchar(36) , `gmt_create` datetime , `gmt_modified` datetime, primary key(`row_key`) ); -
先启动nacos,再启动seate /bin/seata-server.bat
Seata全局异常配置
@GlobalTransactional(name = “fsp-create-order”, rollbackFor = Exception.class)
/**
     * 创建订单->调用库存服务扣减库存->调用账户服务扣减账户余额->修改订单状态
     * 简单说:下订单->扣库存->减余额->改状态
     */
@Override
@GlobalTransactional(name = "fsp-create-order", rollbackFor = Exception.class)
public void createOrder(Order order) {
    log.info("----->开始新建订单");
    //1 新建订单
    orderDao.create(order);

    //2 扣减库存
    log.info("----->订单微服务开始调用库存,做扣减Count");
    storageService.decrease(order.getProductId(), order.getCount());
    log.info("----->订单微服务开始调用库存,做扣减end");

    //3 扣减账户
    log.info("----->订单微服务开始调用账户,做扣减Money");
    accountService.decrease(order.getUserId(), order.getMoney());
    log.info("----->订单微服务开始调用账户,做扣减end");

    //4 修改订单状态,从零到1,1代表已经完成
    log.info("----->修改订单状态开始");
    orderDao.update(order.getUserId(), 0);
    log.info("----->修改订单状态结束");

    log.info("----->下订单结束了,O(∩_∩)O哈哈~");
}


 664
664


 被折叠的 条评论
为什么被折叠?
被折叠的 条评论
为什么被折叠?
 到【灌水乐园】发言


