Vite2 + Vue3 + TypeScript + Pinia +ElementPlus搭建项目

本文介绍了如何使用Vite2,Vue3,TypeScript,Pinia和ElementPlus搭建前端项目。从创建项目到配置路由、axios、ElementPlus,再到安装Pinia和设置环境变量,详细阐述了每个步骤,并解决了eslint和prettier的冲突问题。
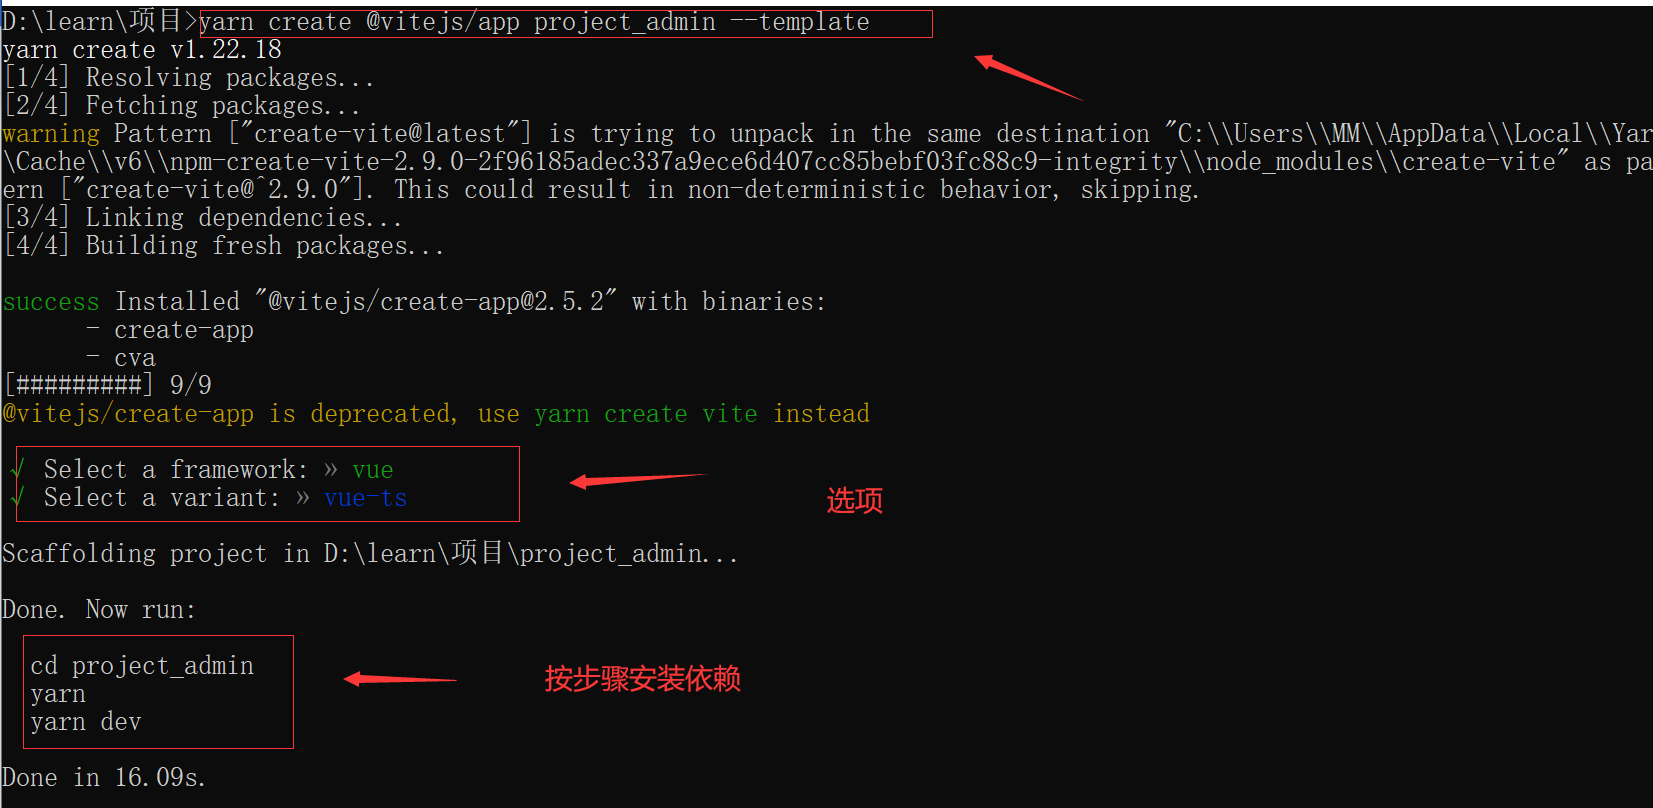
摘要由CSDN通过智能技术生成

一、vite2创建项目

兼容性注意:Vite 需要 Node.js 版本 >= 12.0.0。

在创建项目文件目录下打开 cmd 运行以下命令

# npm 6.x
npm init @vitejs/app projectName --template

# npm 7+, 需要额外的双横线:
npm init @vitejs/app projectName -- --template

# yarn
yarn create @vitejs/app projectName --template

![image.png](https://img-blog.csdnimg.cn/img_convert/3fdcd50f85a804bd3269078d84618c4c.png#clientId=uf30abecb-412b-4&crop=0&crop=0&crop=1&crop=1&from=paste&height=462&id=u60e33100&margin=[object Object]&name=image.png&originHeight=808&originWidth=1653&originalType=binary&ratio=1&rotation=0&showTitle=false&size=121990&status=done&style=none&taskId=ub2a8537f-3a3b-48e3-95f7-161add8ae64&title=&width=944.5714285714286)

二、安装sass插件

//yarn
yarn add sass --dev

//npm
npm i sass -D

就直接使用了,不用像webpack 还要安装sass-loader

三、安装路由

//npm
npm install vue-router

//yarn
yarn add vue-router
  1. 在 src 文件下新增 router 文件夹 => index.ts 文件
import {
    createRouter, createWebHistory, RouteRecordRaw } from 'vue-router'

const routes: RouteRecordRaw[] = [
  {
   
    path: '/',
    name: 'Login',
    component: () => import('xxxx'), // 注意这里要带上 文件后缀.vue
  },
]

const router = createRouter({
   
  history: createWebHistory(),
  routes,
})

export default router


  1. mian.ts 引入
import {
    createApp } from 'vue'
import App from './App.vue'
import router from './router/index'

const app = createApp(App)

//链式
app.use(router).mount('#app')

四、安装axios

yarn add axios

npm i axios -S

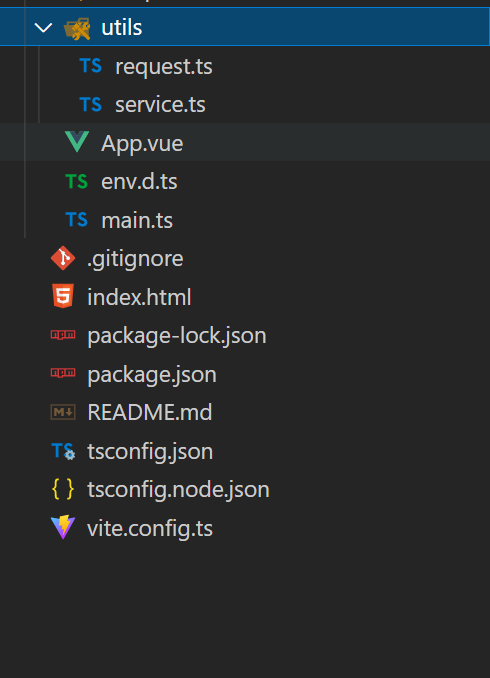
在 src 文件下新增 utils 文件夹,service.ts 和 request.ts
![image.png](https://img-blog.csdnimg.cn/img_convert/03eb23b3bde02518e69bcc5bbf970e4f.png#clientId=u1e499d95-2955-4&crop=0&crop=0&crop=1&crop=1&from=paste&height=387&id=u75ec5e02&margin=[object Object]&name=image.png&originHeight=678&originWidth=490&originalType=binary&ratio=1&rotation=0&showTitle=false&size=39460&status=done&style=none&taskId=u6643d583-8108-4fd6-a658-2927af6bc04&title=&width=280)

  • service.ts:用与创建axios实例,统一配置请求拦截器、响应拦截…
/**
 * axios 请求配置
 */
import axios, {
    AxiosRequestConfig, AxiosResponse } from 'axios'
import {
    ElNotification } from 'element-plus'

/** 
 * 请求失败后的错误统一处理 
 * @param status 请求失败的状态码
 */
const errorHandle = (status: number) => {
   
    // 状态码判断
    switch (status) {
   
        case 302: ElNotification.error('接口重定向了!');
            break;
        case 400:
            ElNotification.error("发出的请求有错误,服务器没有进行新建或修改数据的操作==>" + status)
            break;
        // 401: 未登录
        // 未登录则跳转登录页面,并携带当前页面的路径
        // 在登录成功后返回当前页面,这一步需要在登录页操作。                
        case 401: //重定向
            ElNotification.error("token:登录失效==>" + status)
            break;
        // 403 token过期
        // 清除token并跳转登录页
        case 403:
            ElNotification.error("登录过期,用户得到授权,但是访问是被禁止的==>" + status)
            break;
        case 404:
            ElNotification.error("网络请求不存在==>" + status)
            break;
        case 406:
            ElNotification.error("请求的格式不可得==>" + status)
            break;
        case 408: ElNotification.error(" 请求超时!")
            break;
        case 410:
            ElNotification.error("请求的资源被永久删除,且不会再得到的==>" + status)
            break;
        case 422:
            ElNotification.error("当创建一个对象时,发生一个验证错误==>" + status)
            break;
        case 500:
            ElNotification.error("服务器发生错误,请检查服务器==>" + status)
            break;
        case 502:
            ElNotification.error("网关错误==>" + status)
            break;
        case 503:
            ElNotification.error("服务不可用,服务器暂时过载或维护==>" + status)
            break;
        case 504:
            ElNotification.error("网关超时==>" + status)
            break;
        default:
            ElNotification.error("其他错误错误==>" + status)
    }
}

//axios创建实例
const service = axios.create({
   
    //默认地址
    baseURL: "",
    // baseURL: "",
    //请求超时时间
    timeout: 3000,
    //配置请求头
    headers: 
你好!对于使用 Vue 3、TypeScript 和 Vite 来搭建项目,并结合 Pinia 进行状态管理,你可以按照以下步骤进行操作: 1. 首先,确保你已经安装了 Node.js 和 npm(或者使用 yarn)。 2. 创建一个新的项目文件夹,并进入该文件夹。 3. 在终端中运行以下命令来初始化一个新的 Vue 3 项目: ``` npm init vite@latest ``` 在初始化过程中,选择使用 Vue 3、TypeScript 和默认配置。 4. 进入项目文件夹并安装依赖: ``` cd <project-folder> npm install ``` 5. 接下来,安装 Pinia: ``` npm install pinia ``` 6. 在 `src` 目录下创建一个 `store` 文件夹,并在其中创建名为 `index.ts` 的文件。 7. 在 `index.ts` 中编写你的 Pinia store。例如,你可以创建一个名为 `counter` 的 store,并且在其中定义一个状态和一些操作: ```typescript import { defineStore } from 'pinia'; export const useCounterStore = defineStore('counter', { state: () => ({ count: 0, }), actions: { increment() { this.count++; }, decrement() { this.count--; }, }, }); ``` 8. 在应用的入口文件 `main.ts` 中导入并使用 Pinia: ```typescript import { createApp } from 'vue'; import { createPinia } from 'pinia'; import App from './App.vue'; const app = createApp(App); const pinia = createPinia(); app.use(pinia); app.mount('#app'); ``` 9. 在组件中使用 Pinia store。在你的 Vue 组件中,可以使用 `useStore` 函数来访问 Pinia store: ```typescript import { useCounterStore } from '../store'; export default { setup() { const counterStore = useCounterStore(); return { counterStore, }; }, }; ``` 10. 最后,你可以在组件中使用 `counterStore` 来访问状态和操作: ```vue <template> <div> <p>{{ counterStore.count }}</p> <button @click="counterStore.increment()">Increment</button> <button @click="counterStore.decrement()">Decrement</button> </div> </template> <script> import { useCounterStore } from '../store'; export default { setup() { const counterStore = useCounterStore(); return { counterStore, }; }, }; </script> ``` 这样,你就可以使用 Vue 3、TypeScript、Vite 和 Pinia 搭建一个基本的项目并进行状态管理了。希望对你有帮助!如果还有其他问题,请随时问我。
评论 1
添加红包

请填写红包祝福语或标题

红包个数最小为10个

红包金额最低5元

当前余额3.43前往充值 >
需支付:10.00
成就一亿技术人!
领取后你会自动成为博主和红包主的粉丝 规则
hope_wisdom
发出的红包
实付
使用余额支付
点击重新获取
扫码支付
钱包余额 0

抵扣说明:

1.余额是钱包充值的虚拟货币,按照1:1的比例进行支付金额的抵扣。
2.余额无法直接购买下载,可以购买VIP、付费专栏及课程。

余额充值