


Overview
The complete application architecture of ESP Thread Border Router + Rainmaker as follows:
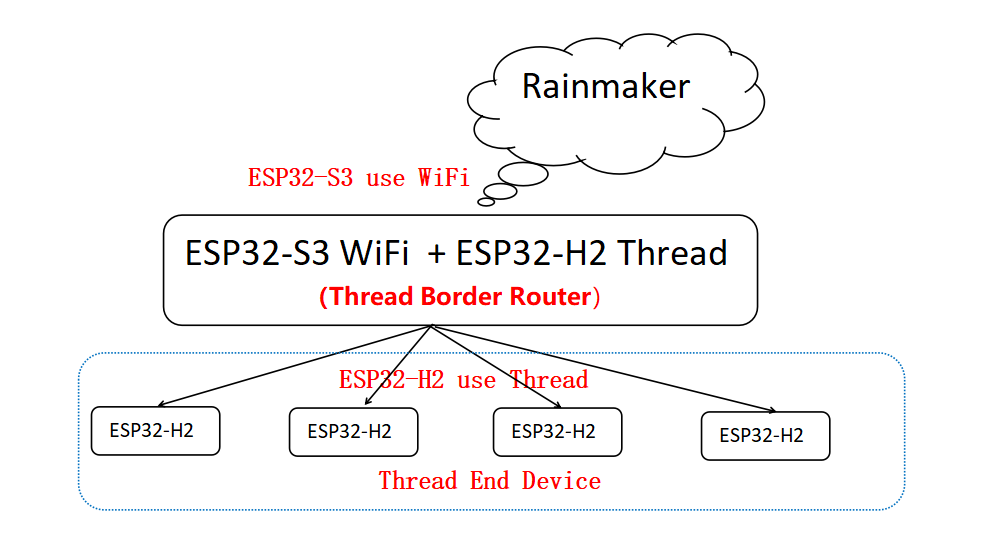
- The
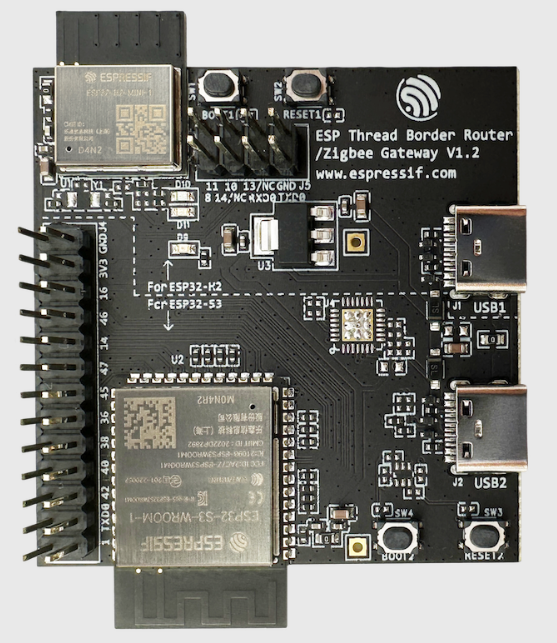
ESP Thread Border Routerdevice must used the WiFi and Threaddual chips, such as ESP32-S3 + ESP32-H2. The ESP32-S3 performs the WiFi function, and the ESP32-H2 performs the Thread function - The number of supported
Thread End devicesdepends on the memory of the WiFi module (ESP32-S3).
Test Preparation
1、PC Envirment:
- Linux or Ubuntu(Recommend)
- Windows 10
- MacOS
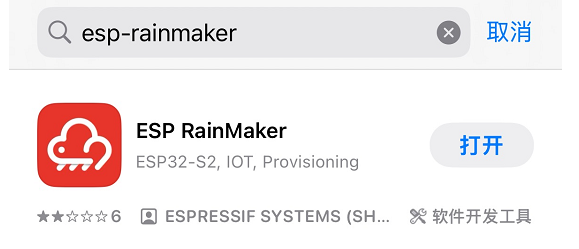
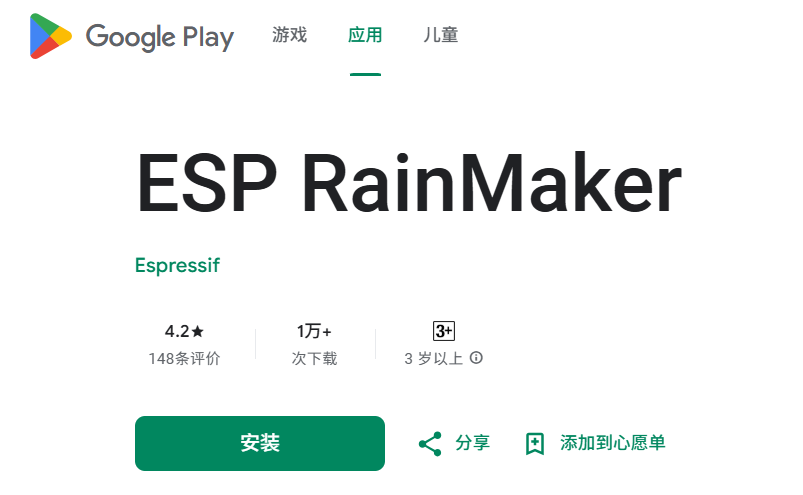
2、Install the ESP-Rainmaker APP on Phone
-
ESP-Rainmaker APP of IOS version :Search for
ESP-Rainmakerin theAPP Storeand install it.
-
ESP-Rainmaker APP of Android version:Install it on Google Play
3、Hardware Preparation:
4、Software Preparation:
-
esp-idf SDK
RCP Devicedownload the esp-idf/examples/openthread/ot_rcp example
-
esp-rainmaker SDK
Thread Border Router Devicedownload the esp-rainmaker/examples/thread_br exampleThread End Devicedownload the esp-rainmaker/examples/led_light example
Set up the ESP-IDF envirment
Step 1 :
First, You need to set up the ESP-IDFsoftware envirment,please refer to ESP-IDF SDK Installation Guide
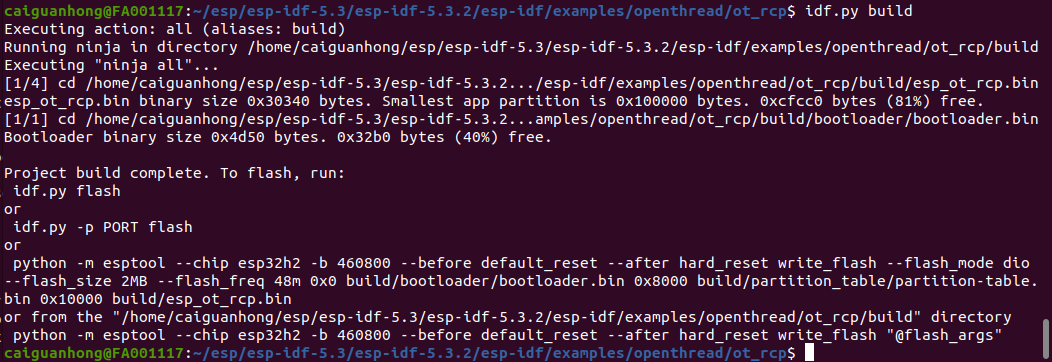
Step 2 :
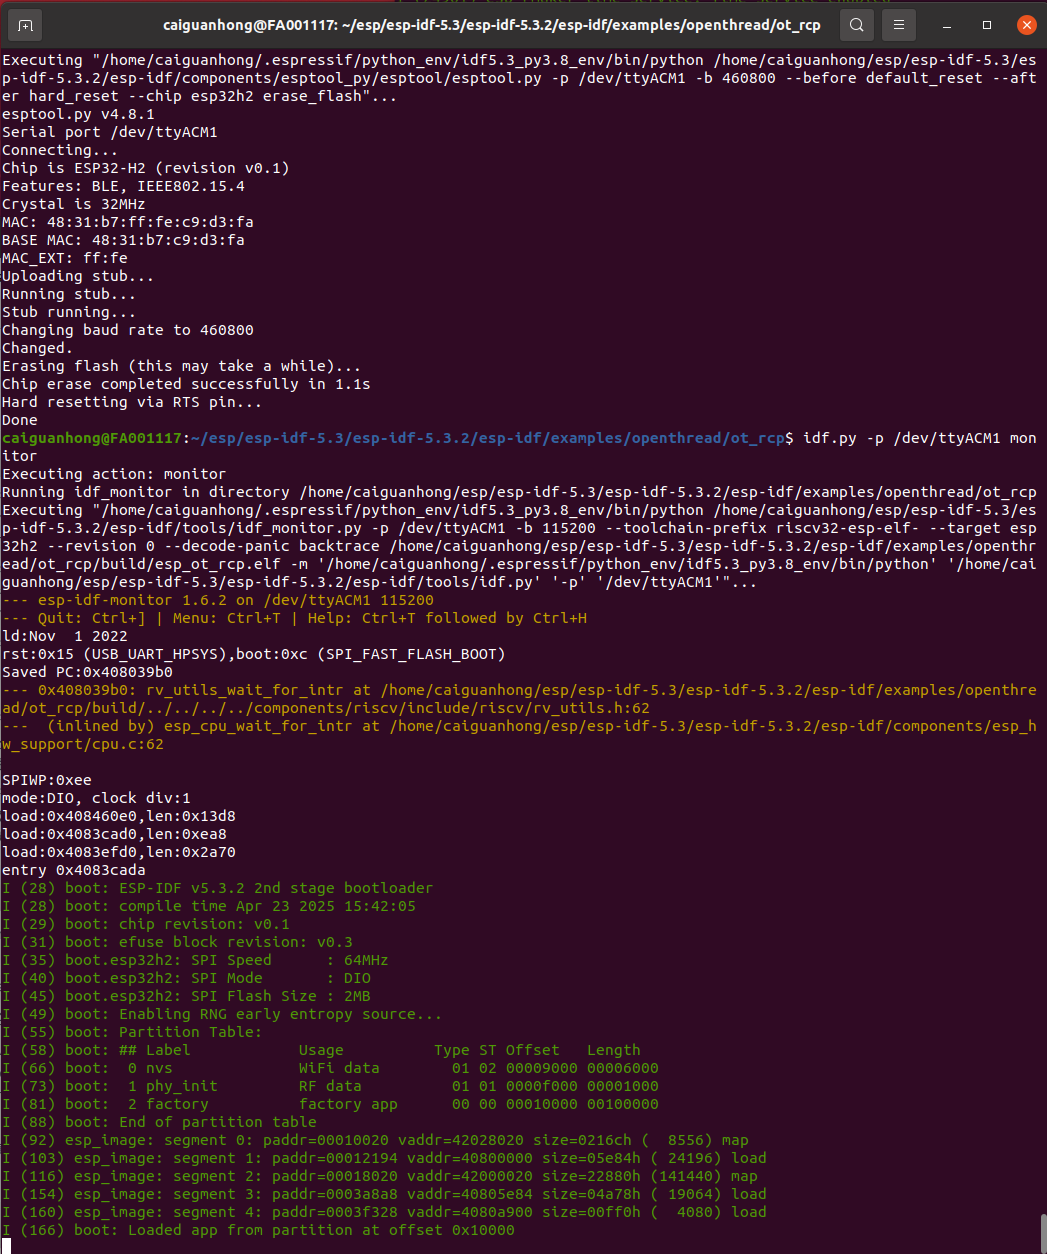
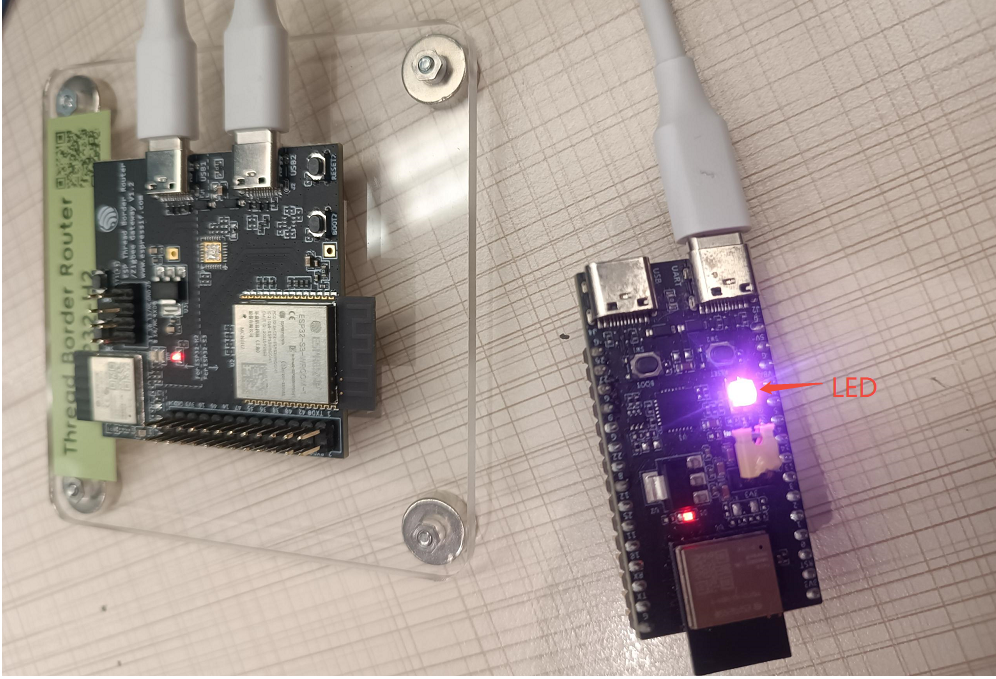
Then, you need to compilation the esp-idf/examples/openthread/ot_rcp example,this is to prepare for downloading the firmware for the RCP device. The RCP Device is the ESP32-H2 on ESP Thread Border Router/Zigbee Gateway board.
cd esp-idf/examples/openthread/ot_rcp

idf.py set-target esp32h2

idf.py build
Set up the ESP-Rainmaker envirment
Step 1 :
Clone esp-rainmaker SDK
git clone https://github.com/espressif/esp-rainmaker

cd esp-rainmaker

git submodule update --init --recursive

git pull
Step 2 :
Compilation the esp-rainmaker/examples/thread_br example,and download the firmware to ESP32-S3 on Thread Border Router board
cd esp-rainmaker/examples/thread_br

idf.py set-target esp32s3

idf.py menuconfig
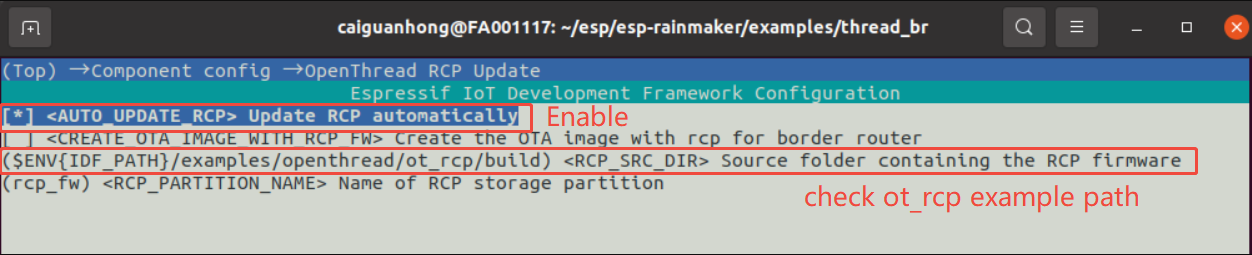
After running the idf.py menuconfig command,the following configuration options need to be enabled and modified:
-> Component config -> OpenThread Rcp Update- **Enable
[*] <AUTO UPDATE RcP> Update RCP automatically** - To checkout the
ot_rcpexample path - The firmware of the
RCP devicewill be transmitted by ESP32-S3 through theUARTinterface and written to the Flash
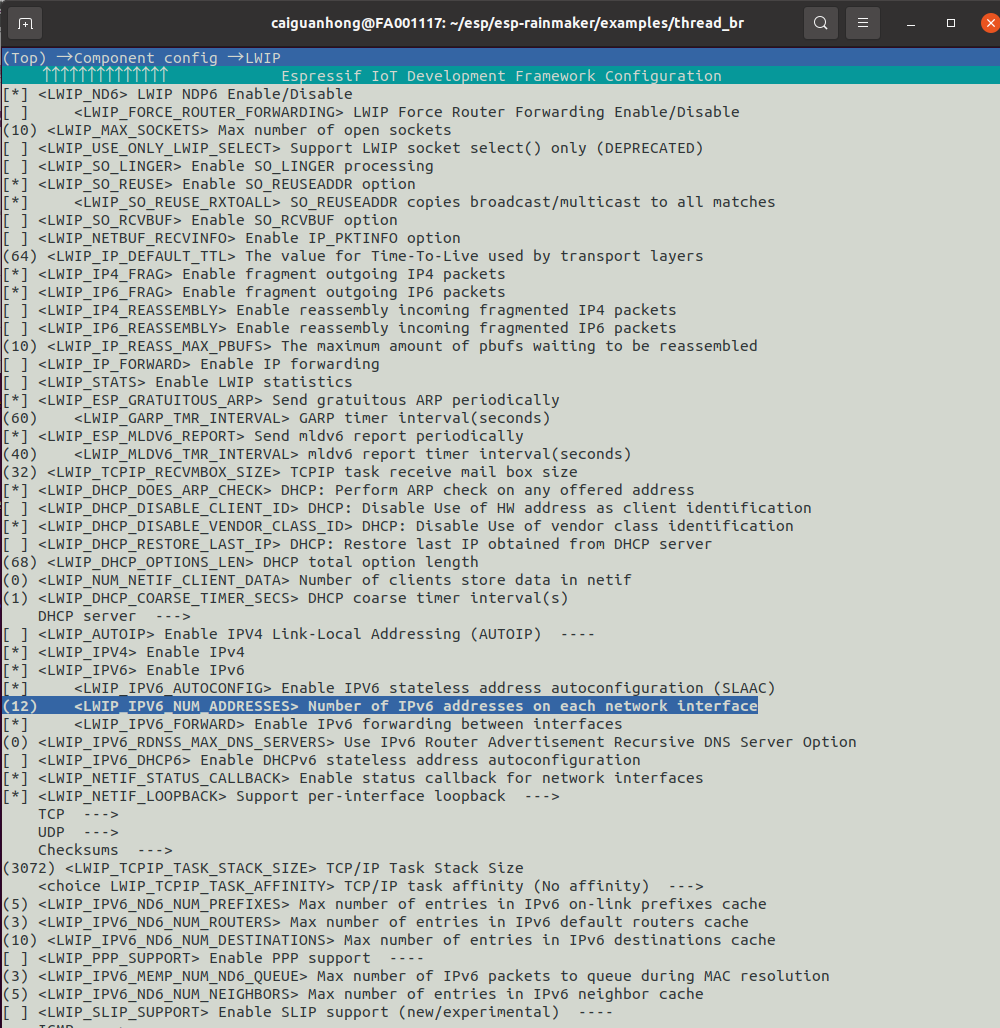
- **Enable
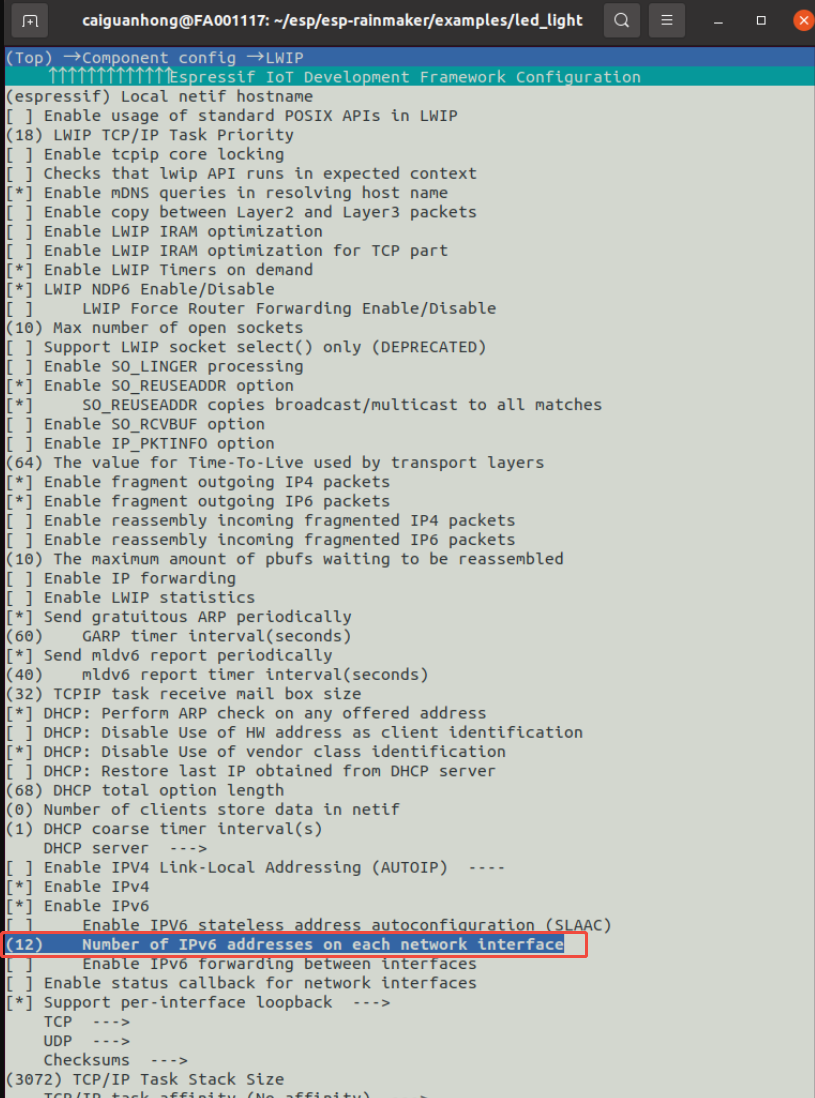
-> Component config -> LWIP- Modify the
LWIP_IPV6_NUM_ADDRESSaddress from the default8to12
- Modify the
idf.py build

idf.py -p /dev/ttyACM0 erase_flash flash monitor
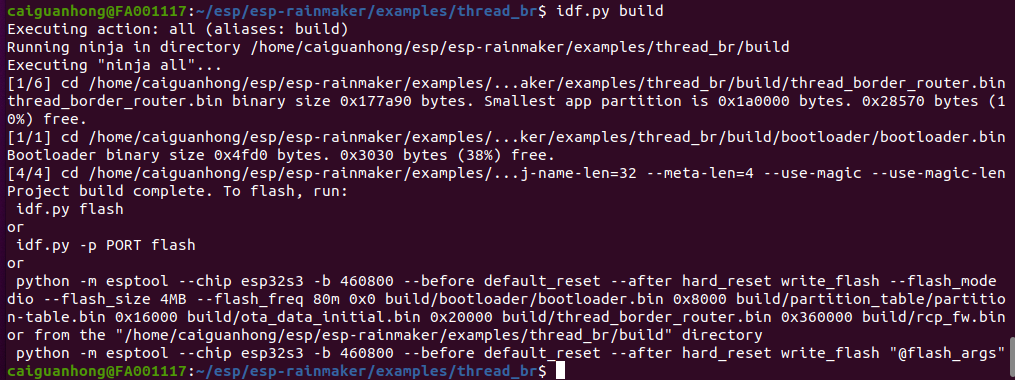
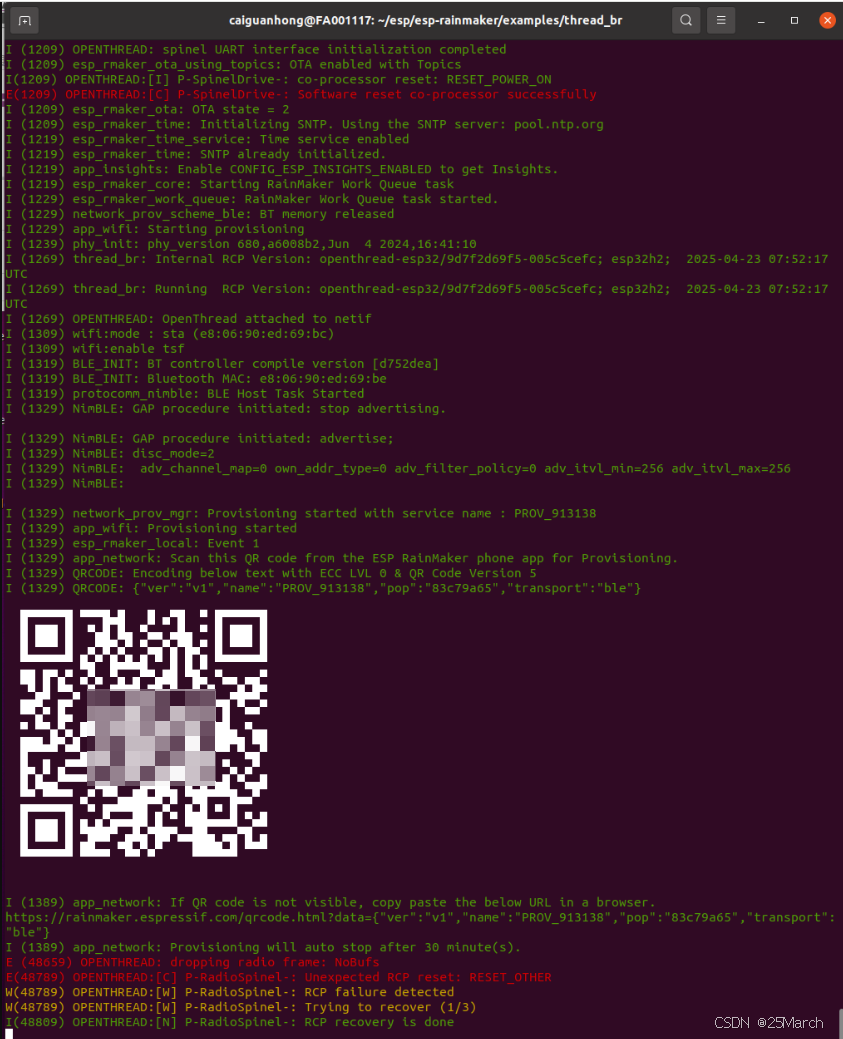
ESP32-S3 running the esp-rainmaker/examples/thread_br example and will print log as follows:
Step 3:Load the firmware for the RCP device
- On the ESP32-S3 device, the log of the firmware transmission for the
RCP devicewill be printed as follows:
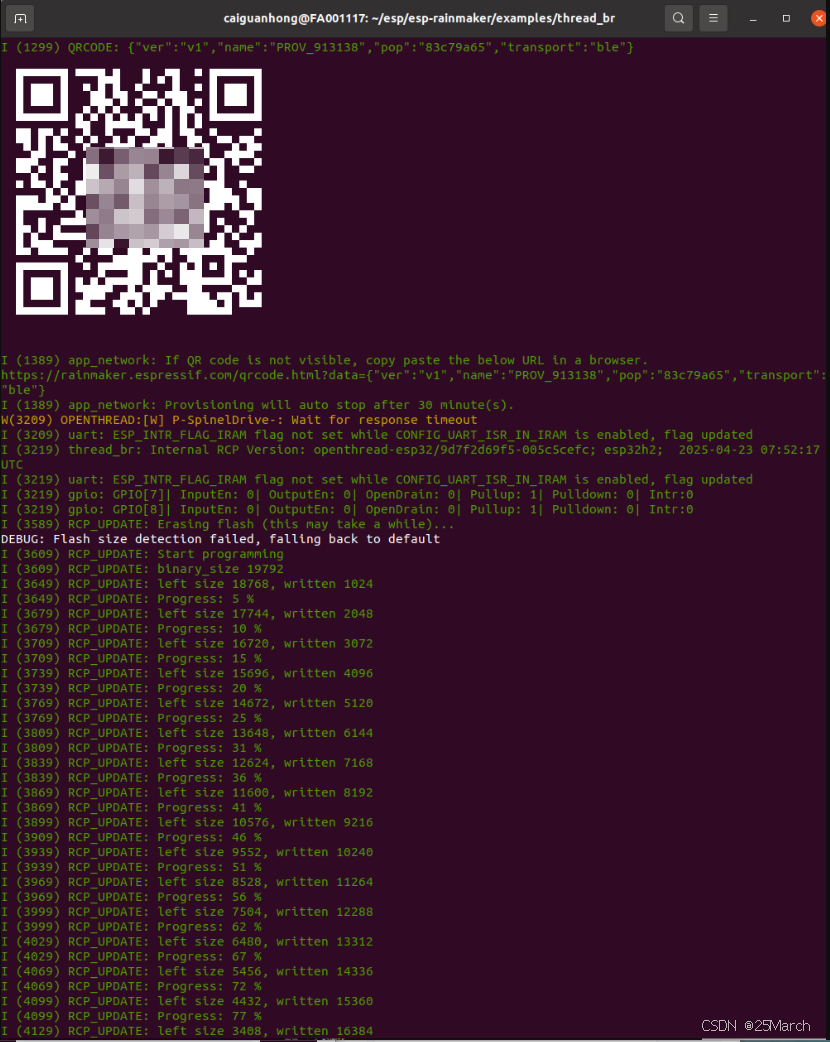
After the RCP firmware is loaded, the ESP32-S3 device will restart the software.
At this point, you can monitor the firmware running log on RCP Device as follows:
Step 4:Download the firmware for the Thread End Device
- Compilation the esp-rainmaker/examples/led_light example
cd esp-rainmaker/examples/led_light

idf.py set-target esp32h2

idf.py menuconfig
After running the idf.py menuconfig command,the following configuration options need to be modified:
-> Component config -> LWIP- Modify the
LWIP_IPV6_NUM_ADDRESSaddress from the default3to12
- Modify the
idf.py build

idf.py -p /dev/ttyUSB0 erase_flash flash monitor
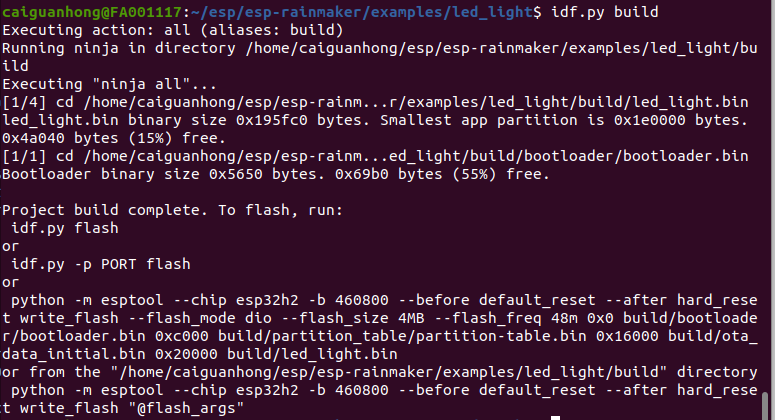
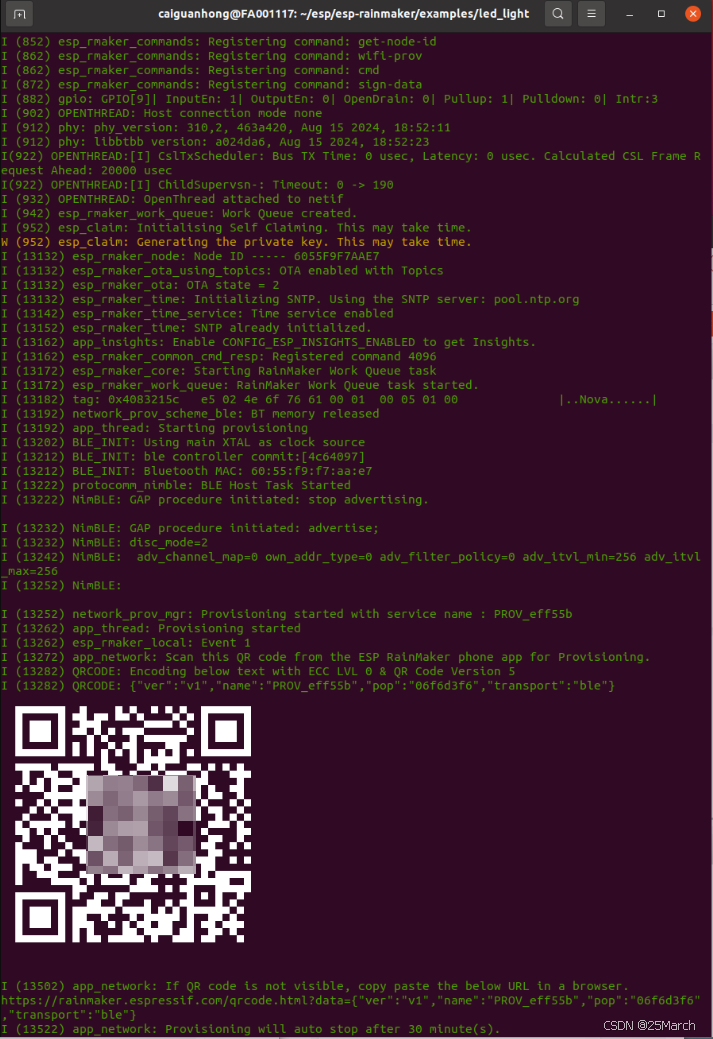
- ESP32-H2 Thread End Device running the esp-rainmaker/examples/led_light example and will print the follows log:
Step 5:Configure the network for the Thread Border Router
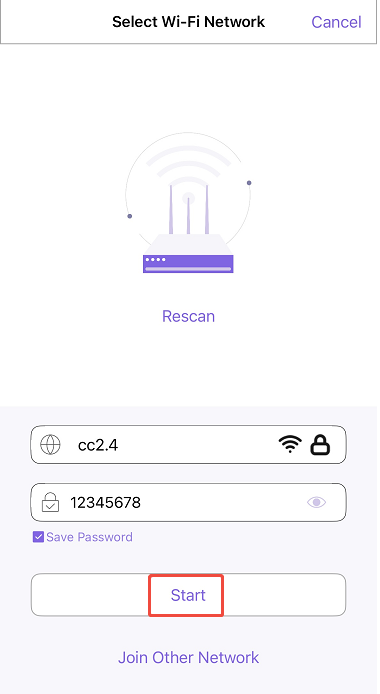
-
Open the
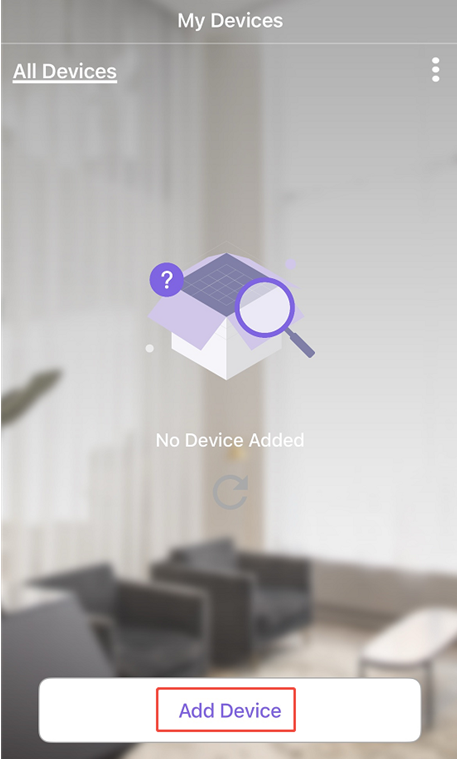
ESP-Rainmaker APPConfigure the network forThread Border Routerdevice -
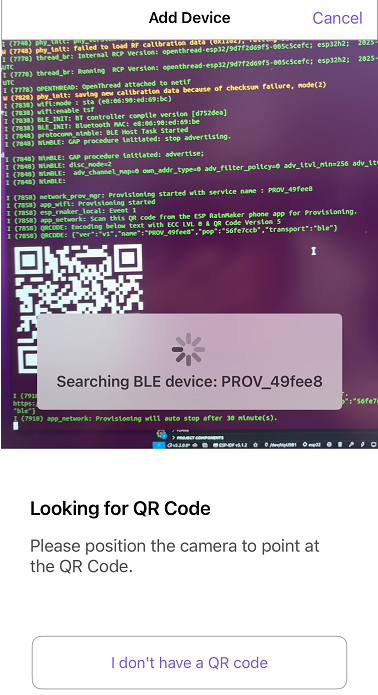
Click
Add Device
-
Scan the
QR codein ESP32-S3 log printf and goto the WiFi network configuration page

At this point, the phone can connect to a 2.4GHz WiFi hotspot. Then, select a 2.4GHz WiFi hotspot, send the WiFi connection informations, and click Start to configure the WiFi network
-
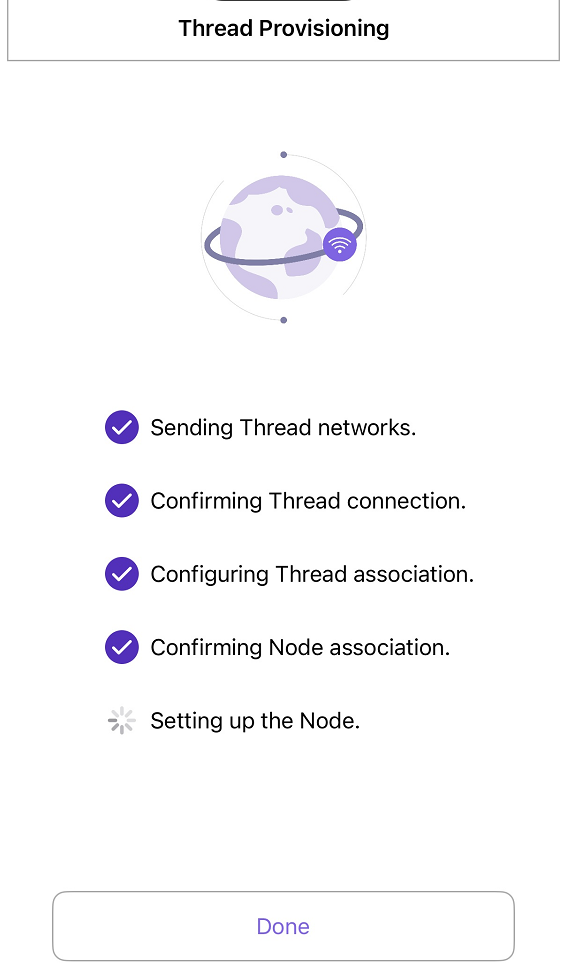
When the WiFi provisioning process has completed the
Confirming Node associationprocess, you can clickDoneto exit the provisioning page.
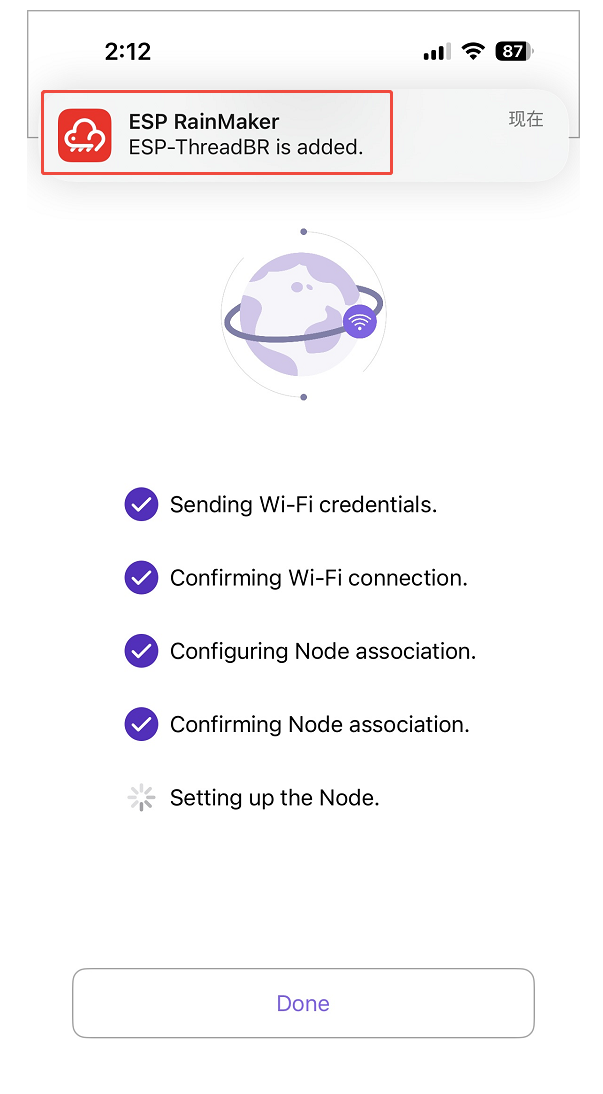
-
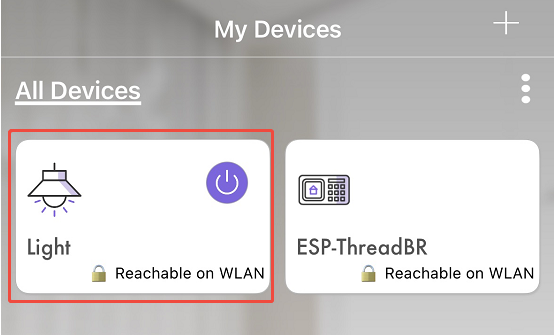
Then, you can seen that the
ESP-ThreadBRdevice has been added to the main page of the ESP-Rainmaker APP
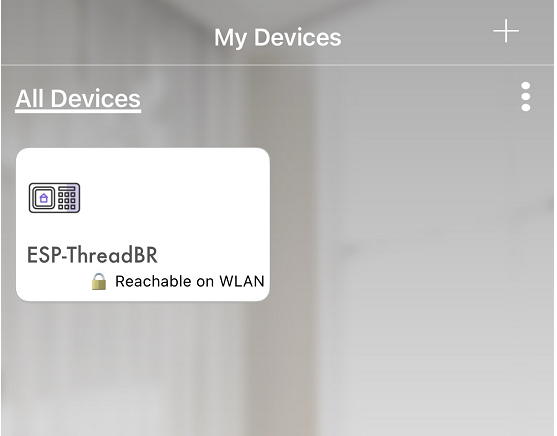
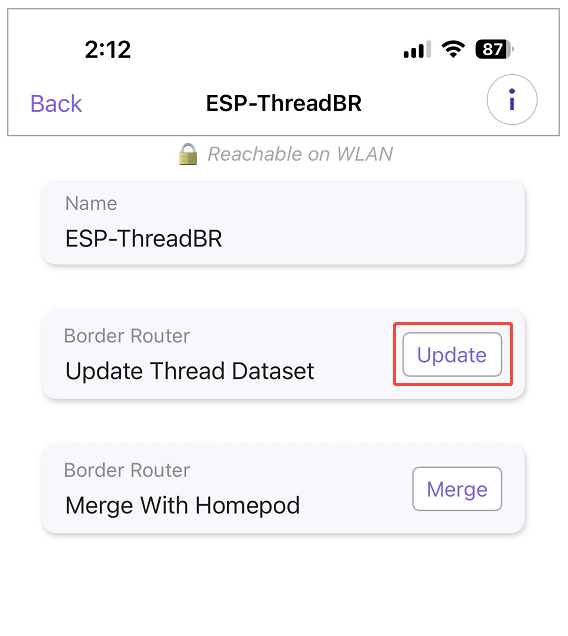
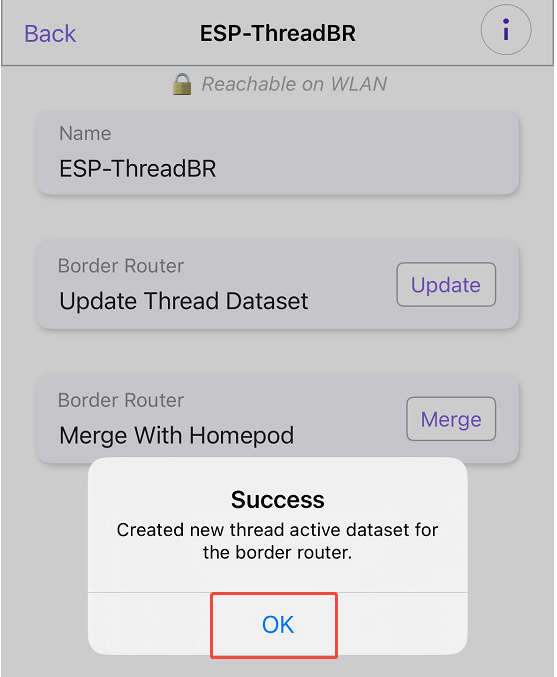
- Then click on the ESP-ThreadBR device control page and click on the
Update Thread DatasetSettings to update.
Step 6:Configure the network for Thread End devices
- Click the
+sign to add theThread End Device

-
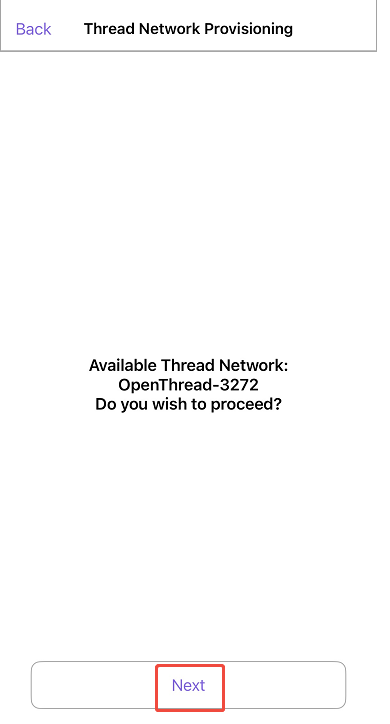
Scan the
QR codein the ESP32-H2Thread End Devicelog print and goto theThread networkconfigure page forThread End Device
-
Click
Next
- Goto the Thread network configure page for
Thread /End Device
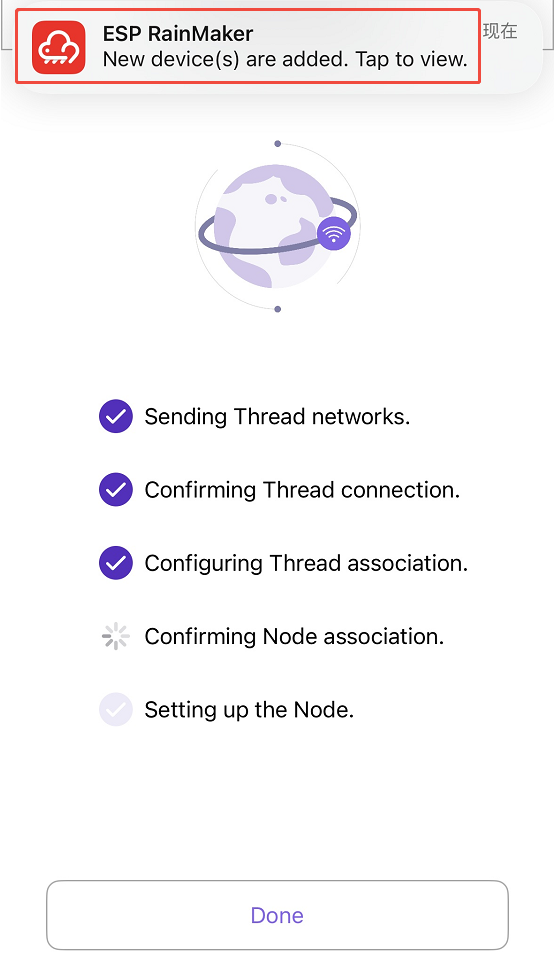
- When the Thread provisioning process has completed the
Confirming Node associationprocess, you can clickDoneto exit the Thread provisioning page.
- Then, you can seen that the
Light (Thread End Device)device has been added to the main page of the ESP-Rainmaker APP
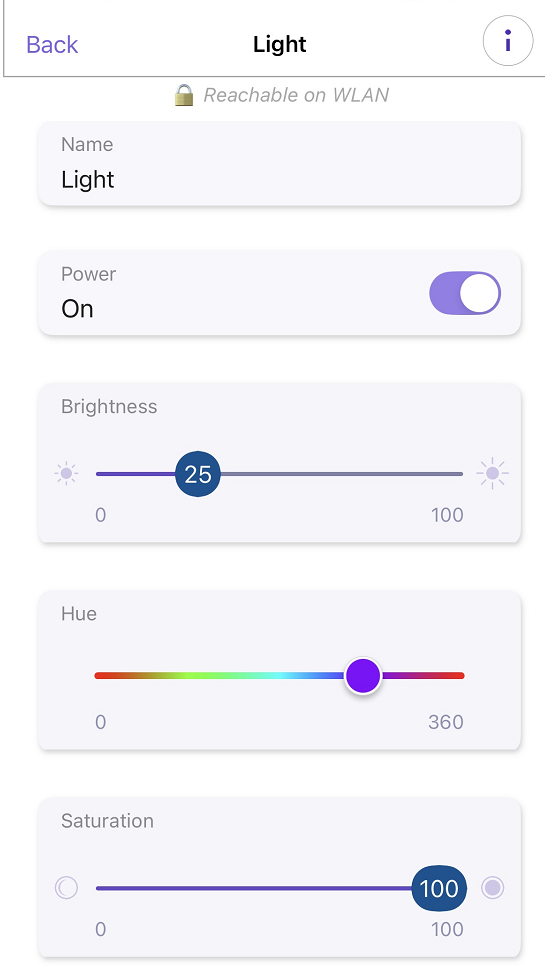
- Finally, goto the LED lights control page ,and you can turn on , turn off, adjust the color, and adjust the brightness the LEG light on ESP32-H2-DevKitM-1 board.


 被折叠的 条评论
为什么被折叠?
被折叠的 条评论
为什么被折叠?
 到【灌水乐园】发言


