


参考:
B站视频:猫狗识别(代码详解) - 使用TensorFlow + CNN 实现猫狗二分类_哔哩哔哩_bilibili
项目代码:https://github.com/JerrybroDu/cats_vs_dogs
数据集(网盘链接):https://pan.baidu.com/s/1PhvC1qZ1GuKVHMmZCjKmZA 提取码:dudu
面临的任务:
之前的:Segment Anything Model (SAM)本地部署,及应用于自己的数据集完成分割-CSDN博客
使用meta出品的segment-anything进行数据分割,得到每张图片的自动分割mask,但是,这些mask是各种各样的,并非所需要的特定mask。如下图:
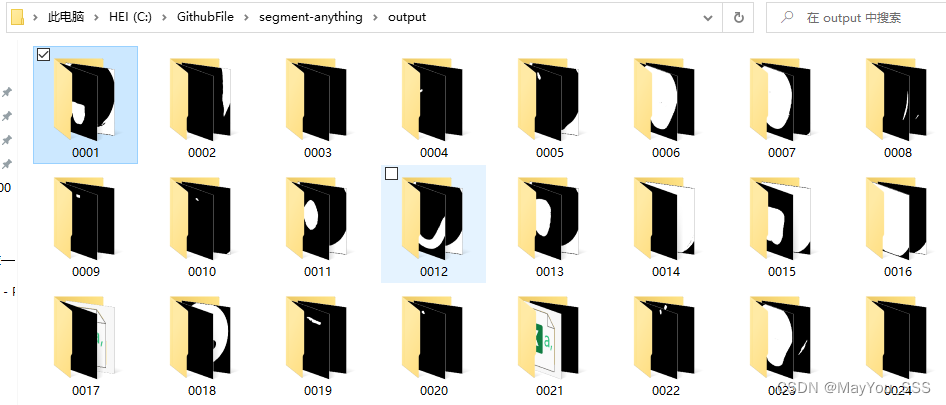
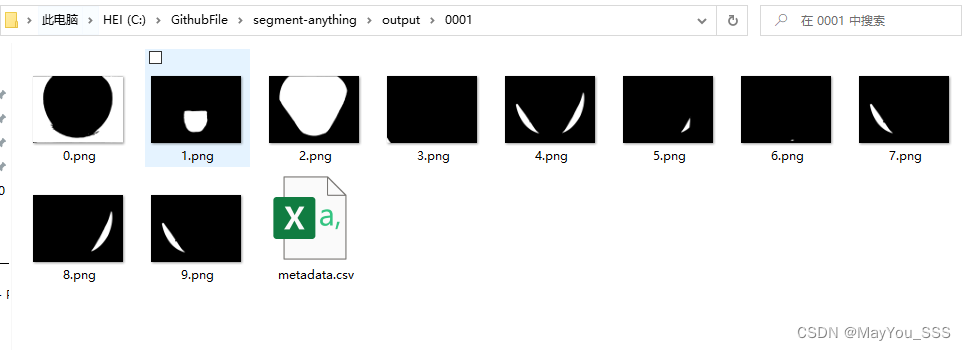
想要的其实是1.png这张图片。
所以就训练了一个二分类网络,来识别舌头的mask和背景。
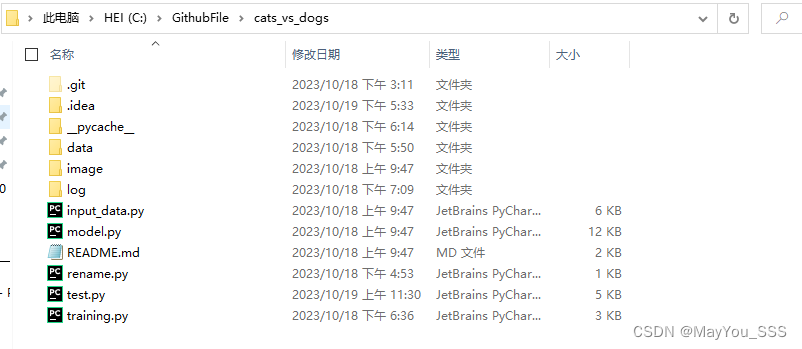
使用的代码:
代码结构:
train.py
"""
    training.py: 模型的训练及评估
"""
# import tensorflow as tf
import tensorflow.compat.v1 as tf
tf.disable_v2_behavior()
import os
import numpy as np
import matplotlib.pyplot as plt
import input_data
import model


N_CLASSES = 2  # 分类数,猫和狗
IMG_W = 208  # resize图片宽高,太大的话训练时间久
IMG_H = 208
BATCH_SIZE = 16  # 每批次读取数据的数量
CAPACITY = 2000  # 队列最大容量
MAX_STEP = 10000  # 训练最大步数,一般5K~10k
learning_rate = 0.0001  # 学习率,一般小于0.0001

# train_dir = 'D:/WorkSpace/Dataset/cats_vs_dogs/data/train/'        # 训练集的文件夹路径
# logs_train_dir = 'D:/WorkSpace/work_to_pycharm/cats_vs_dogs/log/'  # 记录训练过程与保存模型的路径
train_dir = r'C:\GithubFile\cats_vs_dogs\data\all'                 # 训练集的文件夹路径
logs_train_dir = r'C:\GithubFile\cats_vs_dogs\log'  # 记录训练过程与保存模型的路径

# 获取要训练的图片和对应的图片标签, 这里返回的train_img是存放猫狗图片路径的列表,train_label是存放对train对应标签的列表(0是猫,1是狗)
train_img, train_label = input_data.get_files(train_dir)

# 读取队列中的数据
train_batch, train_label_batch = input_data.get_batch(train_img, train_label, IMG_W, IMG_H, BATCH_SIZE, CAPACITY)

# 调用model方法得到返回值, 进行变量赋值
train_logits = model.cnn_inference(train_batch, BATCH_SIZE, N_CLASSES)
train_loss = model.losses(train_logits, train_label_batch)
train_op = model.training(train_loss, learning_rate)
train_acc = model.evaluation(train_logits, train_label_batch)

summary_op = tf.summary.merge_all()  # 将所有summary全部保存到磁盘,以便tensorboard显示

accuracy_list = []   # 记录准确率(每50步存一次)
loss_list = []       # 记录损失值(每50步存一次)
step_list = []       # 记录训练步数(每50步存一次)


with tf.Session() as sess:
    sess.run(tf.global_variables_initializer())                        # 变量初始化,如果存在变量则是必不可少的操作

    train_writer = tf.summary.FileWriter(logs_train_dir, sess.graph)   # 用于向logs_train_dir写入summary(训练)的目标文件
    saver = tf.train.Saver()                                           # 用于存储训练好的模型

    # 队列监控(训练的batch数据用到了队列)
    coord = tf.train.Coordinator()   # 创建线程协调器
    threads = tf.train.start_queue_runners(sess=sess, coord=coord)

    try:
        # 执行MAX_STEP步的训练,一步一个batch
        for step in np.arange(MAX_STEP):
            if coord.should_stop():   # 队列中的所有数据已被读出,无数据可读时终止训练
                break

            _op, tra_loss, tra_acc = sess.run([train_op, train_loss, train_acc])   # 在会话中才能读取tensorflow的变量值

            # 每隔50步打印一次当前的loss以及acc,同时记录log,写入writer
            if step % 50 == 0:
                print('Step %d, train loss = %.2f, train accuracy = %.2f%%' % (step, tra_loss, tra_acc * 100.0))
                summary_train = sess.run(summary_op)            # 调用sess.run(),生成的训练数据
                train_writer.add_summary(summary_train, step)   # 将训练过程及训练步数保存

            # 每隔100步画图,记录训练的准确率和损失值的结点
            if step % 100 == 0:
                accuracy_list.append(tra_acc)
                loss_list.append(tra_loss)
                step_list.append(step)

            # 每隔5000步,保存一次训练好的模型(即:训练好的模型的参数保存下来)
            if step % 5000 == 0 or (step + 1) == MAX_STEP:
                # ckpt文件是一个二进制文件,它把变量名映射到对应的tensor值
                checkpoint_path = os.path.join(logs_train_dir, 'model.ckpt')
                saver.save(sess, checkpoint_path, global_step=step)

        plt.figure()                    # 建立可视化图像框
        plt.plot(step_list, accuracy_list, color='b', label='cnn_accuracy')               # 蓝线为准确率
        plt.plot(step_list, loss_list, color='r', label='cnn_loss', linestyle='dashed')   # 红虚线为损失值
        plt.xlabel("Step")              # x轴取名
        plt.ylabel("Accuracy/Loss")     # y轴取名
        plt.legend()                    # 给图加上图例
        plt.show()                      # 显示图片

    except tf.errors.OutOfRangeError:
        print('Done training -- epoch limit reached')
    finally:
        coord.request_stop()   # 停止所有线程

    coord.join(threads)   # 等待所有线程结束
    sess.close()          # 关闭会话
test.py:
"""
test.py: 用训练好的模型对随机一张图片进行猫狗预测
"""
# import tensorflow as tf
import tensorflow.compat.v1 as tf
tf.disable_v2_behavior()
from PIL import Image
import matplotlib.pyplot as plt
import input_data
import model
import numpy as np
def get_one_image(img_list):
"""
输入:
img_list:图片路径列表
返回:
image:从图片路径列表中随机挑选的一张图片
"""
n = len(img_list) # 获取文件夹下图片的总数
ind = np.random.randint(0, n) # 从 0~n 中随机选取下标
img_dir = img_list[ind] # 根据下标得到一张随机图片的路径
image = Image.open(img_dir) # 打开img_dir路径下的图片
image = image.resize([208, 208]) # 改变图片的大小,定为宽高都为208像素
image = np.array(image) # 转成多维数组,向量的格式
return image
def evaluate_one_image():
# 修改成自己测试集的文件夹路径
test_dir = r'C:\GithubFile\cats_vs_dogs\data\test'
# test_dir = '/home/user/Dataset/cats_vs_dogs/test/'
test_img = input_data.get_files(test_dir)[0] # 获取测试集的图片路径列表
image_array = get_one_image(test_img) # 从测试集中随机选取一张图片
# 将这个图设置为默认图,会话设置成默认对话,这样在with语句外面也能使用这个会话执行。
with tf.Graph().as_default(): # 参考:https://blog.csdn.net/nanhuaibeian/article/details/101862790
BATCH_SIZE = 1 # 这里我们要输入的是一张图(预测这张随机图)
N_CLASSES = 2 # 还是二分类(猫或狗)
image = tf.cast(image_array, tf.float32) # 将列表转换成tf能够识别的格式
image = tf.image.per_image_standardization(image) # 图片标准化处理
image = tf.reshape(image, [1, 208, 208, 3]) # 改变图片的形状
logit = model.cnn_inference(image, BATCH_SIZE, N_CLASSES) # 得到神经网络输出层的预测结果
logit = tf.nn.softmax(logit) # 进行归一化处理(使得预测概率之和为1)
x = tf.placeholder(tf.float32, shape=[208, 208, 3]) # x变量用于占位,输入的数据要满足这里定的shape
# 修改成自己训练好的模型路径
logs_train_dir = 'D:/WorkSpace/work_to_pycharm/cats_vs_dogs/log/'
saver = tf.train.Saver()
with tf.Session() as sess:
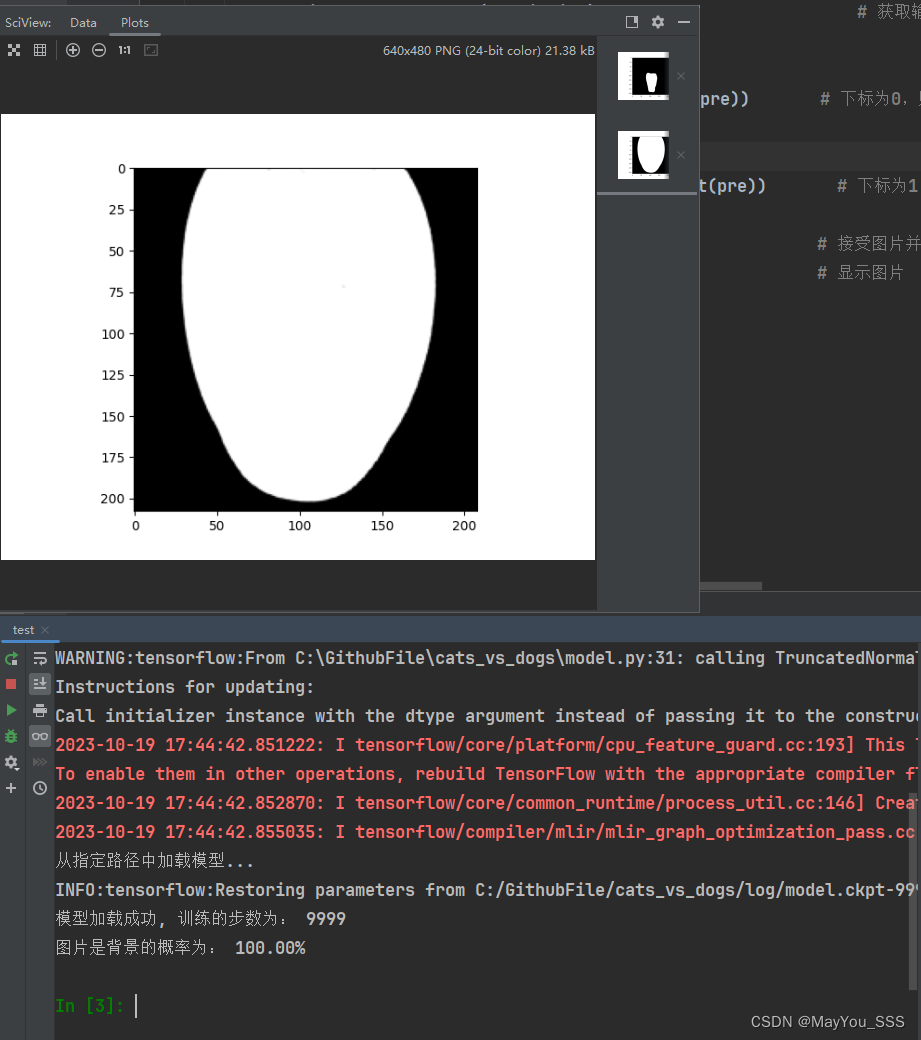
print("从指定路径中加载模型...")
ckpt = tf.train.get_checkpoint_state(logs_train_dir) # 读取路径下的checkpoint
# 载入模型,不需要提供模型的名字,会通过 checkpoint 文件定位到最新保存的模型
if ckpt and ckpt.model_checkpoint_path: # checkpoint存在且其存放的变量不为空
global_step = ckpt.model_checkpoint_path.split('/')[-1].split('-')[-1] # 通过切割获取ckpt变量中的步长
saver.restore(sess, ckpt.model_checkpoint_path) # 当前会话中,恢复该路径下模型的所有参数(即调用训练好的模型)
print('模型加载成功, 训练的步数为: %s' % global_step)
else:
print('模型加载失败,checkpoint文件没找到!')
# 通过saver.restore()恢复了训练模型的参数(即:神经网络中的权重值),这样logit才能得到想要的预测结果
# 执行sess.run()才能运行,并返回结果数据
prediction = sess.run(logit, feed_dict={x: image_array}) # 输入随机抽取的那张图片数据,得到预测值
max_index = np.argmax(prediction) # 获取输出结果中最大概率的索引(下标)
if max_index == 0:
pre = prediction[:, 0][0] * 100
print('图片是猫的概率为: {:.2f}%'.format(pre)) # 下标为0,则为猫,并打印是猫的概率
else:
pre = prediction[:, 1][0] * 100
print('图片是狗的概率为: {:.2f}%'.format(pre)) # 下标为1,则为狗,并打印是狗的概率
plt.imshow(image_array) # 接受图片并处理
plt.show() # 显示图片
if __name__ == '__main__':
# 调用方法,开始测试
evaluate_one_image()一些报错:
大部分报错来自包的问题,换一下就ok。
源代码基于猫狗数据集,这是个彩色图片数据集,而我用的是二值图像,所以要添加通道,即test.py中加入代码:
    image = np.expand_dims(image, axis=-1)
    image = np.concatenate([image]*3, axis=-1)  # 这两行代码,将通道补齐

得到的结果:
构建一个测试用的数据集

运行test.py文件,得到的结果:


 1761
1761

 被折叠的 条评论
为什么被折叠?
被折叠的 条评论
为什么被折叠?
 到【灌水乐园】发言


