


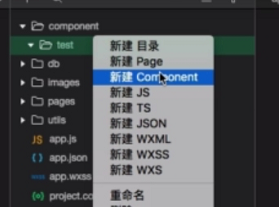
新建组件
新建component文件夹,在建个test文件夹,然后新建Component
与普通页面不同的是,这里的js中是Component({ }),从父组件接受的参数放在properties:{}中,
函数写在methods:{}中;

其他页面使用组件
1、在xxx.json文件中注册:
{
	"usingComponents": {
	"test":"/component/test/index"
	}
}
2、xxx.wxml中,使用组件
<test></test>
3、使用slot插槽
- 使用一个插槽时直接使用,不用在组件的js文件中设置,但是使用多个插槽时,需要配置mutipleSlots: true
Component({
	properties:{},
	options:{
		mutipleSlots: true,
	},
	data:{},
	methods:{}
})
- 组件的wxml文件:
<view>
	小程序<slot name="slot1"></slot>组件
	<slot name="slot2"></slot>
	<slot name="slot3"></slot>
</view>
- 页面中使用:
<test>
	<text slot="slot1">小程序</text>
	<text slot="slot2">slot</text>
	<text slot="slot3">组件</text>
</test>
参数传递
从父页面传递到子组件
- 页面中使用 prop-name="",传递参数
<test prop-name="桃子">
	<text slot="slot1">小程序</text>
	<text slot="slot2">slot</text>
	<text slot="slot3">组件</text>
</test>
- 子组件使用properties接受:
Component({
	properties:{
		propName:{
			type: String
		}
	},
	options:{
		mutipleSlots: true,
	},
	data:{},
	methods:{}
})
- 子组件模板中使用:
<view>
	小程序<slot name="slot1"></slot>组件
	<slot name="slot2"></slot>
	<slot name="slot3"></slot>
	<text>{{propName}}</text>
</view>
子组件向父页面传参
<view>
	小程序<slot name="slot1"></slot>组件
	<slot name="slot2"></slot>
	<slot name="slot3"></slot>
	<text>{{propName}}</text>
	<button catchtap="bindGoods">提交</button>
</view>
- 在子组件中触发bindGoods事件:
Component({
	properties:{
		propName:{
			type: String
		}
	},
	options:{
		mutipleSlots: true,
	},
	data:{},
	methods:{
		bindGoods(){
			const goods = {
				name: '香蕉',
				color: 'yellow'
			}
			this.triggerEvent('bindGoods', goods);
		}
	}
})
- 父组件监听bindGoods事件
<test prop-name="{{name}}" bind:bindGoods="getGoods">
	<text slot="slot1">小程序</text>
	<text slot="slot2">slot</text>
	<text slot="slot3">组件</text>
</test>
js文件
Page({
	data:{
		name:'桃子',
	},
	getGoods(e){
		console.log(e);
	}
})


 185
185


 被折叠的 条评论
为什么被折叠?
被折叠的 条评论
为什么被折叠?
 到【灌水乐园】发言


