


 实战开发环节需求分析头部slider部分和下面的菜单部分新手特权极速借贷理财精选新品推荐生活服务公司信息导航条需求分析头部、轮播图、新手特权、极速借贷、理财精选、新品推荐、生活服务、在线客服、公司介绍、导航条一定要先思考,先做架构:组件设计分析组件该怎么设计?创建三个组件的文件:core/btn.vue<template lang="html"> <...
需求分析
头部、轮播图、新手特权、极速借贷、理财精选、新品推荐、生活服务、在线客服、公司介绍、导航条

一定要先思考,先做架构:
组件设计
分析组件该怎么设计?

创建三个组件的文件:

core/btn.vue
<template lang="html">
    <div :class="[btnClass,cname]">//btnClass默认名字,cname传进来的名字
        <slot/>
    </div>
</template>

<script>
export default {

    props: {

        cname: {

            type: String,
            default: "",
        },
    },
    data() {

        return {

            btnClass: "btn",
        }
    },
}
</script>

<style lang="scss">
@import "../../css/element.scss";
.btn{

  @include btn;
}
</style>
实现
core/panel.vue
<template lang="html">
    <section :class="[panelClass,cname]"> //panelClass默认名字,cname传进来的名字
        <h4>-{
   {
    title }}-</h4>
        <slot/>
    </section>
</template>

<script>
export default {

    props: {

        cname: {

            type: String,
            default: "",
        },
        title: {

            type: String,
            default: "",
        },
    },
    data() {

        return {

            panelClass: "panel",
        }
    },
}
</script>

<style lang="scss">
  @import "../../css/element.scss";
  .panel{

    @include panel;
  }
</style>
轮播图组件使用插件:vue-awesome-swiper
安装:npm i vue-awesome-swiper
查看装好没有:

引入:

core/slider.vue
<template lang="html">
    <section :class="cname">//自定义类名,修改样式
        <swiper :options="options" :not-next-tick="options.notNextTick">
            <swiper-slide v-for="item in items" :key="item.href">
                <router-link :to="{ name: item.href}">
                    <img :src="item.src" alt="">
                </router-link>
            </swiper-slide>
            //options.pagination判断是否显示
            <div class="swiper-pagination" v-if="options.pagination" slot="pagination"/>
        </swiper>
    </section>
</template>

<script>
import {
    swiper, swiperSlide } from "vue-awesome-swiper"
export default {

    components: {

        swiper,
        swiperSlide,
    },
    props: {

        cname: {

            type: String,
            default: "",
        },
        options: {

            type: Object,
            default() {

                return {

                    autoplay: true,
                    loop: true,
                    pagination: {

                        el: ".swiper-pagination",
                    },
                    notNextTick: false,
                }
            },
        },
        items: {

            type: Array,
            default() {

                return []
            },
        },
    },
}
</script>

<style lang="css">
  @import "~swiper/dist/css/swiper.css";
</style>
头部
public/header.vue
<template lang="html">
<div :class="$style.header">
<span :class="$style.left">
<em>注册</em> | <em>登录</em>
</span>
<btn :class="$style.btnDownload">APP下载</btn>
</div>
</template>
<script>
import btn from "../core/btn.vue"
export default {
components: {
btn,
},
}
</script>
<style lang="scss" module>
.header{
color: #666;
height: 100px;
line-height: 100px;
position: fixed;
top: 0;
left: 0;
right: 0;
font-size: 32p;
background: #fff url(//m.jr.jd.com/spe/qyy/main/images/jr-logo.png) center center no-repeat;
background-size: auto 50%;
z-index: 100;
.left{
font-size: 28px;
height: 30px;
line-height: 30px;
margin: 17px 0 0 18px;
}
.btnDownload{
float: right;
font-size: 24px;
border-width: 0;
height: 56px;
line-height: 56px;
min-width: 120px;
padding: 0;
border-radius: 4px;
margin: 28px 24px 0 0;
}
}
</style>
home/index.vue
<template lang="html">
    <div>
        <Heador/>
    </div>
</template>

<script>
import Heador from "../public/header.vue"
export default {

    components: {

        Heador
    },
}
</script>
在router/index.js中引入reset样式
import "../../css/reset.scss"
新建个viewport.js文件,把hotcss.js中的代码复制进去,引入自适应代码:
https://github.com/imochen/hotcss/blob/master/src/hotcss.js
然后,在webpack配置文件中,把viewport.js加入->入口文件中

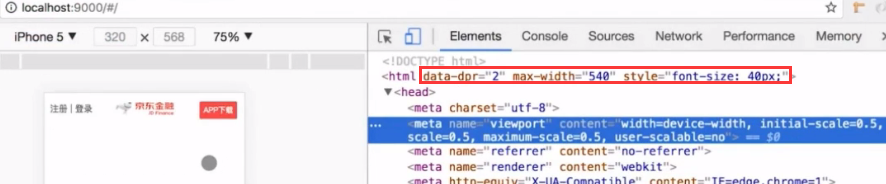
html标签中加入了下面的属性就说明引入成功了:
slider部分和下面的菜单部分
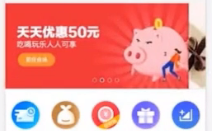
home/hslider.vue
<template lang="html">
    <article class="">
        <Slider :items="items" :cname="$style.slider"/>
        <section :class="$style.list">
 最低0.47元/天 解锁文章


 2万+
2万+


 被折叠的 条评论
为什么被折叠?
被折叠的 条评论
为什么被折叠?
 到【灌水乐园】发言


