


nextcloud默认使用Apache作为Web服务器,详见《CentOS7部署nextcloud最新版本》。
很多情况也可能要使用Nginx作为Web服务器,nextcloud在线文档中,nginx配置使用的是第三方的配置方法,基本是参照这篇文档操作。
1. 相关配置信息
使用的Nginx服务器,www根目录是 /opt/www,nextcloud安装目录是 /opt/www/nextcloud,data目录是/opt/www/nextcloud/data;
yum 方式安装的nginx,服务名是nginx,对应的系统用户是nginx(Apache 对应的服务名是httpd,系统用户是apache)
《CentOS7部署nextcloud最新版本》的PHP74部署方式下,php74的路径是/var/opt/remi/php74,php74配置文件路径是/etc/opt/remi/php74.
2. nginx配置php-fpm
nginx配置相对比较复杂。nginx配置文件的根目录是:/etc/nginx。
(1)新建一个文件:/etc/nginx/conf-available/php_fpm.conf
upstream php_workers{
    server 127.0.0.1:9000;
}
可以netstat -ntlp确认php-fpm服务是否运行(tcp 9000端口)
(2) 按照nextcloud在线文档,新建一个文件 :/etc/nginx/templates/nextcloud.tmpl
内容完全和文档一样,【fastcgi_pass php_workers】要和上面php_fpm.conf中的名字一致。
    location ^~ /.well-known {
        # The rules in this block are an adaptation of the rules
        # in the Nextcloud `.htaccess` that concern `/.well-known`.

        location = /.well-known/carddav { return 301 /nextcloud/remote.php/dav/; }
        location = /.well-known/caldav  { return 301 /nextcloud/remote.php/dav/; }

        location /.well-known/acme-challenge    { try_files $uri $uri/ =404; }
        location /.well-known/pki-validation    { try_files $uri $uri/ =404; }

        # Let Nextcloud's API for `/.well-known` URIs handle all other
        # requests by passing them to the front-end controller.
        return 301 /nextcloud/index.php$request_uri;
    }

    location ^~ /nextcloud {
        # set max upload size
        client_max_body_size 512M;
        fastcgi_buffers 64 4K;

        # Enable gzip but do not remove ETag headers
        gzip on;
        gzip_vary on;
        gzip_comp_level 4;
        gzip_min_length 256;
        gzip_proxied expired no-cache no-store private no_last_modified no_etag auth;
        gzip_types application/atom+xml application/javascript application/json application/ld+json application/manifest+json application/rss+xml application/vnd.geo+json application/vnd.ms-fontobject application/x-font-ttf application/x-web-app-manifest+json application/xhtml+xml application/xml font/opentype image/bmp image/svg+xml image/x-icon text/cache-manifest text/css text/plain text/vcard text/vnd.rim.location.xloc text/vtt text/x-component text/x-cross-domain-policy;

        # Pagespeed is not supported by Nextcloud, so if your server is built
        # with the `ngx_pagespeed` module, uncomment this line to disable it.
        #pagespeed off;

        # HTTP response headers borrowed from Nextcloud `.htaccess`
        add_header Referrer-Policy                      "no-referrer"   always;
        add_header X-Content-Type-Options               "nosniff"       always;
        add_header X-Download-Options                   "noopen"        always;
        add_header X-Frame-Options                      "SAMEORIGIN"    always;
        add_header X-Permitted-Cross-Domain-Policies    "none"          always;
        add_header X-Robots-Tag                         "none"          always;
        add_header X-XSS-Protection                     "1; mode=block" always;

        # Remove X-Powered-By, which is an information leak
        fastcgi_hide_header X-Powered-By;

        # Specify how to handle directories -- specifying `/nextcloud/index.php$request_uri`
        # here as the fallback means that Nginx always exhibits the desired behaviour
        # when a client requests a path that corresponds to a directory that exists
        # on the server. In particular, if that directory contains an index.php file,
        # that file is correctly served; if it doesn't, then the request is passed to
        # the front-end controller. This consistent behaviour means that we don't need
        # to specify custom rules for certain paths (e.g. images and other assets,
        # `/updater`, `/ocm-provider`, `/ocs-provider`), and thus
        # `try_files $uri $uri/ /nextcloud/index.php$request_uri`
        # always provides the desired behaviour.
        index index.php index.html /nextcloud/index.php$request_uri;

        # Rule borrowed from `.htaccess` to handle Microsoft DAV clients
        location = /nextcloud {
            if ( $http_user_agent ~ ^DavClnt ) {
                return 302 /nextcloud/remote.php/webdav/$is_args$args;
            }
        }

        # Rules borrowed from `.htaccess` to hide certain paths from clients
        location ~ ^/nextcloud/(?:build|tests|config|lib|3rdparty|templates|data)(?:$|/)    { return 404; }
        location ~ ^/nextcloud/(?:\.|autotest|occ|issue|indie|db_|console)                  { return 404; }

        # Ensure this block, which passes PHP files to the PHP process, is above the blocks
        # which handle static assets (as seen below). If this block is not declared first,
        # then Nginx will encounter an infinite rewriting loop when it prepends
        # `/nextcloud/index.php` to the URI, resulting in a HTTP 500 error response.
        location ~ \.php(?:$|/) {
            fastcgi_split_path_info ^(.+?\.php)(/.*)$;
            set $path_info $fastcgi_path_info;

            try_files $fastcgi_script_name =404;

            include fastcgi_params;
            fastcgi_param SCRIPT_FILENAME $document_root$fastcgi_script_name;
            fastcgi_param PATH_INFO $path_info;
            fastcgi_param HTTPS on;

            fastcgi_param modHeadersAvailable true;         # Avoid sending the security headers twice
            fastcgi_param front_controller_active true;     # Enable pretty urls
            fastcgi_pass php_workers;

            fastcgi_intercept_errors on;
            fastcgi_request_buffering off;
        }

        location ~ \.(?:css|js|svg|gif)$ {
            try_files $uri /nextcloud/index.php$request_uri;
            expires 6M;         # Cache-Control policy borrowed from `.htaccess`
            access_log off;     # Optional: Don't log access to assets
        }

        location ~ \.woff2?$ {
            try_files $uri /nextcloud/index.php$request_uri;
            expires 7d;         # Cache-Control policy borrowed from `.htaccess`
            access_log off;     # Optional: Don't log access to assets
        }

        # Rule borrowed from `.htaccess`
        location /nextcloud/remote {
            return 301 /nextcloud/remote.php$request_uri;
        }

        location /nextcloud {
            try_files $uri $uri/ /nextcloud/index.php$request_uri;
        }
     }
(3) 在/etc/nginx/sites-enabled/00-default-ssl.conf,增加一句”include /etc/nginx/templates/nextcloud.tmpl;“ 如下:
server {
    listen 443 ssl http2;
    listen [::]:443 ssl http2;
    server_name mx.example.com;

    root /opt/www;
    index index.php index.html;

    include /etc/nginx/templates/misc.tmpl;
    ......
    include /etc/nginx/templates/nextcloud.tmpl;
    }
3. nextcloud配置
现在可以如前文,web方式安装nextcloud。安装完成后在/opt/www/nextcloud/config目录下生成了config.php配置文件如下。
[root@mx nginx]# cat /opt/www/nextcloud/config/config.php
<?php
$CONFIG = array (
  'instanceid' => 'ochq42k4ktyk',
  'passwordsalt' => '54A8OBXD9nhDD4cWjQ6uWlK56W49qg',
  'secret' => 'gMvTQtYHTipn4TDCUdIzeQjYg/V0m2y+sh4KeRfOnHOvbCcT',
  'trusted_domains' =>
  array (
    0 => '192.168.10.51',
  ),
  'datadirectory' => '/opt/www/nextcloud/data',
  'dbtype' => 'mysql',
  'version' => '21.0.2.1',
  'overwrite.cli.url' => 'https://192.168.10.51/nextcloud',
  'overwriteprotocol' => 'https',
  'dbname' => 'nextcloud',
  'dbhost' => 'localhost',
  'dbport' => '',
  'dbtableprefix' => 'oc_',
  'mysql.utf8mb4' => true,
  'dbuser' => 'root',
  'dbpassword' => 'mcwolf2000',
  'installed' => true,
);
这里面,要注意trusted_domains 的设置和overwriteprotocol设置。
但是,登录的时候,会出现怎么也登不上去的情况,排查了很久,总是停留在登录界面状态,最后还是在英文文档的【Tips and tricks】部分发现了问题所在。原文标题是”Login loop without any clue in access.log, error.log, nor nextcloud.log“
首先检查日志文件:
tail /var/www/nextcloud/data/nextcloud.log
tail /var/log/nginx/access.log
tail /var/log/nginx/error.log
发现只有access.log中有相关记录,而且是循环登录了。
文中建议检查php session and wsdlcache directory.的权限,根据php74的路径,执行:
  chown nginx:nginx /var/opt/remi/php74/lib/php/session/
  chown root:nginx /var/opt/remi/php74/lib/php/wsdlcache/
  chown root:nginx /var/opt/remi/php74/lib/php/opcache/
重启一下nginx,就登录正常了。这种问题估计只能通过代码调试才能找出来。
4. https下映射webdavs网络驱动器
使用https协议,需要考虑证书问题。一种是使用权威机构正式发的证书,这需要申请,当然也有一些免费的方式;第二种是可以使用自签名证书,如在内网环境下使用或者开发使用。
这里主要关注自签名证书(如何生成自签名证书及安装Nginx不在这里介绍)
- 使用http协议的webdav,《CentOS7部署nextcloud最新版本》介绍过需要调整注册表才能在windows下映射盘符
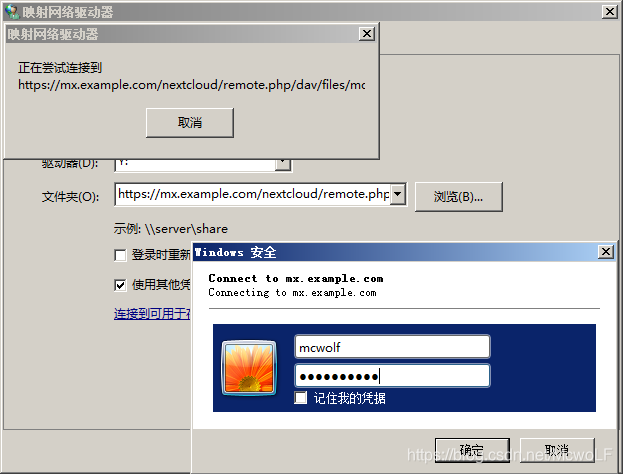
- 使用https协议的webdavs,需要对自签名证书进行设置才能在windows下映射盘符。
【注】如果仅仅开发使用的话,配置一套域名服务比较麻烦,可以使用hosts文件来模拟域名系统,windows下C:\Windows\System32\drivers\etc\hosts,例如将内部地址映射到mx.example.com上可以加上如下一行,在这台windows终端上,就可以通过 mx.example.com域名来访问192.168.10.51了。
192.168.10.51 mx.example.com对于使用自签名证书的服务器,https访问的时候,浏览器会提示不安全,而且无法映射盘符
nextcloud在线手册中的webdav部分《Accessing Nextcloud files using WebDAV 》非常全面,列出来各种可能问题,是很好的参考文档。
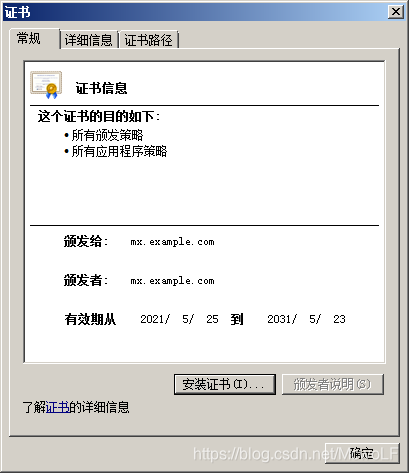
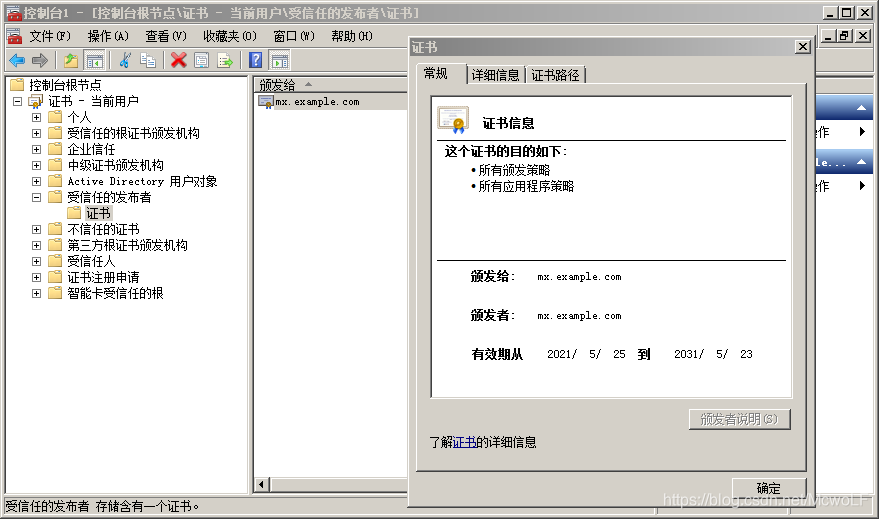
简单来说,windows让自签证书受信任设置,实际上让自签根证书受信任就行了,或者手动将CA根证书添加到“受信任的根证书颁发机构”存储区中
- 导出自签名证书,从浏览器地址栏出现感叹号,点击红叉叉处的“证书错误”查看证书,然后导出证书文件如myNextcloud.pem
- 开始菜单,输入mmc
- 选择“证书”管理单元,如果没有这个管理单元,就文件-》添加/删除管理单元
- 导入证书文件myNextcloud.pem到“受信任的颁发者”或者“受信任的根证书颁发机构”存储区中
- 从控制面板->internet选项->内容,中,“清除SSL状态”
- 重新进行webdavs映射
注:关于webdav调试,在Linux可以使用cURL工具,例如,获取webdav根目录相关信息(XML格式)
[root@mx lib]# curl -X PROPFIND -H "Detph: 1" -u liufan:mcwolf2000 -k https://mx.example.com/nextcloud/remote.php/dav/files/mcwolf/
<?xml version="1.0"?>
 <d:multistatus xmlns:d="DAV:" xmlns:s="http://sabredav.org/ns" xmlns:oc="http://owncloud.org/ns" xmlns:nc="http://nextcloud.org/ns">
  <d:response>
    <d:href>/nextcloud/remote.php/dav/files/mcwolf/</d:href>
    <d:propstat>
        <d:prop>
            <d:resourcetype><d:collection/></d:resourcetype>
        </d:prop>
    <d:status>HTTP/1.1 200 OK</d:status>
    </d:propstat>
  </d:response>
 </d:multistatus>
-k 参数表示不使用证书,直接访问。
-u 用户名:密码
补:RainLoop邮件所用的另外一种配置
在nextcloud中,使用应用RainLoop邮件出现不能访问(https://192.168.10.51/nextcloud/apps/rainloop/?admin),但使用https://192.168.10.51/nextcloud/index.php/apps/rainloop/app/?admin就可以访问,看来是nginx的URLPretty问题?
在nextcloud的Github网站发现有很多讨论,如https://github.com/nextcloud/documentation/pull/2197,以及210/215等,说明是Nextcloud20版本后引入的bug,一个解决方案是使用20版本之前的nextcloud的nginx配置,https://docs.nextcloud.com/server/19/admin_manual/installation/nginx.html
[root@mx Maildir]# cat /etc/nginx/templates/nextcloud.tmpl
    location = /.well-known/carddav {
      return 301 $scheme://$host:$server_port/nextcloud/remote.php/dav;
    }
    location = /.well-known/caldav {
      return 301 $scheme://$host:$server_port/nextcloud/remote.php/dav;
    }

    location /.well-known/acme-challenge { }

    location ^~ /nextcloud {

        # set max upload size
        client_max_body_size 512M;
        fastcgi_buffers 64 4K;

        # Enable gzip but do not remove ETag headers
        gzip on;
        gzip_vary on;
        gzip_comp_level 4;
        gzip_min_length 256;
        gzip_proxied expired no-cache no-store private no_last_modified no_etag auth;
        gzip_types application/atom+xml application/javascript application/json application/ld+json application/manifest+json application/rss+xml application/vnd.geo+json application/vnd.ms-fontobject application/x-font-ttf application/x-web-app-manifest+json application/xhtml+xml application/xml font/opentype image/bmp image/svg+xml image/x-icon text/cache-manifest text/css text/plain text/vcard text/vnd.rim.location.xloc text/vtt text/x-component text/x-cross-domain-policy;

        # Uncomment if your server is build with the ngx_pagespeed module
        # This module is currently not supported.
        #pagespeed off;

        location /nextcloud {
            rewrite ^ /nextcloud/index.php;
        }

        location ~ ^\/nextcloud\/(?:build|tests|config|lib|3rdparty|templates|data)\/ {
            deny all;
        }
        location ~ ^\/nextcloud\/(?:\.|autotest|occ|issue|indie|db_|console) {
            deny all;
        }

        location ~ ^\/nextcloud\/(?:index|remote|public|cron|core\/ajax\/update|status|ocs\/v[12]|updater\/.+|oc[ms]-provider\/.+|.+\/richdocumentscode\/proxy)\.php(?:$|\/) {
            fastcgi_split_path_info ^(.+?\.php)(\/.*|)$;
            set $path_info $fastcgi_path_info;
            try_files $fastcgi_script_name =404;
            include fastcgi_params;
            fastcgi_param SCRIPT_FILENAME $document_root$fastcgi_script_name;
            fastcgi_param PATH_INFO $path_info;
            fastcgi_param HTTPS on;
            # Avoid sending the security headers twice
            fastcgi_param modHeadersAvailable true;
            # Enable pretty urls
            fastcgi_param front_controller_active true;
            fastcgi_pass php_workers;
            fastcgi_intercept_errors on;
            fastcgi_request_buffering off;
        }

        location ~ ^\/nextcloud\/(?:updater|oc[ms]-provider)(?:$|\/) {
            try_files $uri/ =404;
            index index.php;
        }

        # Adding the cache control header for js, css and map files
        # Make sure it is BELOW the PHP block
        location ~ ^\/nextcloud\/.+[^\/]\.(?:css|js|woff2?|svg|gif|map)$ {
            try_files $uri /nextcloud/index.php$request_uri;
            add_header Cache-Control "public, max-age=15778463";
            # Add headers to serve security related headers  (It is intended
            # to have those duplicated to the ones above)
            # Before enabling Strict-Transport-Security headers please read
            # into this topic first.
            #add_header Strict-Transport-Security "max-age=15768000; includeSubDomains; preload;" always;
            #
            # WARNING: Only add the preload option once you read about
            # the consequences in https://hstspreload.org/. This option
            # will add the domain to a hardcoded list that is shipped
            # in all major browsers and getting removed from this list
            # could take several months.
            add_header Referrer-Policy "no-referrer" always;
            add_header X-Content-Type-Options "nosniff" always;
            add_header X-Download-Options "noopen" always;
            add_header X-Frame-Options "SAMEORIGIN" always;
            add_header X-Permitted-Cross-Domain-Policies "none" always;
            add_header X-Robots-Tag "none" always;
            add_header X-XSS-Protection "1; mode=block" always;

            # Optional: Don't log access to assets
            access_log off;
        }

        location ~ ^\/nextcloud\/.+[^\/]\.(?:png|html|ttf|ico|jpg|jpeg|bcmap|mp4|webm)$ {
            try_files $uri /nextcloud/index.php$request_uri;
            # Optional: Don't log access to other assets
            access_log off;
        }
    }
果然可以解决这个问题!


 1810
1810


 被折叠的 条评论
为什么被折叠?
被折叠的 条评论
为什么被折叠?
 到【灌水乐园】发言


