SpringBoot整合Mybatis,解决TypeAliases配置失败的问题

这篇文章主要介绍了SpringBoot整合Mybatis,解决TypeAliases配置失败的问题,具有很好的参考价值,希望对大家有所帮助。如有错误或未考虑完全的地方,望不吝赐教

问题描述

在应用MyBatis时,使用对象关系映射,将对象和Aliase映射起来。

在Mybatis的文档明确写出,如果你没有明确定义实体类的Aliase,框架会自动将Class Name自动作为别名。

那么问题来了,当使用java -jar xxx.jar&启动的时候,会报出以下错误,

Error resolving class. Cause: org.apache.ibatis.type.TypeException: Could not resolve type alias 'XXXXX'.Cause: java.lang.ClassNotFoundException: Cannot find class: XXXXX

从异常信息来看,明显就是无法从本地检索到alise对应的类,并最终导致sqlSessionFactory等初始化失败。而且吊轨的是,直接在Idea中启动是没有问题的,启动jar包才会出现这个问题

解决方法

参考博主A_Beaver的文章,原来mybatis的facroty需要加载SpringBoot独特的虚拟文件系统,才能识别类路径

1

2

3

public SpringBootVFS() {

    this.resourceResolver = new PathMatchingResourcePatternResolver(getClass().getClassLoader());

}

从以上代码看,其实是通过PathMatchingResourcePatternResolver实现资源的加载

修复该问题只需要在mybatis的配置类中,设置一下factory即可,

1

2

3

4

5

6

7

8

9

@Bean(name = "masterSqlSessionFactory")

@Primary

public SqlSessionFactory sqlSessionFactory(@Qualifier("masterDataSource") DataSource dataSource) throws Exception {

    SqlSessionFactoryBean bean = new SqlSessionFactoryBean();

    bean.setDataSource(dataSource);

    bean.setVfs(SpringBootVFS.class);//设置SpringBootVFS

    bean.setTypeAliasesPackage("com.fulan.domain.red");

    ...

}

SpringBoot整合Mybatis及遇到的坑
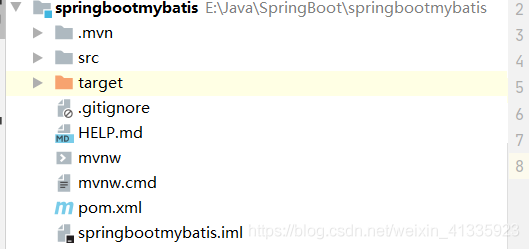
1. 搭建项目环境

1.1 创建项目

在这里插入图片描述

1.2 修改POM文件,添加相关依赖

修改pom.xml文件,在其中添加下面依赖。

1

2

3

4

5

6

7

8

9

10

11

12

13

14

15

16

17

18

19

20

21

22

23

24

25

26

27

28

29

30

31

32

<!--Thymeleaf启动器-->

        <dependency>

            <groupId>org.springframework.boot</groupId>

            <artifactId>spring-boot-starter-thymeleaf</artifactId>

        </dependency>

        <dependency>

            <groupId>org.springframework.boot</groupId>

            <artifactId>spring-boot-starter-web</artifactId>

        </dependency>

        <!--mybatis启动器-->

        <dependency>

            <groupId>org.mybatis.spring.boot</groupId>

            <artifactId>mybatis-spring-boot-starter</artifactId>

            <version>2.1.3</version>

        </dependency>

        <!--jdbc启动器-->

        <dependency>

            <groupId>org.springframework.boot</groupId>

            <artifactId>spring-boot-starter-jdbc</artifactId>

        </dependency>

        <!--数据库驱动坐标-->

        <dependency>

            <groupId>mysql</groupId>

            <artifactId>mysql-connector-java</artifactId>

            <version>8.0.12</version>

        </dependency>

        <!--Druid数据源依赖-->

        <dependency>

            <groupId>com.alibaba</groupId>

            <artifactId>druid</artifactId>

            <version>1.1.10</version>

        </dependency>

1.3 配置数据源

在application.yml文件中配置如下代码。

1

2

3

4

5

6

7

spring:

  datasource:

    driver-class-name: com.mysql.cj.jdbc.Driver

    url: jdbc:mysql://localhost:3306/test?useUnicode=true&characterEnconding=utf-8&useSSL=false&serverTimezone=GMT%2B8

    username: root

    password: root

    type: com.alibaba.druid.pool.DruidDataSource

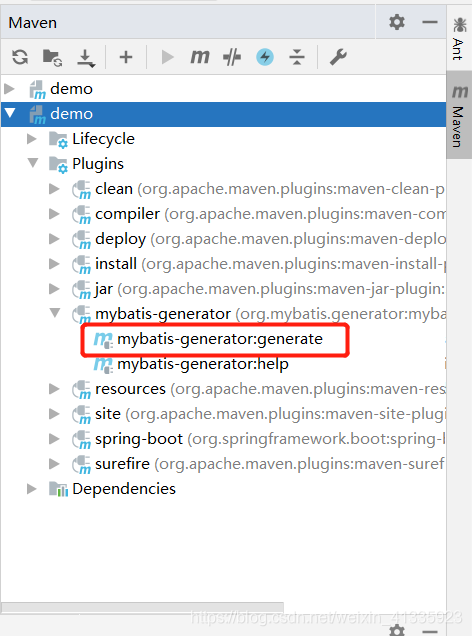
2. 配置Maven的generator插件

2.1 添加generator插件坐标

1

2

3

4

5

6

7

8

9

10

11

12

13

14

15

16

17

18

19

<!--配置generator插件-->

            <plugin>

                <groupId>org.mybatis.generator</groupId>

                <artifactId>mybatis-generator-maven-plugin</artifactId>

                <version>1.4.0</version>

                <dependencies>

                    <dependency>

                        <groupId>mysql</groupId>

                        <artifactId>mysql-connector-java</artifactId>

                        <version>8.0.12</version>

                    </dependency>

                </dependencies>

                <!--指定配置文件的路径-->

                <configuration>

                    <configurationFile>${project.basedir}/src/main/resources/generator.xml</configurationFile>

                    <verbose>true</verbose>

                    <overwrite>true</overwrite>

                </configuration>

            </plugin>

2.2 添加generator配置文件

将文件命名为generator.xml,在src/main/resources中添加。

1

2

3

4

5

6

7

8

9

10

11

12

13

14

15

16

17

18

19

20

21

22

23

24

25

26

27

28

29

30

31

32

33

34

35

36

37

38

39

40

41

42

43

44

45

46

47

48

49

50

51

52

<?xml version="1.0" encoding="UTF-8"?>   

<!DOCTYPE generatorConfiguration   

        PUBLIC "-//mybatis.org//DTD MyBatis Generator Configuration 1.0//EN"   

        "http://mybatis.org/dtd/mybatis-generator-config_1_0.dtd"> 


<generatorConfiguration>

        <context id="testTables" targetRuntime="MyBatis3">

            <commentGenerator>

                <!-- 是否去除自动生成的注释 true:是 : false:否 -->

                <property name="suppressAllComments" value="true" /> 

            </commentGenerator>

            <!-- 数据库连接信息:驱动类、连接地址、用户名、密码-->

            <jdbcConnection driverClass="com.mysql.cj.jdbc.Driver"

                connectionURL="jdbc:mysql://localhost:3306/test?useUnicode=true&amp;characterEnconding=utf-8&amp;useSSL=false&amp;serverTimezone=UTC"

                            userId="root" password="root">

            </jdbcConnection>

            <!-- 默认false,把JDBC DECIMAL 和 NUMERIC 类型解析为 Integer true,把JDBC DECIMAL  

                和 NUMERIC 类型解析为java.math.BigDecimal --> 

            <javaTypeResolver

                <property name="forceBigDecimals" value="false" /> 

            </javaTypeResolver>

            <!--targetProject:生成PO类的位置-->

            <javaModelGenerator targetPackage="com.example.springbootmybatis.pojo"

                targetProject=".\src\main\java">

                <!--enableSubPackages:是否让schema作为包的后缀-->

                <property name="enableSubPackages" value="false" />

                <!-- 从数据库返回的值被清理前后的空格 --> 

                <property name="trimStrings" value="true" /> 

            </javaModelGenerator>

            <!--对应的mapper.xml文件 --> 

            <sqlMapGenerator targetPackage="com.example.springbootmybatis.mapper"

                targetProject=".\src\main\java">

                <!--enableSubPackages:是否让schema作为包的后缀-->

                <property name="enableSubPackages" value="false" />

            </sqlMapGenerator>

            <!-- 对应的Mapper接口类文件 --> 

            <javaClientGenerator type="XMLMAPPER"

                                 targetPackage="com.example.springbootmybatis.mapper" targetProject="./src/main/java">

                <!--enableSubPackages:是否让schema作为包的后缀-->

                <property name="enableSubPackages" value="false" />

            </javaClientGenerator>

            <!-- 指定数据库表 -->

            <table schema="" tableName="users"></table>

            <!-- 列出要生成代码的所有表,这里配置的是不生成Example文件 --> 

<!--            <table tableName="userinfo" domainObjectName="UserInfoPO"  -->

<!--                enableCountByExample="false" enableUpdateByExample="false"  -->

<!--                enableDeleteByExample="false" enableSelectByExample="false"  -->

<!--                selectByExampleQueryId="false">  -->

<!--                <property name="useActualColumnNames" value="false" />  -->

<!--            </table>  -->

        </context

    </generatorConfiguration>

2.3 添加generator配置文件的DTD文件

可以在工具栏中的File->Settings中添加,也可以直接在文件中按alt+shift自动添加。


在这里插入图片描述

2.4 运行generator插件生成代码

在这里插入图片描述

3. 配置资源拷贝插件

3.1 添加资源拷贝插件坐标

1

2

3

4

5

6

7

8

9

10

11

12

13

14

15

<!--配置资源拷贝插件-->

        <resources>

            <resource>

                <directory>src/main/java</directory>

                <includes>

                    <include>**/*.xml</include>

                </includes>

            </resource>

            <resource>

                <directory>src/main/resources</directory>

                <includes>

                    <include>**/*.yml</include>

                </includes>

            </resource>

        </resources>

3.2 修改启动类添加@MapperScan注解

1

2

3

4

5

6

7

8

9

10

11

package com.example.springbootmybatis;

import org.mybatis.spring.annotation.MapperScan;

import org.springframework.boot.SpringApplication;

import org.springframework.boot.autoconfigure.SpringBootApplication;

@SpringBootApplication

@MapperScan("com.example.springbootmybatis.mapper")//指定扫描接口与映射配置文件的包名

public class DemoApplication {

    public static void main(String[] args) {

        SpringApplication.run(DemoApplication.class, args);

    }

}

4. 其他配置项

1

2

3

4

5

mybatis:

  # 扫描classpath中mapper目录下的映射配置文件,针对于映射文件放到了resources目录下

  mapper-locations: classpath:/mapper/*.xml

  # 定义包别名,使用pojo时可以直接使用pojo的类型名称不用加包名

  type-aliases-package: com.example.springbootmybatis.pojo

5. 添加用户功能

5.1 创建页面

1

2

3

4

5

6

7

8

9

10

11

12

13

14

15

16

<!DOCTYPE html>

<html lang="en" xmlns:th="http://www.thymeleaf.org">

<link rel="shortcut icon" href="../resources/favicon.ico" th:href="@{/static/favion.ico}">

<head>

    <meta charset="UTF-8">

    <title>测试SpringBoot连接PostgreSQL数据库</title>

</head>

<body>

    <form th:action="@{/user/addUser}" method="post">

        <input type="text" name="userid"><br>

        <input type="text" name="username"><br>

        <input type="text" name="usersex"><br>

        <input type="submit" value="添加"><br>

    </form>

</body>

</html>

5.2 创建Controller

5.2.1 PageController

1

2

3

4

5

6

7

8

9

10

11

12

13

14

15

16

17

package com.example.springbootmybatis.controller;

import org.springframework.stereotype.Controller;

import org.springframework.web.bind.annotation.PathVariable;

import org.springframework.web.bind.annotation.RequestMapping;

/**

 * 页面跳转Controller

 */

@Controller

public class PageController {

    /**

     * 页面跳转方法

     */

    @RequestMapping("/{page}")

    public String showPage(@PathVariable String page){

        return page;

    }

}

5.2.2 UsersController

1

2

3

4

5

6

7

8

9

10

11

12

13

14

15

16

17

18

19

20

21

22

23

24

25

26

27

28

29

30

package com.example.springbootmybatis.controller;

import com.example.springbootmybatis.pojo.Users;

import com.example.springbootmybatis.service.UsersService;

import org.springframework.beans.factory.annotation.Autowired;

import org.springframework.stereotype.Controller;

import org.springframework.web.bind.annotation.PostMapping;

import org.springframework.web.bind.annotation.RequestMapping;

import org.springframework.web.bind.annotation.RestController;

/**

 * 用户管理Controller

 */

@RestController

@RequestMapping("/user")

public class UsersController {

    @Autowired

    private UsersService usersService;

    /**

     * 添加用户

     */

    @PostMapping("/addUser")

    public String addUsers(Users users){

        try {

            this.usersService.addUsers(users);

        } catch (Exception e){

            e.printStackTrace();

            return "error";

        }

        return "redirect:/ok";

    }

}

5.3 创建Service 接口实现类Impl

1

2

3

4

5

6

7

8

9

10

11

12

13

/**

 * 用户管理业务层

 */

@Service

public class UsersServiceImpl implements UsersService {

    @Autowired

    private UsersMapper usersMapper;

    @Override

    @Transactional

    public void addUsers(Users users) {

        this.usersMapper.insert(users);

    }

}

接口

1

2

3

public interface UsersService {

    void addUsers(Users users);

}

遇到的错误

1. Mybatis Generator自动生成,数据库的同名表也会生产的问题

[WARNING] Table Configuration users matched more than one table (test..users,performance_schema..users)

[WARNING] Cannot obtain primary key information from the database, generated objects may be incomplete

在 MyBatis Generator官网 中对这一问题做出了解答。

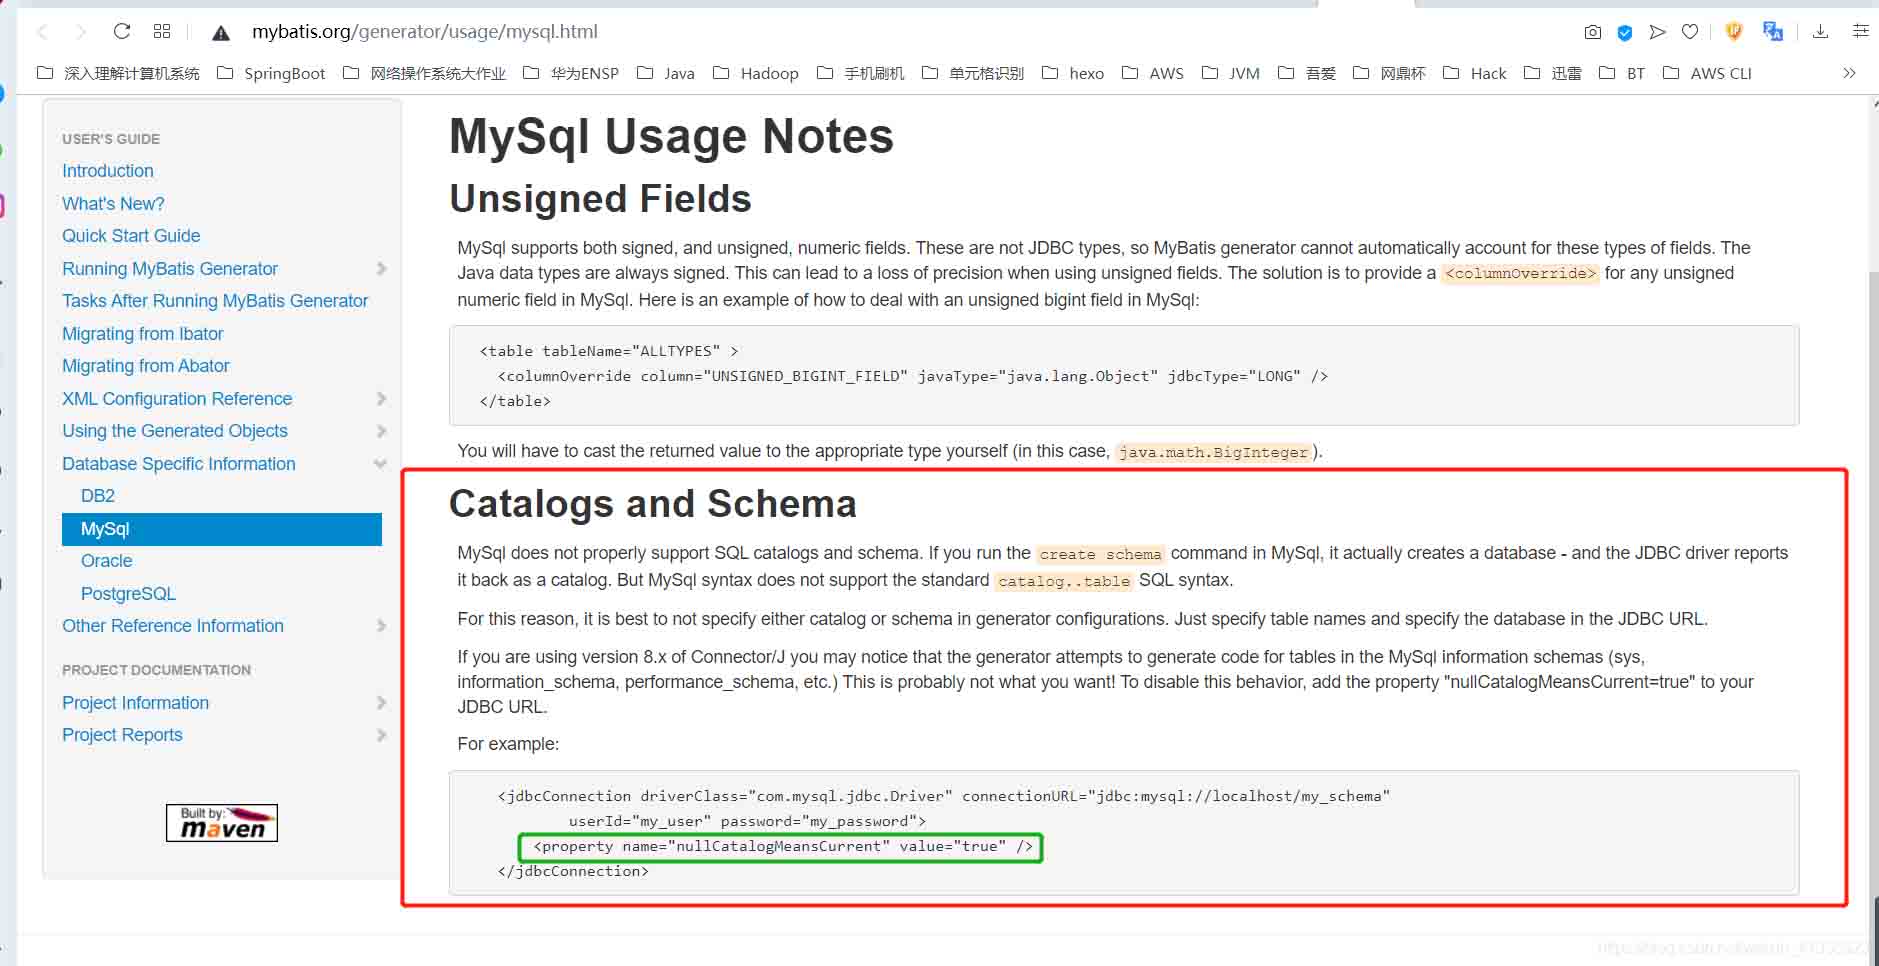
翻译如下:Mysql 无法正常支持 SQL catalogs 和 schema。因此,最好不要在 generator 配置文件中指定 catalog 以及schema,仅需指定数据表的名字并在 JDBC URL 中指定数据库即可。如果使用 mysql-connector-java 8.x 版本,generator 会为MySql中信息数据库(sys, information_schema, performance_schema)的表生成代码,若要避免这种操作,请在 JDBC URL 中加入属性“nullCatalogMeansCurrent=true”。

修改配置文件generator.xml

1

2

3

4

5

<jdbcConnection driverClass="com.mysql.cj.jdbc.Driver"

                        connectionURL="jdbc:mysql://localhost:3306/test?useUnicode=true&amp;characterEnconding=utf-8&amp;useSSL=false&amp;serverTimezone=UTC"

                        userId="username" password="password">

            <property name="nullCatalogMeansCurrent" value="true"/>

        </jdbcConnection>

2. 页面出现500错误

在这里插入图片描述

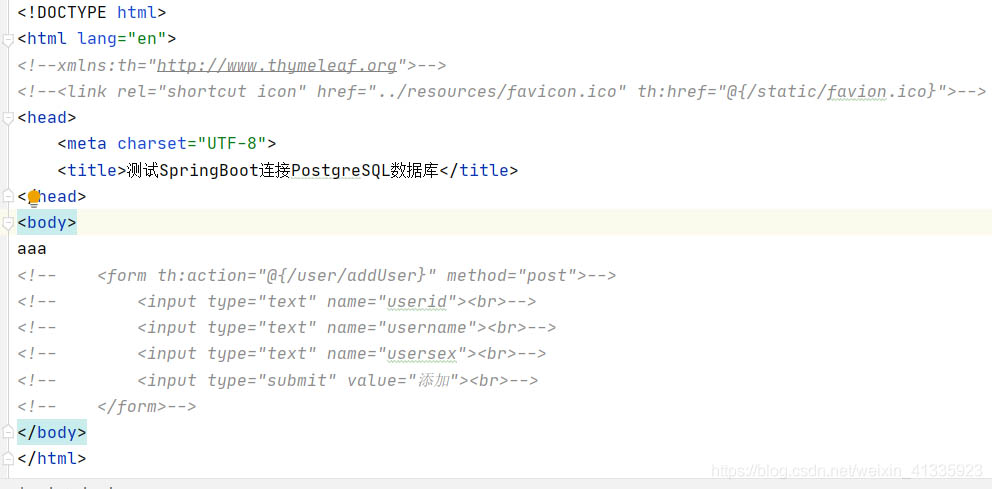
2020-06-27 14:23:42.459 ERROR 19676 --- [nio-8080-exec-1] o.a.c.c.C.[.[.[/].[dispatcherServlet] : Servlet.service() for servlet [dispatcherServlet] in context with path [] threw exception [Circular view path [addUsers]: would dispatch back to the current handler URL [/addUsers] again. Check your ViewResolver setup! (Hint: This may be the result of an unspecified view, due to default view name generation.)] with root cause

javax.servlet.ServletException: Circular view path [addUsers]: would dispatch back to the current handler URL [/addUsers] again. Check your ViewResolver setup! (Hint: This may be the result of an unspecified view, due to default view name generation.)
at org.springframework.web.servlet.view.InternalResourceView.prepareForRendering(InternalResourceView.java:210) ~[spring-webmvc-5.2.7.RELEASE.jar:5.2.7.RELEASE]
at

解决方法

查了很多博客,但是都不是www.1818xinwen.com自己的问题,自己的问题是在pom.xml配置文件中的资源路径中,没有写所有,而是单独的xml和yml配置文件。要加载所有的静态资源。

1

2

3

4

5

6

7

8

9

10

11

12

13

14

15

16

17

18

19

<!--原本的-->

<!--资源文件的路径-->

            <resource>

                <directory>src/main/resources</directory>

                <includes>

                    <include>**/*.yml</include>

                    <include>**/*.xml</include>

                </includes>

                <!-- <filtering>false</filtering>-->

            </resource>

<!--修改后的-->

<!--资源文件的路径-->

            <resource>

                <directory>src/main/resources</directory>

                <includes>

                    <include>**/*.*</include>

                </includes>

                <!-- <filtering>false</filtering>-->

            </resource>

以上为个人经验,希望能给大家一个参考

  • 1
    点赞
  • 2
    收藏
    觉得还不错? 一键收藏
  • 0
    评论

“相关推荐”对你有帮助么?

  • 非常没帮助
  • 没帮助
  • 一般
  • 有帮助
  • 非常有帮助
提交
评论
添加红包

请填写红包祝福语或标题

红包个数最小为10个

红包金额最低5元

当前余额3.43前往充值 >
需支付:10.00
成就一亿技术人!
领取后你会自动成为博主和红包主的粉丝 规则
hope_wisdom
发出的红包
实付
使用余额支付
点击重新获取
扫码支付
钱包余额 0

抵扣说明:

1.余额是钱包充值的虚拟货币,按照1:1的比例进行支付金额的抵扣。
2.余额无法直接购买下载,可以购买VIP、付费专栏及课程。

余额充值