


 本文详细介绍了Linux下的网络文件系统Samba、NFS和iSCSI的配置与使用。从服务简介、安装启用、用户管理到访问控制,逐一阐述了Samba的配置参数和权限设定,NFS的基本信息、启用步骤及配置选项,以及iSCSI的启动、永久挂载和删除操作。通过实例演示了如何确保安全性和用户访问权限。
samba
一、samba服务简介
作用:
- smb = Server Message Block Sum
- cifs = Common Internet File System Miscrosoft
- windows系统共享文件时用到的协议smb
- smb是由miscrosoft+sun
- Linux cifs
二、samba基本信息
服务启动脚本: smb.service
主配置目录: /etc/samba
主配置文件: /etc/smb.conf
安全上下文: samba_share_t
端口: 139 445
安装包: samba samba-common
三、samba的安装与启用
samba的安装:
dnf install samba samba-common samba-client -y
samba服务启动:
systemctl enable --now smb.service
samba服务启用
firewall-cmd --permanent --add-service=samba
firewall-cmd --reload


测试:
smbclient -L //172.25.254.111 ##当要输入root密码时请直接回车

四、samba用户的建立
1.samba用户必须是被地存在的用户
2.samba用户的建立
smbpasswd -a lee ##添加用户
pdbedit -L ##查看用户列表
pdbedit -x lee ##删除用户

五、samba用户访问家目录
当selinux开启时:
setsebool -P samba_enable_home_dirs on
windows下
\\172.25.254.20 ##访问
net use ##查看访问记录
net use * /del ##删除访问记录
在linux下:
smbclient //172.25.254.20/westos -U westos
六、samba服务共享目录
服务端
[root@westos111 ~]# mkdir /westos
[root@westos111 ~]# cd /etc/samba
[root@westos111 samba]# mv smb.conf smb.conf.bak
[root@westos111 samba]# cp smb.conf.example smb.conf ##复制模板
[root@westos111 samba]# ls
lmhosts smb.conf smb.conf.bak smb.conf.example
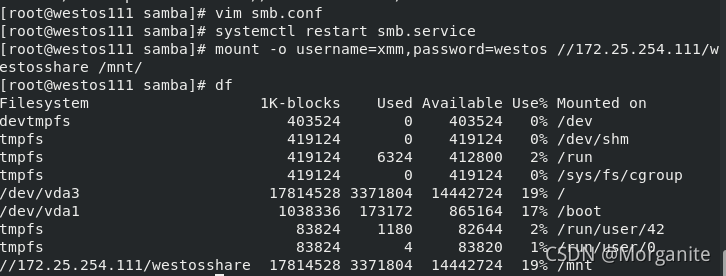
[root@westos111 samba]# vim smb.conf
[westosshare] ##共享名称
comment = westos dir ##共享说明
path = /westos ##共享路径
[root@westos111 samba]# semanage fcontext -a -t samba_share_t '/westos(/.*)?' ##更改安全上下文
[root@westos111 samba]# restorecon -RvvF /westos ##
Relabeled /westos from unconfined_u:object_r:default_t:s0 to system_u:object_r:samba_share_t:s0
[root@westos111 samba]# ls -Zd /westos/ ##查看安全上下文
system_u:object_r:samba_share_t:s0 /westos/
[root@westos111 samba]# cd /westos/
[root@westos111 westos]# touch westosfile ##在/westos中建立文件
客户端
[root@westos211 yum.repos.d]# dnf install samba-client -y ##安装samba
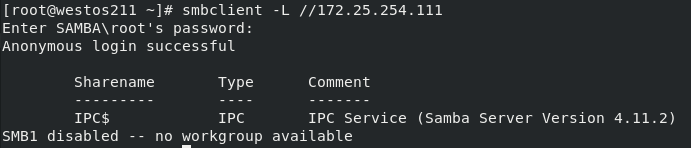
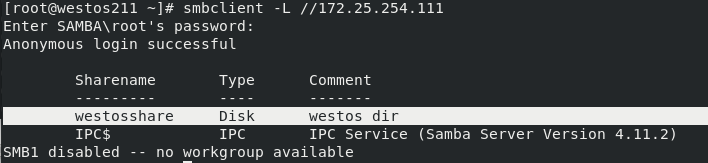
[root@westos211 ~]# smbclient -L //172.25.254.111 ##匿名访问
Enter SAMBA\root's password:
Anonymous login successful
Sharename Type Comment
--------- ---- -------
westosshare Disk westos dir
IPC$ IPC IPC Service (Samba Server Version 4.11.2)
SMB1 disabled -- no workgroup available
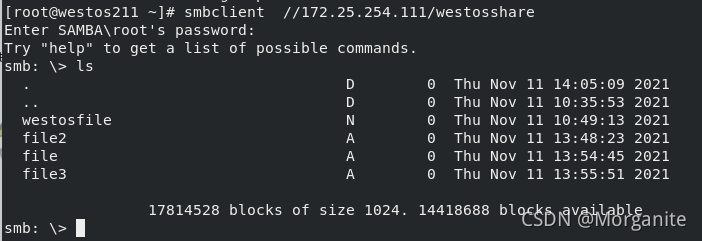
[root@westos211 ~]# smbclient //172.25.254.111/westosshare -U westos ##用户westos访问
Enter SAMBA\westos's password:
Try "help" to get a list of possible commands.
smb: \> ls
. D 0 Thu Nov 11 10:49:13 2021
.. D 0 Thu Nov 11 10:35:53 2021
westosfile N 0 Thu Nov 11 10:49:13 2021
17814528 blocks of size 1024. 14443916 blocks available
smb: \> quit
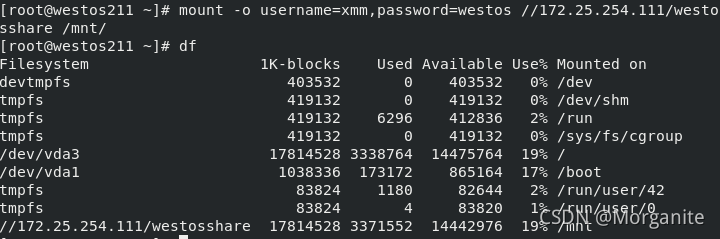
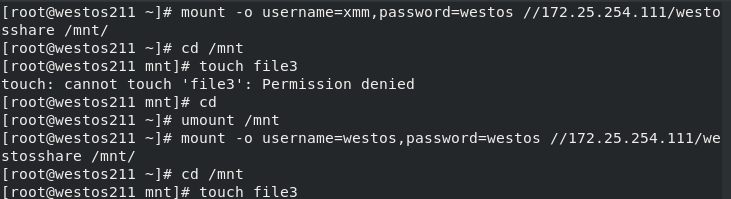
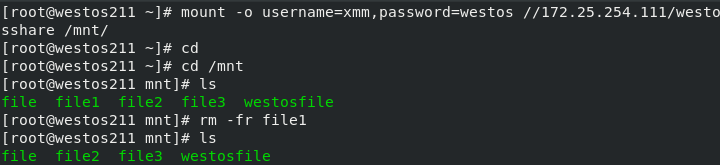
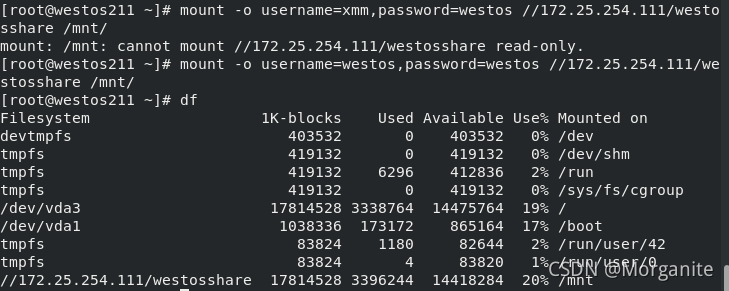
[root@westos211 ~]# mount -o username=xmm,password=westos //172.25.254.111/westosshare /mnt/ ##挂载共享目录到/mnt
[root@westos211 ~]# df
Filesystem 1K-blocks Used Available Use% Mounted on
devtmpfs 403532 0 403532 0% /dev
tmpfs 419132 0 419132 0% /dev/shm
tmpfs 419132 6300 412832 2% /run
tmpfs 419132 0 419132 0% /sys/fs/cgroup
/dev/vda3 17814528 3337788 14476740 19% /
/dev/vda1 1038336 173172 865164 17% /boot
tmpfs 83824 1180 82644 2% /run/user/42
tmpfs 83824 4 83820 1% /run/user/0
//172.25.254.111/westosshare 17814528 3370616 14443912 19% /mnt
[root@westos211 ~]# cd /mnt
[root@westos211 mnt]# ls ##查看/mnt可看到服务器共享目录中的内容
westosfile
七、samba的访问控制
hosts allow 172.25.254.30 172.25.254. ##当写到单独共享时之对此共享生效
hosts deny ##当写到【GLOBAL】时对samba整体生效
设置ip 172.25.254.211可以访问

测试111不可以访问

测试211可以访问
将ip 172.25.254.211写入黑名单

测试111可以访问
211不可以访问

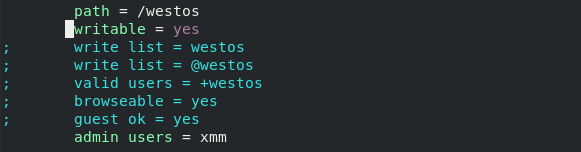
八、samba的常用配置参数
writable = yes ##可写
write list = westos ##指定用户可写
write list = +westos ##指定组可写
write list = @westosvalid users = lee ##指定访问用户
valid users = +lee|@lee ##指定访问组
browseable = yes|no ##是否隐藏共享map to guest = bad user ##写到全局设定中
guest ok = yes ##允许匿名用户访问
admin users = lee ##指定此共享的超级用户身份
指定用户可写 write list = westos

指定组可写 write list = +westos 或 write list = @westos
让用户xmm的附属组为westos,指定westos组可写


用户xmm可写
指定访问用户 valid users = westos

测试用户westos可访问,用户xmm不可访问
指定访问组 valid users = +westos|@westos

westos组成员xmm可以访问

是否隐藏共享 browseable = yes|no
隐藏共享browseable = no

隐藏共享browseable = yes


map to guest = bad user ##写到全局设定中
允许匿名用户访问 guest ok = yes

指定此共享的超级用户身份 admin users = lee
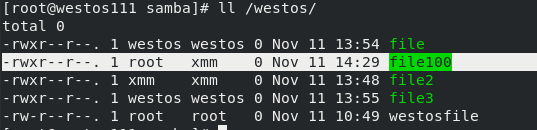
用户xmm访问并建立文件file100

在服务端可看到文件的所有者为root
九、samba的多用户挂载
在客户端如果用普通的挂载方式,没有用过用户验证的人也可以访问samba服务,不安全,我们可以指定用户访问。
隐藏认证密码
[root@westos211 ~]# dnf install cifs-utils -y
[root@westos211 ~]# vim .smbauth
[root@westos211 ~]# cat .smbauth   ##将用户名和密码写入隐藏文件中
username=xmm
password=westos
[root@westos211 ~]# chmod 600 .smbauth  ##给文件设置权限
[root@westos211 ~]# mount -o credentials=/root/.smbauth //172.25.254.111/westosshare /mnt/  ##隐藏密码访问
[root@westos211 ~]# mount -o credentials=/root/.smbauth,multiuser,sec=ntlmssp //172.25.254.111/westosshare /mnt/  ##指定认证类型,开启多用户
[root@westos211 ~]# su - westos     ##用户westos不可访问
Last login: Fri Mar 26 14:04:37 CST 2021 on tty2
[westos@westos211 ~]$ ls /mnt
ls: cannot access '/mnt': Permission denied
[westos@westos211 ~]$ cifscreds add -u westos 172.25.254.111  ##添加用户westos
Password:    ##输入错误密码
[westos@westos211 ~]$ ls /mnt  ##不可访问
ls: cannot access '/mnt': Permission denied
[westos@westos211 ~]$ cifscreds add -u westos 172.25.254.111   ##再次访问出错
You already have stashed credentials for 172.25.254.111 (172.25.254.111)
If you want to update them use:
	cifscreds update
[westos@westos211 ~]$ cifscreds clearall  ##清除之前的设定
[westos@westos211 ~]$ cifscreds add -u westos 172.25.254.111 ##添加用户
Password:
[westos@westos211 ~]$ ls /mnt  ##通过认证并显示
file  file100  file2  file3  westosfile
自动挂载和卸载
[root@westos211 ~]# dnf install autofs-1:5.1.4-40.el8.x86_64 -y
[root@westos211 ~]# systemctl enable --now autofs.service
[root@westos211 ~]# vim /etc/auto.master
最终挂载点的上层目录       自动策略文件
/samba                  /etc/auto.samba

[root@westos211 ~]# vim /etc/auto.samba
最终挂载点        挂载参数,挂载资源
westos   -fstype=cifs,credentials=/root/.smbauth,multiuser,sec=ntlmssp         ://172.25.254.111/westosshare


[root@westos211 ~]# systemctl restart autofs.service
[root@westos211 ~]# cd /samba/
[root@westos211 samba]# cd westos   ##切换到westos目录自动挂载
[root@westos211 westos]# df
Filesystem                   1K-blocks    Used Available Use% Mounted on
devtmpfs                        403532       0    403532   0% /dev
tmpfs                           419132       0    419132   0% /dev/shm
tmpfs                           419132    6304    412828   2% /run
tmpfs                           419132       0    419132   0% /sys/fs/cgroup
/dev/vda3                     17814528 3342136  14472392  19% /
/dev/vda1                      1038336  173172    865164  17% /boot
tmpfs                            83824    1180     82644   2% /run/user/42
tmpfs                            83824       4     83820   1% /run/user/0
//172.25.254.111/westosshare  17814528 3395752  14418776  20% /samba/westos
[root@westos211 ~]# vim /etc/autofs.conf

timeout =5  ##设置5秒后自动卸载

[root@westos211 ~]# systemctl restart autofs.service
[root@westos211 ~]# cd /samba/westos/  ##切换到westos目录自动挂载
[root@westos211 westos]# df
Filesystem                   1K-blocks    Used Available Use% Mounted on
devtmpfs                        403532       0    403532   0% /dev
tmpfs                           419132       0    419132   0% /dev/shm
tmpfs                           419132    6304    412828   2% /run
tmpfs                           419132       0    419132   0% /sys/fs/cgroup
/dev/vda3                     17814528 3342116  14472412  19% /
/dev/vda1                      1038336  173172    865164  17% /boot
tmpfs                            83824    1180     82644   2% /run/user/42
tmpfs                            83824       4     83820   1% /run/user/0
//172.25.254.111/westosshare  17814528 3395752  14418776  20% /samba/westos
[root@westos211 westos]# cd  ##切出westos
[root@westos211 ~]# df   ##等待5秒之后查看,共享目录已卸载
Filesystem     1K-blocks    Used Available Use% Mounted on
devtmpfs          403532       0    403532   0% /dev
tmpfs             419132       0    419132   0% /dev/shm
tmpfs             419132    6304    412828   2% /run
tmpfs             419132       0    419132   0% /sys/fs/cgroup
/dev/vda3       17814528 3342116  14472412  19% /
/dev/vda1        1038336  173172    865164  17% /boot
tmpfs              83824    1180     82644   2% /run/user/42
tmpfs              83824       4     83820   1% /run/user/0
nfs
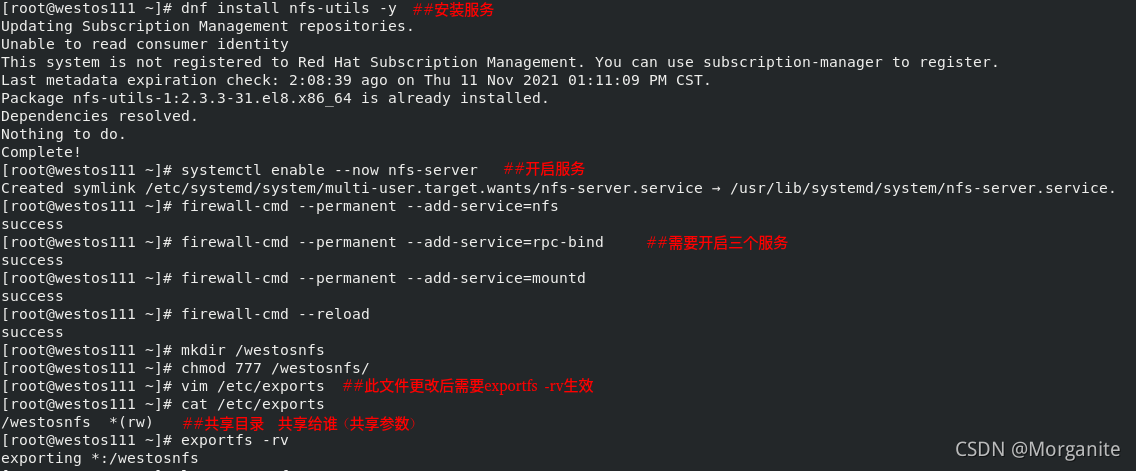
一、nfs基本信息
nfs: Net File System
nfs-utils ##安装包
nfs-server ##服务脚本
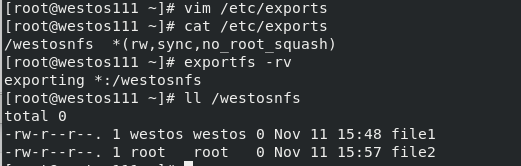
/etc/exports ##共享配置文件
二、nfs的启用
systemctl start nfs-server
firewall-cmd --permanent --add-service=rpc-bind
firewall-cmd --permanent --add-service=mountd
firewall-cmd --permanent --add-service=nfs
firewall-cmd --reload
服务端:
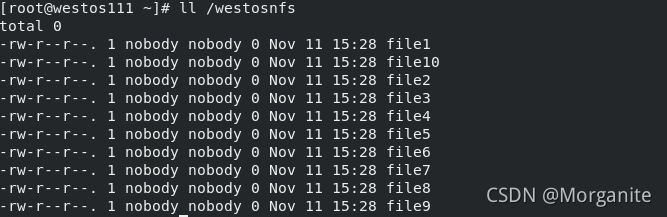
客户端
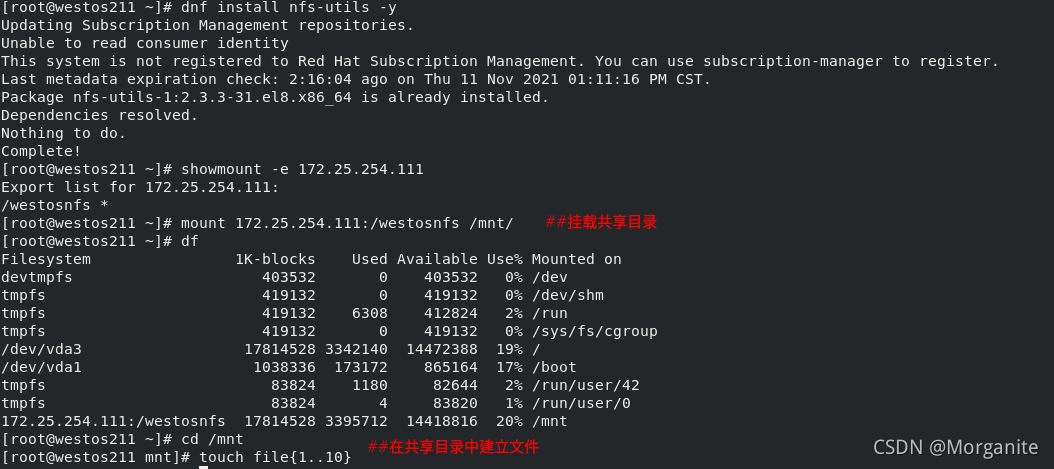
在服务端可以看到客户端所建立的文件
三、nfs配置
anonuid=1000,anongid=1000 ##指定用户身份
sync ##更改生成后同步数据到服务器
async ##时时同步数据到服务器
rw ##读写
ro ##只读
no_root_squash ##root用户挂载不转换身份
指定用户身份 anonuid=1000,anongid=1000
服务端:

客户端访问并建立文件

可以从服务端看到所建立的文件是指定用户身份的

root用户挂载不转换身份 no_root_squash
在客户端建立file2可以看到用户身份为root
四、自动挂载和卸载
[root@westos211 ~]# umount /mnt
[root@westos211 ~]# vim /etc/auto.master
[root@westos211 ~]# head -n 15 /etc/auto.master
#
# Sample auto.master file
# This is a 'master' automounter map and it has the following format:
# mount-point [map-type[,format]:]map [options]
# For details of the format look at auto.master(5).
#
/misc	/etc/auto.misc
/samba /etc/auto.samba
/nfsshare /etc/auto.nfs   ##最终挂载点的上层目录和策略文件
#
# NOTE: mounts done from a hosts map will be mounted with the
#	"nosuid" and "nodev" options unless the "suid" and "dev"
#	options are explicitly given.
#
/net	-hosts
[root@westos211 ~]# vim /etc/auto.nfs
[root@westos211 ~]# cat /etc/auto.nfs
westosnfs -rw 172.25.254.111:/westosnfs
[root@westos211 ~]# systemctl restart autofs.service
[root@westos211 ~]# cd /nfsshare
[root@westos211 nfsshare]# cd westosnfs  ##切换到westosnfs自动挂载
[root@westos211 westosnfs]# df
Filesystem                1K-blocks    Used Available Use% Mounted on
devtmpfs                     403532       0    403532   0% /dev
tmpfs                        419132       0    419132   0% /dev/shm
tmpfs                        419132    6308    412824   2% /run
tmpfs                        419132       0    419132   0% /sys/fs/cgroup
/dev/vda3                  17814528 3342128  14472400  19% /
/dev/vda1                   1038336  173172    865164  17% /boot
tmpfs                         83824    1180     82644   2% /run/user/42
tmpfs                         83824       4     83820   1% /run/user/0
172.25.254.111:/westosnfs  17814528 3434880  14379648  20% /nfsshare/westosnfs

[root@westos211 ~]# vim /etc/autofs.conf
timeout = 5

[root@westos211 ~]# systemctl restart autofs.service
[root@westos211 westosnfs]# cd  ##切出等待s自动卸载
[root@westos211 ~]# df
Filesystem     1K-blocks    Used Available Use% Mounted on
devtmpfs          403532       0    403532   0% /dev
tmpfs             419132       0    419132   0% /dev/shm
tmpfs             419132    6304    412828   2% /run
tmpfs             419132       0    419132   0% /sys/fs/cgroup
/dev/vda3       17814528 3342128  14472400  19% /
/dev/vda1        1038336  173172    865164  17% /boot
tmpfs              83824    1180     82644   2% /run/user/42
tmpfs              83824       4     83820   1% /run/user/0
iscsi
一、iscsi的启动
服务端:
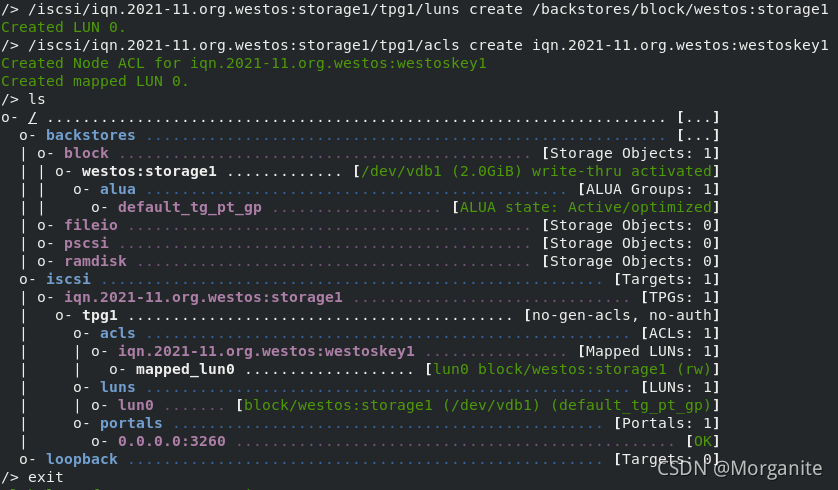
[root@westos111 ~]# dnf install targetcli -y
[root@westos111 ~]# fdisk /dev/vdb  ##添加硬盘分区vdb1
[root@westos111 ~]# targetcli
Warning: Could not load preferences file /root/.targetcli/prefs.bin.
targetcli shell version 2.1.51
Copyright 2011-2013 by Datera, Inc and others.
For help on commands, type 'help'.
/> /backstores/block create westos:storage1 /dev/vdb1
Created block storage object westos:storage1 using /dev/vdb1.
/> /iscsi create iqn.2021-11.org.westos:storage1
Created target iqn.2021-11.org.westos:storage1.
Created TPG 1.
Global pref auto_add_default_portal=true
Created default portal listening on all IPs (0.0.0.0), port 3260.
/> /iscsi/iqn.2021-11.org.westos:storge1/tpg1/luns create /backstores/block/westos:storage1
No such path /iscsi/iqn.2021-11.org.westos:storge1
/> /iscsi/iqn.2021-11.org.westos:storage1/tpg1/luns create /backstores/block/westos:storage1
Created LUN 0.
/> /iscsi/iqn.2021-11.org.westos:storage1/tpg1/acls create iqn.2021-11.org.westos:westoskey1
Created Node ACL for iqn.2021-11.org.westos:westoskey1
Created mapped LUN 0.

[root@westos111 ~]# vim /etc/target/saveconfig.json ##改动都在此文件中
[root@westos111 ~]# firewall-cmd --permanent --add-port=3260/tcp
success
[root@westos111 ~]# firewall-cmd --reload
客户端:
[root@westos211 ~]# dnf search iscsi
[root@westos211 ~]# dnf install iscsi-initiator-utils.x86_64 -y
[root@westos211 ~]# iscsiadm -m discovery -t st -p 172.25.254.111
172.25.254.111:3260,1 iqn.2021-11.org.westos:storage1
[root@westos211 ~]# vim /etc/iscsi/initiatorname.iscsi
[root@westos211 ~]# cat /etc/iscsi/initiatorname.iscsi
InitiatorName=iqn.2021-11.org.westos:westoskey1
[root@westos211 ~]# systemctl restart iscsid
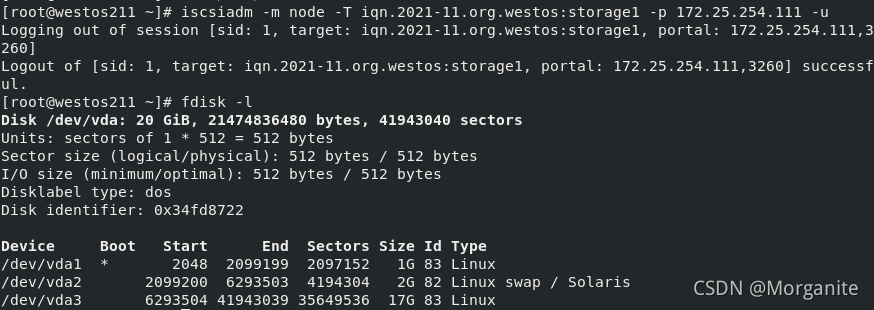
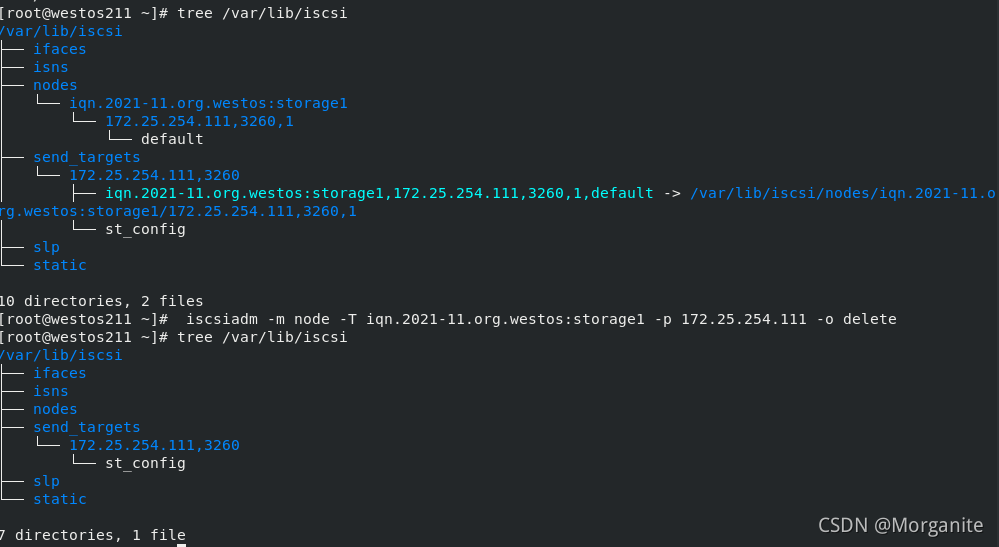
[root@westos211 ~]# iscsiadm -m node -T iqn.2021-11.org.westos:storage1 -p 172.25.254.111 -l
Logging in to [iface: default, target: iqn.2021-11.org.westos:storage1, portal: 172.25.254.111,3260]
Login to [iface: default, target: iqn.2021-11.org.westos:storage1, portal: 172.25.254.111,3260] successful.
[root@westos211 ~]# fdisk -l
Disk /dev/vda: 20 GiB, 21474836480 bytes, 41943040 sectors
Units: sectors of 1 * 512 = 512 bytes
Sector size (logical/physical): 512 bytes / 512 bytes
I/O size (minimum/optimal): 512 bytes / 512 bytes
Disklabel type: dos
Disk identifier: 0x34fd8722
Device Boot Start End Sectors Size Id Type
/dev/vda1 * 2048 2099199 2097152 1G 83 Linux
/dev/vda2 2099200 6293503 4194304 2G 82 Linux swap / Solaris
/dev/vda3 6293504 41943039 35649536 17G 83 Linux
Disk /dev/sda: 2 GiB, 2147483648 bytes, 4194304 sectors
Units: sectors of 1 * 512 = 512 bytes
Sector size (logical/physical): 512 bytes / 512 bytes
I/O size (minimum/optimal): 512 bytes / 512 bytes
[root@westos211 ~]# fdisk /dev/sda
Welcome to fdisk (util-linux 2.32.1).
Changes will remain in memory only, until you decide to write them.
Be careful before using the write command.
Device does not contain a recognized partition table.
Created a new DOS disklabel with disk identifier 0x0ebd1def.
Command (m for help): n
Partition type
p primary (0 primary, 0 extended, 4 free)
e extended (container for logical partitions)
Select (default p):
Using default response p.
Partition number (1-4, default 1):
First sector (2048-4194303, default 2048):
Last sector, +sectors or +size{K,M,G,T,P} (2048-4194303, default 4194303):
Created a new partition 1 of type 'Linux' and of size 2 GiB.
Command (m for help): wq
The partition table has been altered.
Calling ioctl() to re-read partition table.
Syncing disks.
[root@westos211 ~]# mkfs.xfs /dev/sda1
meta-data=/dev/sda1 isize=512 agcount=4, agsize=131008 blks
= sectsz=512 attr=2, projid32bit=1
= crc=1 finobt=1, sparse=1, rmapbt=0
= reflink=1
data = bsize=4096 blocks=524032, imaxpct=25
= sunit=0 swidth=0 blks
naming =version 2 bsize=4096 ascii-ci=0, ftype=1
log =internal log bsize=4096 blocks=2560, version=2
= sectsz=512 sunit=0 blks, lazy-count=1
realtime =none extsz=4096 blocks=0, rtextents=0
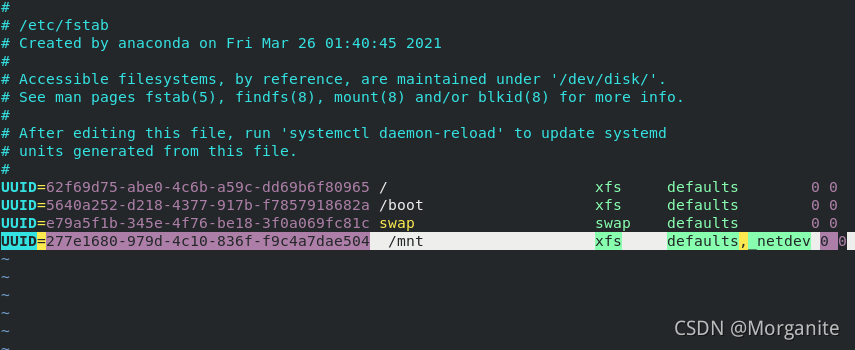
[root@westos211 ~]# mount /dev/sda1 /mnt/二、永久挂载

三、 删除
查看
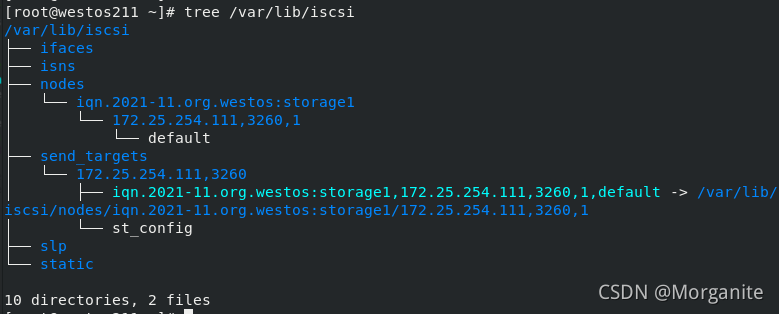
首先删除永久挂载
退出
删除


 2296
2296

 被折叠的 条评论
为什么被折叠?
被折叠的 条评论
为什么被折叠?
 到【灌水乐园】发言


