


为了提高性能,减少数据库的压力,使用缓存是非常好的手段之一。因此本文讲解 Spring Boot 如何集成缓存管理。
声明式缓存
Spring 定义 CacheManager 和 Cache 接口用来统一不同的缓存技术。例如 JCache、 EhCache、 Hazelcast、 Guava、 Redis 等。在使用 Spring 集成 Cache 的时候,我们需要注册实现CacheManager 的 Bean。
几个重要概念&缓存注解
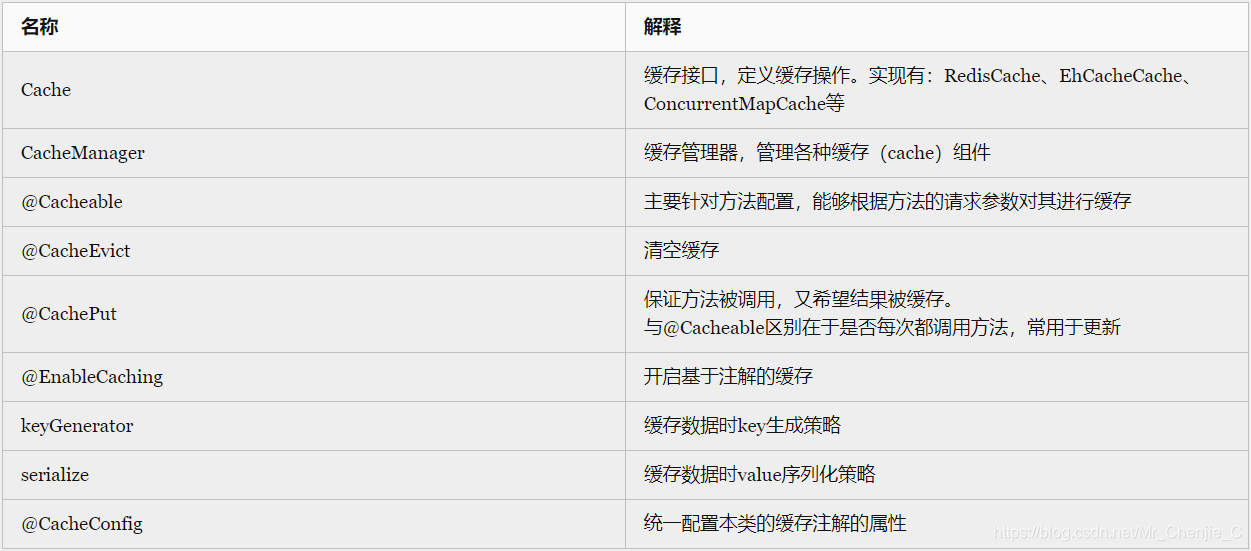
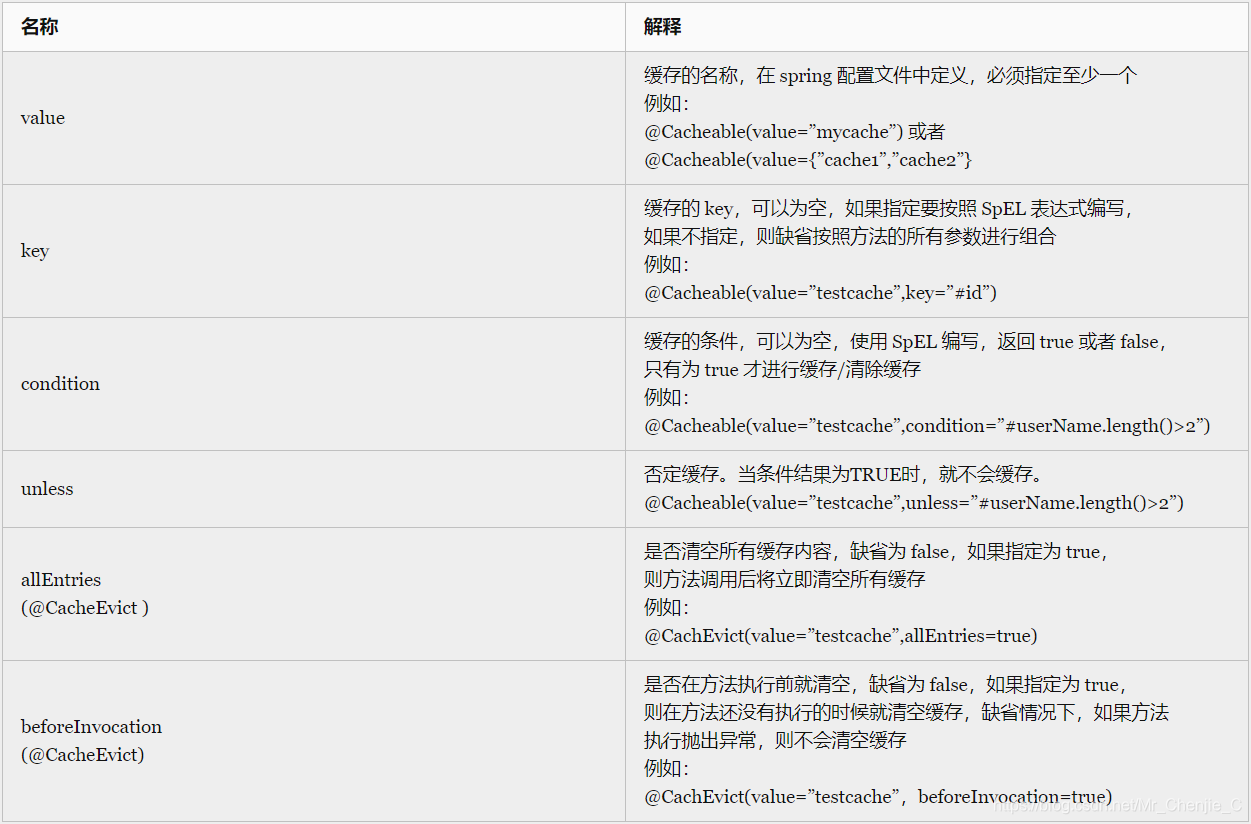
@Cacheable/@CachePut/@CacheEvict 主要的参数
SpEL上下文数据
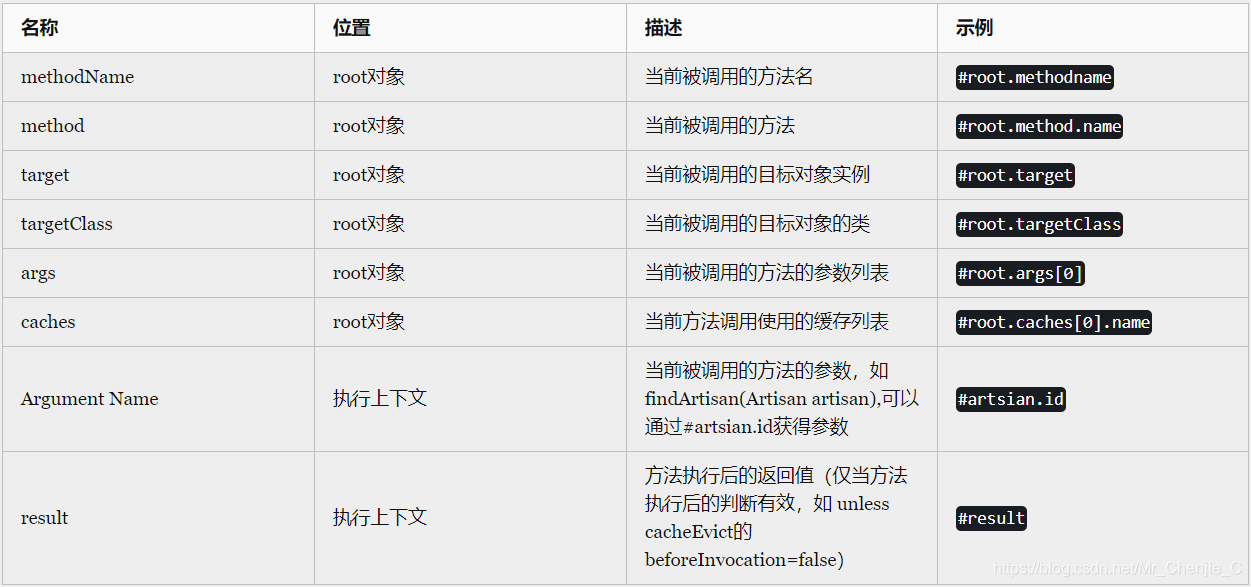
注意:
- 当我们要使用root对象的属性作为key时我们也可以将“#root”省略,因为Spring默认使用的就是root对象的属性。 如
@Cacheable(key = "targetClass + methodName +#p0")
- 使用方法参数时我们可以直接使用“#参数名”或者“#p参数index”。 如:
@Cacheable(value="users", key="#id")@Cacheable(value="users", key="#p0")
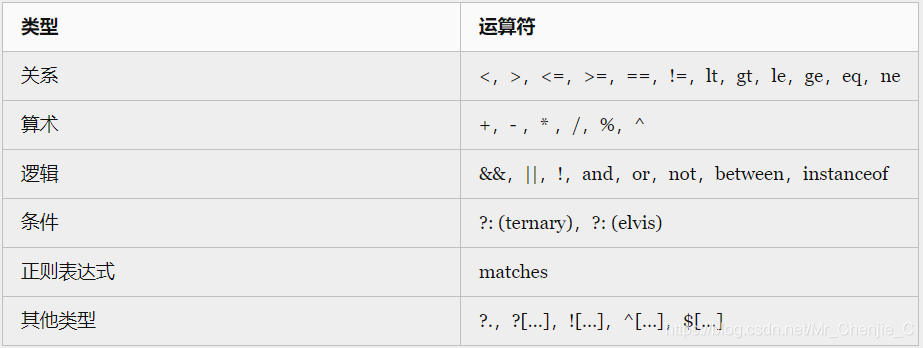
SpEL提供了多种运算符
Spring Boot默认集成CacheManager
Spring Boot 为我们自动配置了多个 CacheManager 的实现。
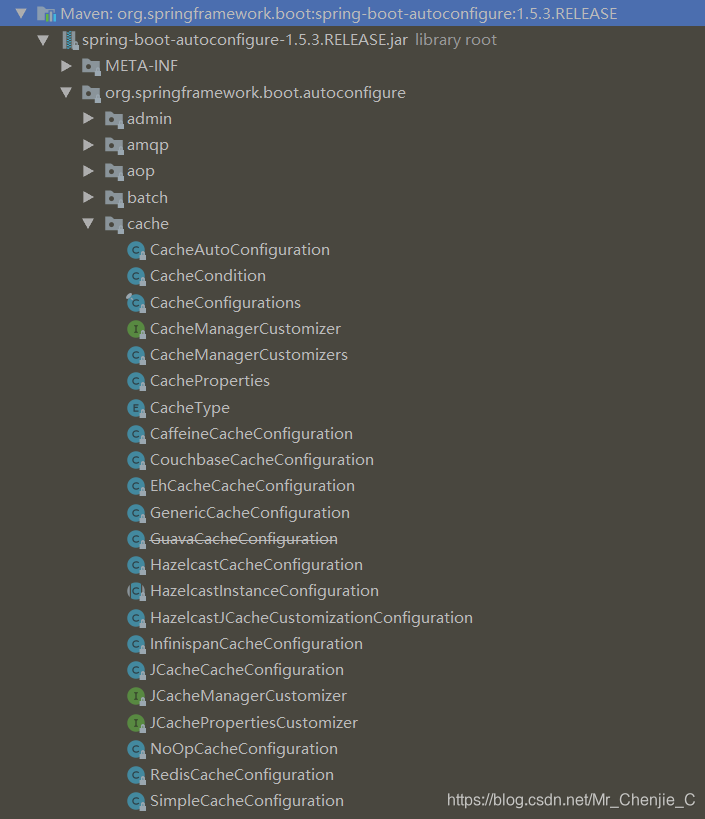
Spring Boot 为我们自动配置了 JcacheCacheConfiguration、 EhCacheCacheConfiguration、HazelcastCacheConfiguration、GuavaCacheConfiguration、RedisCacheConfiguration、SimpleCacheConfiguration 等。
默认使用 ConcurrenMapCacheManager
在我们不使用其他第三方缓存依赖的时候,springboot自动采用ConcurrenMapCacheManager作为缓存管理器。
环境依赖
Ehcache是一种广泛使用的开源Java分布式缓存。主要面向通用缓存,Java EE和轻量级容器。它具有内存和磁盘存储,缓存加载器,缓存扩展,缓存异常处理程序,一个gzip缓存servlet过滤器,支持REST和SOAP api等特点。本文使用Ehcache,在pom文件引入spring-boot-starter-cache和ehcache环境依赖:
<dependency>
	<groupId>org.springframework.boot</groupId>
	<artifactId>spring-boot-starter-cache</artifactId>
</dependency>
<dependency>
    <groupId>net.sf.ehcache</groupId>
    <artifactId>ehcache</artifactId>
</dependency>
yml配置
需要说明的是config: classpath:/ehcache.xml可以不用写,因为默认就是这个路径。但ehcache.xml必须有。
spring:
  cache:
    type: ehcache
    ehcache:
      config: classpath:/ehcache.xml
ehcache.xml
<ehcache>

    <!--
        磁盘存储:将缓存中暂时不使用的对象,转移到硬盘,类似于Windows系统的虚拟内存
        path:指定在硬盘上存储对象的路径
        path可以配置的目录有:
            user.home(用户的家目录)
            user.dir(用户当前的工作目录)
            java.io.tmpdir(默认的临时目录)
            ehcache.disk.store.dir(ehcache的配置目录)
            绝对路径(如:d:\\ehcache)
        查看路径方法:String tmpDir = System.getProperty("java.io.tmpdir");
     -->
    <diskStore path="java.io.tmpdir" />

    <!--
        defaultCache:默认的缓存配置信息,如果不加特殊说明,则所有对象按照此配置项处理
        maxElementsInMemory:设置了缓存的上限,最多存储多少个记录对象
        eternal:代表对象是否永不过期 (指定true则下面两项配置需为0无限期)
        timeToIdleSeconds:最大的发呆时间 /秒
        timeToLiveSeconds:最大的存活时间 /秒
        overflowToDisk:是否允许对象被写入到磁盘
        说明:下列配置自缓存建立起600秒(10分钟)有效 。
        在有效的600秒(10分钟)内,如果连续120秒(2分钟)未访问缓存,则缓存失效。
        就算有访问,也只会存活600秒。
     -->
    <defaultCache maxElementsInMemory="10000" eternal="false"
                  timeToIdleSeconds="600" timeToLiveSeconds="600" overflowToDisk="true" />

    <cache name="userCache" maxElementsInMemory="10000" eternal="false"
                  timeToIdleSeconds="120" timeToLiveSeconds="600" overflowToDisk="true" />

</ehcache>
开启缓存支持
在 Spring Boot 中使用 @EnableCaching 开启缓存支持。
@EnableCaching
@SpringBootApplication
public class SpringbootCacheApplication {

    public static void main(String[] args) {
        SpringApplication.run(SpringbootCacheApplication.class, args);
    }
}
Service层
创建一个服务类,添加@CacheConfig(cacheNames = {“userCache”})注解设置ehcache的名称,这个名称必须在ehcache.xml已配置 。
@Service
@CacheConfig(cacheNames = {"userCache"})
public class UserService {

}
首先,我们先来讲解下 @Cacheable 注解。@Cacheable 在方法执行前 Spring 先查看缓存中是否有数据,如果有数据,则直接返回缓存数据;若没有数据,调用方法并将方法返回值放进缓存。此处的value不是必需的,你可以使用@CacheConfig(cacheNames = {“userCache”})注解来统一指定value的值,这时可省略value,如果你在方法依旧写上了value,那么依然以方法的value值为准。注意:此处的User实体类一定要实现序列化,否则会报java.io.NotSerializableException异常。
@Cacheable(key = "#id")
public User findUser(int id) {
     return userDao.findUser(id);
}
@CachePut注解的作用主要针对方法配置,能够根据方法的请求参数对其结果进行缓存,和@Cacheable不同的是,它每次都会触发真实方法的调用 。简单来说就是用户更新缓存数据。但需要注意的是该注解的value和key必须与要更新的缓存相同,也就是与@Cacheable 相同。
@CachePut(key = "#id")
public User add(int id,String name,int age) {
   User user = new User(id, name, age);
   userDao.add(user);
   return user;
}
@CachePut(key = "#id")
public User update(String name,int age, int id) {
   User user = new User(id, name, age);
   userDao.update(user);
   return user;
}
@CacheEvict 将一条或多条数据从缓存中删除, 主要用于删除方法,用来从缓存中移除相应数据。
 @CacheEvict(key = "#id")
public int delete(int id) {
    return userDao.delete(id);
}
Controller层
为了展现效果,我们先定义一组简单的 RESTful API 接口进行测试。
@RestController
@RequestMapping("/user/cache")
public class UserController {

    @Autowired
    private UserService userService;

    @GetMapping(value = "/list")
    public List<User> findUserList() {
        return userService.findUserList();
    }

    @GetMapping(value = "/{id}")
    public User findUser(@PathVariable("id") int id) {
        return userService.findUser(id);
    }

    @PutMapping(value = "/{id}")
    public String updateAccount(@PathVariable("id") int id, @RequestParam(value = "name", required = true) String name,
                                @RequestParam(value = "age", required = true) int age) {
        if (0 < userService.update(name, age, id)) {
            return "success";
        } else {
            return "fail";
        }
    }

    @DeleteMapping(value = "/{id}")
    public String delete(@PathVariable(value = "id") int id) {
        if (0 < userService.delete(id)) {
            return "success";
        } else {
            return "fail";
        }
    }

    @PostMapping(value = "/add")
    public String postAccount(@RequestParam(value = "id") int id, @RequestParam(value = "name") String name,
                              @RequestParam(value = "age") int age) {
        if (0 < userService.add(id, name, age)) {
            return "success";
        } else {
            return "fail";
        }
    }

}
测试
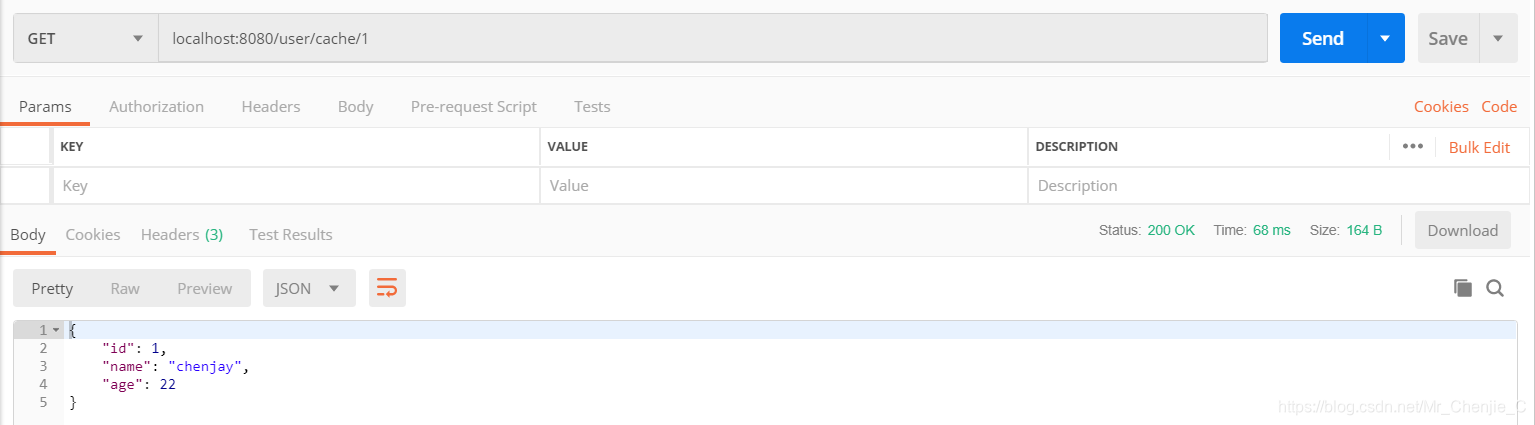
- 多次调用查询接口
查看日志信息
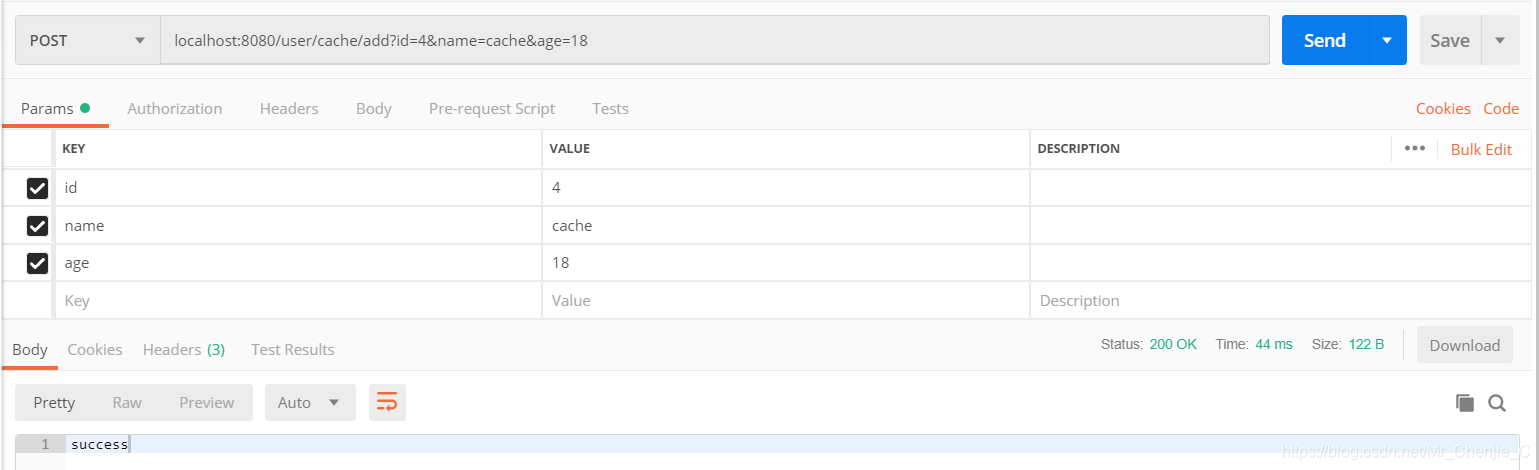
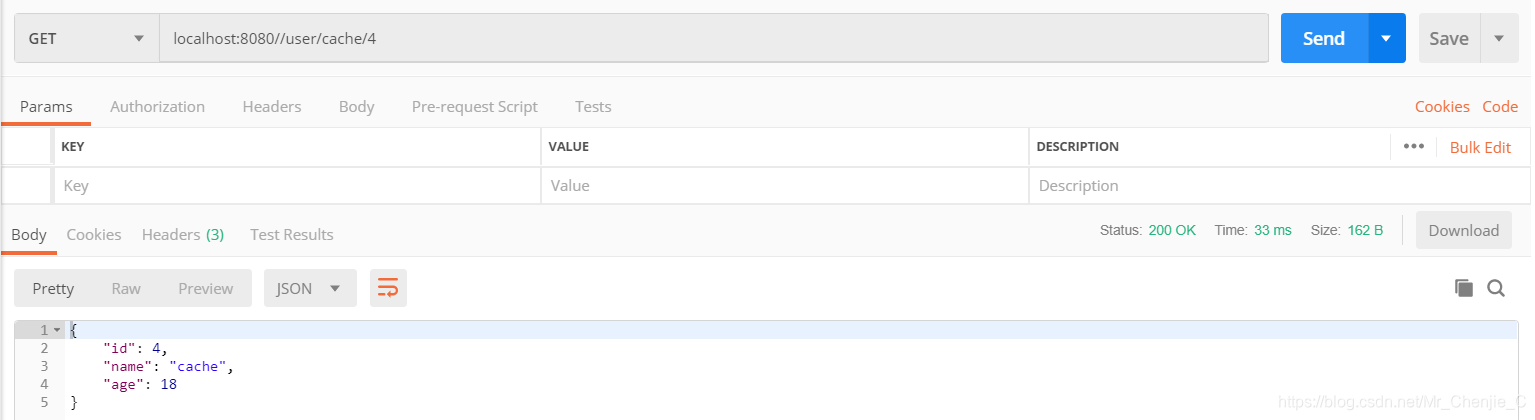
由上图可知,只打印了一条日志信息,这说明缓存起了作用。- 调用保存接口,再调用查询接口
查看日志信息
由上图可知,只打印了一条日志信息,这说明缓存起了作用。

扩展阅读
如果想更深入理解 Spring 的 Cache 机制,小编推荐一篇不错的文章。
Spring Cache 抽象详解


 213
213


 被折叠的 条评论
为什么被折叠?
被折叠的 条评论
为什么被折叠?
 到【灌水乐园】发言


