


SpringBoot - 集成Swagger2、Knife4j接口文档/升级版swagger-bootstrap-ui配置以及账号密码登录
pom引入
<dependency>
    <groupId>com.github.xiaoymin</groupId>
    <artifactId>knife4j-spring-boot-starter</artifactId>
    <version>1.9.6</version>
    <exclusions>
        <exclusion>
            <groupId>com.google.guava</groupId>
            <artifactId>guava</artifactId>
        </exclusion>
    </exclusions>
</dependency>

<dependency>
    <groupId>io.springfox</groupId>
    <artifactId>springfox-swagger2</artifactId>
    <version>2.9.2</version>
    <exclusions>
        <exclusion>
            <groupId>com.google.guava</groupId>
            <artifactId>guava</artifactId>
        </exclusion>
    </exclusions>
</dependency>
<!--原生swagger ui-->
<dependency>
    <groupId>io.springfox</groupId>
    <artifactId>springfox-swagger-ui</artifactId>
    <version>2.9.2</version>
    <exclusions>
        <exclusion>
            <groupId>com.google.guava</groupId>
            <artifactId>guava</artifactId>
        </exclusion>
    </exclusions>
</dependency>
配置类SwaggerConfig
package your.package.config;

import com.github.xiaoymin.swaggerbootstrapui.annotations.EnableSwaggerBootstrapUI;
import org.springframework.context.annotation.Bean;
import org.springframework.context.annotation.Configuration;
import springfox.documentation.builders.ApiInfoBuilder;
import springfox.documentation.builders.PathSelectors;
import springfox.documentation.builders.RequestHandlerSelectors;
import springfox.documentation.service.ApiInfo;
import springfox.documentation.spi.DocumentationType;
import springfox.documentation.spring.web.plugins.Docket;
import springfox.documentation.swagger2.annotations.EnableSwagger2;

@Configuration
@EnableSwagger2
public class SwaggerConfig {
    @Bean
    public Docket api() {
        return new Docket(DocumentationType.SWAGGER_2)
        		.apiInfo(apiInfo())
                .select()
                .apis(RequestHandlerSelectors.basePackage("your.package.controller"))
                .paths(PathSelectors.any())
                .build();
    }

    /**
     * API 说明,包含作者、简介、版本、host、服务URL
     */
    private ApiInfo apiInfo() {
        return new ApiInfoBuilder().title("XXXAPI文档")
                .description("XXXAPI文档")
                //.contact(new Contact("API文档", "http://www.XXX.com/", "xxx@qq.com"))//作者信息
                //.version("1.0")//定义api 版本号
                .build();
    }
}
请注意@Configuration和@EnableSwagger2注解。这两个注解分别表示这是一个配置类,以及启用了Swagger 2。只有在这两个注解都存在的情况下,Swagger才会被正确启用。
如果您的项目使用的是Swagger 3(即OpenAPI 3),则配置文件可能如下所示:
package your.package.config;

import org.springframework.context.annotation.Bean;
import org.springframework.context.annotation.Configuration;
import springfox.documentation.builders.PathSelectors;
import springfox.documentation.builders.RequestHandlerSelectors;
import springfox.documentation.oas.annotations.EnableOpenApi;
import springfox.documentation.spi.DocumentationType;
import springfox.documentation.spring.web.plugins.Docket;

@Configuration
@EnableOpenApi
public class SwaggerConfig {
    @Bean
    public Docket api() {
        return new Docket(DocumentationType.OAS_30)
                .select()
                .apis(RequestHandlerSelectors.basePackage("your.package.controller"))
                .paths(PathSelectors.any())
                .build();
    }
}
访问http://localhost:8080/swagger-ui.html(假设项目运行在8080端口)应该可以看到Swagger UI。如果您的项目使用的是OpenAPI 3,访问http://localhost:8080/swagger-ui/index.html。
启动项目
访问http://localhost:8080/swagger-ui.html

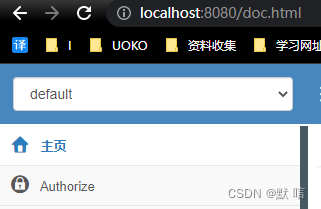
访问http://localhost:8080/doc.html
账号密码登录
现有需求,/swagger-ui.html 页面需要添加登录认证,但是本来的接口不需要登录认证
一、使用http://localhost:8080/swagger-ui.html路径访问,设置账号密码登录:
为Swagger UI添加登录权限,我使用Spring Security来实现。首先,确保您已经在项目中添加了Spring Security依赖。在pom.xml文件中添加以下依赖:
<dependency>
    <groupId>org.springframework.boot</groupId>
    <artifactId>spring-boot-starter-security</artifactId>
</dependency>
从application.yml文件中读取用户名和密码
# 自定义swagger登录拦截,拦截路径swagger-ui.html和/doc.html
custom-swagger-security:
  basic:
    enabled: false
    path: /swagger-ui.html
  user:
    name: admin #账号
    password: 123456  #密码
接下来,创建一个配置类来配置Spring Security。在src/main/java/your/package/config目录下,创建一个名为SecurityConfig.java的文件,并添加以下内容:
package your.package.config;

import org.springframework.beans.factory.annotation.Value;
import org.springframework.context.annotation.Configuration;
import org.springframework.http.HttpMethod;
import org.springframework.security.config.annotation.authentication.builders.AuthenticationManagerBuilder;
import org.springframework.security.config.annotation.web.builders.HttpSecurity;
import org.springframework.security.config.annotation.web.configuration.EnableWebSecurity;
import org.springframework.security.config.annotation.web.configuration.WebSecurityConfigurerAdapter;

@Configuration
@EnableWebSecurity
public class SecurityConfig extends WebSecurityConfigurerAdapter {

    @Value("${security.user.name}")
    private String username;

    @Value("${security.user.password}")
    private String password;

    @Override
    protected void configure(HttpSecurity http) throws Exception {
        http
            .csrf().disable()
            .authorizeRequests()
                .antMatchers(HttpMethod.GET, "/swagger-ui.html").authenticated()
                //.antMatchers(HttpMethod.GET, "/webjars/**", "/swagger-resources/**", "/v2/api-docs").permitAll()
                .anyRequest().permitAll()
            .and()
            .httpBasic();
    }

    @Override
    protected void configure(AuthenticationManagerBuilder auth) throws Exception {
        auth
            .inMemoryAuthentication()
                .withUser(username)
                .password("{noop}" + password)
                .roles("USER");
    }
}
这个配置类继承了WebSecurityConfigurerAdapter,并覆盖了configure(HttpSecurity http)和configure(AuthenticationManagerBuilder auth)方法。在configure(HttpSecurity http)方法中,我们配置了对/swagger-ui.html的访问需要认证,同时允许访问其他必要的资源。
在configure(AuthenticationManagerBuilder auth)方法中,我们设置了一个内存中的用户(admin)和密码(123456)。这里我们使用了明文密码,但在实际生产环境中,请确保使用加密的密码。
在Spring Security 5中,可以使用"{noop}"前缀来表示不对密码进行加密。这将告诉Spring Security使用NoOpPasswordEncoder来处理密码。将此前缀添加到SecurityConfig.java中的.password()方法中,可以解决 "There is no PasswordEncoder mapped for the id 'null'" 错误。

请注意,这种方法不建议在生产环境中使用,因为它不安全。在生产环境中,您应该使用一个安全的密码编码器,例如 BCryptPasswordEncoder。
现在,当您访问http://localhost:8080/swagger-ui.html时,浏览器会要求您输入用户名和密码。只有在输入正确的用户名和密码后,您才能访问Swagger UI。

二、使用http://localhost:8080/doc.html路径访问,设置账号密码登录:
knife4j相比swagger-ui更加强大,针对Swagger的资源接口,Knife4j提供了简单的Basic认证功能,个人觉得文档页面样式也更加简洁明了
1、yml中添加配置
knife4j:
  # 开启增强配置
  enable: true
  # 开启生产环境屏蔽,配置此属性为true,所有资源都会屏蔽输出.
  production: false
 # 开启Swagger的Basic认证功能,默认是false
  basic:
      enable: true
      # Basic认证用户名
      username: admin
      # Basic认证密码
      password: 123456
2、在swagger-ui基础上只是多了@EnableSwaggerBootstrapUi类注解
@Configuration
@EnableSwagger2
@EnableSwaggerBootstrapUi
public class SwaggerConfig implements WebMvcConfigurer {

}
访问效果:
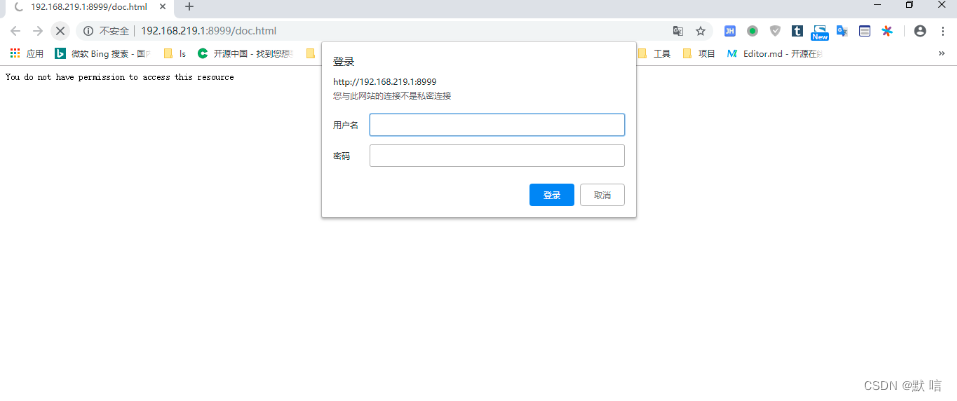
注意:
knife4j:
  # 开启增强配置
  enable: true
 # 开启生产环境屏蔽
  production: true
配置此属性后,所有资源都会屏蔽输出.
效果图如下:

调整
由于http://localhost:8080/swagger-ui.htm和http://localhost:8080/doc.htm都需要登录配置。
为了做统一权限验证,所以此处实现方法如下:
1、yml中配置如下
# 自定义swagger登录拦截,拦截路径swagger-ui.html和/doc.html
custom-swagger-security:
  basic:
    enabled: false
    path: /swagger-ui.html
  user:
    name: admin #账号
    password: 123456  #密码
修改
package your.package.config;

import org.springframework.beans.factory.annotation.Value;
import org.springframework.context.annotation.Bean;
import org.springframework.context.annotation.Configuration;
import org.springframework.http.HttpMethod;
import org.springframework.security.config.annotation.authentication.builders.AuthenticationManagerBuilder;
import org.springframework.security.config.annotation.web.builders.HttpSecurity;
import org.springframework.security.config.annotation.web.configuration.EnableWebSecurity;
import org.springframework.security.config.annotation.web.configuration.WebSecurityConfigurerAdapter;
import org.springframework.security.crypto.bcrypt.BCryptPasswordEncoder;
import org.springframework.security.crypto.password.PasswordEncoder;

/**
 * Security配置拦截
 * 1、开启swagger-ui.html原生页面认证
 * @author chenp
 */
@Configuration
@EnableWebSecurity
public class SecurityConfig extends WebSecurityConfigurerAdapter {

    @Value("${custom-swagger-security.basic.enabled:false}")
    private boolean basicEnabled;

    @Value("${custom-swagger-security.basic.path}")
    private String basicPath;

    @Value("${custom-swagger-security.user.name}")
    private String username;

    @Value("${custom-swagger-security.user.password}")
    private String password;

    @Bean
    public PasswordEncoder passwordEncoder() {
        return new BCryptPasswordEncoder();
    }

    @Override
    protected void configure(HttpSecurity http) throws Exception {
        http
                .csrf().disable(); // Disable CSRF protection for simplicity

        if (basicEnabled) {
            http.authorizeRequests()
                    // swagger页面需要添加登录校验
                    .antMatchers(HttpMethod.GET, "/swagger-ui.html", "/doc.html").authenticated() // Require authentication for Swagger UI
                    //其他请求全部允许
                    .anyRequest().permitAll() // Allow all other requests
                    .and()
                    .httpBasic(); // Enable basic authentication
        } else {
            http.authorizeRequests()
                    .anyRequest().permitAll();
        }
    }

    @Override
    protected void configure(AuthenticationManagerBuilder auth) throws Exception {
        auth.inMemoryAuthentication()
                .withUser(username)
                // Use clear text password for simplicity, but don't use it in production
                //.password("{noop}" + password)
                //{noop}是使用明文密码,不进行加密,不建议使用在生产环境,在生产环境中,使用一个安全的密码编码器,例如 BCryptPasswordEncoder
                .password(passwordEncoder().encode(password))
                .roles("USER");
    }
}
ps:此处对{noop}密码编码器改为使用一个安全的密码编码器,例如 BCryptPasswordEncoder
加强版swagger-bootstrap-ui配置
swagger-bootstrap-ui相比swagger-ui更加强大,提供测试及账号密码验证登录等配置,个人觉得文档页面样式更加简洁明了
配置方式基本与swagger-ui一致
1、pom依赖
<!--swagger-->
<dependency>
    <groupId>io.springfox</groupId>
    <artifactId>springfox-swagger2</artifactId>
    <version>2.9.2</version>
</dependency>
<dependency>
    <groupId>com.github.xiaoymin</groupId>
    <artifactId>swagger-bootstrap-ui</artifactId>
    <version>1.9.6</version>
</dependency>
2、添加配置类SwaggerConfig:在swagger-ui基础上只是多了@EnableSwaggerBootstrapUI类注解
import com.github.xiaoymin.swaggerbootstrapui.annotations.EnableSwaggerBootstrapUI;
import org.springframework.context.annotation.Bean;
import org.springframework.context.annotation.Configuration;
import springfox.documentation.builders.ApiInfoBuilder;
import springfox.documentation.builders.PathSelectors;
import springfox.documentation.builders.RequestHandlerSelectors;
import springfox.documentation.service.ApiInfo;
import springfox.documentation.spi.DocumentationType;
import springfox.documentation.spring.web.plugins.Docket;
import springfox.documentation.swagger2.annotations.EnableSwagger2;

@Configuration
@EnableSwagger2
@EnableSwaggerBootstrapUI
public class SwaggerConfig {

    @Bean
    public Docket createRestApi() {
        return new Docket(DocumentationType.SWAGGER_2).apiInfo(apiInfo())
                .select()
                .apis(RequestHandlerSelectors.basePackage("com.XXX.web.controller"))//扫描包范围
                .paths(PathSelectors.any())
                .build();
    }

    /**
     * API 说明,包含作者、简介、版本、host、服务URL
     */
    private ApiInfo apiInfo() {
        return new ApiInfoBuilder().title("XXXAPI文档")
                .description("XXXAPI文档")
                //.contact(new Contact("API文档", "http://www.XXX.com/", "xxx@qq.com"))//作者信息
                //.version("1.0")//定义api 版本号
                .build();
    }
}
注:如果有登录验证等拦截器,如下资源需要放行
@Component
public class MyInterceptorConfigure extends WebMvcConfigurationSupport { //WebMvcConfigurer

    @Autowired
    private MyInterceptor myInterceptor;

    @Override
    public void addInterceptors(InterceptorRegistry registry) {

        // excludePathPatterns 用户排除拦截
        String[] excludePathPatterns = { "/swagger-ui.html/**","/swagger-resources/**","/webjars/**","/v2/**"};
		registry.addInterceptor(userTokenInterceptor).addPathPatterns("/**").excludePathPatterns(excludePathPatterns);
        super.addInterceptors(registry);
    }

    @Override
    protected void addResourceHandlers(ResourceHandlerRegistry registry) {
        registry.addResourceHandler("swagger-ui.html")
                .addResourceLocations("classpath:/META-INF/resources/");
        registry.addResourceHandler("/webjars/**")
                .addResourceLocations("classpath:/META-INF/resources/webjars/");
        super.addResourceHandlers(registry);
    }
  }
3:yml配置文件添加接口文档访问自定义账号密码
#配置swagger登陆验证
swagger:
  production: false
  basic:
    enable: true
    username: admin
    password: 123456
4、修改拦截器等放行资源
主要修改:
String[] excludePathPatterns = { "/doc.html/**","/swagger-resources/**","/webjars/**","/v2/**"};
@Component
public class MyInterceptorConfigure extends WebMvcConfigurationSupport { //WebMvcConfigurer

    @Autowired
    private MyInterceptor myInterceptor;

    @Override
    public void addInterceptors(InterceptorRegistry registry) {

        // excludePathPatterns 用户排除拦截
        String[] excludePathPatterns = { "/doc.html/**","/swagger-resources/**","/webjars/**","/v2/**"};
		registry.addInterceptor(userTokenInterceptor).addPathPatterns("/**").excludePathPatterns(excludePathPatterns);
        super.addInterceptors(registry);
    }

    @Override
    protected void addResourceHandlers(ResourceHandlerRegistry registry) {
        registry.addResourceHandler("doc.html")
                .addResourceLocations("classpath:/META-INF/resources/");
        registry.addResourceHandler("/webjars/**")
                .addResourceLocations("classpath:/META-INF/resources/webjars/");
        super.addResourceHandlers(registry);
    }
  }
访问地址
localhost:8080/doc.html
资源参考
https://doc.xiaominfo.com/docs/features/accesscontrol
swagger配置及升级版swagger-bootstrap-ui配置+访问账号密码登录限制
直接使用security.basic.path无效|——springboot2.0以上的security的配置
SpringBoot - 集成Swagger、Knif4j接口文档以及文档添加账号密码登录
Swagger设置密码登录
Spring Boot整合Swagger3.0及Knife4j


 3713
3713


 被折叠的 条评论
为什么被折叠?
被折叠的 条评论
为什么被折叠?
 到【灌水乐园】发言


